
小杰机器视觉(finally)——题库下——图象ROI切割、矫正、凸包检测、轮廓检测、最小外接矩形、最小外接圆、模板、水印、直方图均衡化、霍夫变换、图象明暗变换。
·
1.把卫生纸旋转到正角度,并且使用ROI切割出卫生纸。
import cv2
import numpy as np


# 1. 图片输入
path = 'paper.jpg'
image_np = cv2.imread(path)

# 2. 单点旋转 + 图片旋转,相当于直接构建复合矩阵
angle = 317  # 旋转角
scale = 2  # 缩放比例
# 获得二维旋转的仿射变换矩阵
M = cv2.getRotationMatrix2D(
    (0, 800),  # 旋转点
    angle,  # 旋转角度
    scale  # 缩放比例
)

# 4. 插值方法 + 5. 边缘填充
# 仿射变换
rotation_image = cv2.warpAffine(
    image_np,  # 图像
    M,  # 仿射变换矩阵
    (image_np.shape[1]*2 , image_np.shape[0] *2),  # 目标图像的分辨率
    flags=cv2.INTER_LINEAR,  # 插值方法
    borderMode=cv2.BORDER_REPLICATE  # 边界填充
)

#5.ROI切割

try:
    x_min = 168
    y_min = 1273
    x_max = 1426
    y_max = 2126
    (h,w,_)=rotation_image.shape
    if not ((x_min > 0) and (x_max < w) and (y_min > 0) and (y_max < h)):
        raise OverflowError('范围越界!!!')
    if (x_min >= x_max) or (y_min >= y_max):
        raise ValueError("最值错误!!!")

    result_image = rotation_image[y_min:y_max, x_min:x_max]

    # 6. 图片输出
    cv2.imwrite('result1.jpg', result_image)
    cv2.waitKey(0)


except Exception as e:
    # 如果出错,弹出错误信息
    print('错误信息:', e)
2.显示16盒卫生纸,只有卫生纸,卫生纸显示为正角度。
(边界包裹)
import cv2 as cv
import numpy as np

path = 'paper.jpg'
image_np = cv.imread(path)
img_shape = image_np.shape

M = cv.getRotationMatrix2D(center=(640, 850), angle=-43, scale=1)
rotated_img = cv.warpAffine(image_np, M,
                            dsize=(img_shape[1] * 2, img_shape[0] * 2),
                             flags=cv.INTER_LANCZOS4,
                            borderMode=cv.BORDER_CONSTANT)

ROI_imge = rotated_img[610:1049, 285:915]
ROI_shape = ROI_imge.shape
cv.imshow('ROI_image',ROI_imge)

M = cv.getRotationMatrix2D(center=(0, 0), angle=0, scale=1)
rotated_img = cv.warpAffine(ROI_imge, M,
                            dsize=(ROI_shape[1] * 4, ROI_shape[0] * 4),
                            flags=cv.INTER_LINEAR,
                            borderMode=cv.BORDER_WRAP)

# cv.imshow('rotated', rotated_img)
cv.imwrite('tissuex16.jpg',rotated_img)
cv.waitKey(0)
3.恢复硬盘包装盒的正面显示,越像真实的越好。
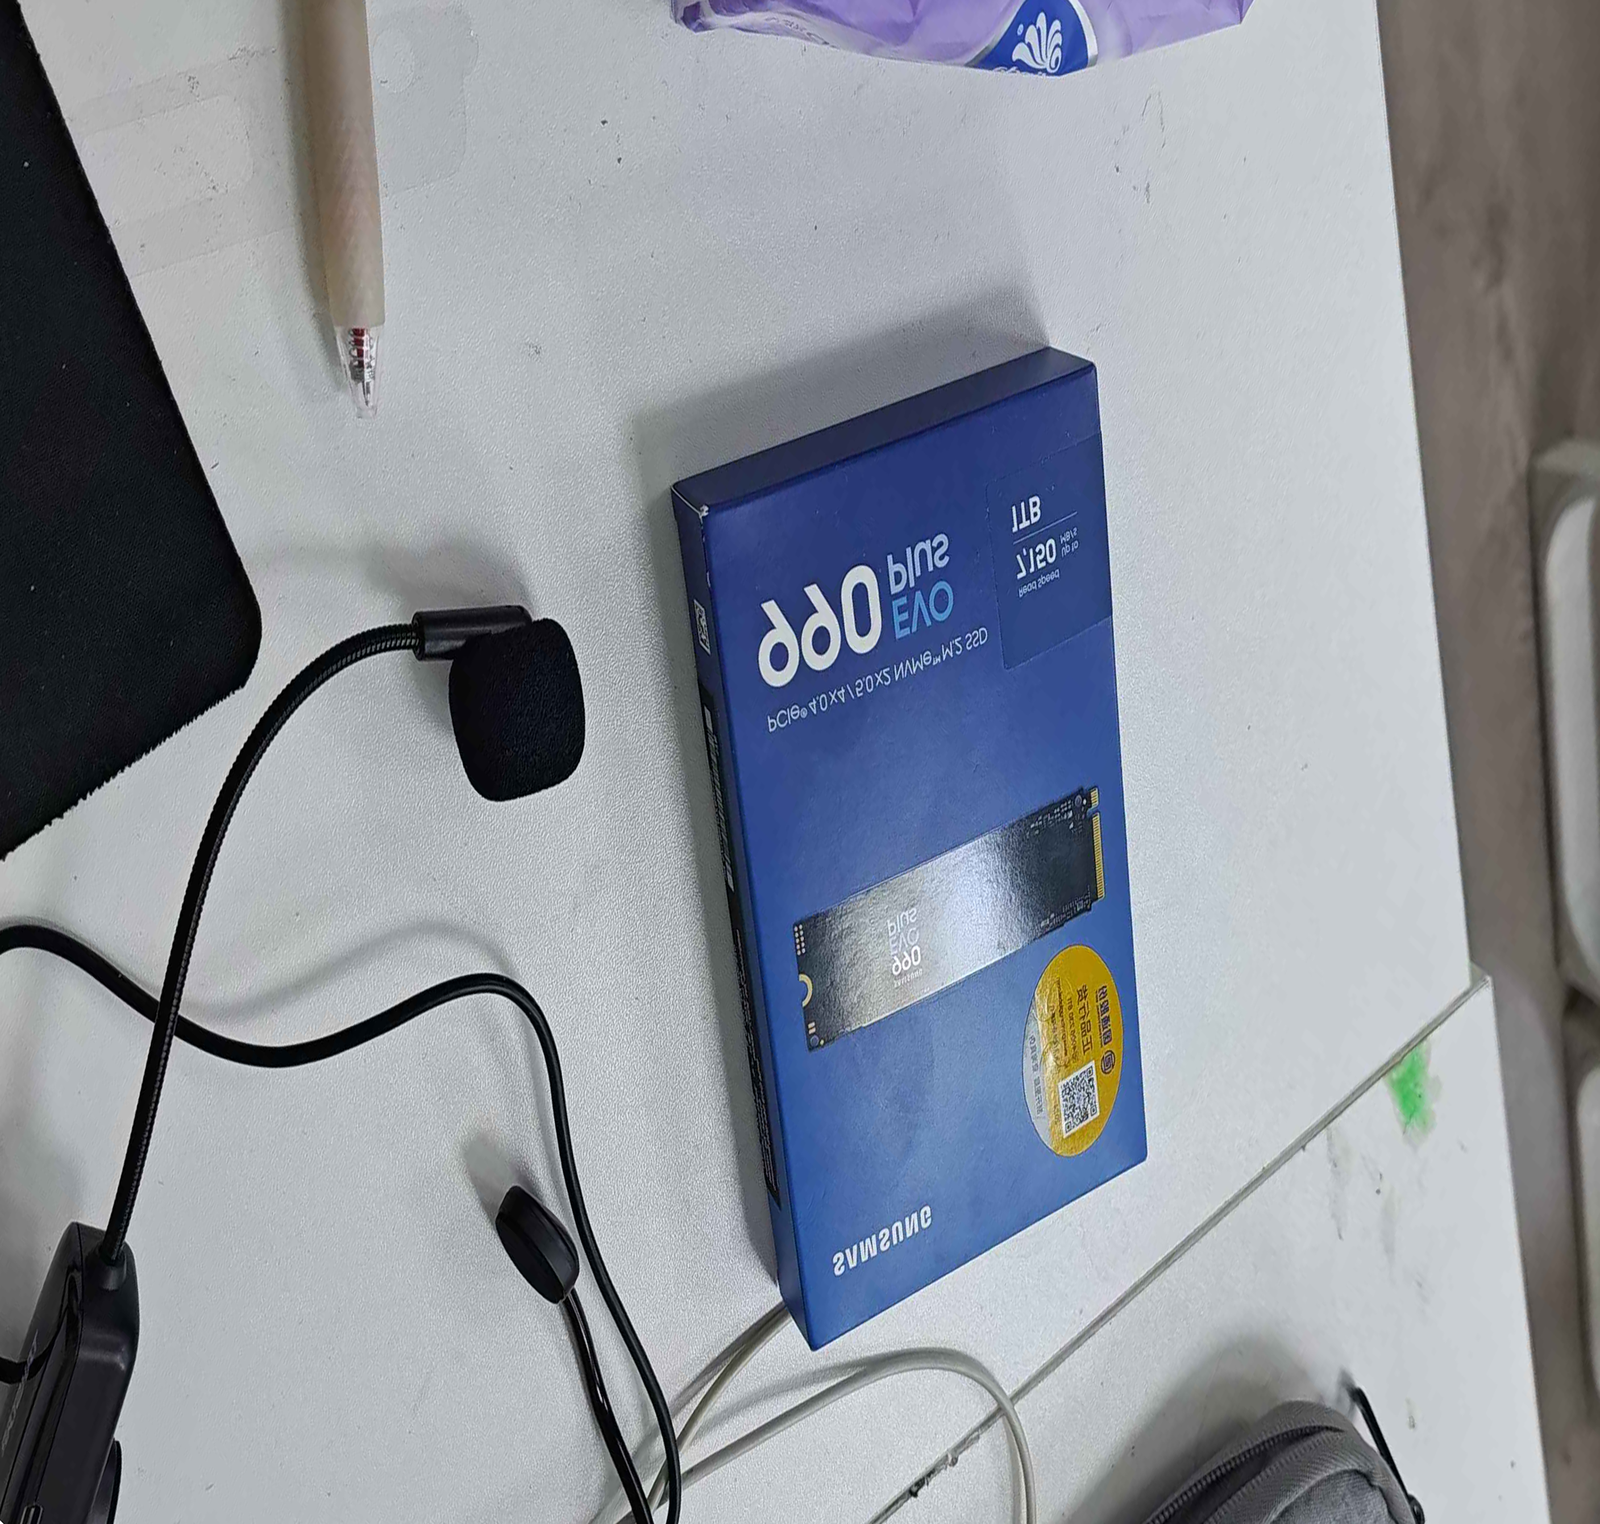
(镜像,再矫正)
import cv2
import matplotlib.pyplot as plt
import numpy as np


def correct_img():
    img = cv2.imread('img/zy4.jpg')

    # pints
    points = [[1146, 1158], [818, 1351], [1096, 365], [703, 514]]
    pst1 = np.float32(points)

    img_line = img.copy()
    # 画线
    cv2.line(img_line, points[0], points[1], [0, 0, 255], 2, cv2.LINE_AA)
    cv2.line(img_line, points[1], points[3], [0, 0, 255], 2, cv2.LINE_AA)
    cv2.line(img_line, points[2], points[3], [0, 0, 255], 2, cv2.LINE_AA)
    cv2.line(img_line, points[0], points[2], [0, 0, 255], 2, cv2.LINE_AA)

    points = [[0, 0], [400, 0], [0, 600], [400, 600]]
    pst2 = np.float32(points)

    M = cv2.getPerspectiveTransform(pst1, pst2)
    img_new = cv2.warpPerspective(img, M, (400, 600), cv2.INTER_LINEAR, cv2.BORDER_WRAP)
    img_new_flip = cv2.flip(img_new, 1)
    cv2.namedWindow('img_new', cv2.WINDOW_NORMAL)
    cv2.resizeWindow('img_new', 400, 600)

    cv2.imshow('img_new', img_new_flip)
    cv2.waitKey(0)


if __name__ == '__main__':
    correct_img()
    # arr = plt.imread('img/zy4_cankaotu.jpg')
    # plt.imshow(arr)
    # plt.show()
4.给图象添加水印
模板: 原图:
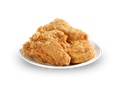
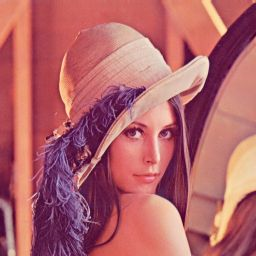
import cv2
import numpy as np

if __name__ == '__main__':
    # 1. 图片输入
    image_np = cv2.imread('lena.png')

    # 2. 模板输入
    logo = cv2.imread('kfc.png')

    # 3.灰度化
    gray_logo = cv2.cvtColor(logo, cv2.COLOR_BGR2GRAY)

    # 4. 二值化
    ret, mask_logo = cv2.threshold(gray_logo,
                                   1,
                                   255,
                                   cv2.THRESH_BINARY_INV)

    # 5. 与运算
    rows, cols = logo.shape[:2]
    print(rows, cols)
    # 从原图中做ROI切割
    roi = image_np[:rows, :cols]
    cv2.imshow('roi', roi)

    # 位于操作需要传两个原图,之前的实验遇见过
    # mask_logo在位于操作中充当掩膜的角色
    image_np_bg = cv2.bitwise_and(
        roi,
        roi,
        mask=mask_logo
    )
    cv2.imshow('image_np_bg', image_np_bg)

    # 6. 图像融合
    dst = cv2.add(image_np_bg, logo)
    # dst是小图融合后的结果,需要把像素值替换到原大图中
    image_np[:rows, :cols] = dst

    # 7. 图片输出
    cv2.imshow('image_np', image_np)
    cv2.waitKey(0)
5.给小狗P上第三只眼,眼睛大小自己调节。

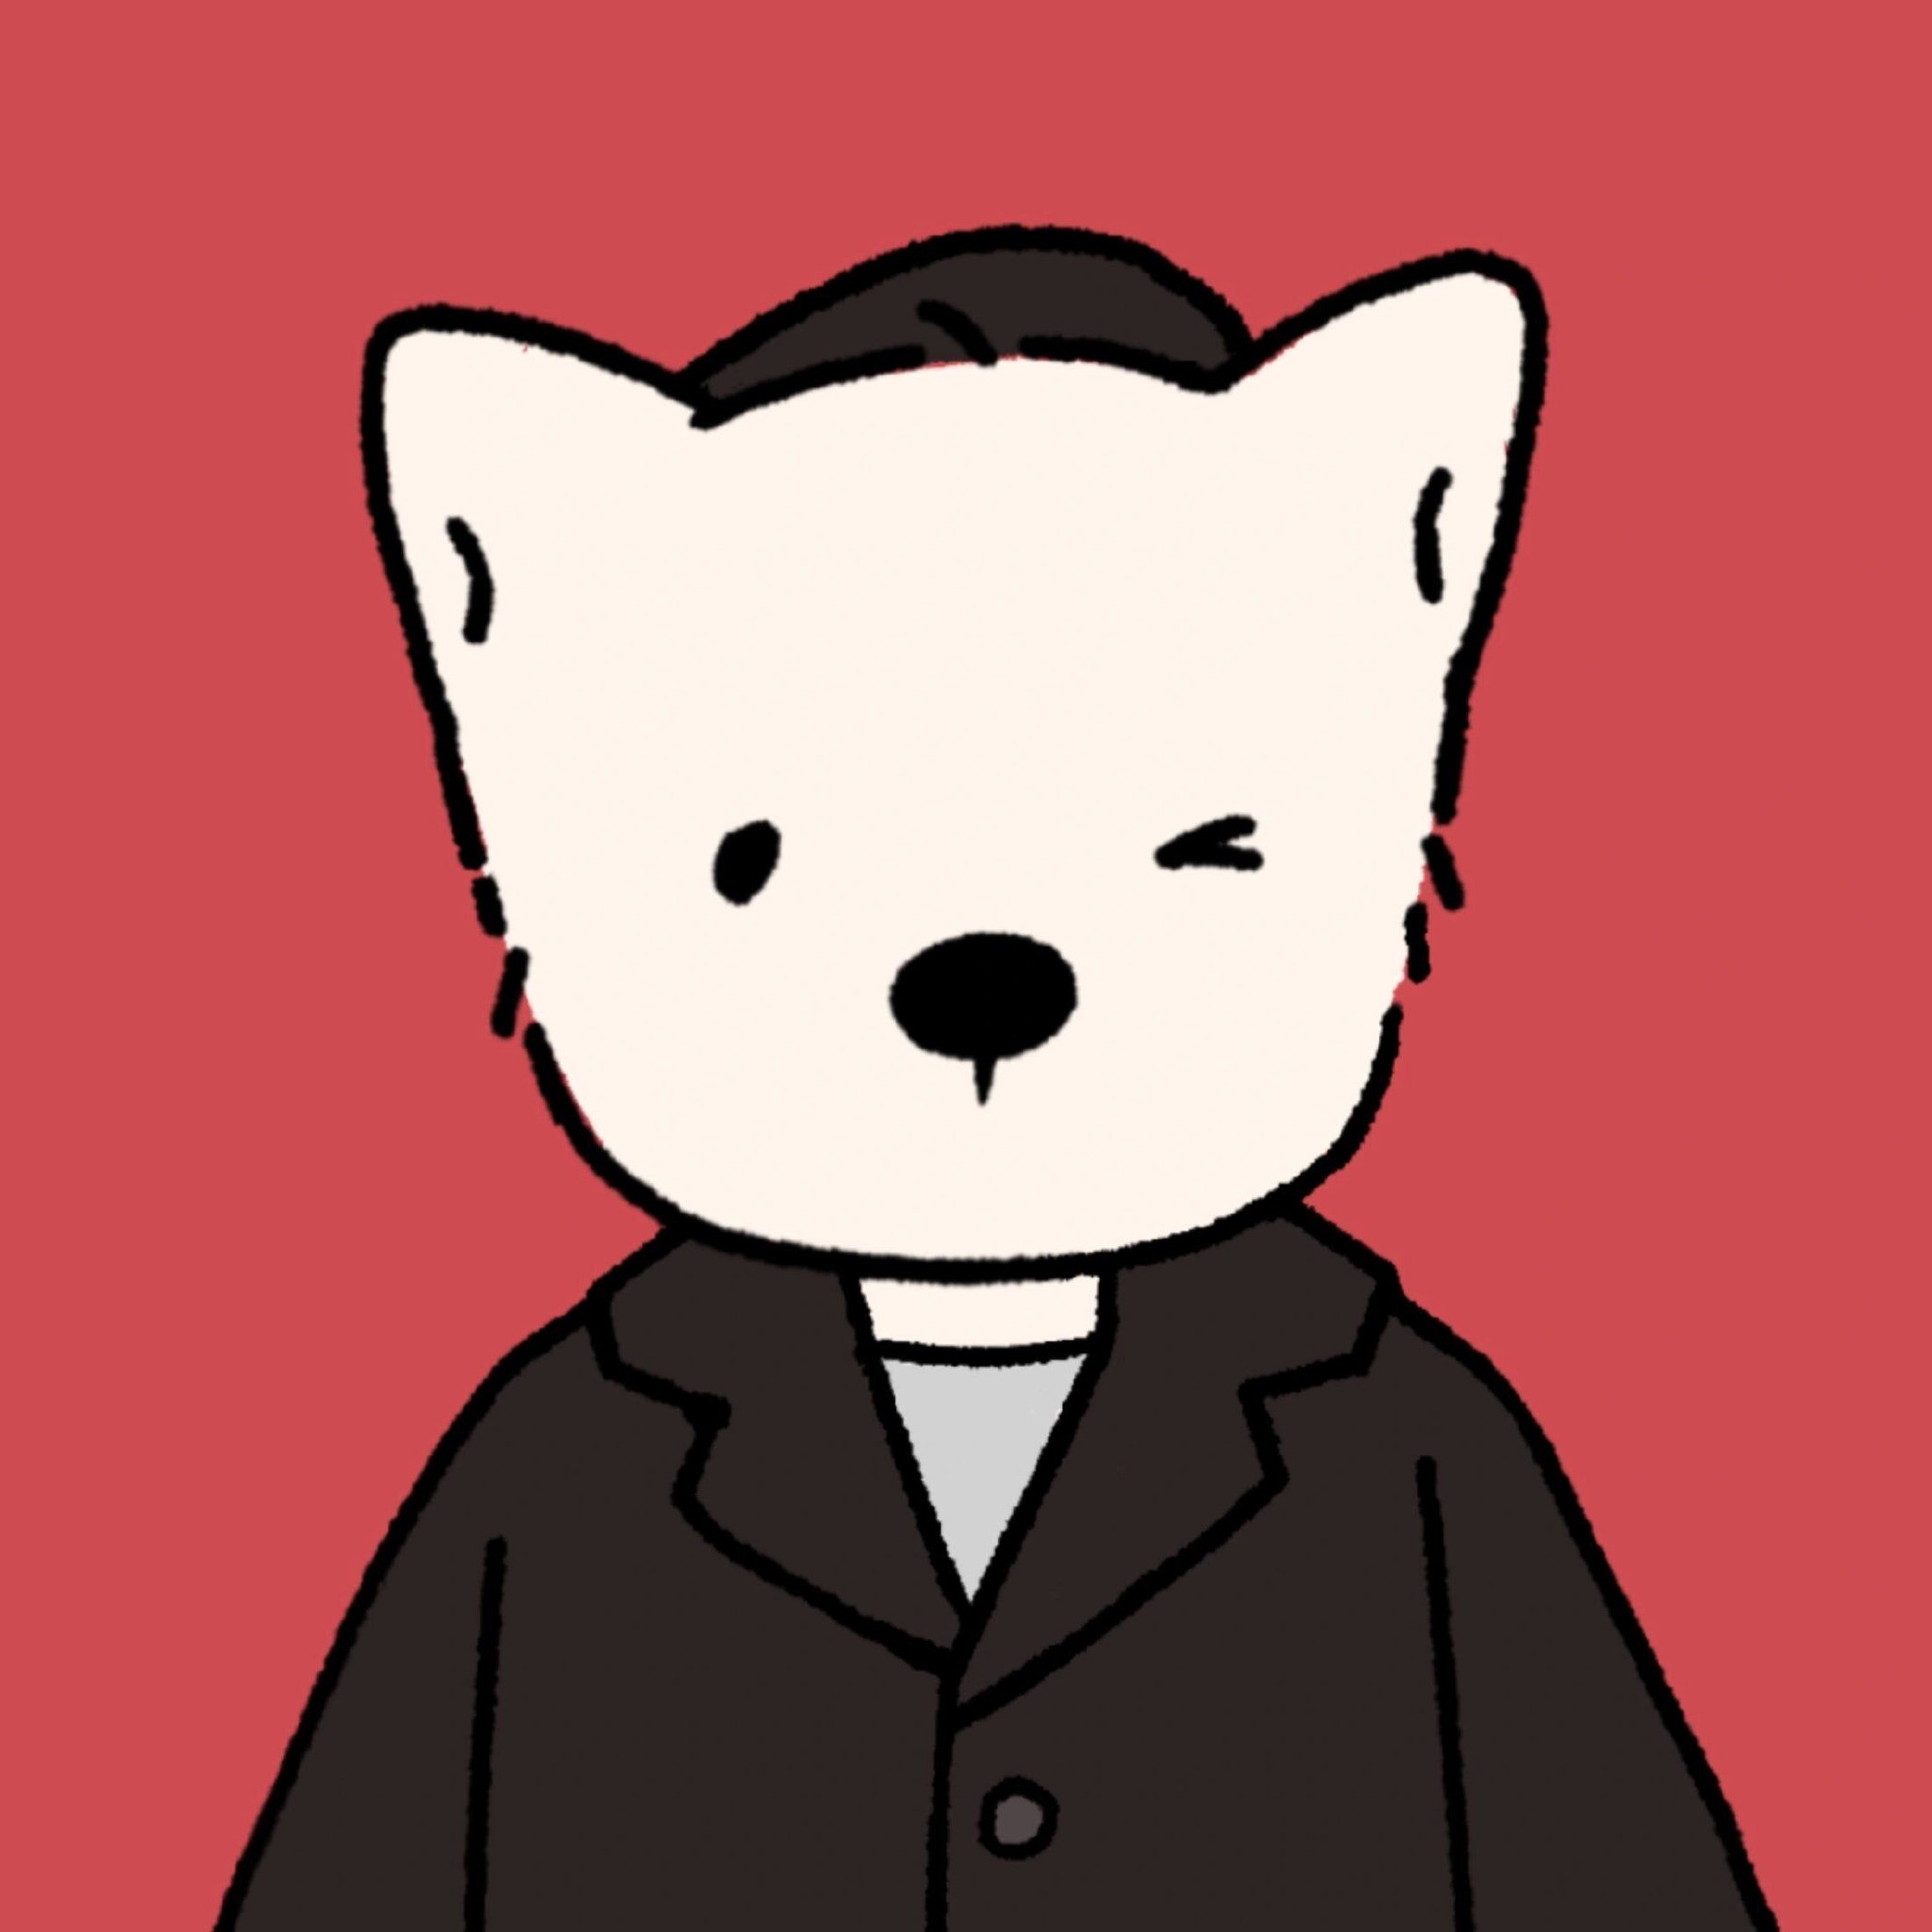
import cv2
import numpy as np

dog = cv2.imread('dog.png')
eye = cv2.imread('eye.png')

eye_gray = cv2.cvtColor(eye, cv2.COLOR_BGR2GRAY)
_, eye_thresh = cv2.threshold(eye_gray, 1, 255, cv2.THRESH_BINARY_INV)

rows, cows = eye.shape[:2]
x_position = 928
y_position = 626
roi = dog[626:626+rows, 920:920+cows]

image_mask = cv2.bitwise_and(roi, roi, mask=eye_thresh)
dst = cv2.add(image_mask, eye)

dog[626:626+rows, 920:920+cows] = dst

cv2.imshow("1",eye_thresh)
cv2.imwrite("dog_eye.jpg", dog)
cv2.waitKey(0)
6.除了植物的区域,变得更加虚化。
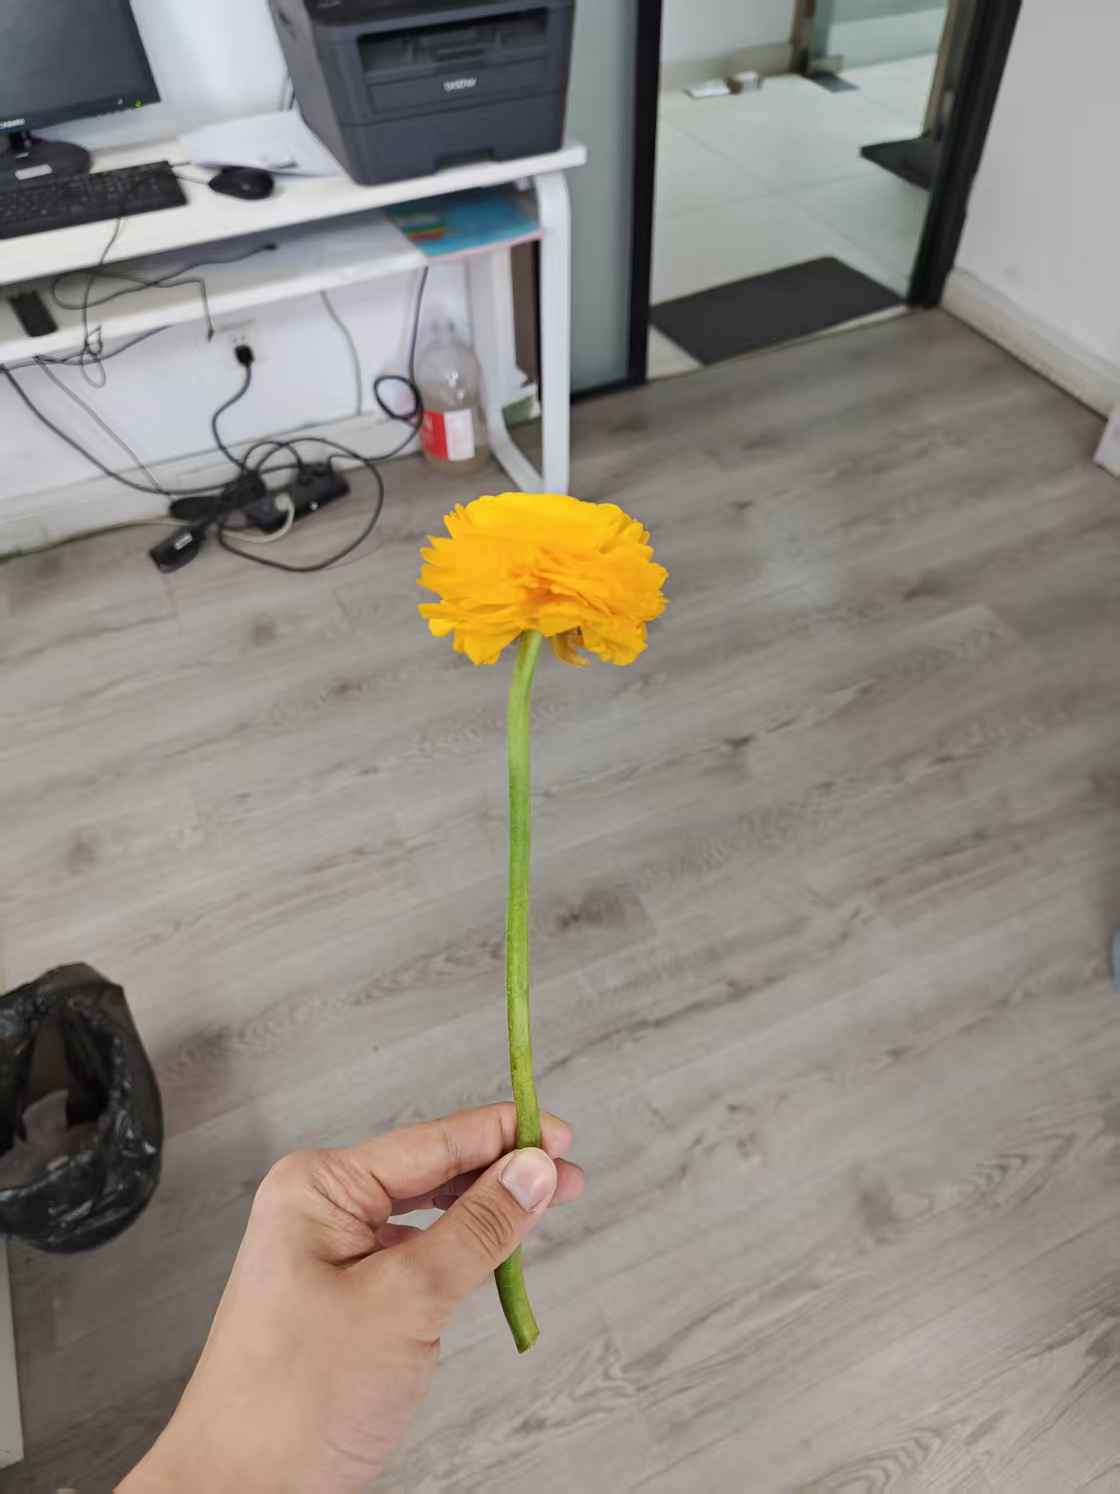
import cv2
import numpy as np


def blur_mask_region(image, mask):
    """
    使用了图像融合技术,但可以像素替换更佳
    """
    # 对原始图像进行模糊处理
    blurred = cv2.GaussianBlur(image, (25, 25), 0)

    # 将掩膜反转,使得要模糊的区域变为白色
    mask_inv = cv2.bitwise_not(mask)

    # 提取原始图像中不需要模糊的区域
    noblur_bimage = cv2.bitwise_and(image, image, mask=mask)

    # 提取模糊图像中需要模糊的区域
    blur_image = cv2.bitwise_and(blurred, blurred, mask=mask_inv)

    # 合并两个区域
    result = cv2.add(noblur_bimage,blur_image)

    return result


if __name__ == '__main__':
    path = 'flower.jpg'
    image_np = cv2.imread(path)

    # HSV空间转换
    hsv_image_np = cv2.cvtColor(image_np, cv2.COLOR_BGR2HSV)

    # 制作掩膜
    # 花橙色+手的掩膜
    or_low = np.array([18, 43, 46])
    or_high = np.array([25, 255, 255])
    mask1 = cv2.inRange(hsv_image_np, or_low, or_high)

    # 花黄色的掩膜
    ye_low = np.array([0, 43, 46])
    ye_high = np.array([34, 255, 255])
    mask2 = cv2.inRange(hsv_image_np, ye_low, ye_high)

    # 整个花+手的掩膜
    mask_mid1 = cv2.bitwise_or(mask1, mask2)

    # 茎的掩膜
    gr_low = np.array([35, 43, 46])
    gr_high = np.array([77, 255, 255])
    mask3 = cv2.inRange(hsv_image_np, gr_low, gr_high)

    # 花朵阴影的掩膜
    mid_low = np.array([10, 240, 200])
    mid_high = np.array([18, 255, 222])
    mask4 = cv2.inRange(hsv_image_np, mid_low,mid_high)

    # 茎+阴影
    mask_mid2 = cv2.bitwise_or(mask3, mask4)

    # 茎+阴影+花+手
    mask_image = cv2.bitwise_or(mask_mid1, mask_mid2)

    kernel1 = cv2.getStructuringElement(cv2.MORPH_CROSS, (5, 5))
    kernel2 = cv2.getStructuringElement(cv2.MORPH_RECT, (3, 3))
    # 因为掩膜合并的是多个,会出现异常的点,执行开运算来进行掩膜降噪
    open_image_np = cv2.morphologyEx(src=mask_image,  # 需要计算的二值化图像
                                     op=cv2.MORPH_OPEN,  # 选择开操作还是闭操作 MORHPH_CLOSE
                                     kernel=kernel1  # 核
                                     )
    # 再闭运算填充掩膜空洞
    close_image_np = cv2.morphologyEx(src=open_image_np,
                                      op=cv2.MORPH_CLOSE,
                                      kernel=kernel2)

    cv2.namedWindow('mask', cv2.WINDOW_NORMAL)
    cv2.imshow('mask', close_image_np)

    result_image = blur_mask_region(image_np, close_image_np)
    cv2.namedWindow("result_image",cv2.WINDOW_NORMAL)
    cv2.imshow('result_image',result_image)
    cv2.imwrite('flower1_1.png',result_image)

    cv2.waitKey(0)
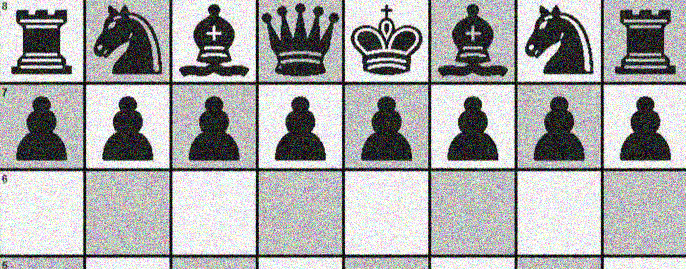
7.进行水平和垂直边缘检测,要求画质尽量纯净。
(图象梯度处理)
import cv2

if __name__ == '__main__':
    image = cv2.imread('chess.jpg')
    image_gray = cv2.cvtColor(image, cv2.COLOR_BGR2GRAY)
    ret, image_binary = cv2.threshold(image_gray, 127, 255, cv2.THRESH_BINARY + cv2.THRESH_OTSU)

    non_noise_image = cv2.medianBlur(
        image_binary,
        5
    )

    dst_image = cv2.Laplacian(
        non_noise_image,
        -1
    )

    cv2.imshow('1', dst_image)
    cv2.waitKey(0)
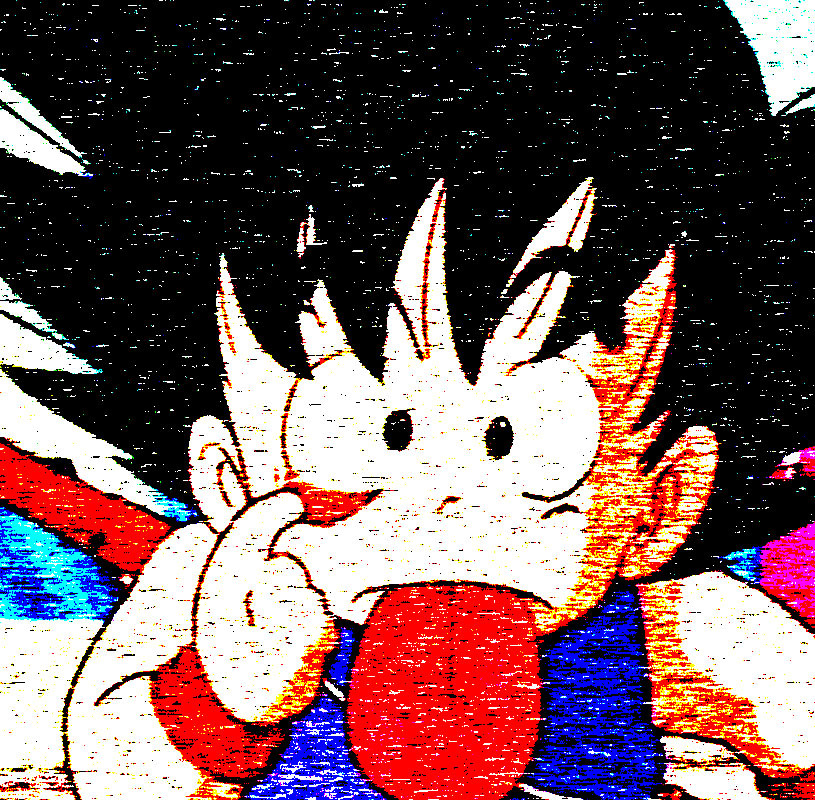
8.优化图片显示效果
import cv2
import numpy as np

# 加载图像
image = cv2.imread('wukong.jpg')

# 应用中值滤波
ksize = 7
filtered_image = cv2.medianBlur(image, ksize)

# 将图像从BGR格式转换为HSV格式
hsv_image = cv2.cvtColor(filtered_image, cv2.COLOR_BGR2HSV)

# 定义黄色、蓝色和红色的HSV范围
yellow_lower = np.array([20, 100, 100])
yellow_upper = np.array([30, 255, 255])

blue_lower = np.array([100, 150, 0])
blue_upper = np.array([140, 255, 255])

red_lower1 = np.array([0, 100, 100])
red_upper1 = np.array([10, 255, 255])
red_lower2 = np.array([160, 100, 100])
red_upper2 = np.array([180, 255, 255]) # 红色在HSV中有两个区间

# 创建掩膜
mask_yellow = cv2.inRange(hsv_image, yellow_lower, yellow_upper)
mask_blue = cv2.inRange(hsv_image, blue_lower, blue_upper)
mask_red1 = cv2.inRange(hsv_image, red_lower1, red_upper1)
mask_red2 = cv2.inRange(hsv_image, red_lower2, red_upper2)
mask_red = mask_red1 | mask_red2

# 对每个颜色区域应用形态学操作
kernel = np.ones((5, 5), np.uint8)
mask_blue = cv2.morphologyEx(mask_blue, cv2.MORPH_CLOSE, kernel)
mask_red = cv2.morphologyEx(mask_red, cv2.MORPH_CLOSE, kernel)
mask_yellow = cv2.morphologyEx(mask_yellow, cv2.MORPH_CLOSE, kernel)

# 对黄色区域应用高强度高斯模糊
blurred_yellow = cv2.GaussianBlur(filtered_image, (21, 21), 4) # 使用较大的内核大小和标准差
result_image = filtered_image.copy()
result_image[mask_yellow > 0] = blurred_yellow[mask_yellow > 0]

# 转换回BGR以进行梯度处理
gray_image = cv2.cvtColor(result_image, cv2.COLOR_BGR2GRAY)

# 分别对红蓝区域计算梯度并处理
for color_mask, color_name in [(mask_blue, 'blue'), (mask_red, 'red')]:
    # 使用Sobel算子计算梯度
    grad_x = cv2.Sobel(gray_image, cv2.CV_16S, 1, 0, ksize=3, scale=1, delta=0, borderType=cv2.BORDER_DEFAULT)
    grad_y = cv2.Sobel(gray_image, cv2.CV_16S, 0, 1, ksize=3, scale=1, delta=0, borderType=cv2.BORDER_DEFAULT)

    # 转换回uint8类型
    abs_grad_x = cv2.convertScaleAbs(grad_x)
    abs_grad_y = cv2.convertScaleAbs(grad_y)

    # 计算总梯度
    grad = cv2.addWeighted(abs_grad_x, 0.5, abs_grad_y, 0.5, 0)

    # 设定一个阈值来检测高梯度区域
    threshold_value = 50
    _, high_grad_mask = cv2.threshold(grad, threshold_value, 255, cv2.THRESH_BINARY)

    # 结合颜色掩膜与高梯度掩膜
    final_mask = cv2.bitwise_and(color_mask, high_grad_mask)

    # 根据最终掩膜处理图像
    # 示例处理:将高梯度区域的颜色恢复为原始颜色
    if color_name == 'blue':
        result_image[final_mask > 0] = [255, 0, 0] # 蓝色
    elif color_name == 'red':
        result_image[final_mask > 0] = [0, 0, 255] # 红色

# 转换回BGR以进行亮度和饱和度调整
hsv_result = cv2.cvtColor(result_image, cv2.COLOR_BGR2HSV)

# 降低亮度和饱和度
h, s, v = cv2.split(hsv_result)
s = cv2.convertScaleAbs(s, alpha=0.9)
v = cv2.convertScaleAbs(v, alpha=0.9)

# 合并调整后的H,S,V通道
final_hsv = cv2.merge([h, s, v])

# 转换回BGR颜色空间
final_image = cv2.cvtColor(final_hsv, cv2.COLOR_HSV2BGR)

# 显示结果
cv2.imshow('Final Image', final_image)
cv2.waitKey(0)
cv2.destroyAllWindows()
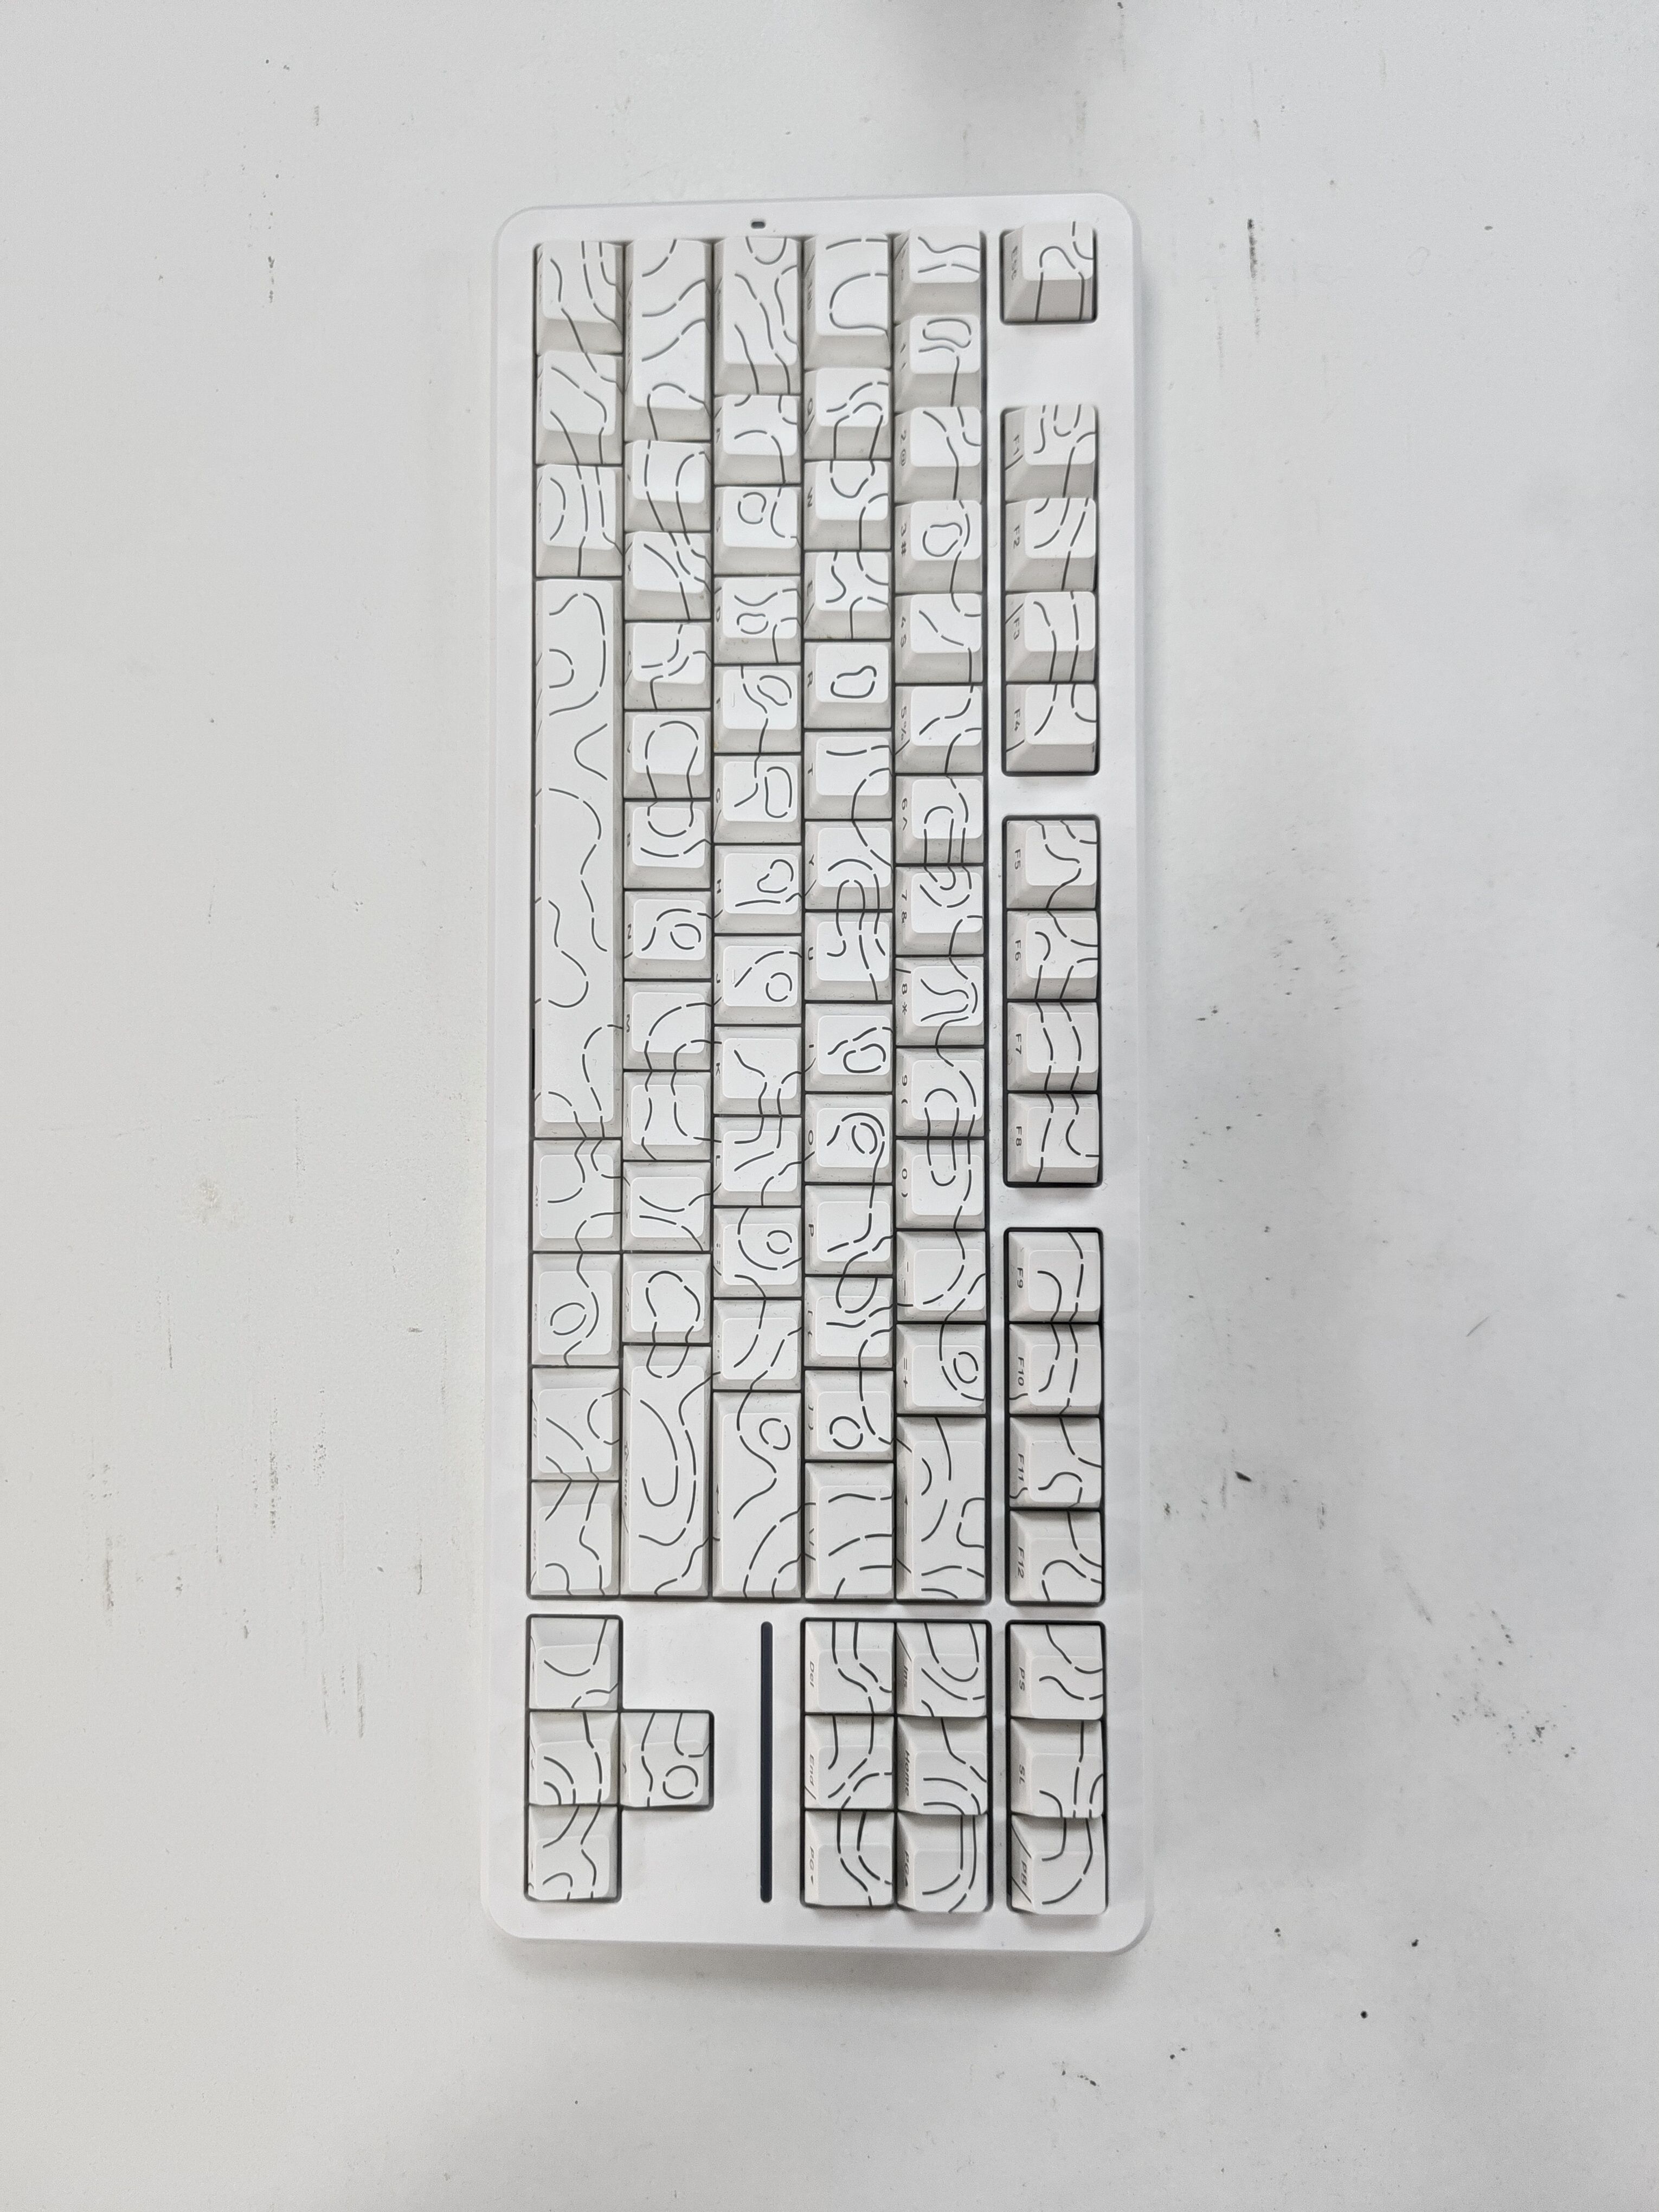
9.边缘检测
import cv2
import numpy as np

if __name__ == '__main__':
    # 1. 图片输入
    path = 'imgs/5-1.jpeg'
    image_np = cv2.imread(path)

    # 2. 灰度化
    image_np_gray = cv2.cvtColor(image_np, cv2.COLOR_BGR2GRAY)

    # 3. 二值化
    _, image_np_thresh = cv2.threshold(
        image_np_gray,
        130,
        255,
        cv2.THRESH_BINARY
    )
    # cv2.imshow('binary',image_np_thresh)

    # 开运算
    kernel=cv2.getStructuringElement(cv2.MORPH_RECT,[3,3])
    open_image=cv2.morphologyEx(image_np_thresh,cv2.MORPH_CLOSE,kernel)

    # Canny算法:高斯滤波 + 5. 计算梯度与方向 + 6. 非极大值抑制 + 7. 双阈值筛选
    edges_image = cv2.Canny(
        open_image, # 要处理的图像
        30, # 低阈值
        70 # 高阈值
    )

    # 8. 图片输出
    # cv2.imshow('edges_image',edges_image)
    cv2.imwrite('imgs/5-1-thresh.jpg', open_image)
    cv2.imwrite('imgs/5-1-1.jpg', edges_image)
    cv2.waitKey(0)
10.凸包检测
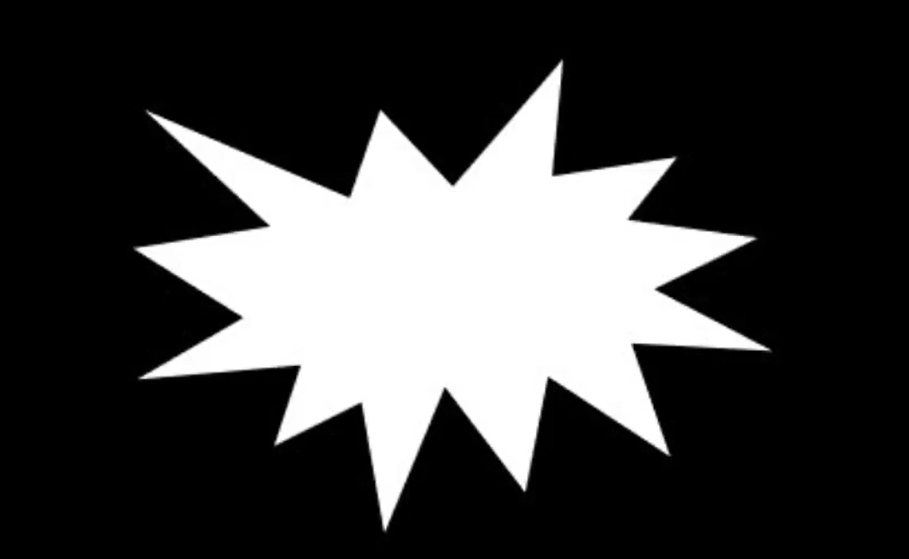

import cv2
import numpy as np

if __name__ == '__main__':
    # 1. 图片输入
    path = 'tubao2.jpg'
    image_np = cv2.imread(path)

    # 2. 灰度化
    image_np_gray = cv2.cvtColor(image_np, cv2.COLOR_BGR2GRAY)

    # 3. 二值化
    ret, image_np_thresh = cv2.threshold(
        image_np_gray,
        127,
        255,
        cv2.THRESH_BINARY + cv2.THRESH_OTSU
    )
    print('thresh:', ret)

    # 4. 寻找轮廓
    # 返回值1:轮廓的点坐标,使用array存储n个轮廓的信息
    # 返回值2:多个轮廓之间的层级关系
    contours, hierarchy = cv2.findContours(
        image_np_thresh,  # 二值化图像
        cv2.RETR_EXTERNAL,  # 轮廓的查找方式
        cv2.CHAIN_APPROX_SIMPLE  # 轮廓近似办法
    )
    print(len(contours))  # 轮廓的数量
    # print(contours)
    # print(hierarchy)
    # 拿到第一个轮廓的数据
    cnt = contours[0]
    # print(cnt)
    # 1394表示前景轮廓的像素点,1表示占位,2表示二维点
    print(cnt.shape)  # (1394, 1, 2)

    # 5. 查找凸包
    # 返回轮廓凸包点
    hull = cv2.convexHull(cnt)  # 参数也可以替换为其他的轮廓,cnt是第一个轮廓
    print(hull)
    print(hull.shape)  # 包含凸包点数量

    # 6. 绘制轮廓
    # 绘制多条线
    cv2.polylines(
        image_np,  # 在哪个图上画线
        [hull],  # 绘制的轮廓列表
        isClosed=True,  # 轮廓是否封闭
        color=(0, 0, 255),  # 颜色
        thickness=2  # 粗细
    )

    # 7. 图片输出
    cv2.imshow('image_np', image_np)
    cv2.waitKey(0)
11.给下面的图像绘制凸包轮廓,灰色是背景。
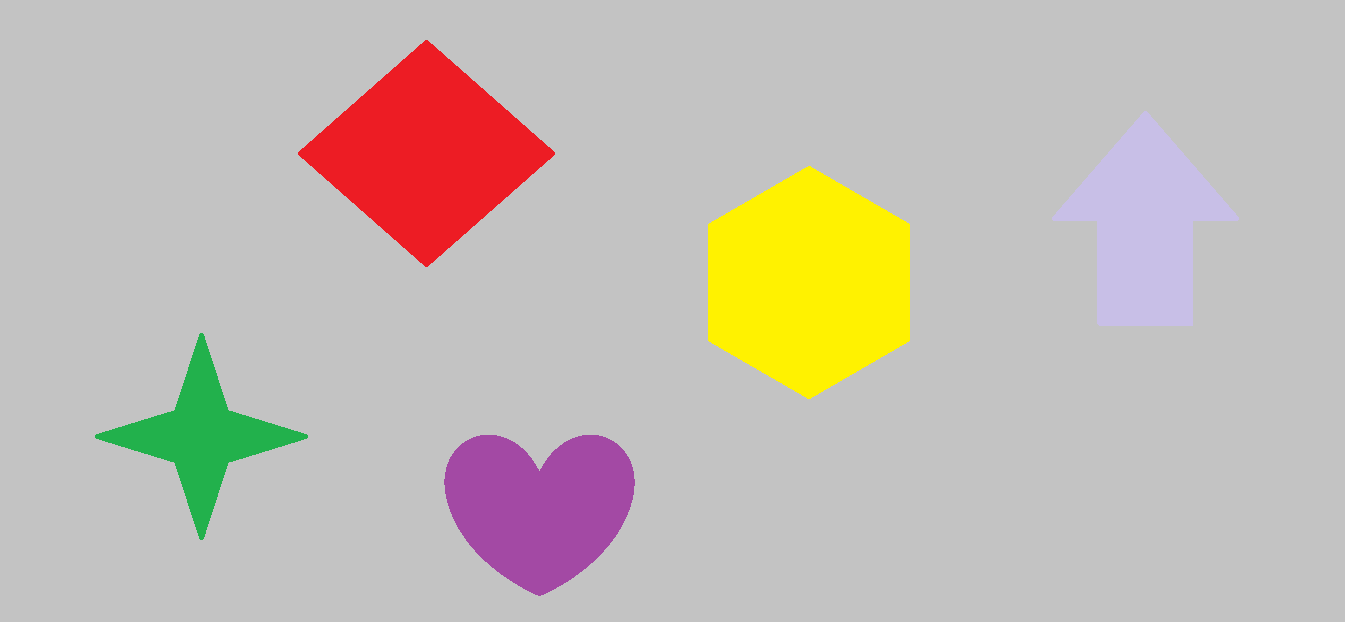
import cv2
import numpy as np

if __name__ == '__main__':
    # 读取图片
    image_np = cv2.imread('practice_two.png')
    # HSV空间转换
    hsv_image_np = cv2.cvtColor(image_np, cv2.COLOR_BGR2HSV)
    # 制作掩膜
    grey_low = np.array([0, 0, 46])
    grey_high = np.array([180, 43, 220])
    mask = cv2.inRange(hsv_image_np, grey_low, grey_high)
    contours, hierarchy = cv2.findContours(
        mask,
        cv2.RETR_CCOMP,  # 注意
        cv2.CHAIN_APPROX_SIMPLE
    )
    print(len(contours))
    print(hierarchy)
    # 跳过最大的轮廓
    for i in range(1, len(contours)):
        cnt = contours[i]
        hull = cv2.convexHull(cnt)
        cv2.polylines(
            image_np,
            [hull],
            isClosed=True,
            color=(255, 0, 0),
            thickness=2
        )
    cv2.imshow('image_np', image_np)
    cv2.waitKey(0)
12.绘制图像的所有轮廓,并使用不同的颜色标识。
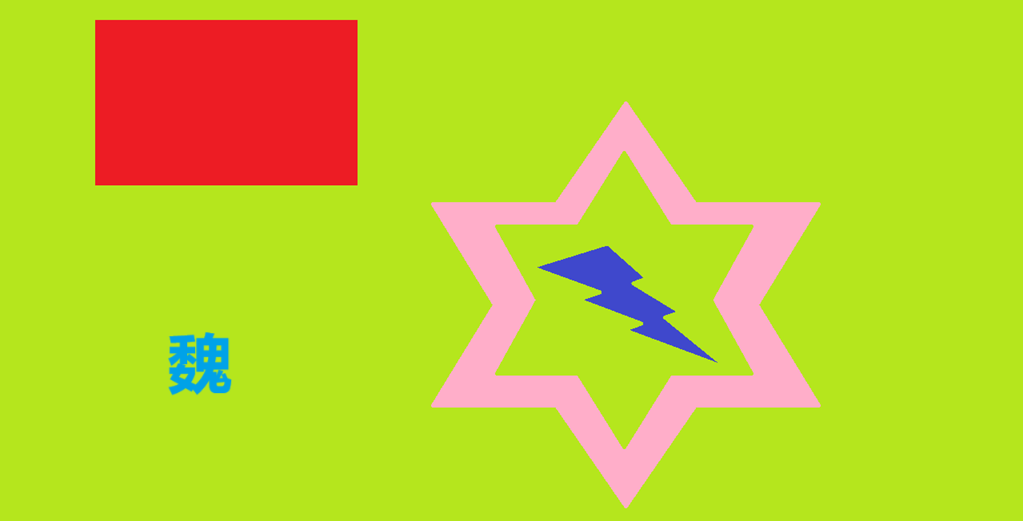
import cv2
import numpy as np

if __name__ == '__main__':
    # 1. 图片输入
    path = './image/lunkuo.jpg'
    image_np = cv2.imread(path)
    # 2. 灰度化
    image_np_gray = cv2.cvtColor(image_np, cv2.COLOR_BGR2GRAY)
    # 3. 二值化
    # 红 + 蓝 + 字
    ret, image_np_thresh1 = cv2.threshold(image_np_gray, 147, 255, cv2.THRESH_BINARY_INV + cv2.THRESH_OTSU)
    # 粉
    ret, image_np_thresh2 = cv2.threshold(image_np_gray, 200, 255, cv2.THRESH_BINARY)
    # 红 + 蓝
    ret, image_np_thresh3 = cv2.threshold(image_np_gray, 120, 255, cv2.THRESH_BINARY_INV)

    # 2. 滤波算法
    # 中值滤波
    # 粉
    no_noise_image = cv2.medianBlur(
        image_np_thresh2,  # 原图
        3  # 核
    )
    # 4. 寻找轮廓1
    contours1, hierarchy1 = cv2.findContours(
        image_np_thresh1,  # 二值化之后的图像
        cv2.RETR_LIST,  # 查找方式
        cv2.CHAIN_APPROX_NONE  # 近似办法
    )
    # 5. 绘制轮廓1
    image_np = cv2.drawContours(
        image_np,  # 在哪个图上绘制
        contours1,  # 轮廓数据列表
        contourIdx=-1,  # 绘制轮廓的id,-1表示全绘制
        color=(0, 255, 255),  # 绘制的颜色
        thickness=2  # 线宽
    )

    # 4. 寻找轮廓2
    contours2, hierarchy2 = cv2.findContours(
        no_noise_image,  # 二值化之后的图像
        cv2.RETR_LIST,  # 查找方式
        cv2.CHAIN_APPROX_NONE  # 近似办法
    )
    # 5. 绘制轮廓2
    image_np = cv2.drawContours(
        image_np,  # 在哪个图上绘制
        contours2,  # 轮廓数据列表
        contourIdx=-1,  # 绘制轮廓的id,-1表示全绘制
        color=(255,0 , 255),  # 绘制的颜色
        thickness=2  # 线宽
    )

    # 4. 寻找轮廓3
    contours3, hierarchy3 = cv2.findContours(
        image_np_thresh3,  # 二值化之后的图像
        cv2.RETR_LIST,  # 查找方式
        cv2.CHAIN_APPROX_NONE  # 近似办法
    )
    # 5. 绘制轮廓3
    for i in range(0,2):
        image_np = cv2.drawContours(
            image_np,  # 在哪个图上绘制
            contours3,  # 轮廓数据列表
            contourIdx=i,  # 绘制轮廓的id,-1表示全绘制
            color=(255-255*i, 255-255*i, 255-255*i),  # 绘制的颜色
            thickness=2  # 线宽
        )

    cv2.imshow('image_np',image_np)
    cv2.waitKey(0)
13.给星星绘制外接圆(不许ROI)
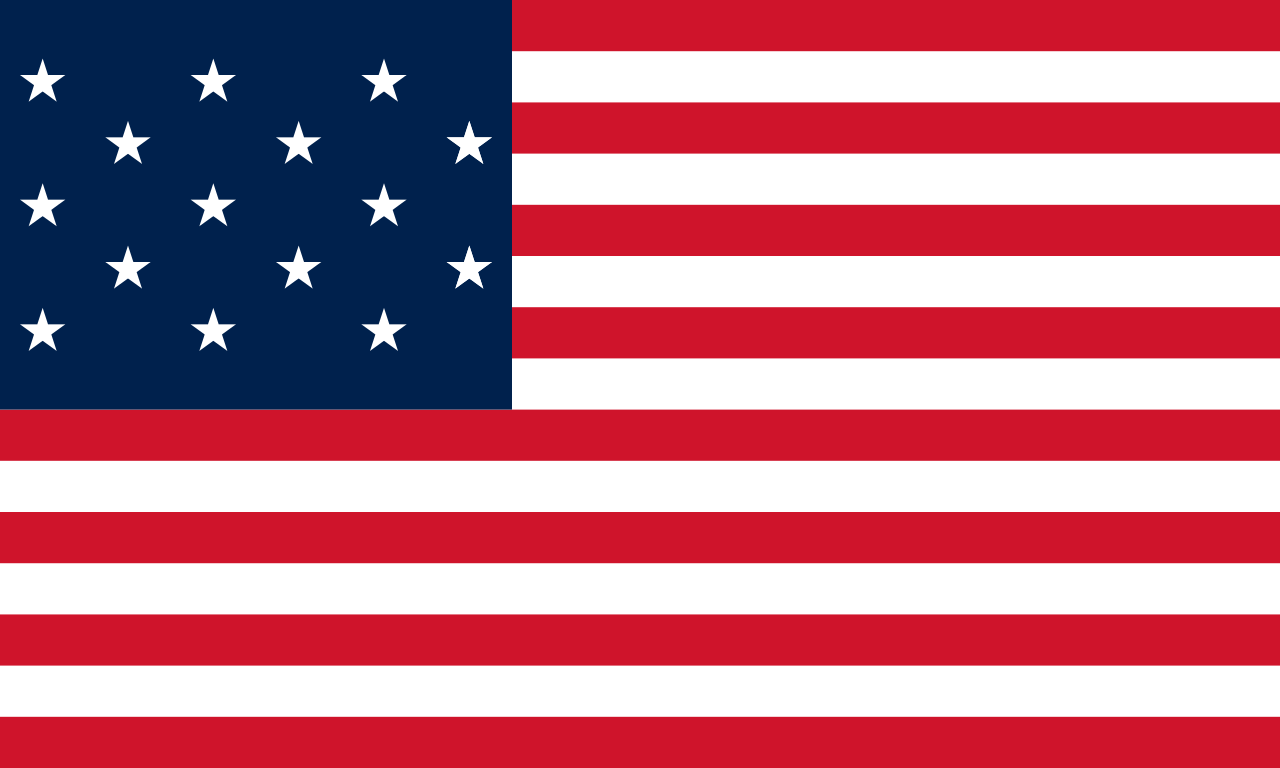
import cv2
import numpy as np
if __name__ == '__main__':
    image = cv2.imread('usa.jpg')

    image_gray = cv2.cvtColor(image, cv2.COLOR_BGR2GRAY)

    ret, image_gray_thresh = cv2.threshold(
        image_gray,
        124,
        255,
        cv2.THRESH_BINARY + cv2.THRESH_OTSU
    )
    cv2.imshow('ss', image_gray_thresh)
    cv2.waitKey(0)
    contours, hir = cv2.findContours(
        image_gray_thresh,
        cv2.RETR_EXTERNAL,
        cv2.CHAIN_APPROX_SIMPLE     # 有用点
    )
    print(contours[0].shape)
    for i in contours:
        print(i.shape)

    contour_image = image.copy()
    for i in contours:
        # 因为CHAIN_APPROX_SIMPLE只保存轮廓的有用点
        # 所以星星反而轮廓的有用点更多
        if i.shape[0] > 40:
            (x, y), radius = cv2.minEnclosingCircle(i)
            x, y, radius = int(x), int(y), int(radius)
            cv2.circle(
                contour_image,
                (x, y),
                radius,
                (255, 255, 255),
                2
            )
        # cv2.imshow('image_np', image)
    cv2.imshow('contour_image', contour_image)
    cv2.waitKey(0)
14.绘制星星的最小外接矩形,要求矩形的颜色不同,越美观越好。
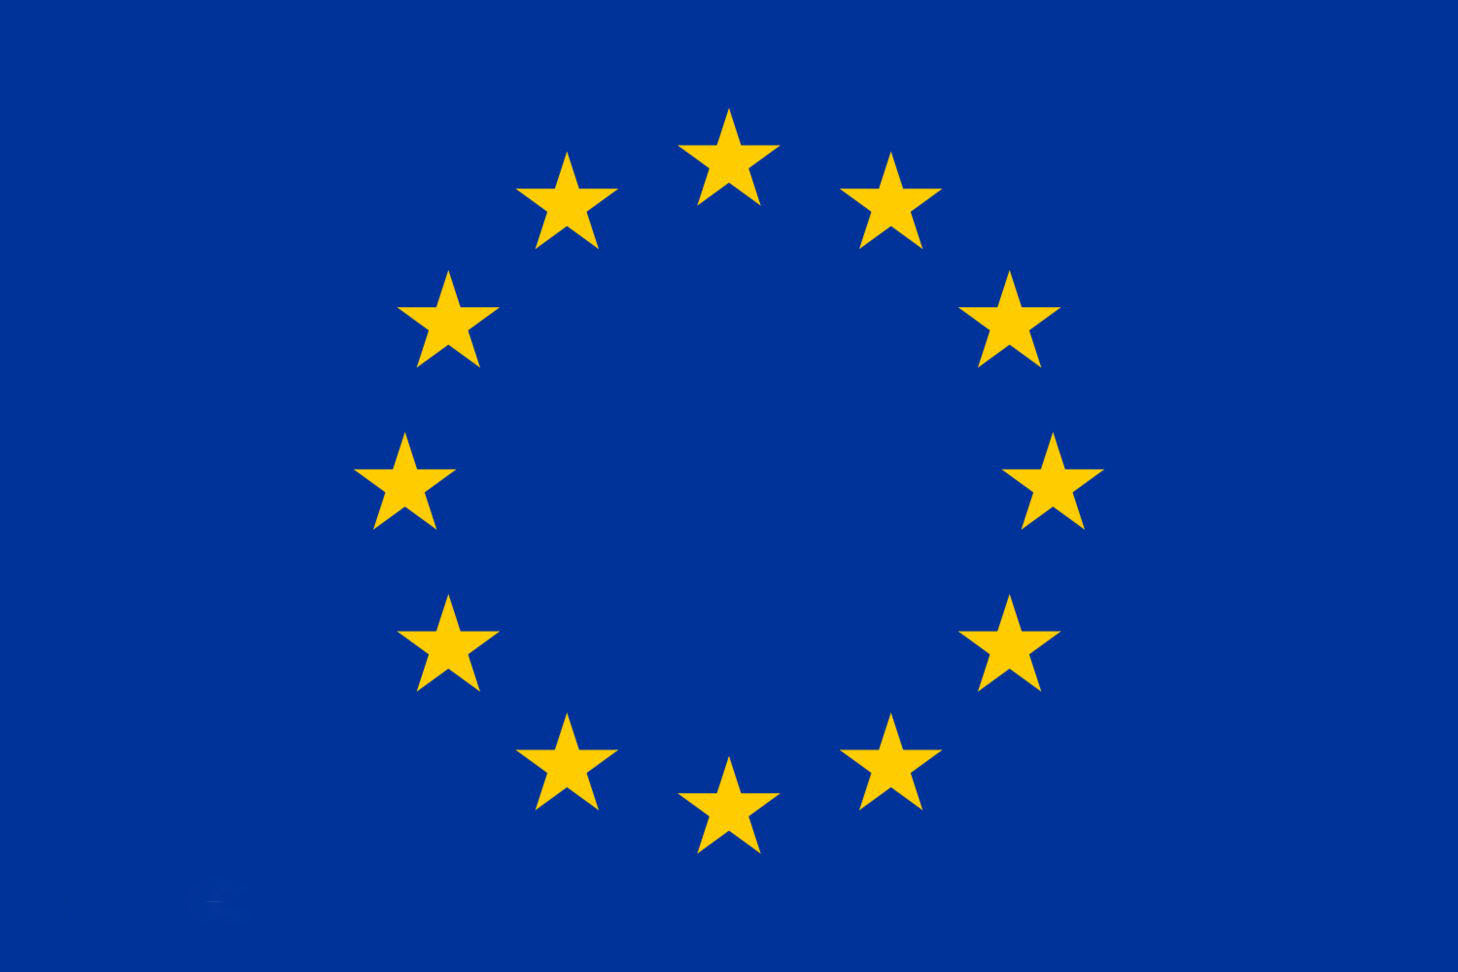
import cv2
import numpy as np

if __name__ == '__main__':
    # 1. 图片输入
    path = 'eu.jpg'
    image_np = cv2.imread(path)

    # 2. 灰度化
    image_np_gray = cv2.cvtColor(image_np, cv2.COLOR_BGR2GRAY)

    # 3. 二值化
    ret, image_np_thresh = cv2.threshold(image_np_gray, 127, 255, cv2.THRESH_BINARY + cv2.THRESH_OTSU)
    cv2.imshow('image_np_thresh', image_np_thresh)

    # 4.查找轮廓
    contours, hierarchy = cv2.findContours(
        image_np_thresh,  # 二值化之后的图像
        cv2.RETR_LIST,  # 查找方式
        cv2.CHAIN_APPROX_SIMPLE  # 近似办法
    )

    # 5. 外界轮廓
    epoch = 70
    contour_image = image_np.copy()
    for i in contours:
        # 计算最小外接矩形
        # 返回值:包含最小外接矩形参数的对象
        rect = cv2.minAreaRect(i)
        # 把矩形数据转换为四个角点坐标
        points = cv2.boxPoints(rect)
        # 转换为整形
        box = np.int32(points)
        # 绘制轮廓
        cv2.drawContours(
            contour_image,
            [box],
            -1,
            ((epoch + 34) % 255, (epoch + 92) % 255, epoch * 4 % 255),
            2
        )
        epoch += 35

    # 6. 图片输出
    cv2.imshow('contour_image', contour_image)
    cv2.imwrite('result5.jpg', contour_image)
    cv2.waitKey(0)
15.绘制六芒星的内外轮廓
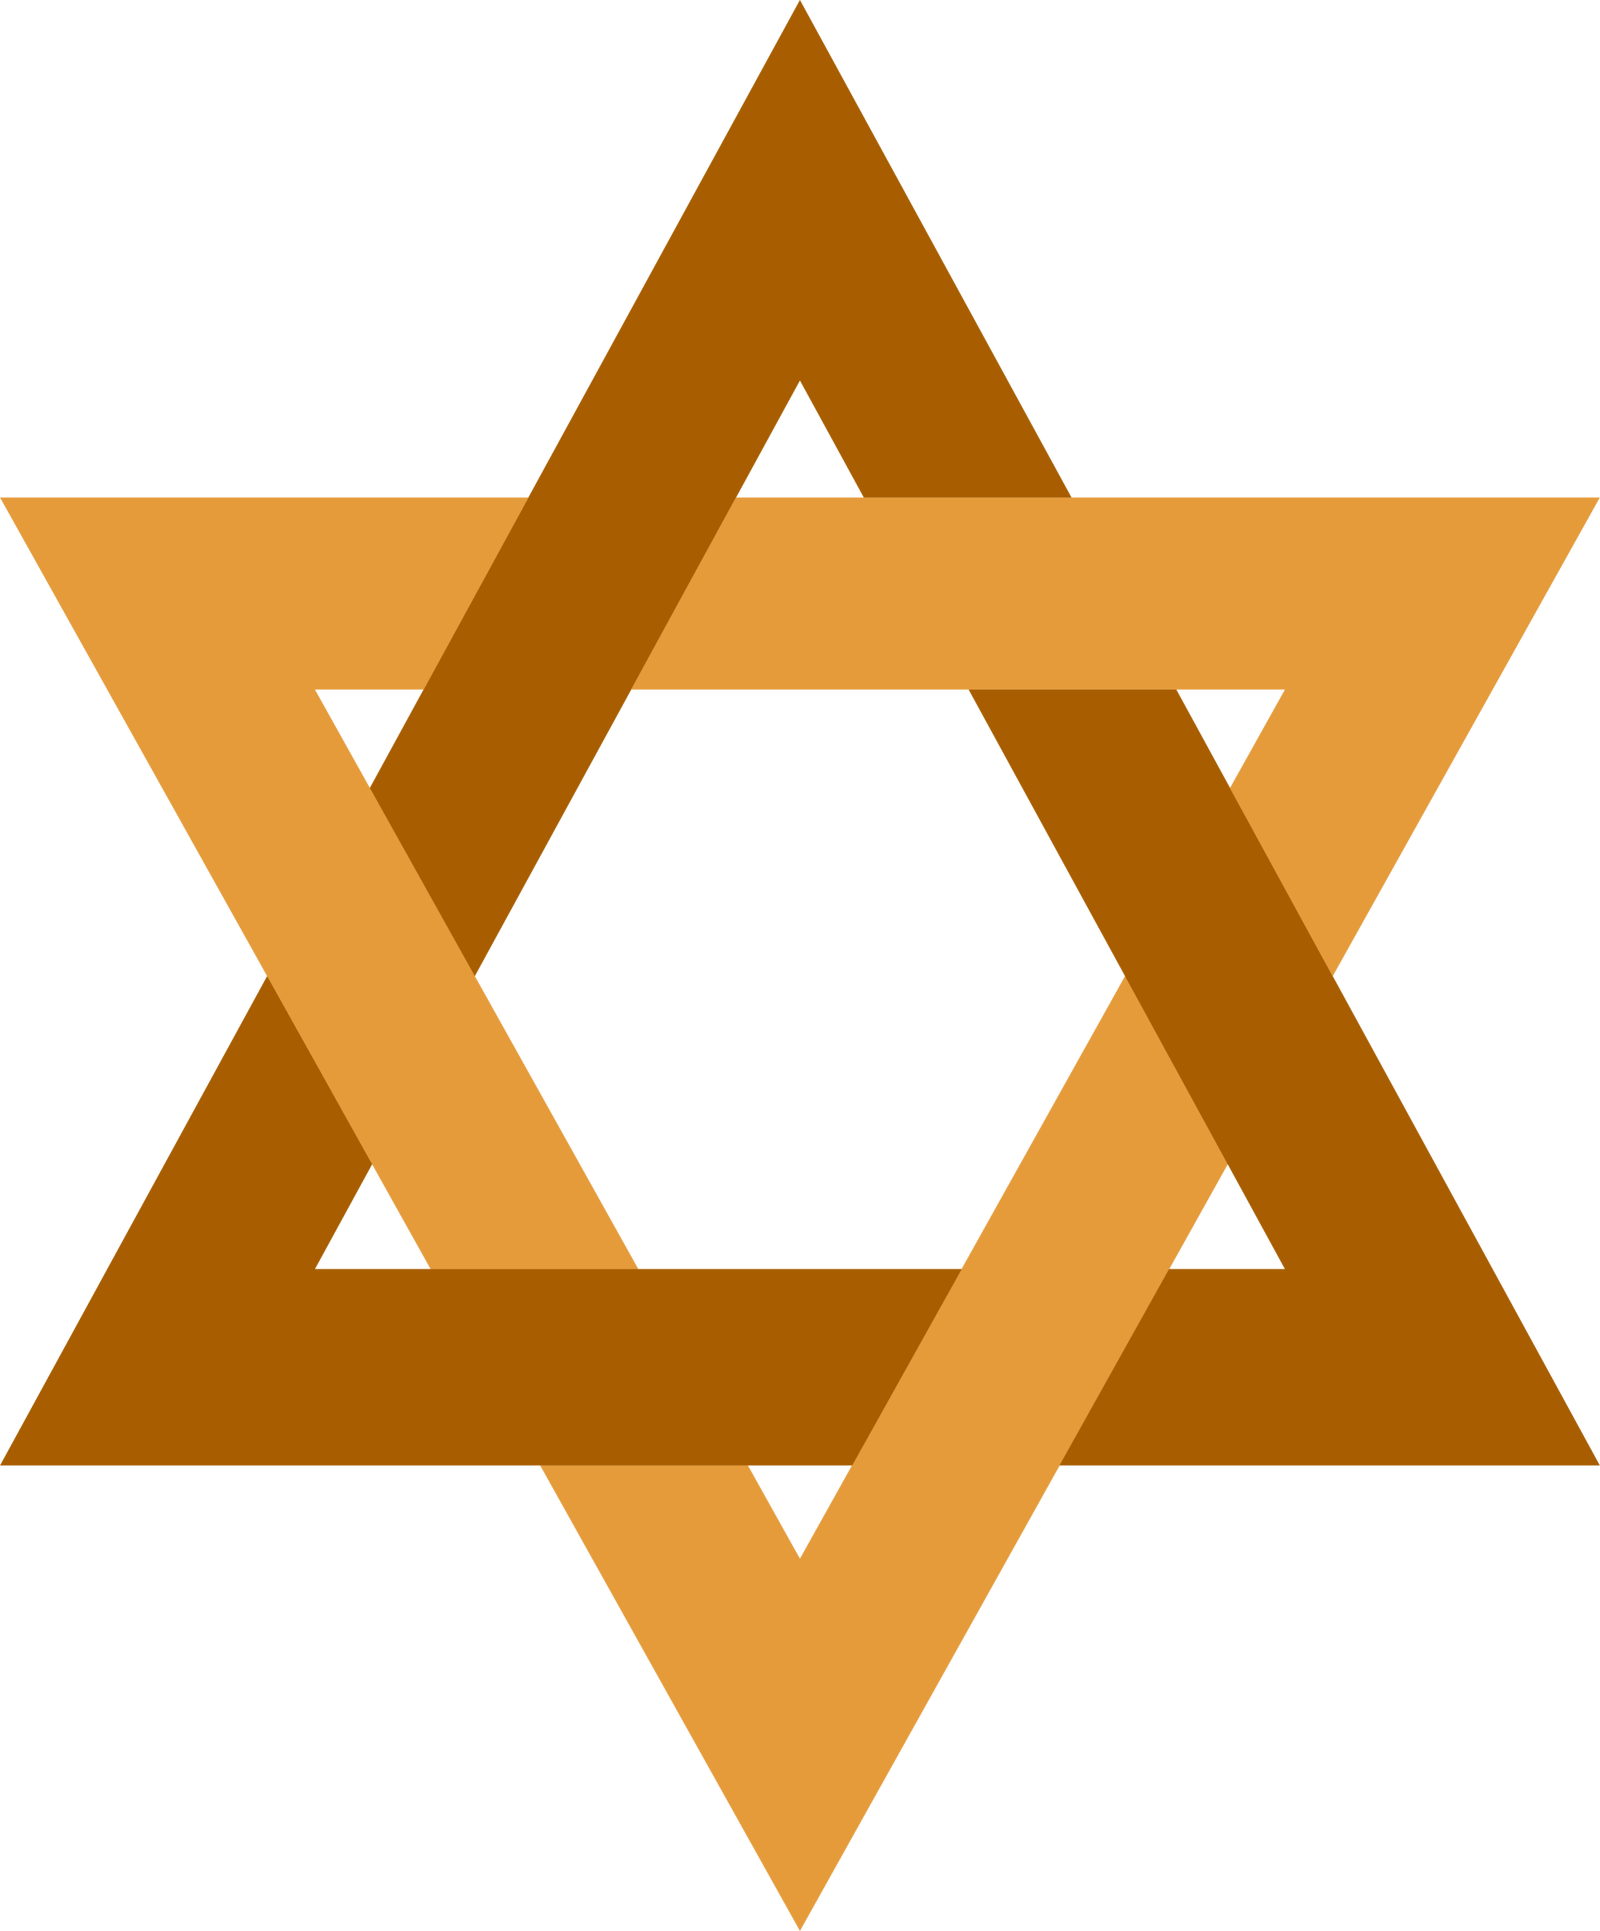
import cv2

if __name__ == '__main__':
    img = cv2.imread('six.png')
    img_gray = cv2.cvtColor(img, cv2.COLOR_BGR2GRAY)
    ret, img_two = cv2.threshold(img_gray, 67, 255, cv2.THRESH_BINARY)
    contours, hierarchy = cv2.findContours(img_two, cv2.RETR_TREE, cv2.CHAIN_APPROX_NONE)
    img = cv2.drawContours(img, contours, -1, (0, 255, 0), 3)
    cv2.imwrite('work_6.png', img)
    cv2.waitKey(0)
16.使用最小外接圆把东字圈起来。
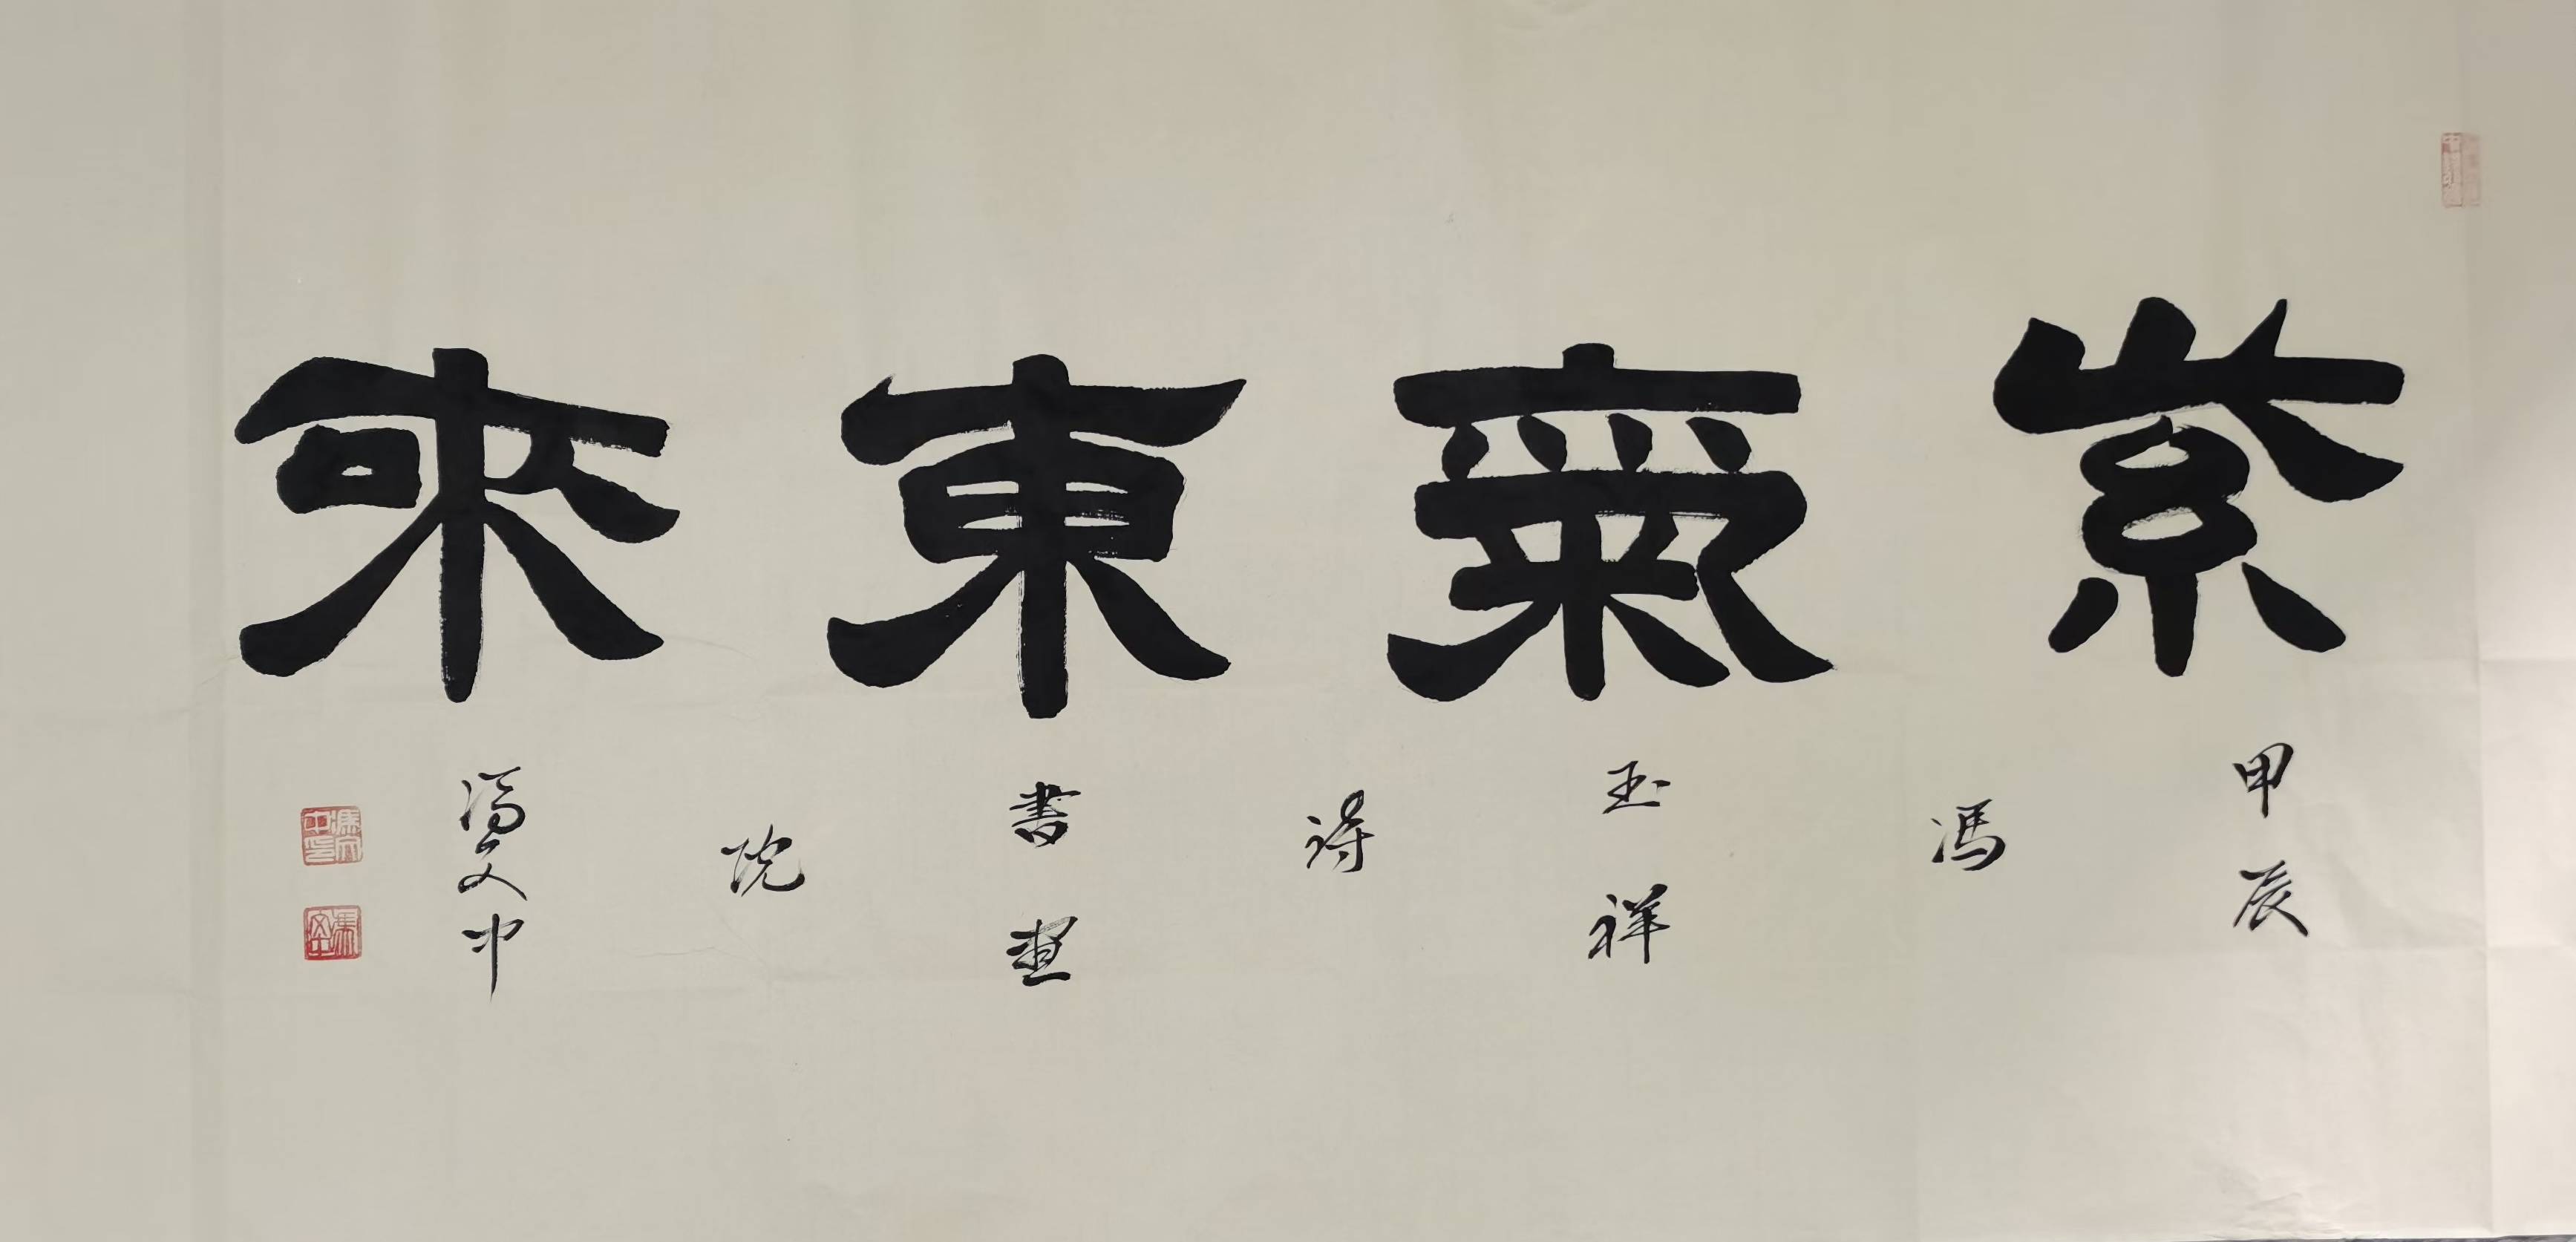
import cv2

if __name__ == '__main__':
    img = cv2.imread('dong.jpeg')
    img_gray = cv2.cvtColor(img, cv2.COLOR_BGR2GRAY)
    ret1, img_two = cv2.threshold(img_gray, 0, 255, cv2.THRESH_BINARY_INV + cv2.THRESH_OTSU)
    kernel = cv2.getStructuringElement(cv2.MORPH_RECT, (3, 3))
    img_two = cv2.morphologyEx(src=img_two, op=cv2.MORPH_OPEN, kernel=kernel)
    contours, hierarchy = cv2.findContours(img_two, cv2.RETR_EXTERNAL, cv2.CHAIN_APPROX_NONE)
    for i in range(len(contours)):
        (x, y), radius = cv2.minEnclosingCircle(contours[i])
        x, y, radius = int(x), int(y), int(radius)
        if 1090 < x < 1688 and y < 1000:
            cv2.circle(img, (x, y), radius, (0, 0, 255), 2)
    cv2.imwrite('work_7.png', img)
    cv2.waitKey(0)
17.使用最小外接矩形框选蜡笔小新的动感超人眼睛。
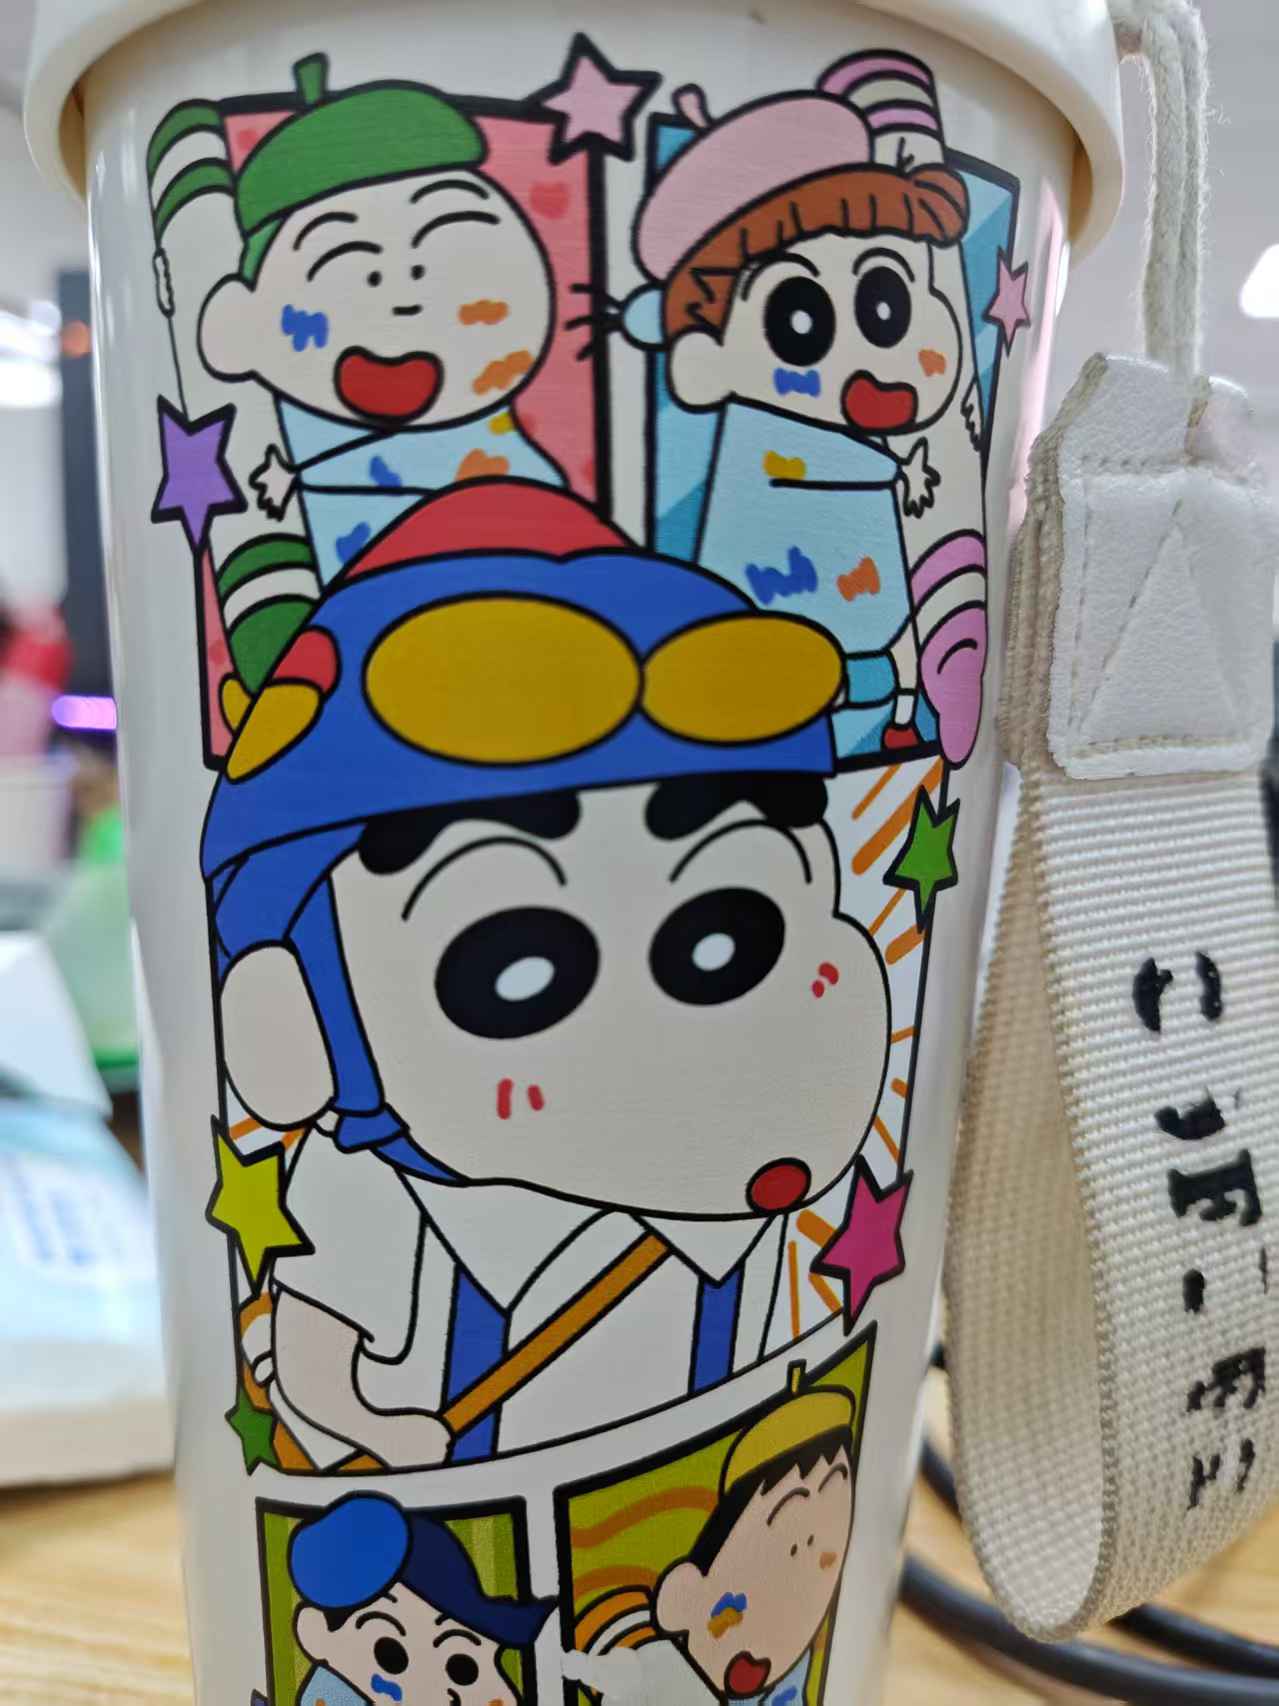
import cv2
import numpy as np

if __name__ == '__main__':
    # 读取,颜色转换
    path = 'xiaoxin.jpg'
    image_np = cv2.imread(path)
    image_hsv = cv2.cvtColor(image_np, cv2.COLOR_BGR2HSV)
    # 定义黄色,制作掩膜
    yellow_low=np.array([22,220,150])
    yellow_high=np.array([25,255,180])
    mask_yellow=cv2.inRange(image_hsv,yellow_low,yellow_high)

    # 消除同为黄色的其它小区域
    # 消除无关部分
    kernel=cv2.getStructuringElement(cv2.MORPH_RECT,[3,3])
    for _ in range(17):
        mask_yellow=cv2.erode(mask_yellow,kernel)

    # 尽量还原目标部分形状
    kernel=cv2.getStructuringElement(cv2.MORPH_ELLIPSE,[3,3])
    for _ in range(32):
        mask_yellow=cv2.dilate(mask_yellow,kernel)
    # 最终掩膜
    cv2.namedWindow('mask',cv2.WINDOW_NORMAL)
    cv2.imshow('mask',mask_yellow)

    # 寻找轮廓
    contours, hierarchy = cv2.findContours(
        mask_yellow,  # 二值化之后的图像
        cv2.RETR_EXTERNAL,  # 查找方式
        cv2.CHAIN_APPROX_SIMPLE  # 近似办法
    )
    print('contours:', len(contours))

    # 绘制矩形
    contour_image = image_np.copy()
    for i in contours:
        # 计算最小外接矩形
        rect = cv2.minAreaRect(i)
        points = cv2.boxPoints(rect)
        box = np.int32(points)

        cv2.drawContours(
            contour_image,
            [box],
            -1,
            (150, 255, 0),
            2
        )

    cv2.imshow('contour_image', contour_image)
    # cv2.imwrite('imgs/5-8-1.jpg',contour_image)
    cv2.waitKey(0)
18.卫星扫描了一张遥感图,需要增强显示效果。
(直方图均衡化)
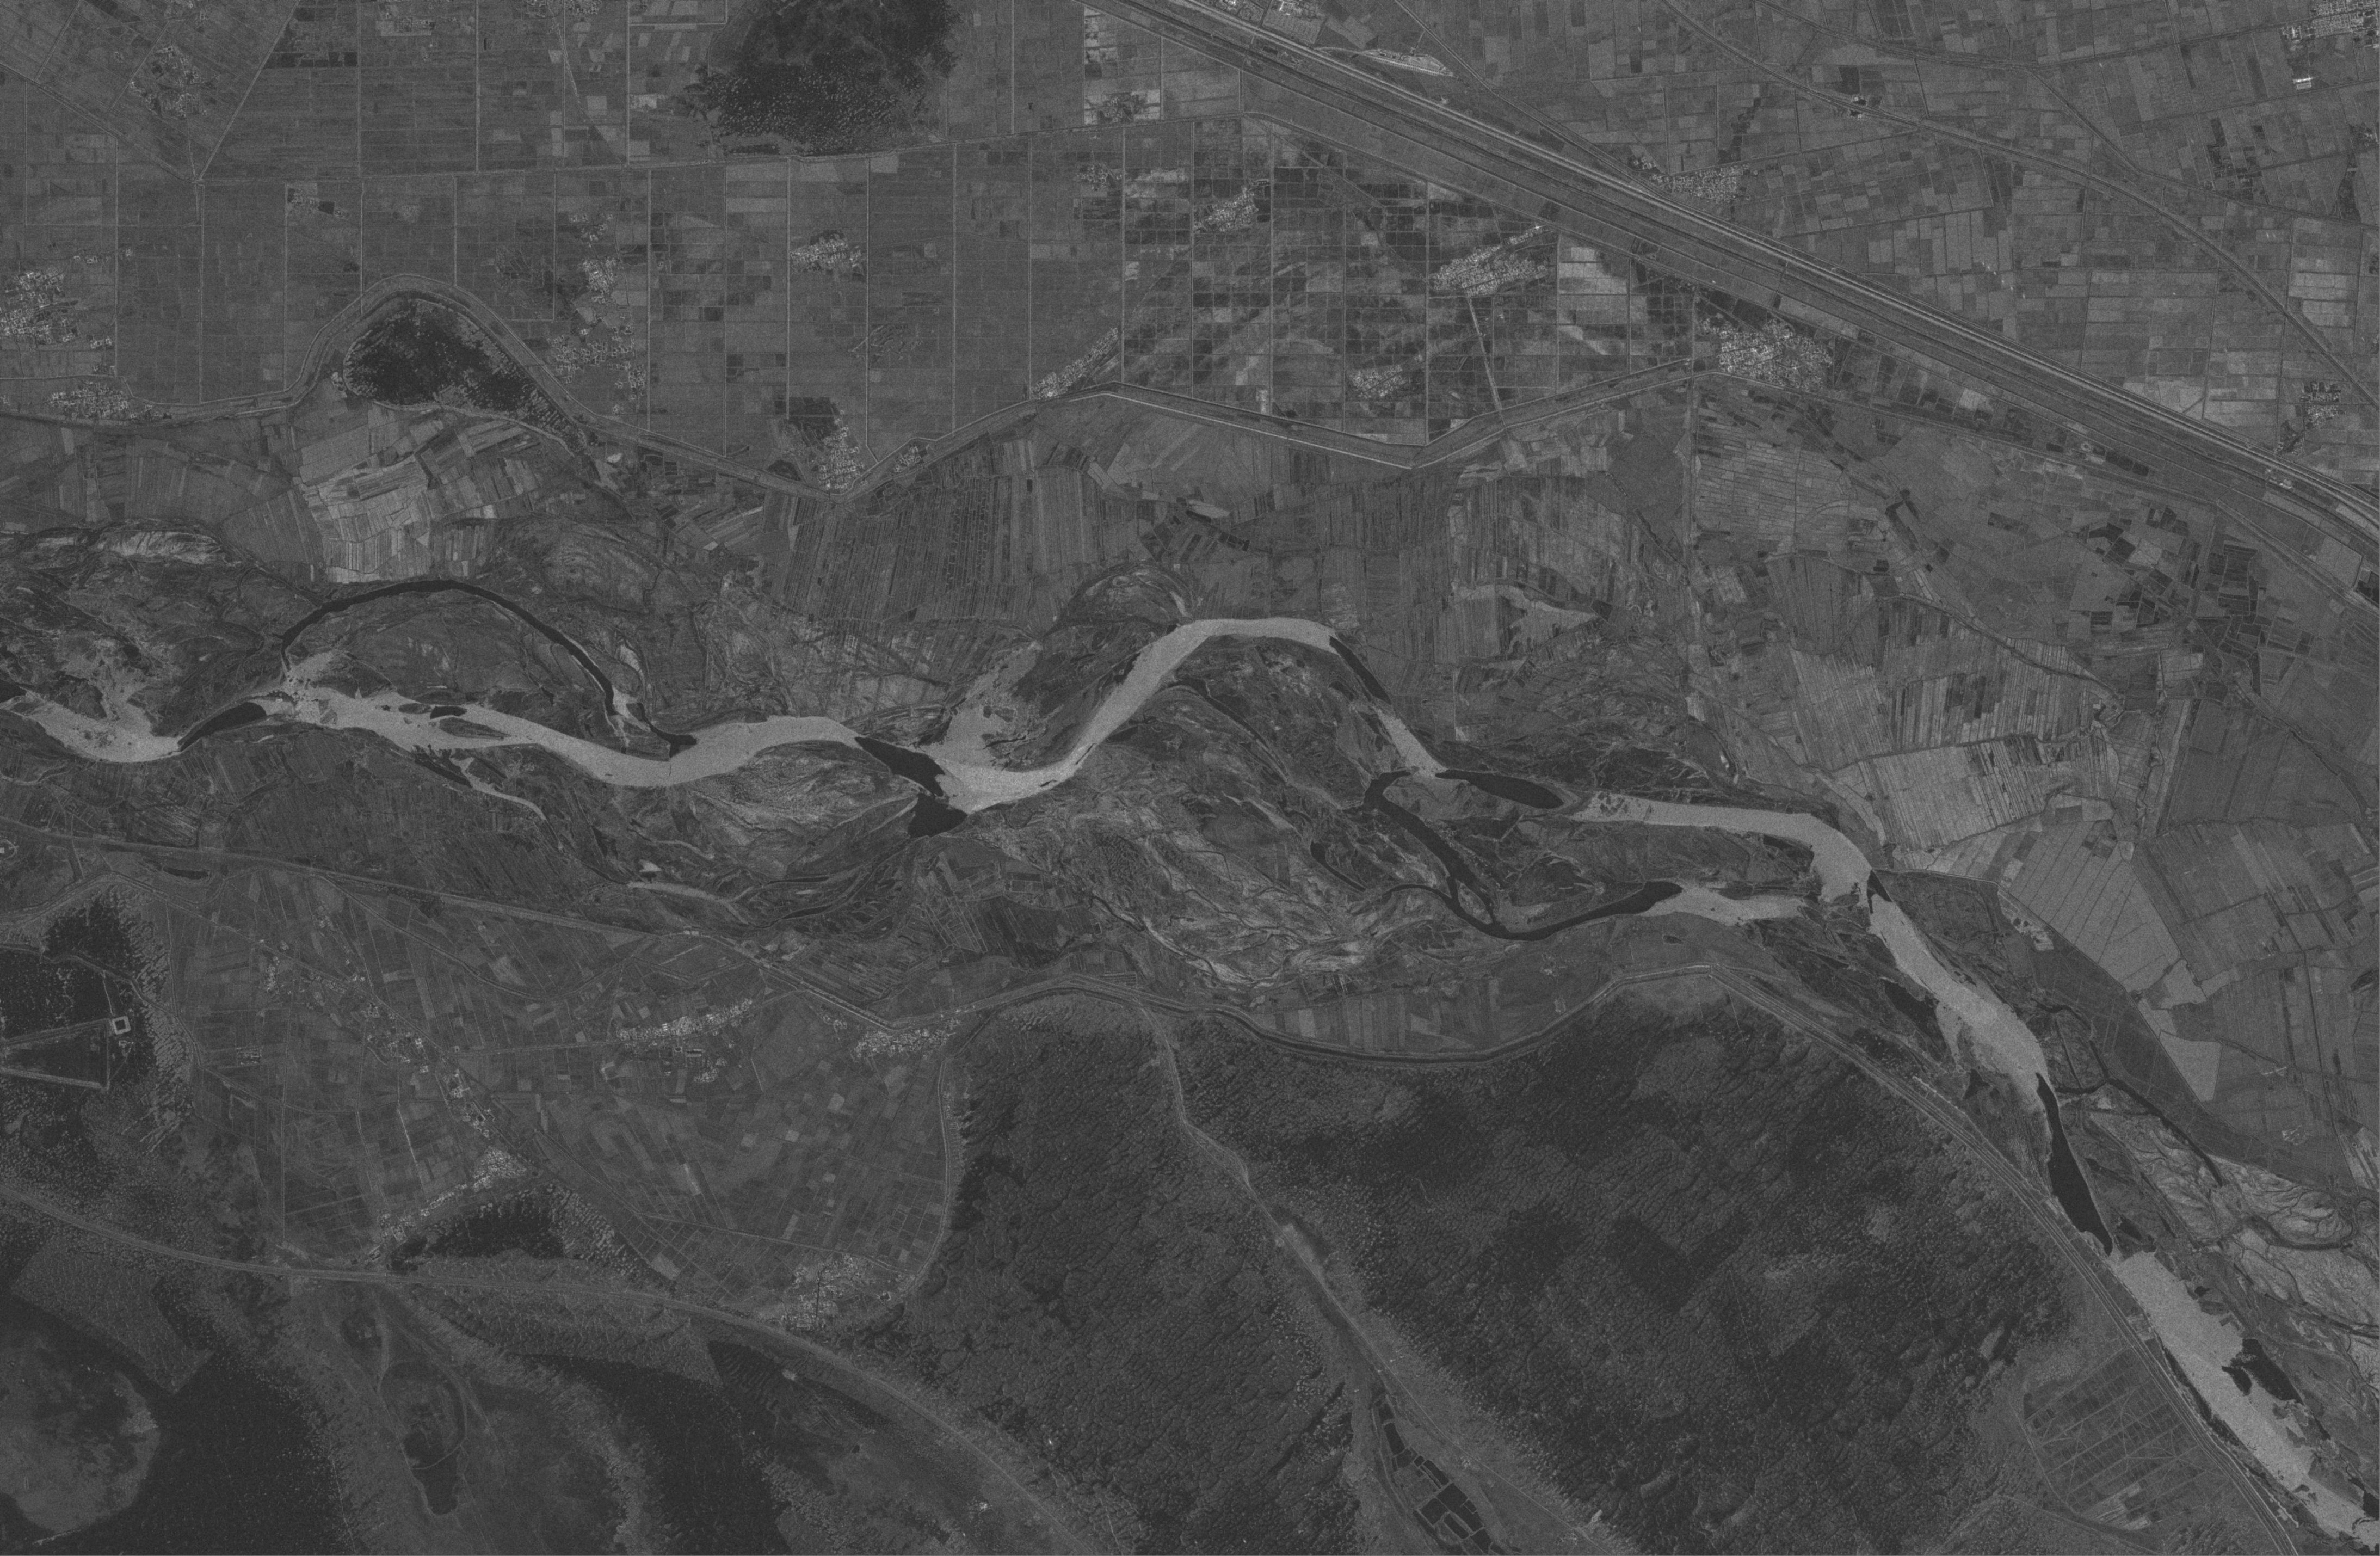
# 卫星扫描了一张遥感图,需要增强显示效果。
import cv2
import numpy as np


def draw_hist(image, color):
    """
    绘制直方图
    :param image: 哪个图的直方图图像(灰度化之后的)
    :param color: 直方图柱子什么颜色
    :return: 直方图图像
    """
    hist = cv2.calcHist(
        [image],  # 计算直方图的图像,支持多图像输入,因此一个图像也要写成列表
        [0],  # 要计算的图像灰度值通道需要,灰度图直接传0
        None,  # 掩膜,全图计算不需要
        [256],  # 直方图x轴的精细程度,256表示分为256份
        [0, 255]  # x轴的范围
    )
    print(hist.shape)  # (256, 1) 256表示有256个灰度频数数据
    # 提取关键数据
    min_val, max_val, min_loc, max_loc = cv2.minMaxLoc(hist)
    # print('min_val:', min_val)  # 0.0,最小的灰度频数
    print('max_val:', max_val)  # 471606.0,最大的灰度频数
    # print('min_loc:', min_loc)  # (0, 255),最小的灰度频数对应的灰度值
    # print('max_loc:', max_loc)  # (0, 1),最大的灰度频数对应的灰度值
    # 创建一张纯黑图,画柱子
    hist_img = np.zeros([256, 256, 3], np.uint8)
    # 为了让y轴最高的柱子留一部门空白,最高柱子的高度
    hpt = int(256 * 0.9)
    for h in range(256):  # 从0到255,每个灰度画柱子
        # 柱子高度(整数) = 直方图的最高值hpt * 每个灰度的频数/最高的频数
        intensity = int(hpt * hist[h] / max_val)
        # print(intensity)
        # 画柱子(线)
        cv2.line(
            hist_img,
            (h, 256),  # x轴的起始点
            (h, 256 - intensity),  # 线段从下往上画的终点
            color
        )
    return hist_img


if __name__ == '__main__':
    # 1. 图片输入
    path = 'yaogan.png'
    image_np = cv2.imread(path)

    # 2. 灰度化
    image_np_gray = cv2.cvtColor(image_np, cv2.COLOR_BGR2GRAY)

    # 3. 绘制直方图
    color = {"red": (0, 0, 255), "green": (0, 255, 0), "blue": (255, 0, 0)}
    hist_img = draw_hist(image_np_gray, color['green'])

    # 4. 直方图均衡化
    clahe = cv2.createCLAHE(
        clipLimit=3,  # 对比度限制阈值
        tileGridSize=(8, 8)  # 小区域面积:可以偶数
    )
    # 把上面的小区域参数应用到均衡化中
    equ_hist_image_np = clahe.apply(image_np_gray)

    # # 5. 均衡化之后的直方图
    equ_hist_image = draw_hist(equ_hist_image_np, color['blue'])

    # 6. 图片输出
    cv2.imshow('image_np_gray', image_np_gray)  # 原始灰度图
    # cv2.imshow('hist_img', hist_img)  # 原始直方图
    cv2.imshow('equ_hist_image_np', equ_hist_image_np)  # 均衡化之后的灰度图
    # cv2.imshow('equ_hist_image', equ_hist_image)  # 均衡化之后的直方图
    cv2.waitKey(0)
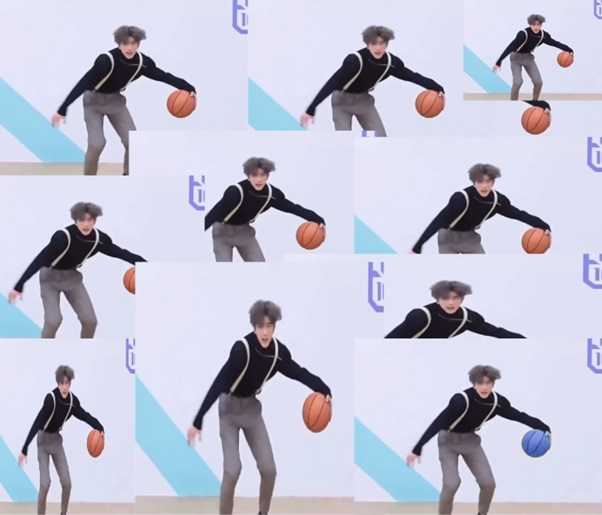
19.模板匹配
可以看到坤坤的蓝球也被识别了,有办法筛掉吗?
模板匹配也可以支持三通道。

import cv2
import numpy as np

if __name__ == '__main__':
    # 1. 图片输入
    path_search = 'ctrl.png'
    image_np = cv2.imread(path_search)


    # 3. 模板输入
    path_target = 'basketball.jpg'
    template = cv2.imread(path_target)


    # 5. 模板匹配
    # 获得模板的宽高
    h, w = template.shape[:2]
    # 调用模板匹配结构,使用平方差匹配 TM_SQDIFF
    # 返回值:平方差
    res = cv2.matchTemplate(
        image_np,  # 原始图像
        template,  # 模板图像
        cv2.TM_CCOEFF_NORMED,  # 归一化相关系数匹配
    )
    # print(res)
    print(res.shape)

    print(res.min(), res.max())
    # 手动阈值
    threshold = 0.9

    # 大于等于阈值的匹配认为是成功的
    loc = np.where(res >= threshold)
    print(loc)
    print(len(loc))  # 第一维度保存x坐标,第二维度保存y坐标

    # 6. 绘制轮廓
    for x, y in zip(loc[1], loc[0]):
        print('坐标:', (x, y))
        # 画框
        cv2.rectangle(
            img=image_np,  # 原图
            pt1=(x, y),  # 左上角
            pt2=(x + w, y + h),  # 右下角
            color=(0, 0, 255),
            thickness=2
        )

    # 7. 图像输出
    cv2.imshow('image_np', image_np)
    cv2.waitKey(0)
20.使用霍夫变换检测库里的篮球,检测葡萄牙球员的足球。
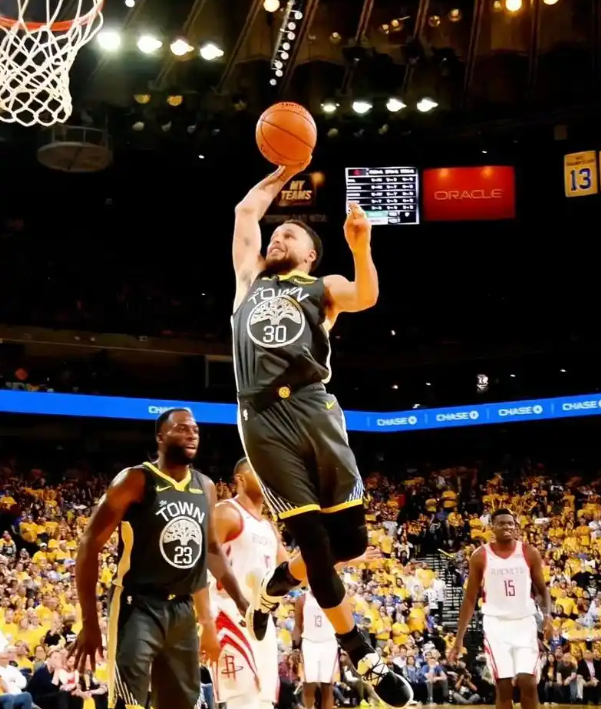
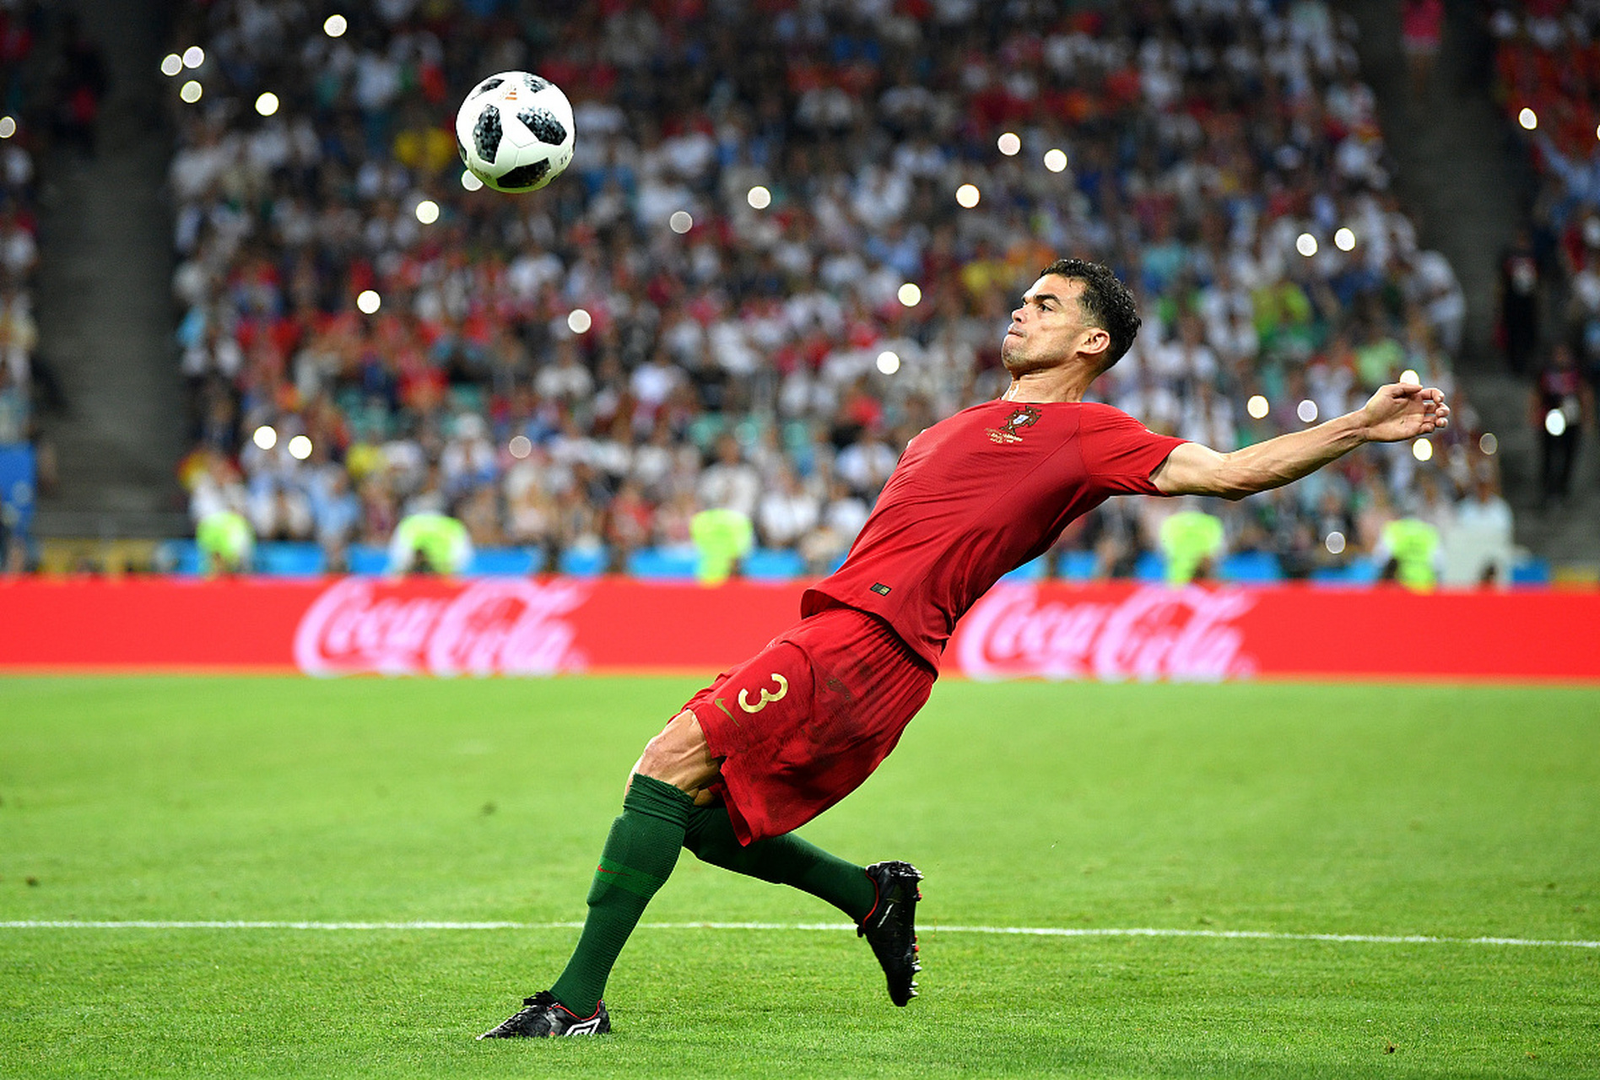
# 库里篮球
import cv2
import numpy as np


def drawzf(image, jnum, color=(0, 255, 0)):
    """
    画直方图
    :param image:输入图像
    :param jnum: 1表示手动计算直方图,2表示自动计算直方图
    :param color: 直方图颜色
    :return: 1.直方图图像 2.频数最高的灰度在全图中的占比 3.直方图最大值所在开始位置
    """
    # 逻辑统计
    if jnum == 1:
        # dataa = {}#低层
        # for i in range(0, 256):
        #     dataa.update({i: 0})
        data = dict.fromkeys(range(256), 0)  # 批量生产键名 后面批量赋予键值
        # print(dataa)
        shape = np.shape(image)
        height = shape[0]
        width = shape[1]
        pxd = height * width
        for i in range(0, height):
            for j in range(0, width):
                pxdata = image[i, j]
                data[pxdata] = data[pxdata] + 1
        # print(data)
        data = np.array(list(data.values()), dtype=np.float32).reshape(256, 1)
        # print(f"np接口1:{data}")
        zuishaoshu, zuidashu, zuidizhi, zuigaozhi = cv2.minMaxLoc(data)  # 后两个值是对应频数所在的值(X轴)
        pass
    # 接口统计
    elif jnum == 2:
        shape = np.shape(image)
        height = shape[0]
        width = shape[1]
        pxd = height * width
        data = cv2.calcHist(
            [image],  # 需要放入列表进行规范化,同时也支持了多个图像
            [0],  # 统计对应图像的通道序号 BGR:0-3 GRAY:0
            None,  # 是否有掩膜,没有写none,有些[mask1,mask2...]
            [256],  # 对应X轴的精度(分度值,这里分成256份)
            [0, 255]  # X轴的范围,最小0,最大255像素
        )
        # print(datab.shape)
        # print(f"接口2:{data}")
        zuishaoshu, zuidashu, zuidazhi, zuigaozhi = cv2.minMaxLoc(data)  # 后两个值是对应频数所在的值(X轴)
        pass

    else:
        print("选择正确的接编号")
        return -1

    # 绘制直方图
    cannv = np.zeros((264, 272, 3), np.uint8)
    for se in range(0, 256):
        # print(data[se])
        gaodu = (data[se] / zuidashu * int(256 * 0.9))
        cv2.line(
            cannv,
            (se + 8, 256),  # (x,y)的起点,坐标原点在左上角
            (se + 8, 256 - int(gaodu)),  # (x,y)的终点
            color=color
        )

    maxpct = zuidashu / pxd

    return cannv, maxpct, zuidazhi

# 读取图片
path = r"kuli.png"
image = cv2.imread(path)
shape = np.shape(image)
imheight = shape[0]
imwidth = shape[1]

# 灰度化
imagegray = cv2.cvtColor(image, cv2.COLOR_BGR2GRAY)

# 自适应直方图均衡化
adptF = cv2.createCLAHE(
    clipLimit=2,  # 对比度限制阈值 通常在1-4之间
    tileGridSize=(5, 5),  # 区块范围
)  # 不是np类型
adptimageju = adptF.apply(imagegray)  # 区块拉伸应用在目标用 F.apply(aim)
# adptimageju = adptF.apply(imagegray)#区块拉伸应用在目标用 F.apply(aim)

# 边缘检测
imageedge = cv2.Canny(imagegray, 20, 150)  # canny检测边缘直接得到二值图像 cv2.findContours得到的是轮廓集合
# 目标图像,像素最低阈值,像素最高阈值

# 霍夫圆变换
yuan = cv2.HoughCircles(  # 找到轮廓图里的圆形,返回圆心坐标点半径
    imageedge,
    cv2.HOUGH_GRADIENT,
    1,  # 分辨率(清晰度/拥有的像素点个数)越大越多 每个输入像素对应输入图像的n*n范围像素
    20,  # 圆心间分离最小距离(车灯)
    param2=75,  # 降噪阈值
)
# print(yuan)
# print(len(yuan[0]))

yuan = np.uint16(np.around(yuan))  # **这里的uint16是坐标的范围 元素类型还是uint8**
# around-四舍五入 中间选择用的方法 去掉则会根据int直接切除小数部分
yuan = yuan[0]  # 否则会多一层括号
print(yuan)
print(len(yuan[0]))

# cannv = np.zeros(shape,dtype=np.uint8)#纯黑画布 shape(H,W,3)是彩图 这里的uint8是元素类型

for c in yuan:
    R = c[2]
    if 20 < R < 35:
        # print(R)
        x = c[0]
        y = c[1]
        area = imagegray[y - R:y + R, x - R:x + R]  # 不能拉彩图

        biao, maxpct, zuidazhi = drawzf(area, 2)
        pianhaose = zuidazhi[1]

        # cv2.imshow("qukuan",area)
        # cv2.imshow("biao",biao)
        # cv2.waitKey(0)
        print(f"偏好颜色:{pianhaose} 纯净率:{maxpct}")
        # 因为画面的圆形太多,通过筛选,找出库里的篮球
        if (maxpct > 0.028) and (40 < pianhaose < 70):
            cv2.circle(  # 画圆
                image,
                (x, y),
                R,
                (0, 255, 255),
                2,
                cv2.LINE_AA  # 抗锯齿线
            )

cv2.imshow("yuan", imagegray)
cv2.imshow("bianyuan", imageedge)
cv2.imshow("hua", image)
cv2.waitKey(0)
import cv2
import numpy as np

if __name__ == '__main__':
    # 读取图片
    path = "soccer.png"
    image_np = cv2.imread(path)
    # 灰度化
    image_np_gray = cv2.cvtColor(image_np, cv2.COLOR_BGR2GRAY)
    # Canny算法
    image_edges = cv2.Canny(image_np_gray, 30, 70)
    drawing = np.zeros(image_np.shape, dtype=np.uint8)
    # 霍夫圆检测
    circles = cv2.HoughCircles(
        image_edges,
        cv2.HOUGH_GRADIENT,
        1,
        75,
        param2=155,
    )
    print(circles)

    # 画圆,这个圆是根据上一步输出结果看到后编写的
    cv2.circle(image_np, (516, 130), 62, (0, 0, 255), 2, lineType=cv2.LINE_AA)
    cv2.imshow("image_np", image_np)
    cv2.waitKey(0)
21.抠出上面足球图的光斑作为模板,基于原图进行模板匹配,尽量匹配上所有白色光斑。
模板:
import cv2
import numpy as np

if __name__ == '__main__':
    # 1. 图片输入
    path_search = "soccer.png"
    image_np = cv2.imread(path_search)

    # 2.高斯滤波
    no_noise_image = cv2.GaussianBlur(image_np, (3, 3), 1)

    # 3. 模板输入
    path_target = "roi.jpg"
    template = cv2.imread(path_target)

    # 4. 模板匹配
    # 取出模板的宽高
    h, w = template.shape[:2]
    # 调用模板匹配接口
    # 返回值:二维数组,元素的数量为模板匹配的次数,匹配的数据
    res = cv2.matchTemplate(
        no_noise_image,  # 原始图像
        template,  # 模板图像
        cv2.TM_CCOEFF_NORMED  # 匹配方法
    )
    # 设置阈值
    threshold = 0.80

    # 给where送入一个元素值判断的条件,可以只保留通过条件判断的元素
    loc = np.where(res >= threshold)

    # 5. 绘制轮廓
    # 组装原始图像中匹配上模板的矩形区域的左上角的xy坐标
    for x, y in zip(loc[1], loc[0]):
        # 画框
        cv2.rectangle(image_np,  # 原图
                      (x, y),  # 框左上角
                      (x + w, y + h),  # 框右下角
                      (0, 0, 255),  # 颜色
                      2  # 线宽
                      )

    # 6. 图片输出
    cv2.imshow("image_np", image_np)
    cv2.imwrite('roi_image_np.jpg', image_np)
    cv2.waitKey(0)
22.亮度与对比度
import cv2
import numpy as np

if __name__ == '__main__':
    # 1. 图片输入
    path = 'ctrl.jpg'
    image_np = cv2.imread(path)

    # 2. 亮度变换
    # 公式:g(i,j) = α * f(i,j) + β
    alpha = 1.5  # 对比度
    beta = -100  # 虚拟仿真限制在 [-100到100],实际可超过这个范围
    # 截取,可以保证数据的上下限
    pix = np.clip(
        (alpha * image_np + beta),  # 要处理的原始图像数据
        0,  # 下限,低于此数值会被改为此数值
        255  # 上限,高于此数值会被改为此数值
    )
    print(pix)
    print(pix.dtype)  # int16
    # 16位转8位
    pix = np.uint8(pix)

    # 5. 图像输出
    cv2.imshow('pix', pix)
    cv2.waitKey(0)
更多推荐


 11
11 0
0- 0


 已为社区贡献2条内容

所有评论(0)