
Bert模型(pytorch版)CPU部署推理(Linux版)
提示:文章写完后,目录可以自动生成,如何生成可参考右边的帮助文档
文章目录
前言
提示:这里可以添加本文要记录的大概内容:
例如:随着人工智能的不断发展,机器学习这门技术也越来越重要,很多人都开启了学习机器学习,本文就介绍了机器学习的基础内容。
提示:以下是本篇文章正文内容,下面案例可供参考
一、下载Anaconda,安装3.6以上的python解析器
示例:本文以Miniconda3的Python 311版本为例进行配置
1、下载Anaconda(Miniconda)
 https://mirrors.tuna.tsinghua.edu.cn/anaconda/miniconda/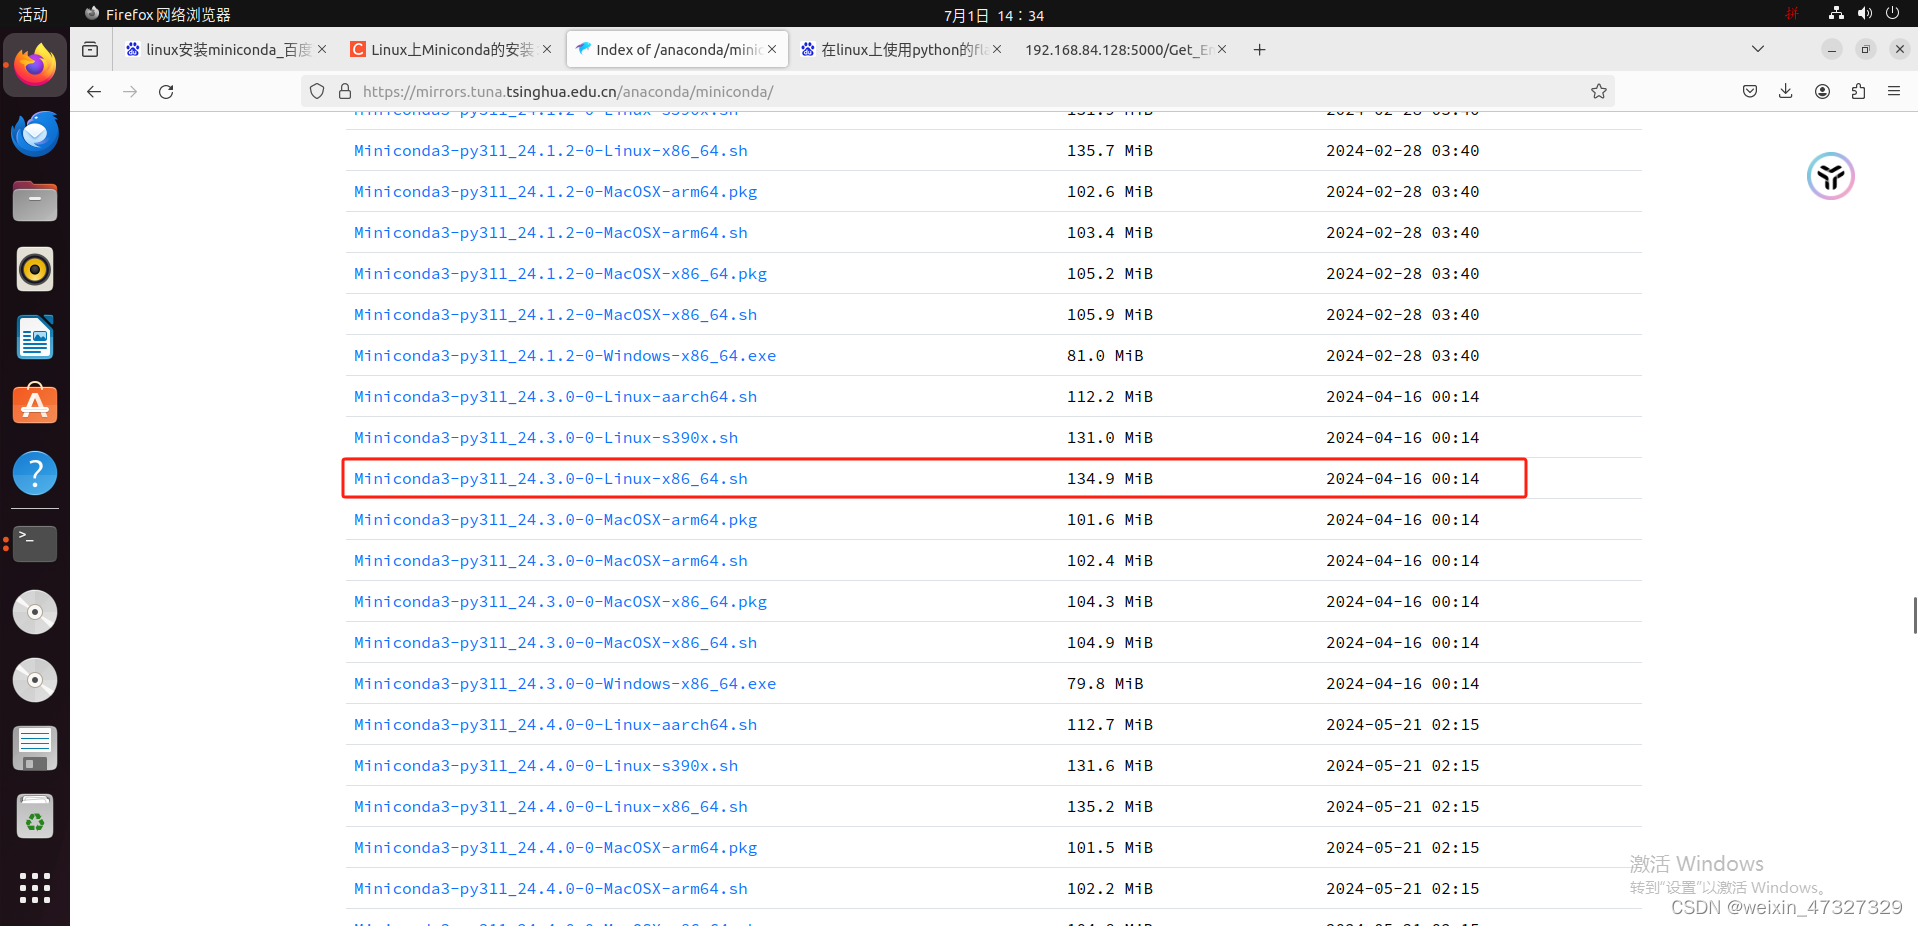
●选择合适的版本,右键复制链接,利用wget命令下载到指定目录
wget https://mirrors.tuna.tsinghua.edu.cn/anaconda/miniconda/Miniconda3-py311_24.3.0-0-Linux-x86_64.sh2.安装Miniconda
●运行一下命令安装到指定目录
bash Miniconda3-py311_24.3.0-0-Linux-x86_64.sh3.配置环境变量
●打开终端并编辑~/.bashrc文件:
nano ~/.bashrc ●在文件末尾添加以下行(换成自己的安装路径):
export PATH="$HOME/Miniconda3-py311/bin:$PATH" ●保存并退出编辑器(在nano中按Ctrl+O保存,Ctrl+X退出)
●使更改生效:
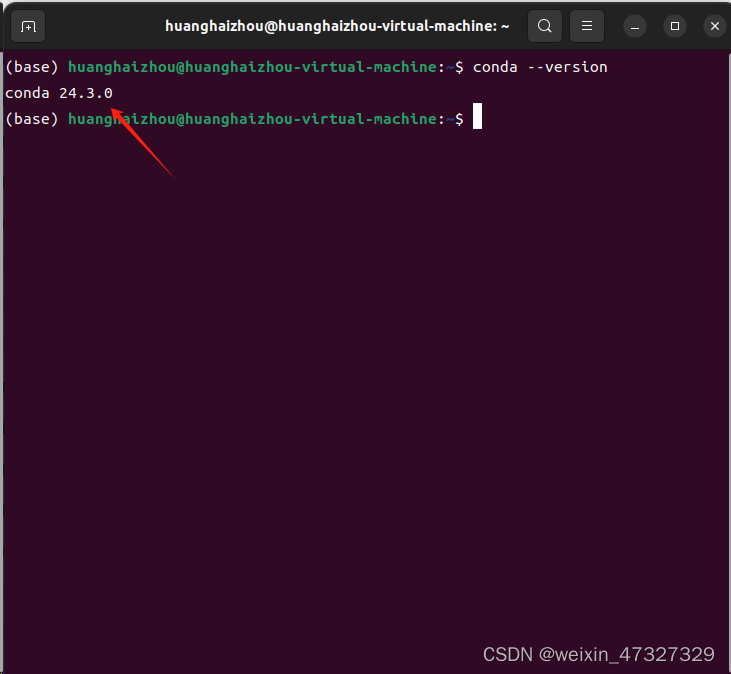
source ~/.bashrc ●检查是否安装成功
conda --version●此为成功
二、创建虚拟环境,避免不同项目的环境冲突
1.创建虚拟环境到指定目录(安装python3.11)
代码如下:
conda create --name Python311 python=3.11.9●初始化conda:
conda init●重新加载Shell配置文件:
source ~/.bashrc ●或者你使用的是zsh:
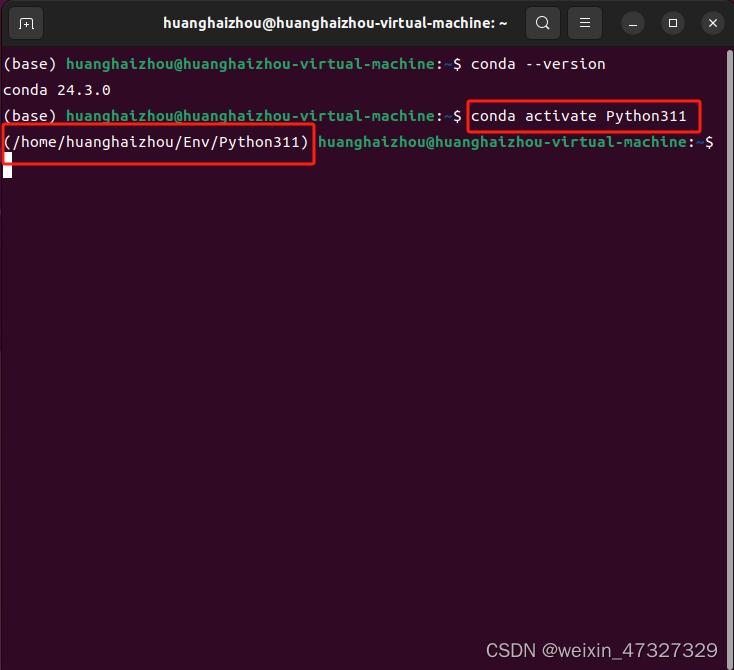
source ~/.zshrc 2.激活虚拟环境Python311
代码如下:
conda activate Python311查看是否创建成功,查看虚拟环境路径以及python版本,出现下图即为成功:
三、安装模型推理所需第三方库,这里只讲CPU版本的torch安装
1.在激活环境下导入所需库(在Linux终端中的激活状态下):
●先换源,否则可能安装库会失败(换为清华镜像源)
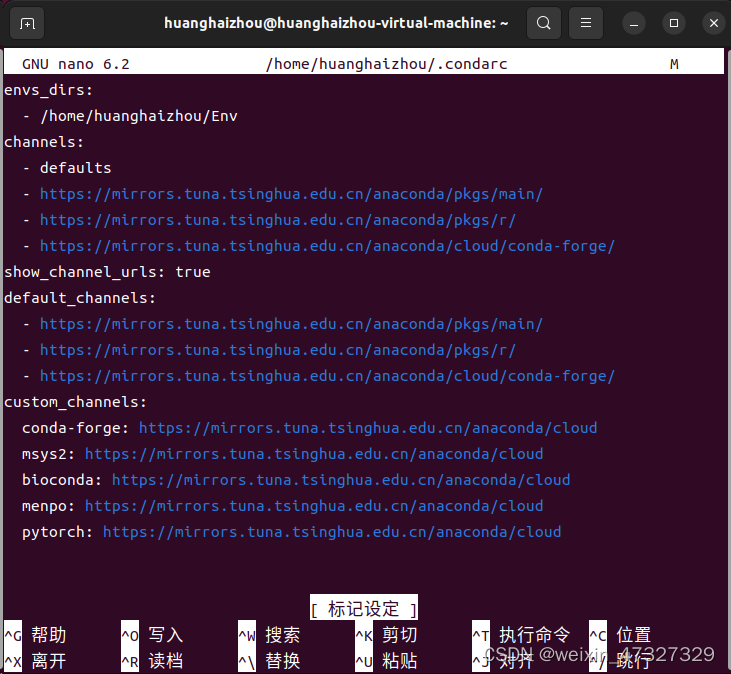
通过修改~/.condarc文件来实现。例如,你可以将channels和show_channel_urls配置项设置为使用清华大学的conda镜像。没有~/.condarc文件的话,先创建再进行以下操作。
●首先使用nano编辑~/.condarc文件(没有nano编辑器的话自行百度安装)
nano ~/.condarc
●复制以下代码粘贴进~/.condarc文件保存退出
channels:
  - defaults
  - https://mirrors.tuna.tsinghua.edu.cn/anaconda/pkgs/main/
  - https://mirrors.tuna.tsinghua.edu.cn/anaconda/pkgs/r/
  - https://mirrors.tuna.tsinghua.edu.cn/anaconda/cloud/conda-forge/
show_channel_urls: true
default_channels:
  - https://mirrors.tuna.tsinghua.edu.cn/anaconda/pkgs/main/
  - https://mirrors.tuna.tsinghua.edu.cn/anaconda/pkgs/r/
  - https://mirrors.tuna.tsinghua.edu.cn/anaconda/cloud/conda-forge/
custom_channels:
  conda-forge: https://mirrors.tuna.tsinghua.edu.cn/anaconda/cloud
  msys2: https://mirrors.tuna.tsinghua.edu.cn/anaconda/cloud
  bioconda: https://mirrors.tuna.tsinghua.edu.cn/anaconda/cloud
  menpo: https://mirrors.tuna.tsinghua.edu.cn/anaconda/cloud
  pytorch: https://mirrors.tuna.tsinghua.edu.cn/anaconda/cloud
●安装所需库
conda install pytorch pyyaml transformers snownlp termcolor pymysql flask●查看所需库是否安装成功
pip list
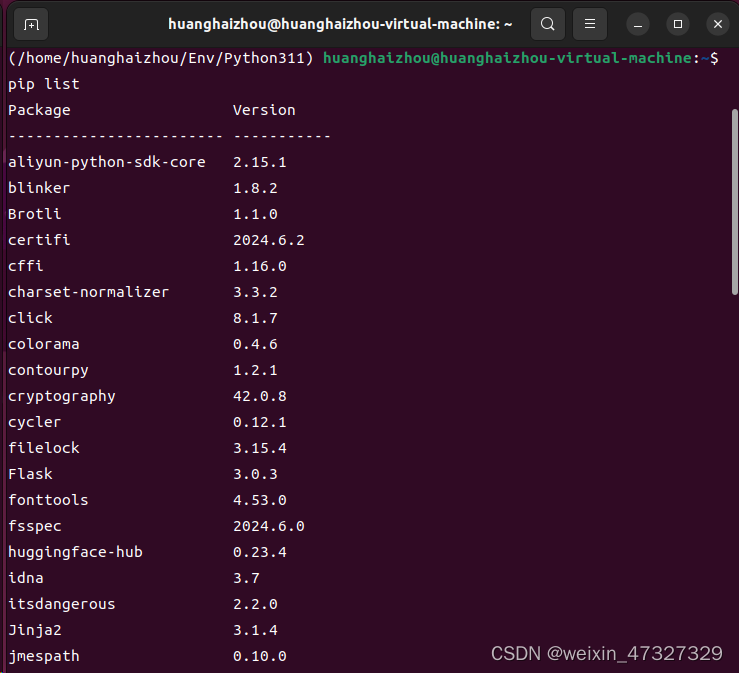
此即为成功
四、打开项目文件,进入相应目录执行python文件
●在激活Python311虚拟环境下,进入Train_Model目录执行First_Classify_API.py
python Separate_Comment_Classify_API.py
●出现此图,则部署完成!
总结
附加一些实用的方法:
我这里准备了适合bert模型CPU推理版本的requirements.txt文件,一行代码安装所需依赖库,其他模型和依赖库,自行搜索(在激活环境下再进行以下操作):
● requirements.txt在主页下载
pip install -r requirements.txt
●Linux中配置pip:
1.创建pip.conf:
mkdir -p ~/.pip
touch ~/.pip/pip.conf
2.编辑 pip.conf 文件:
[global]
index-url = https://pypi.tuna.tsinghua.edu.cn/simple更多推荐


 41
41 0
0- 0


 已为社区贡献2条内容

所有评论(0)