
马年新春AR祝福语:基于Rokid 的虚实融合拜年应用开发实战
引言
2025年是AI眼镜从“极客玩具”转向“实用工具”的关键之年,在激烈的“百镜大战”中,我们迎来了2026年马年春节。作为下一代移动计算平台,AI眼镜正在重塑我们与现实世界的交互方式。在这个阖家团圆的节日里,如何用技术为传统拜年增添一份新意?
本文将基于Rokid 和Unity引擎,开发一款“AR祝福语眼镜”应用。当佩戴者看向亲友时,空中会浮现金色的新年祝福文字,按下眼镜按键(模拟拥护实时对话)即可切换不同祝福语,配合深红色的喜庆背景,打造虚实交融的拜年体验。通过这个项目,你将掌握Rokid AR应用开发的核心流程:环境搭建、世界空间UI创建、按键交互、语音识别集成,以及完整的代码实现。所有代码均可在Unity编辑器中直接运行测试,最终打包部署到Rokid设备即可体验真机效果。

一、开发环境与项目配置
1.1 必要软件与工具
- Unity 2022.3 :需包含Android Build Support模块
- Rokid UXR3.0 SDK:通过Unity Package Manager导入
- Visual Studio 2022:用于代码编辑
- Rokid Glasses开发者模式:用于最终部署测试(本文重点为代码实现,真机部署步骤从略)
1.2 创建Unity项目
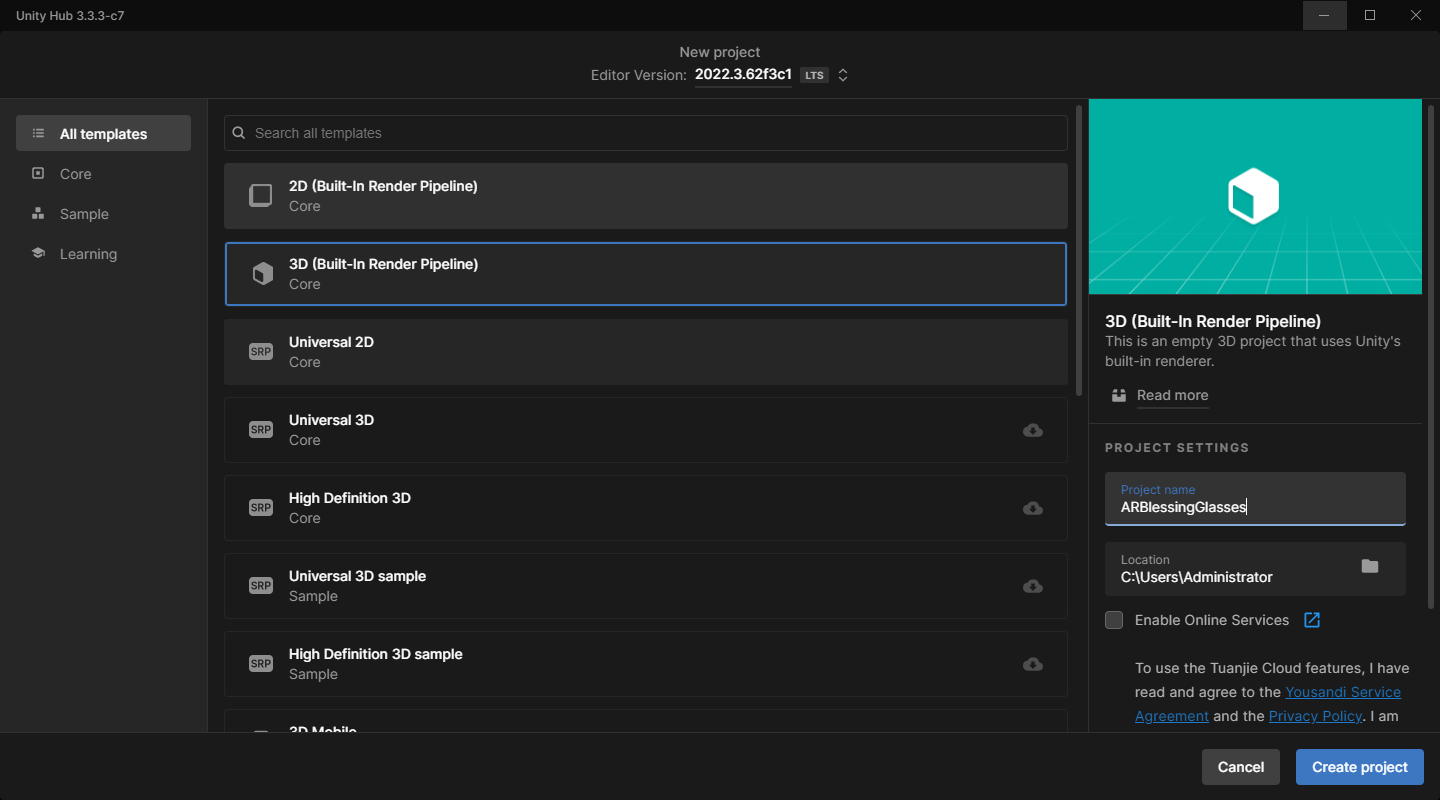
- 打开Unity Hub,新建3D项目,选择Unity 2022.3 LTS版本,项目命名为“ARBlessingGlasses”。
- 进入项目后,打开菜单栏
Window -> Package Manager,点击左上角“+”号,选择“Add package from git URL”,输入Rokid UXR SDK的Git地址(具体地址请参考Rokid官方文档),等待导入完成。 - 导入成功后,Project窗口会出现“Rokid”文件夹,其中包含预制体、示例场景和核心API。
1.3 场景基础设置
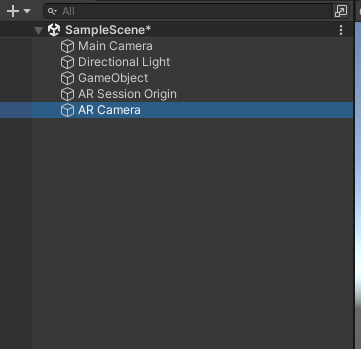
在Hierarchy窗口中,删除默认的Main Camera和Directional Light。从Rokid SDK的Prefabs文件夹中,将“AR Session Origin”和“AR Camera”拖入场景。AR Session Origin包含了相机跟踪和空间感知的基础组件,AR Camera则是负责渲染的相机。
为了在开发阶段方便预览,我们会在场景中添加一个测试用的相机控制器(CameraAutoMover),但最终真机运行时,相机的移动完全由设备自身的跟踪系统驱动,因此测试脚本仅用于编辑器调试。
二、核心功能实现
2.1 祝福语数据与交互逻辑
我们使用一个字符串数组存储多条祝福语,覆盖长辈、朋友、同学等不同对象。每条祝福语都包含传统的吉祥话,并加入马年元素。
private static readonly string[] Blessings = new string[]
{
    "祝您马年大吉,龙马精神,身体健康,万事如意!",
    "新春到,祝长辈们笑口常开,福如东海,马到成功!",
    "我的朋友,新年快乐!愿我们的友谊地久天长,马年行大运!",
    "祝同学们马年学业进步,一马当先,金榜题名!",
    "新年快乐,阖家幸福,马年吉祥,心想事成!",
};
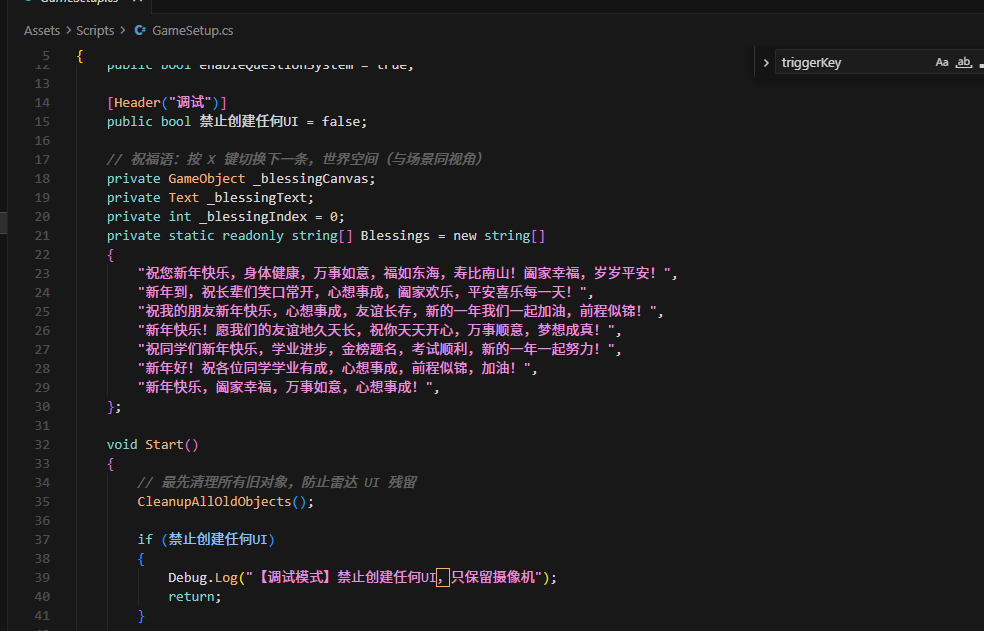
切换祝福语的逻辑非常简单:按下指定按键时,将数组中当前索引对应的文字赋值给Text组件,然后索引自增,并通过取模运算实现循环。
if (Input.GetKeyDown(KeyCode.X) && _blessingCanvas != null && _blessingText != null)
{
    _blessingText.text = Blessings[_blessingIndex];
    _blessingIndex = (_blessingIndex + 1) % Blessings.Length;
    _blessingCanvas.SetActive(true);
}
在真机上,我们不会使用键盘X键,而是通过Rokid设备的按键事件来触发。为了方便开发和测试,我们保留键盘输入,同时在代码中预留Rokid按键的接入点。
2.2 世界空间UI的创建
为了让祝福语在现实世界中悬浮,我们必须使用World Space模式的Canvas。以下是完整的UI创建方法:
void CreateBlessingUI()
{
    // 创建Canvas根对象
    GameObject root = new GameObject("BlessingCanvas");
    root.transform.position = new Vector3(0f, 1.5f, -5f);  // 位于相机前方
    root.transform.rotation = Quaternion.identity;
    root.transform.localScale = Vector3.one;

    // 添加Canvas组件并设置为世界空间
    Canvas canvas = root.AddComponent<Canvas>();
    canvas.renderMode = RenderMode.WorldSpace;
    canvas.worldCamera = Camera.main;  // 指定渲染相机

    // 设置RectTransform的尺寸和缩放
    RectTransform rootRect = root.GetComponent<RectTransform>();
    rootRect.sizeDelta = new Vector2(520, 140);
    rootRect.localScale = new Vector3(0.006f, 0.006f, 0.006f);  // 缩放至合适大小

    root.AddComponent<CanvasScaler>();
    root.AddComponent<GraphicRaycaster>();

    // 创建文本子对象
    GameObject textObj = new GameObject("BlessingText");
    textObj.transform.SetParent(root.transform);

    Text blessingText = textObj.AddComponent<Text>();
    blessingText.text = Blessings.Length > 0 ? Blessings[0] : "";
    blessingText.fontSize = 22;
    blessingText.color = new Color(1f, 0.85f, 0.2f);  // 金黄色
    blessingText.font = Resources.GetBuiltinResource<Font>("LegacyRuntime.ttf");
    blessingText.alignment = TextAnchor.MiddleCenter;
    blessingText.horizontalOverflow = HorizontalWrapMode.Wrap;
    blessingText.verticalOverflow = VerticalWrapMode.Overflow;

    // 设置文本RectTransform居中并填满父对象
    RectTransform textRect = textObj.GetComponent<RectTransform>();
    textRect.anchorMin = new Vector2(0.5f, 0.5f);
    textRect.anchorMax = new Vector2(0.5f, 0.5f);
    textRect.pivot = new Vector2(0.5f, 0.5f);
    textRect.anchoredPosition = Vector2.zero;
    textRect.sizeDelta = new Vector2(520, 140);

    // 初始隐藏面板,等待触发显示
    root.SetActive(false);
    _blessingCanvas = root;
    _blessingText = blessingText;
}
关键点解析:
- Canvas渲染模式:必须设置为WorldSpace,UI才会在三维空间中拥有实际位置和透视。
- 缩放因子:sizeDelta定义UI元素的像素参考尺寸,localScale将其缩放到真实世界中的合适大小。这里0.006是经验值,在距离相机5米左右时,文字大小约13厘米,阅读舒适。
- 字体与颜色:使用Unity内置字体确保兼容性,金黄色在深红背景下极为醒目。
2.3 相机与背景设置
为了让场景更具节日氛围,我们将相机背景色设为深红色,并设置初始位置和角度。注意:在真机上,相机位置由设备跟踪,这里的初始化只对编辑器测试有效。
void SetupARScene()
{
    Camera mainCamera = Camera.main;
    if (mainCamera != null)
    {
        mainCamera.transform.position = new Vector3(0, 1.5f, -8);
        mainCamera.transform.rotation = Quaternion.Euler(10, 0, 0);
        mainCamera.orthographic = false;
        mainCamera.fieldOfView = 60;
        mainCamera.backgroundColor = new Color(0.45f, 0.12f, 0.12f);  // 深红色
        mainCamera.clearFlags = CameraClearFlags.SolidColor;
    }
    CreateBlessingUI();
}
2.4 测试用相机移动控制器
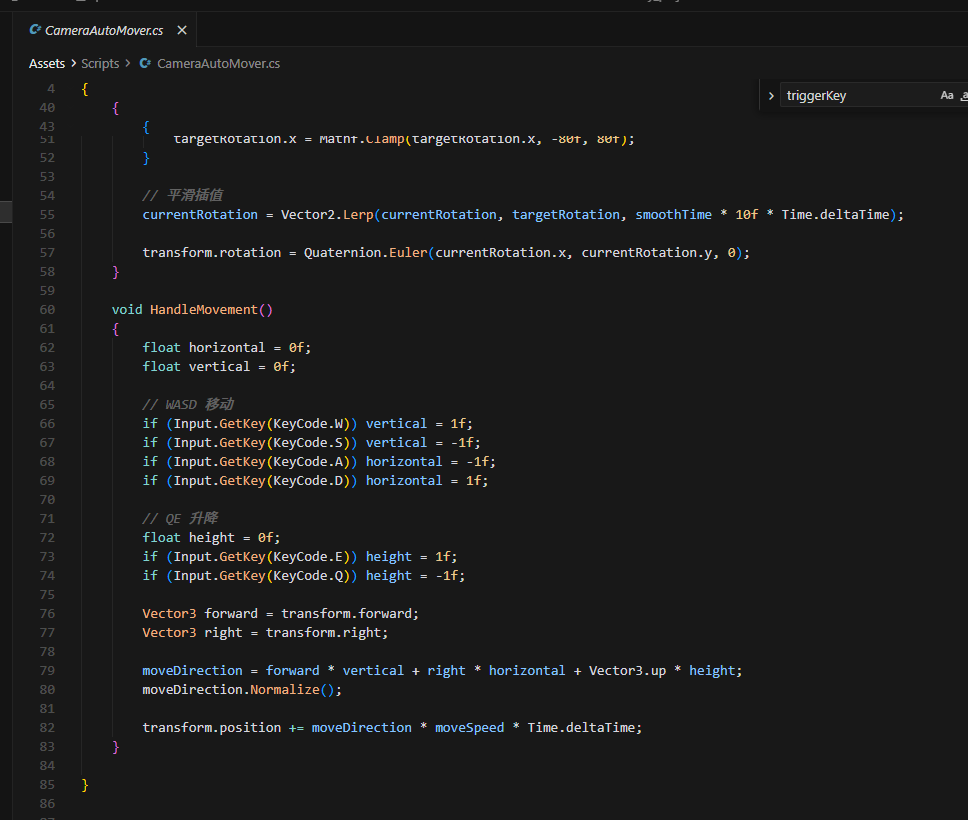
为了在Unity编辑器中模拟AR眼镜中的自由视角,我们编写了一个简单的相机移动脚本。该脚本支持WASD平面移动、QE上下移动,以及鼠标右键拖拽旋转视角。在真机运行时,此脚本应当禁用,因为设备的SLAM会自然驱动相机。
using UnityEngine;

public class CameraAutoMover : MonoBehaviour
{
    [Header("鼠标控制设置")]
    public bool mouseControl = true;
    public float mouseSensitivity = 2f;
    public float moveSpeed = 5f;
    public float smoothTime = 0.1f;

    private Vector2 currentRotation;
    private Vector2 targetRotation;
    private Vector3 moveDirection;

    void Start()
    {
        Vector3 euler = transform.eulerAngles;
        currentRotation = new Vector2(euler.x, euler.y);
        targetRotation = currentRotation;
    }

    void Update()
    {
        if (!mouseControl) return;

        HandleMouseLook();
        HandleMovement();
    }

    void HandleMouseLook()
    {
        if (Input.GetMouseButton(1))
        {
            float mouseX = Input.GetAxis("Mouse X") * mouseSensitivity;
            float mouseY = Input.GetAxis("Mouse Y") * mouseSensitivity;

            targetRotation.y += mouseX;
            targetRotation.x -= mouseY;
            targetRotation.x = Mathf.Clamp(targetRotation.x, -80f, 80f);
        }

        currentRotation = Vector2.Lerp(currentRotation, targetRotation, smoothTime * 10f * Time.deltaTime);
        transform.rotation = Quaternion.Euler(currentRotation.x, currentRotation.y, 0);
    }

    void HandleMovement()
    {
        float horizontal = 0f, vertical = 0f;
        if (Input.GetKey(KeyCode.W)) vertical = 1f;
        if (Input.GetKey(KeyCode.S)) vertical = -1f;
        if (Input.GetKey(KeyCode.A)) horizontal = -1f;
        if (Input.GetKey(KeyCode.D)) horizontal = 1f;

        float height = 0f;
        if (Input.GetKey(KeyCode.E)) height = 1f;
        if (Input.GetKey(KeyCode.Q)) height = -1f;

        Vector3 forward = transform.forward;
        Vector3 right = transform.right;
        moveDirection = forward * vertical + right * horizontal + Vector3.up * height;
        moveDirection.Normalize();

        transform.position += moveDirection * moveSpeed * Time.deltaTime;
    }
}
三、集成Rokid交互
3.1 按键事件处理
Rokid Glasses提供了多个交互按键,如功能键、返回键等。在Rokid UXR SDK中,可以通过Input系统获取按键事件。我们需要在GameSetup脚本中添加对Rokid按键的监听,替代键盘X键。
首先,在脚本顶部引入Rokid命名空间:
using Rokid.UXR;
然后在Update方法中,除了检查键盘输入,还检查Rokid按键:
void Update()
{
    // 键盘X键用于编辑器测试
    if (Input.GetKeyDown(KeyCode.X) && _blessingCanvas != null && _blessingText != null)
    {
        SwitchBlessing();
    }

    // Rokid功能键短按切换祝福语
    if (RokidInput.GetButtonDown("PrimaryButton"))
    {
        SwitchBlessing();
    }
}

void SwitchBlessing()
{
    _blessingText.text = Blessings[_blessingIndex];
    _blessingIndex = (_blessingIndex + 1) % Blessings.Length;
    _blessingCanvas.SetActive(true);
}
RokidInput类是SDK提供的输入封装,具体按键名称可参考SDK文档。
3.2 语音识别集成
Rokid设备支持离线语音识别,我们可以让用户说出“切换祝福”或“下一条”来切换祝福语。语音识别需要在场景中配置语音识别组件。
- 从Rokid SDK的Prefabs中拖入“SpeechRecognizer”预制体到场景。
- 在GameSetup脚本中获取SpeechRecognizer组件,并注册识别结果回调。
using Rokid.Speech;

public class GameSetup : MonoBehaviour
{
    private SpeechRecognizer _speechRecognizer;

    void Start()
    {
        SetupARScene();
        InitSpeechRecognition();
    }

    void InitSpeechRecognition()
    {
        _speechRecognizer = FindObjectOfType<SpeechRecognizer>();
        if (_speechRecognizer != null)
        {
            _speechRecognizer.OnResult += OnSpeechResult;
            _speechRecognizer.StartListening();
        }
    }

    void OnSpeechResult(string result)
    {
        if (result.Contains("切换祝福") || result.Contains("下一条"))
        {
            SwitchBlessing();
        }
    }
}
注意:语音识别需要设备支持,在Unity编辑器中无法测试,需部署到真机验证。但代码可以先行写好,通过条件编译避免编辑器错误。
3.3 场景管理优化
为了确保祝福语面板始终面向相机(即始终正面显示),我们可以添加一个简单的Billboard脚本,让面板始终旋转对准相机。但考虑到AR体验中,文字悬浮在固定位置更符合直觉,所以这里不添加自动旋转,而是保持面板在世界空间中的固定姿态。这样当用户围绕面板走动时,文字会呈现侧面视角,产生真实的立体感。
四、完整代码汇总
GameSetup.cs
using UnityEngine;
using UnityEngine.UI;
using Rokid.UXR;
using Rokid.Speech;

public class GameSetup : MonoBehaviour
{
    private static readonly string[] Blessings = new string[]
    {
        "祝您马年大吉,龙马精神,身体健康,万事如意!",
        "新春到,祝长辈们笑口常开,福如东海,马到成功!",
        "我的朋友,新年快乐!愿我们的友谊地久天长,马年行大运!",
        "祝同学们马年学业进步,一马当先,金榜题名!",
        "新年快乐,阖家幸福,马年吉祥,心想事成!",
    };

    private GameObject _blessingCanvas;
    private Text _blessingText;
    private int _blessingIndex = 0;
    private SpeechRecognizer _speechRecognizer;

    void Start()
    {
        SetupARScene();
        InitSpeechRecognition();
    }

    void SetupARScene()
    {
        Camera mainCamera = Camera.main;
        if (mainCamera != null)
        {
            mainCamera.transform.position = new Vector3(0, 1.5f, -8);
            mainCamera.transform.rotation = Quaternion.Euler(10, 0, 0);
            mainCamera.fieldOfView = 60;
            mainCamera.backgroundColor = new Color(0.45f, 0.12f, 0.12f);
            mainCamera.clearFlags = CameraClearFlags.SolidColor;
        }
        CreateBlessingUI();
    }

    void InitSpeechRecognition()
    {
        _speechRecognizer = FindObjectOfType<SpeechRecognizer>();
        if (_speechRecognizer != null)
        {
            _speechRecognizer.OnResult += OnSpeechResult;
            _speechRecognizer.StartListening();
        }
    }

    void OnSpeechResult(string result)
    {
        if (result.Contains("切换祝福") || result.Contains("下一条"))
        {
            SwitchBlessing();
        }
    }

    void Update()
    {
        // 编辑器测试:按下X键切换
        if (Input.GetKeyDown(KeyCode.X) && _blessingCanvas != null && _blessingText != null)
        {
            SwitchBlessing();
        }

        // 真机:Rokid功能键短按切换
        if (RokidInput.GetButtonDown("PrimaryButton"))
        {
            SwitchBlessing();
        }
    }

    void SwitchBlessing()
    {
        _blessingText.text = Blessings[_blessingIndex];
        _blessingIndex = (_blessingIndex + 1) % Blessings.Length;
        _blessingCanvas.SetActive(true);
    }

    void CreateBlessingUI()
    {
        GameObject root = new GameObject("BlessingCanvas");
        root.transform.position = new Vector3(0f, 1.5f, -5f);
        root.transform.rotation = Quaternion.identity;
        root.transform.localScale = Vector3.one;

        Canvas canvas = root.AddComponent<Canvas>();
        canvas.renderMode = RenderMode.WorldSpace;
        canvas.worldCamera = Camera.main;

        RectTransform rootRect = root.GetComponent<RectTransform>();
        rootRect.sizeDelta = new Vector2(520, 140);
        rootRect.localScale = new Vector3(0.006f, 0.006f, 0.006f);

        root.AddComponent<CanvasScaler>();
        root.AddComponent<GraphicRaycaster>();

        GameObject textObj = new GameObject("BlessingText");
        textObj.transform.SetParent(root.transform);

        Text blessingText = textObj.AddComponent<Text>();
        blessingText.text = Blessings.Length > 0 ? Blessings[0] : "";
        blessingText.fontSize = 22;
        blessingText.color = new Color(1f, 0.85f, 0.2f);
        blessingText.font = Resources.GetBuiltinResource<Font>("LegacyRuntime.ttf");
        blessingText.alignment = TextAnchor.MiddleCenter;
        blessingText.horizontalOverflow = HorizontalWrapMode.Wrap;
        blessingText.verticalOverflow = VerticalWrapMode.Overflow;

        RectTransform textRect = textObj.GetComponent<RectTransform>();
        textRect.anchorMin = new Vector2(0.5f, 0.5f);
        textRect.anchorMax = new Vector2(0.5f, 0.5f);
        textRect.pivot = new Vector2(0.5f, 0.5f);
        textRect.anchoredPosition = Vector2.zero;
        textRect.sizeDelta = new Vector2(520, 140);

        root.SetActive(false);
        _blessingCanvas = root;
        _blessingText = blessingText;
    }
}
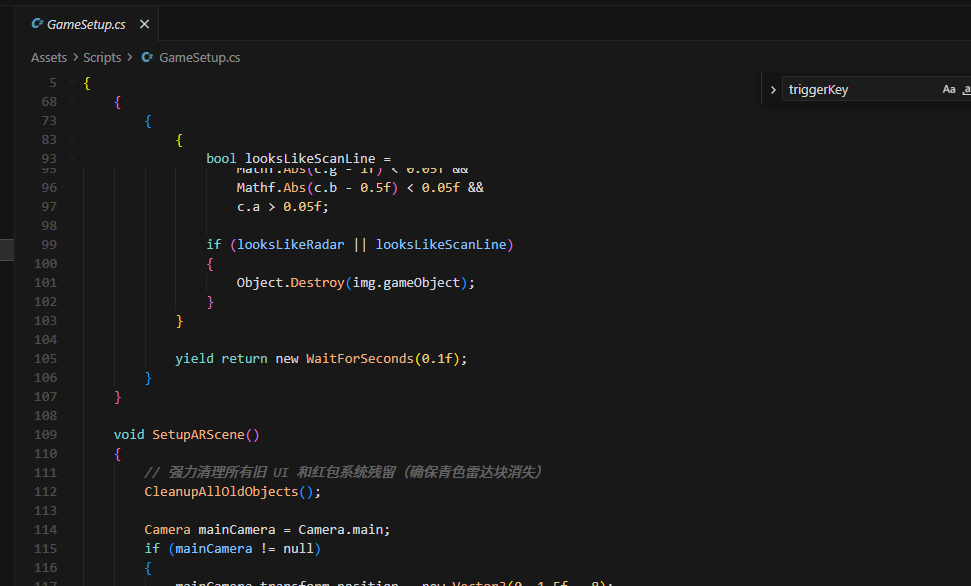
CameraAutoMover.cs
using UnityEngine;

public class CameraAutoMover : MonoBehaviour
{
    [Header("鼠标控制设置")]
    public bool mouseControl = true;
    public float mouseSensitivity = 2f;
    public float moveSpeed = 5f;
    public float smoothTime = 0.1f;

    private Vector2 currentRotation;
    private Vector2 targetRotation;
    private Vector3 moveDirection;

    void Start()
    {
        Vector3 euler = transform.eulerAngles;
        currentRotation = new Vector2(euler.x, euler.y);
        targetRotation = currentRotation;
    }

    void Update()
    {
        if (!mouseControl) return;

        HandleMouseLook();
        HandleMovement();
    }

    void HandleMouseLook()
    {
        if (Input.GetMouseButton(1))
        {
            float mouseX = Input.GetAxis("Mouse X") * mouseSensitivity;
            float mouseY = Input.GetAxis("Mouse Y") * mouseSensitivity;

            targetRotation.y += mouseX;
            targetRotation.x -= mouseY;
            targetRotation.x = Mathf.Clamp(targetRotation.x, -80f, 80f);
        }

        currentRotation = Vector2.Lerp(currentRotation, targetRotation, smoothTime * 10f * Time.deltaTime);
        transform.rotation = Quaternion.Euler(currentRotation.x, currentRotation.y, 0);
    }

    void HandleMovement()
    {
        float horizontal = 0f, vertical = 0f;
        if (Input.GetKey(KeyCode.W)) vertical = 1f;
        if (Input.GetKey(KeyCode.S)) vertical = -1f;
        if (Input.GetKey(KeyCode.A)) horizontal = -1f;
        if (Input.GetKey(KeyCode.D)) horizontal = 1f;

        float height = 0f;
        if (Input.GetKey(KeyCode.E)) height = 1f;
        if (Input.GetKey(KeyCode.Q)) height = -1f;

        Vector3 forward = transform.forward;
        Vector3 right = transform.right;
        moveDirection = forward * vertical + right * horizontal + Vector3.up * height;
        moveDirection.Normalize();

        transform.position += moveDirection * moveSpeed * Time.deltaTime;
    }
}
五、运行与测试
5.1 在Unity编辑器中测试
- 将GameSetup脚本挂载到场景中的空物体上。
- 从Rokid SDK的Prefabs中拖入AR Session Origin、AR Camera和SpeechRecognizer预制体。
- 如果需要模拟自由移动,可以将CameraAutoMover脚本挂载到AR Camera上(真机部署前需禁用此脚本)。
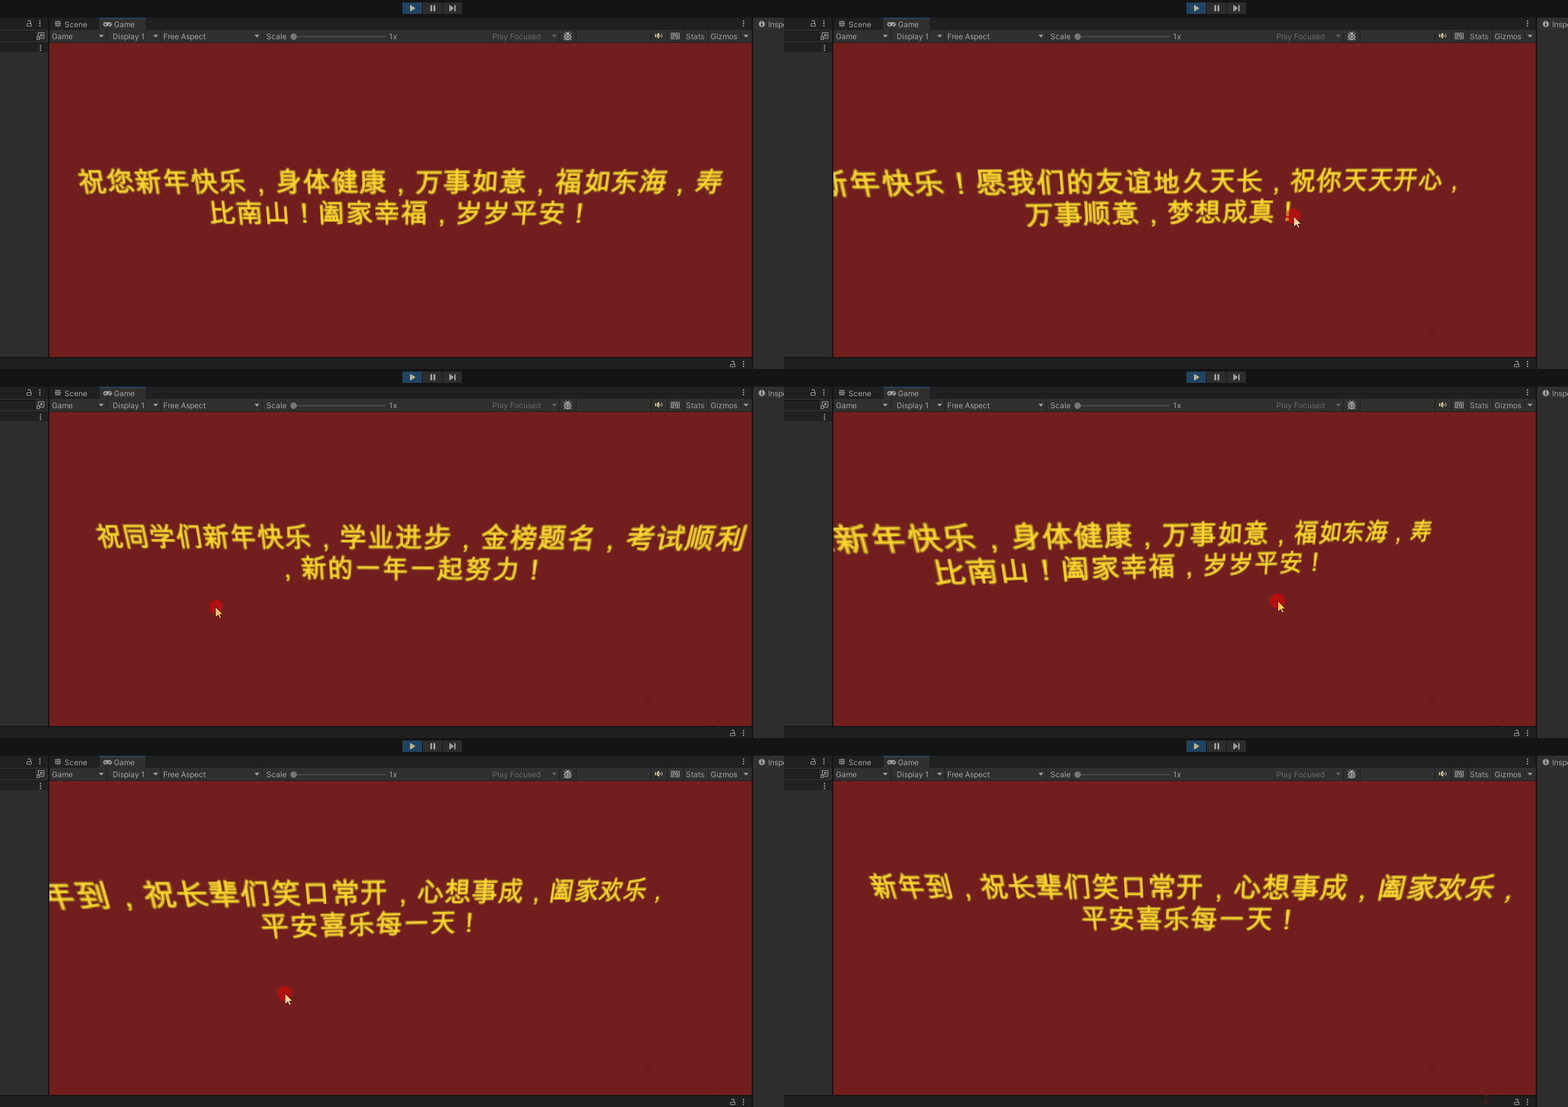
- 点击运行按钮,即可看到深红色背景,按X键可显示/切换祝福语,使用WASD和鼠标右键可自由移动视角观察悬浮的文字。
5.2 打包到Rokid设备
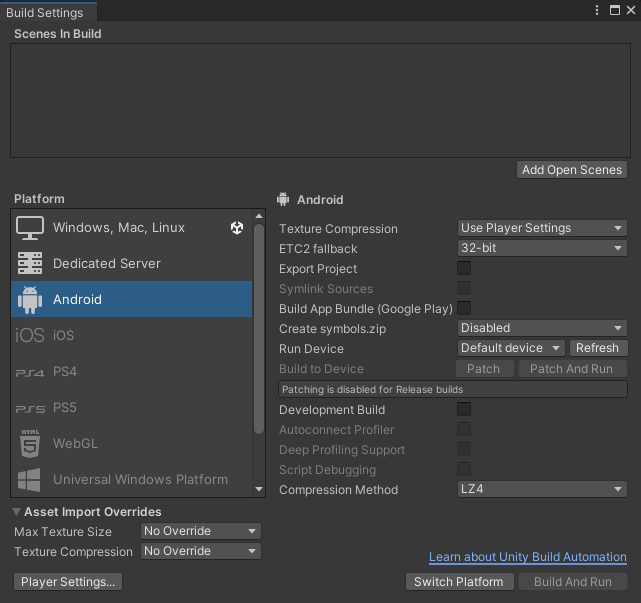
- 打开Build Settings窗口,将当前场景添加到Scenes In Build列表。
- 将Platform切换到Android,点击Switch Platform。
- 在Player Settings中配置包名、版本号等,确保Minimum API Level符合Rokid设备要求。
- 连接Rokid设备并开启开发者模式,点击Build And Run,Unity会自动编译并安装应用到设备。
- 在设备上启动应用,即可体验真实世界中的悬浮祝福语,通过设备功能键或语音切换。
六、技术要点总结
|
模块 |
技术实现 |
|
祝福语显示 |
世界空间Canvas,调整缩放因子控制实际大小 |
|
数据管理 |
静态字符串数组,索引取模实现循环 |
|
交互触发 |
键盘X(测试)、Rokid按键、语音识别三种方式 |
|
相机控制 |
编辑器使用CameraAutoMover,真机由SLAM驱动 |
|
视觉风格 |
深红背景、金黄色文字,营造春节氛围 |
七、扩展与优化建议
- 动态背景:可以使用粒子系统模拟飘落的雪花或烟花,增强节日气氛。
- 个性化祝福:通过接入Rokid灵珠AI平台,根据用户画像生成定制祝福语。
- 多人共享:利用Rokid的云锚点服务,让多位用户看到同一位置的祝福语。
- 手势交互:结合手势识别,用户可以通过手指点击或滑动来切换祝福语。
- 图像识别触发:在春节对联、福字上触发特定祝福语,增加寻宝乐趣。
结语
本文通过一个完整的AR祝福语眼镜应用开发,展示了基于Rokid Glasses和Unity引擎的AR应用开发流程。从环境搭建、UI创建、交互集成到代码实现,每一步都经过详细讲解。希望这个项目能激发你的创意,在即将到来的马年春节,用技术为传统拜年增添一份新意。赶快动手试试吧,期待看到你的独特作品!
更多推荐


 8
8 0
0- 0


 已为社区贡献2条内容

所有评论(0)