
带标注的红外图像车辆与行人检测数据集,识别率73.9%,18106张图,支持yolo,coco json,voc xml,文末有模型训练代码
本文介绍一个带标注的红外图像车辆与行人检测数据集,该数据集包含 18,106 张图像,识别率达 73.9%,支持 YOLO、COCO JSON 和 VOC XML 格式。文末附有完整的模型训练代码。## 模型训练指标参数:


模型训练图:

数据集拆分
总图数:18106 张图数
训练集
15843 张图
验证集
1508 张图
测试集
755 张图
预处理
自动定向:应用
调整大小:拉伸到640x640
增强
每个训练样本生成 3 组增强样本
模糊处理:最大模糊半径 2.25 像素
噪声添加:最多对 5% 的像素叠加噪声
随机遮挡:生成 2 个遮挡方块,单个方块尺寸占原图 10%
数据集标签:
[‘bus’, ‘cyclist’, ‘car’, ‘person’, ‘truck’]
标签解释
数据集图片和标注信息示例:


数据集下载
本数据集提供多种格式下载,所有版本均可在以下地址获取:
- YOLO 格式:支持 YOLOv7、YOLOv8、YOLOv9、YOLOv11、YOLOv12 及 YOLO26
- COCO JSON 格式:适用于需要 COCO 标注格式的项目
- Pascal VOC XML 格式:兼容 VOC 标注标准
下载地址:https://download.csdn.net/download/pbymw8iwm/92997108
下载后请根据您的需求选择相应格式的文件进行使用。
YOLO模型训练
YOLO模型训练
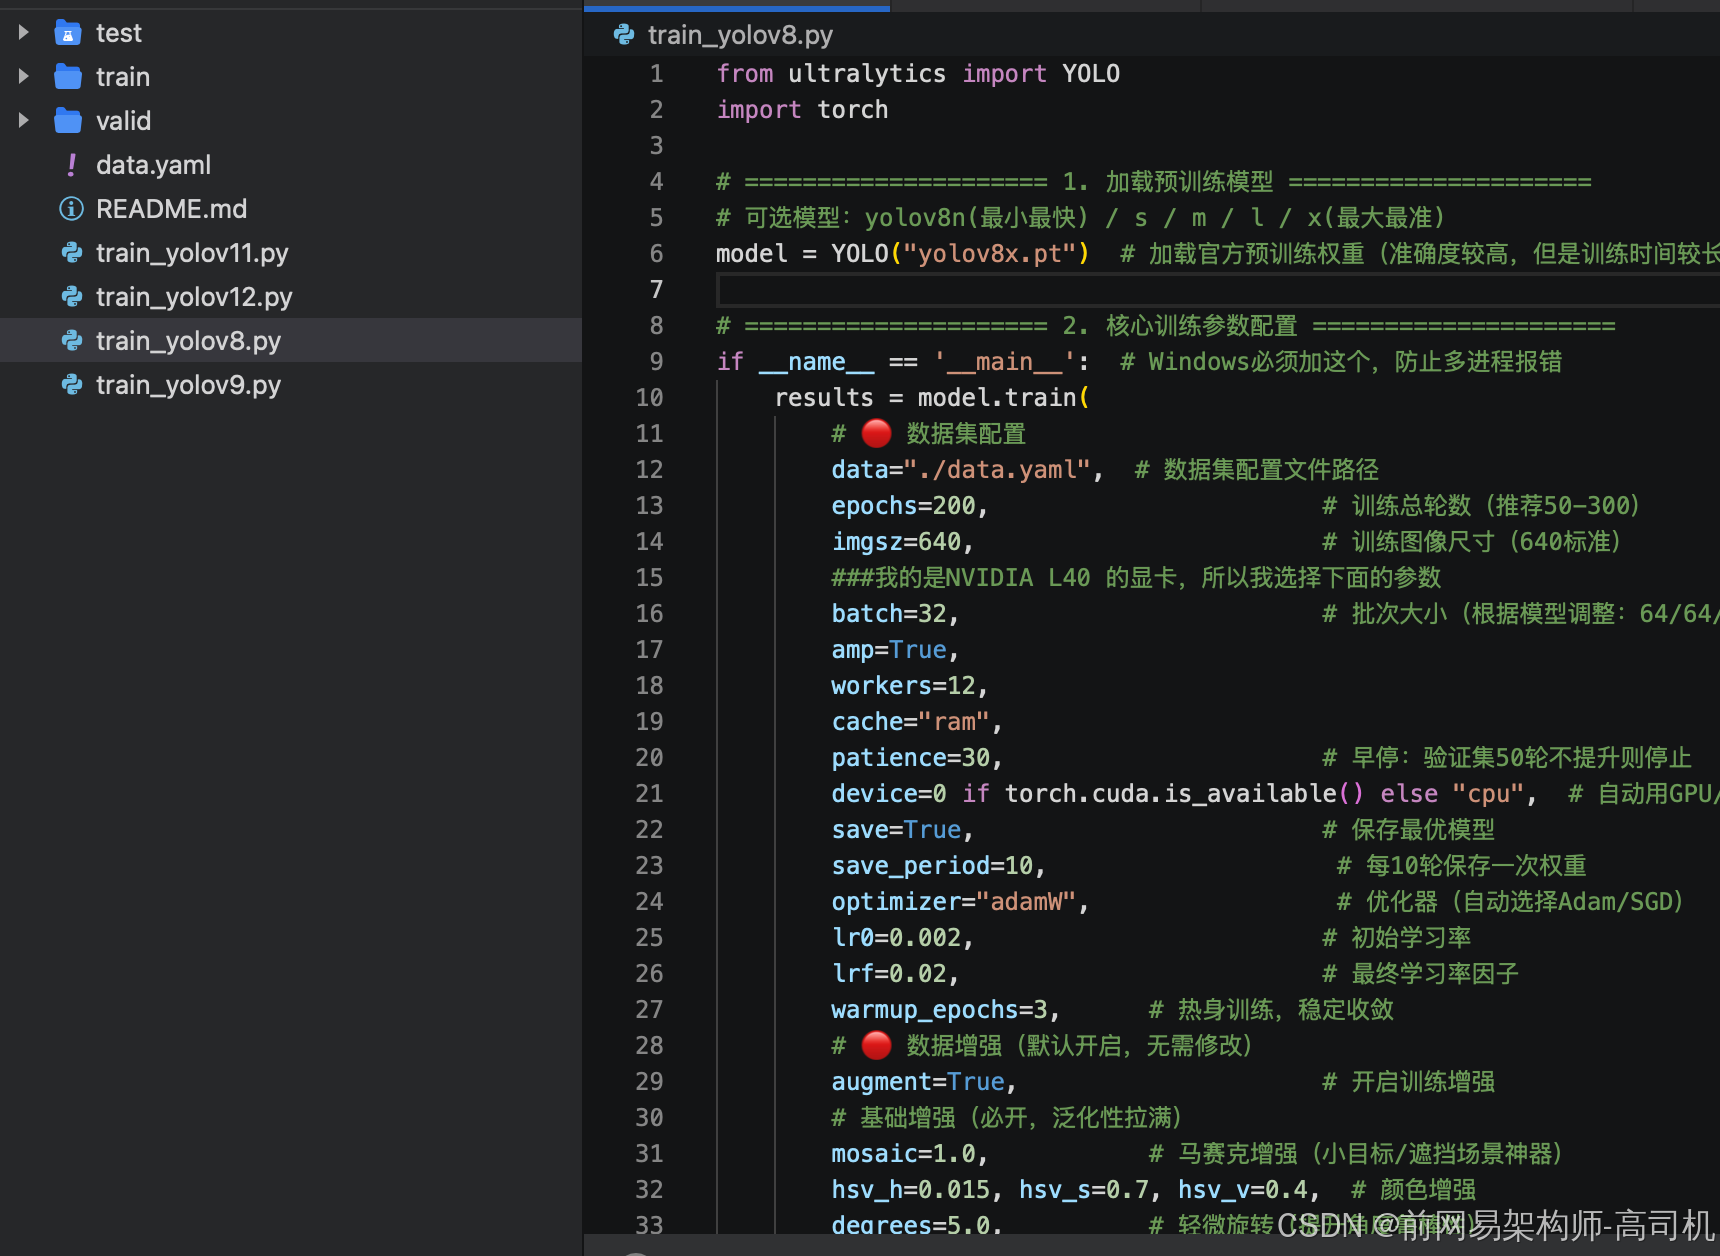
下载数据集后,解压到当前工作目录。然后从我的仓库 YOLOProject 复制训练脚本到该目录下。例如,如果您使用 YOLOv8 进行训练,只需运行 python train_yolov8.py 即可开始训练。
模糊图片在模型训练中的优势分析
该数据集中包含的模糊图片并非数据缺陷,而是一种精心设计的数据增强策略,能为模型训练带来以下显著优势:
-
提升模型鲁棒性:现实场景中,图像可能因运动模糊、对焦不准或光线不足而质量下降。在训练集中引入模糊样本,可以迫使模型学习更本质的特征,而不是过度依赖清晰的边缘或纹理细节,从而提升模型在复杂、非理想成像条件下的识别能力。
-
模拟真实世界噪声:监控摄像头、手机等设备在低光照或快速移动时极易产生模糊。包含此类图片的数据集能让模型提前适应这种噪声,减少在实际部署时因图像质量下降而导致的性能骤降。
-
防止模型过拟合:如果训练集全是高清、摆拍的完美图片,模型容易记住这些特定场景下的"干净"特征,而对新的、稍有模糊的图片泛化能力差。模糊图片作为一种有效的正则化手段,可以增加数据分布的多样性,防止模型过拟合到有限的清晰样本上。
总结:因此,数据集中包含的模糊图片,与"水平翻转"、“剪切形变”、"随机遮挡"等增强操作一样,都是为了构建一个更接近真实世界复杂分布的数据环境,从而训练出更健壮、更泛化、更实用的模型。## 模型验证测试情况:
验证测试代码:
#需要安装pip install ultralytics
from ultralytics import YOLO
import cv2

# ===================== 1. 加载YOLO模型 =====================
# 自动下载预训练模型(yolov8n最轻量快速),也可换 yolov8s/m/l/x
model = YOLO("best.pt")
# ===================== 2. 推理配置 =====================
image_path = "326_jpg.rf.8ad64cc0668df32c4e5f59b50e899e9c.jpg"  # 你的图片路径
save_result = True       # 是否保存标注后的图
# ===================== 3. 执行推理 =====================
results = model.predict(
    source=image_path,
    conf=0.01,          # 置信度阈值(低于该值忽略)
    save=False,         # 关闭默认保存,自定义保存
    verbose=False       # 关闭冗余日志
)

# ===================== 4. 解析结果:目标区域 + 标注信息 =====================
print("="*50)
print("YOLO 推理结果(目标区域 + 标注信息)")
print("="*50)

# 获取图片(用于绘制框)
img = cv2.imread(image_path)

# 遍历所有检测目标
for idx, result in enumerate(results):
    boxes = result.boxes  # 所有检测框

    for box in boxes:
        # ========== 提取目标区域(坐标) ==========
        # xyxy: 左上角x, 左上角y, 右下角x, 右下角y
        x1, y1, x2, y2 = box.xyxy[0].cpu().numpy()
        # 宽高
        w = x2 - x1
        h = y2 - y1

        # ========== 提取标注信息 ==========
        cls_id = int(box.cls[0])          # 类别ID
        cls_name = model.names[cls_id]    # 类别名称
        conf = float(box.conf[0])         # 置信度

        # ========== 打印信息 ==========
        print(f"目标 {idx+1}:")
        print(f"  标注类别:{cls_name}")
        print(f"  置信度:{conf:.2f}")
        print(f"  目标区域坐标:")
        print(f"    左上角 ({x1:.1f}, {y1:.1f})")
        print(f"    右下角 ({x2:.1f}, {y2:.1f})")
        print(f"    宽×高:{w:.1f} × {h:.1f}")
        print("-"*30)

        # ========== 在图片上绘制检测框 ==========
        cv2.rectangle(img, (int(x1), int(y1)), (int(x2), int(y2)), (0, 255, 0), 2)
        cv2.putText(img, f"{cls_name} {conf:.2f}",
                    (int(x1), int(y1)-10),
                    cv2.FONT_HERSHEY_SIMPLEX, 0.5, (0, 255, 0), 2)

# ===================== 5. 保存/显示结果 =====================
if save_result:
    cv2.imwrite("yolo_result.jpg", img)
    print("✅ 标注图片已保存为:yolo_result.jpg")

# 显示图片(可选)
cv2.imshow("YOLO Result", img)
#cv2.waitKey(0)
#cv2.destroyAllWindows()

模型推理结果:
{
“predictions”: [
{
“x”: 108,
“y”: 194.5,
“width”: 46,
“height”: 43,
“confidence”: 0.999,
“class”: “car”,
“class_id”: 1,
“detection_id”: “eb0eae43-32e3-44fe-b9cd-59bc32065c60”
},
{
“x”: 166,
“y”: 180,
“width”: 8,
“height”: 10,
“confidence”: 0.999,
“class”: “car”,
“class_id”: 1,
“detection_id”: “4772e0d5-1d11-4c0e-9ba4-beed183fd80d”
},
{
“x”: 220,
“y”: 182.5,
“width”: 12,
“height”: 17,
“confidence”: 0.999,
“class”: “car”,
“class_id”: 1,
“detection_id”: “9bcd2672-5c58-4718-ad00-502e03179faa”
},
{
“x”: 207.5,
“y”: 182.5,
“width”: 9,
“height”: 13,
“confidence”: 0.999,
“class”: “car”,
“class_id”: 1,
“detection_id”: “529d44c1-f03b-4ade-b698-7ca848658648”
},
{
“x”: 332,
“y”: 222,
“width”: 108,
“height”: 104,
“confidence”: 0.999,
“class”: “car”,
“class_id”: 1,
“detection_id”: “ae44c178-d4b2-4c79-b01a-b237d2ddd3bc”
},
{
“x”: 186,
“y”: 180,
“width”: 8,
“height”: 10,
“confidence”: 0.999,
“class”: “car”,
“class_id”: 1,
“detection_id”: “7ecd7ad9-08ae-45f1-b8be-912769f07e0f”
},
{
“x”: 174.5,
“y”: 178.5,
“width”: 9,
“height”: 9,
“confidence”: 0.999,
“class”: “car”,
“class_id”: 1,
“detection_id”: “8ab73ca2-0607-46b9-ae6f-8fcb0b030841”
},
{
“x”: 156,
“y”: 181,
“width”: 12,
“height”: 14,
“confidence”: 0.999,
“class”: “car”,
“class_id”: 1,
“detection_id”: “e16653c7-68b3-4c67-a791-361db4fd063f”
},
{
“x”: 230.5,
“y”: 185,
“width”: 19,
“height”: 24,
“confidence”: 0.998,
“class”: “car”,
“class_id”: 1,
“detection_id”: “df124f8e-da4b-48e8-8d9a-d926b6daa8c7”
},
{
“x”: 195,
“y”: 185.5,
“width”: 20,
“height”: 23,
“confidence”: 0.998,
“class”: “car”,
“class_id”: 1,
“detection_id”: “6bab1f6f-48f8-4787-94b4-0c363ef61dc4”
},
{
“x”: 149,
“y”: 179,
“width”: 8,
“height”: 10,
“confidence”: 0.998,
“class”: “car”,
“class_id”: 1,
“detection_id”: “cab38ae1-9731-47bc-b5a3-9b9d2ed8fa7f”
},
{
“x”: 129,
“y”: 187,
“width”: 12,
“height”: 22,
“confidence”: 0.996,
“class”: “car”,
“class_id”: 1,
“detection_id”: “04366147-a4be-4389-ba91-0ff595f9ffb0”
},
{
“x”: 212,
“y”: 179,
“width”: 8,
“height”: 12,
“confidence”: 0.995,
“class”: “car”,
“class_id”: 1,
“detection_id”: “5e84f0c7-28d3-45dc-afa0-bb6fd6c52fed”
},
{
“x”: 36,
“y”: 184,
“width”: 4,
“height”: 10,
“confidence”: 0.919,
“class”: “person”,
“class_id”: 3,
“detection_id”: “fcc596a8-3c41-4b05-baca-c5c6c5069668”
},
{
“x”: 13,
“y”: 232,
“width”: 24,
“height”: 138,
“confidence”: 0.641,
“class”: “car”,
“class_id”: 1,
“detection_id”: “6c3825ef-9430-4aa2-9b0f-25a770ba9b83”
},
{
“x”: 13,
“y”: 193,
“width”: 8,
“height”: 26,
“confidence”: 0.625,
“class”: “cyclist”,
“class_id”: 2,
“detection_id”: “4cfd242e-f524-48c0-b8a7-84639b827357”
}
]
}
更多推荐


 5
 0
- 0


 已为社区贡献29条内容

所有评论(0)