
Ubuntu20.04 PX4V1.13+Gazebo+Mavros2+ROS2Foxy+QGC+FAST-DDS联合仿真环境搭建
Ubuntu20.04 PX4v1.13+Gazebo+Mavros2+ROS2-Foxy+QGC+FAST-DDS联合仿真环境搭建
踩了很多坑,文章制作不易,求点赞收藏转发。
1 生成ssh密钥
1.1生成ssh密钥
ssh-keygen -t rsa -b 4096 -C "your_email@example.com"
1.2 将ssh密钥添加到ssh代理
eval "$(ssh-agent -s)"
ssh-add ~/.ssh/id_rsa
1.3 生成的公钥添加到GitHub
cat ~/.ssh/id_rsa.pub

1.4 测试添加成功
ssh -T git@github.com

2 安装px4固件v1.13
2.1 克隆px4v1.13
sudo apt install git

git clone -b v1.13.0-beta1 https://github.com/PX4/PX4-Autopilot.git --recursive
- 网不好的话,换成ssh下载会更好一点。如果要确认网如何就用以下指令:
ping github.com
ping google.com
- 然后Ctrl C,看包的丢失率,如果是0,就证明网还可以。
git clone -b v1.13.0-beta1 git@github.com:PX4/PX4-Autopilot.git --recursive
- 出现如下问题克隆失败:
-
2.2 更新下载子模块
cd PX4-Autopilot/
git submodule update --init --recursive

2.3 安装依赖
sudo ./Tools/setup/ubuntu.sh
😸 成功安装:
2.3.1 报错与警告
执行依赖的时候,会出现一些问题 😢。
- ERROR: pandas 2.0.3 has requirement python-dateutil>=2.8.2, but you’ll have python-dateutil 2.7.3 which is incompatible.
ERROR: pandas 2.0.3 has requirement python-dateutil>=2.8.2, but you'll have python-dateutil 2.7.3 which is incompatible.

-
sudo pip install --upgrade python-dateutil -
成功安装:

2.3.2 问题出现以及解决
出现如下问题:

//新建终端,打开环境
nano ~/.bashrc
//最下面添加环境变量
export PATH=:$PATH:/jun/.local/bin
//让环境变量生效
source ~/.bashrc
-
添加环境变量:

-
Ctrl+X离开保存· -
source ~/.bashrc让环境变量生效 -

2.3.2 问题解决
- 解决后,重新如下操作:
cd PX4-Autopilot/
//重新操作
./Tools/setup/ubuntu.sh
//等待时间
- 成功安装依赖

- 重启虚拟机
2.4 编译固件
//进入px4
cd PX4-Autopilot/
make px4_sitl
-
编译报错

解决如下:
sudo apt update
sudo apt upgrade
cd ~/PX4-Autopilot
 //清理
make clean
 //重新编译
make px4_sitl
-如果出现报错em.RAW_OPT: True, em.BUFFERED_OPT: True})AttributeError: module 'em' has no attribute 'RAW_OPT'

- 解决如下:
pip uninstall empy
pip install empy==3.3.4
make clean
make px4_sitl
-
编译成功:

3 安装Fast-DDS系列
3.1 安装Foonathan memory
- 克隆源码
git clone https://github.com/eProsima/foonathan_memory_vendor.git
//网不好就ssh
git clone git@github.com:eProsima/foonathan_memory_vendor.git
-
克隆完成:

cd foonathan_memory_vendor
//创建工作空间
mkdir build && cd build
//编译
 cmake ..
//安装
sudo cmake --build . --target install
-
无法访问等网络问题,就多试几次
-
安装成功:

3.2 安装Fast-DDS
- 克隆源码
git clone --recursive https://github.com/eProsima/Fast-DDS.git -b v2.0.2 ~/FastDDS-2.0.2
//老规矩,网不好就换成ssh
cd ~/FastDDS-2.0.2

-
创建工作空间,编译,安装😸:😸😸
mkdir build && cd build
cmake -DTHIRDPARTY=ON -DSECURITY=ON ..
//需要编译一段时间,加油哦!超棒哦!
make -j$(nproc --all)
sudo make install
编译成功:


- 安装成功:

3.3 安装Fast-RTPS-Gen
-
克隆源码
git clone --recursive https://github.com/eProsima/Fast-DDS-Gen.git -b v1.0.4 ~/Fast-RTPS-Gen

-
修改文件
cd ~/Fast-RTPS-Gen/gradle/wrapper //修改gradle-wrapper.properties文件里的distributionUrl=https\://services.gradle.org/distributions/gradle-6.8.3-bin.zip //打开文件 nano gradle-wrapper.properties -
修改文件前后:


-
安装编译:🛩🛩🛩
cd ~/Fast-RTPS-Gen ./gradlew assemble && sudo env "PATH=$PATH" ./gradlew install -
编译成功:

4 安装ROS2
参考小甲鱼一键安装wget http://fishros.com/install -O fishros && bash fishros
4.1 安装ros2-foxy
wget http://fishros.com/install -O fishros && bash fishros

4.2 安装依赖
sudo apt install python3-colcon-common-extensions
sudo apt install ros-foxy-eigen3-cmake-module
pip install --user -U empy pyros-genmsg setuptools
报错

- 解决
unset all_proxy
unset ALL_PROXY
python3 -m pip install launchpadlib
-
重新安装
pip install --user -U empy pyros-genmsg setuptools -
查看ros2版本
echo ROS_DisTRO
5 安装Gazebo
//编译px4固件的时候安装了gazebo
//查看gazebo版本
gazebo --version
//启动gazebo
gazevbo
//都没问题则无需在意

6 安装MAVROS2
6.1 安装依赖
sudo apt install -y python3-vcstool python3-rosinstall-generator python3-osrf-pycommon python3-colcon-common-extensions
6.2 创建mavros2_ws工作空间
mkdir -p ~/mavros2_ws/src
6.3 下载安装清单
cd ~/mavros2_ws/
rosinstall_generator --format repos mavlink | tee /tmp/mavlink.repos
//网不好就多试一下,要将mavros2.4改成2.7,下面介绍
//2.4本身有bug
//生成mavros清单
rosinstall_generator --format repos --upstream mavros | tee -a /tmp/mavros.repos

- mavros改版本


6.4 下载源码😿加油加油
//老规矩,网不好就多弄几次
//或者ping github.com 看看丢包率
//运气也占很大一部分,重启一下虚拟机试试
//好吧,我也搞了好久这个地方
//重启后要重新从清单那步开始弄
//搞定,大家加油加油
vcs import src < /tmp/mavlink.repos
vcs import src < /tmp/mavros.repos


6.5 安装依赖
rosdep install --from-paths src --ignore-src -y
-
安装成功

-
报错
ERROR: your rosdep installation has not been initialized yet. Please run: sudo rosdep init rosdep update
-
解决1
sudo rosdep init rosdep update rosdep install --from-paths src --ignore-src -y //网不好就多试几次,搞不出来就下一个方法 -
解决2
wget http://fishros.com/install -O fishros && bash fishros
//选3
//1]:一键安装(推荐):ROS(支持ROS/ROS2,树莓派Jetson)
//[3]:一键安装:rosdep(小鱼的rosdepc,又快又好用)
rosdep install --from-paths src --ignore-src -y
6.6 安装GeographicLib
sudo ./src/mavros/mavros/scripts/install_geographiclib_datasets.sh

-
报错
sudo ./src/mavros/mavros/scripts/install_geographiclib_datasets.sh ./src/mavros/mavros/scripts/install_geographiclib_datasets.sh: 第 33 行: hash: geographiclib-get-geoids:未找到 ./src/mavros/mavros/scripts/install_geographiclib_datasets.sh: 第 37 行: hash: geographiclib-datasets-download:未找到 OS not supported! Check GeographicLib page for supported OS and lib versions.

- 解决
sudo apt-get update
sudo apt-get install geographiclib-tools

-
重新执行
sudo ./src/mavros/mavros/scripts/install_geographiclib_datasets.sh
6.7 编译
cd ~/mavros2_ws
colcon build
//至少十分钟,加油加油呀
//保佑大家一次过
-
报错
Could not find a package configuration file provided by "geographic_msgs with any of the following namesgeographic_msgsConfig.cmakegeographic_msgs-config.cmake

- 解决:
sudo apt-get install ros-foxy-geographic-msgs
-
继续:
//删除刚刚编译 rm -rf build install log //重新编译 colcon build -
报错:

-
解决将
.hpp文件变成.h文件find ./src/mavros/ -type f -exec sed -i 's/tf2_eigen\.hpp/tf2_eigen\.h/g' {} + -
继续
colcon
rm -rf build install log
colcon build
-
编译成功

6.8 设置环境
nano ~/.bashrc
//在最下面设置环境变量
source ~/mavros2_ws/install/setup.bash
//打开一个终端
ros2 launch mavros px4.launch
7 ROS2工作空间
7.1 创建工作空间
mkdir -p ~/ws_sensor_combined/src/
cd ~/ws_sensor_combined/src/
7.2 克隆1.13版本的px4_ros_com和px4_msgs
 git clone -b release/1.13 https://github.com/PX4/px4_ros_com.git ~/px4_ros_com_ros2/src/px4_ros_com
 git clone -b release/1.13 https://github.com/PX4/px4_msgs.git ~/px4_ros_com_ros2/src/px4_msgs
 //老规矩,网不好就ssh

7.3 编译工作空间
cd ~/px4_ros_com_ros2/src/px4_ros_com/scripts
source build_ros2_workspace.bash
//编译得十几分钟,可以喝个水休息一下,加油加油

7.4 添加环境变量
//老规矩,先打开,然后找到最下面
nano ~/.bashrc
//保存文档
source ~/px4_ros_com_ros2/install/setup.bash
//让文档生效
source ~/.bashrc
7.5 检验安装成功
-
打开一个终端
cd PX4-Autopilot/
make px4_sitl_rtps gazebo

- 打开另外一个终端
//通信
micrortps_agent -t UDP

- 再打开一个终端
//启动示例
ros2 launch px4_ros_com sensor_combined_listener.launch.py

8 安装QT 5.15.2
8.1 安装依赖
sudo apt install gcc g++ make cmake build-essential libgl1-mesa-dev
sudo apt install libxcb-cursor0 libxcb-cursor-dev
sudo apt install gstreamer1.0-plugins-bad gstreamer1.0-libav gstreamer1.0-gl -y
8.2 下载qt
//虚拟机的浏览器下载
https://mirrors.tuna.tsinghua.edu.cn/qt/archive/online_installers/4.8

chmod +x qt-online-installer-linux-x64-4.8.1.run
sudo ./qt-online-installer-linux-x64-4.8.1.run
8.3 安装qt


9 基于Qt5.15.2的QGC 4.3安装
9.1 安装依赖,安装后重启
sudo usermod -a -G dialout $USER
sudo apt-get remove modemmanager -y
sudo apt install gcc g++ make cmake git
sudo apt install speech-dispatcher libudev-dev libsdl2-dev patchelf build-essential curl
//安装后重启

9.2 克隆源码
git clone https://github.com/mavlink/qgroundcontrol.git
//不顺畅就ssh,白天网会更好点
git clone git@github.com:mavlink/qgroundcontrol.git

cd qgroundcontrol/
//切换分支
git checkout Stable_V4.3

git submodule update --init --recursive
//更新下载子模块
//网不好就多试几次
//我就是试好几次
//大家加油加油

9.3 编译qgc 方法1
- 打开qt,找到qgc编译文件

-
编译:

-
很慢的:

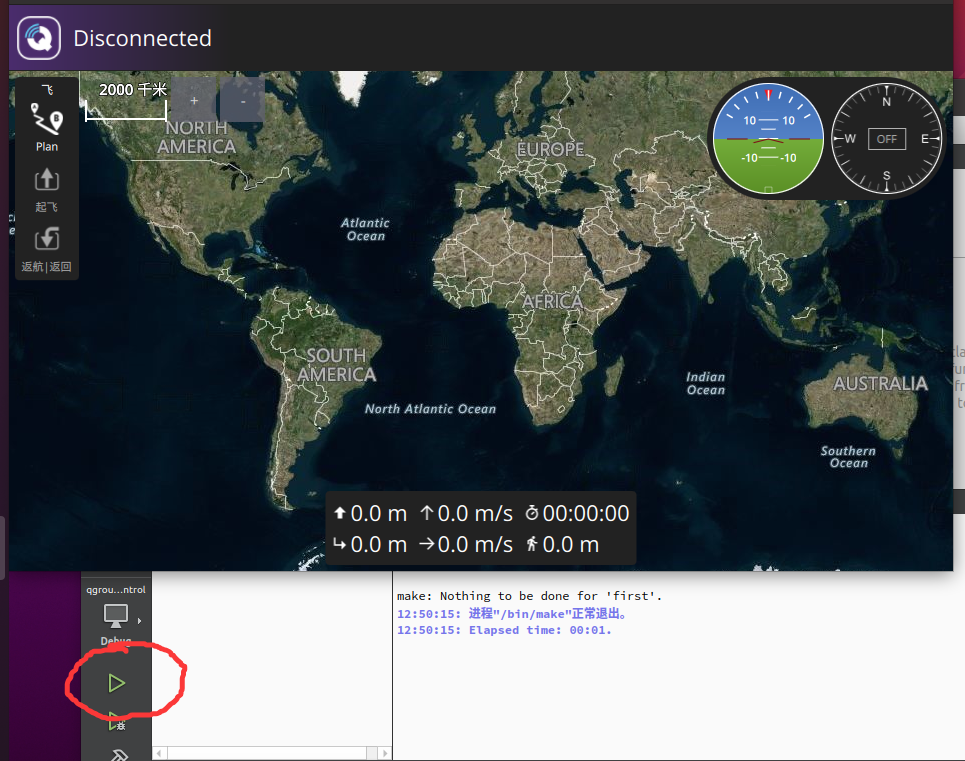
9.4 编译qgc 方法2
cd qgroundcontrol
mkdir build
cd build
qmake ..
make -j$(nproc)  # 使用多核加速编译
cd ~/qgroundcontrol/build/staging
./QGroundControl

9.4.1 报错与警告

nano ~/.bashrc
//找到最后一行
export PATH="/opt/Qt/5.15.2/gcc_64/bin:$PATH"
source ~/.bashrc
10 测试mavros节点
10.1 启动gazebo仿真
打开一个终端
cd ~/PX4-Autopilot
make px4_sitl gazebo

10.2 启动mavros 2 通讯
打开另一个终端
//进入工作区间
cd ~/mavros2_ws
ros2 launch mavros px4.launch fcu_url:="udp://:14550@192.168.1.1:14550"

再打开一个终端
ros2 topic echo /mavros/state

11 PX4+Gazebo+fast通信
11.1 启动Gazebo
打开一个终端
cd PX4-Autopilot/
make px4_sitl_rtps gazebo
11.2 启动fast通讯
打开另外一个终端
cd px4_ros_com_ros2/
micrortps_agent -t UDP

12 未完待续,敬请期待,PX4和matlab联合仿真教程
更多推荐


 41
 0
- 0


 已为社区贡献1条内容

所有评论(0)