
【微信小程序】 前后台实时位置获取
·
注:个人记录,方便以后直接使用,所以文章少了一些非必要的描述,详细信息查看官方文档。
微信官方文档(位置API)
1、接口申请
申请过程涉及到隐私信息,所以不进行展示。
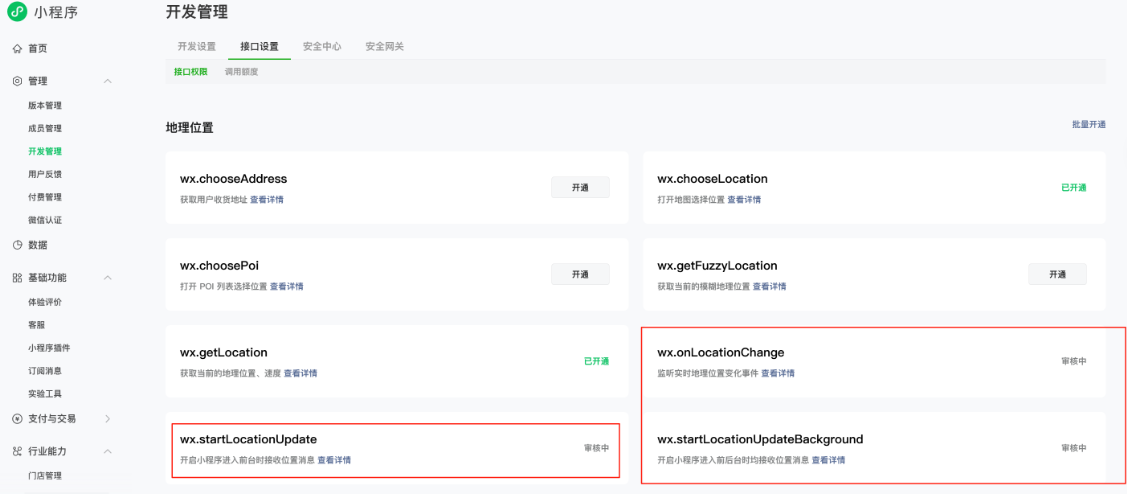
如果微信小程序需要开启前后台实时定位功能,先要申请如下圈出来的三个接口。
wx.onLocationChange:定位的核心,这个接口返回变化后的地理位置。wx.startLocationUpdate:开启微信小程序前台定位的接口,配合wx.onLocationChange实现前台经纬度变化。wx.startLocationUpdateBackground: 与wx.startLocationUpdate相似,唯一的区别是这个接口是小程序进入后台后获取经纬度的。
2、权限开放
接口开通后,还需在
微信开发者中对配置文件进行权限配置。
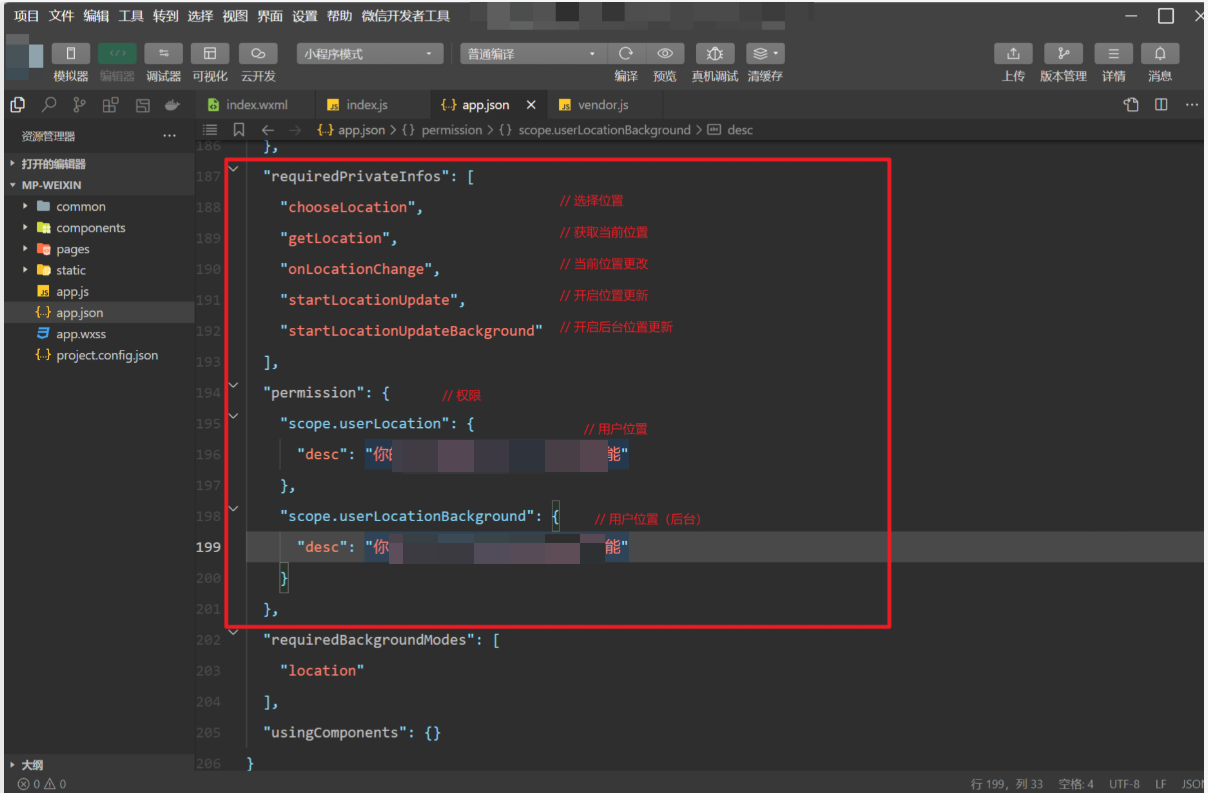
配置文件是项目根路径下的app.json。所需要添加的配置如下,及各配置项的描述的图片
- requiredPrivateInfos
- 必须:
onLocationChange、startLocationUpdate、startLocationUpdateBackground- 非必须:
chooseLocation、getLocation- permission
- 必须:
scope.userLocationBackground、scope.userLocation
- 代码
{
  "requiredPrivateInfos": [
    "chooseLocation",
    "getLocation",
    "onLocationChange",
    "startLocationUpdate",
    "startLocationUpdateBackground"
  ],
  "permission": {
    "scope.userLocation": {
      "desc": "..."
    },
    "scope.userLocationBackground": {
      "desc": "..."
    }
  },
}
- 截图
3、代码编写
这个代码编写的涉及两个文件
wxml和js
这里不在进行过多赘述,直接上代码
3.1、 wxml
  <!-- 地图 -->
  <map id="map"
       longitude="{{longitudeCenter}}"
       latitude="{{latitudeCenter}}"
       markers="{{markerArr}}"
       scale="12"
       bindcontroltap="controltap"
       bindmarkertap="markertap"
       polyline="{{polylineArr}}"
       bindregionchange="regionchange"
       show-location >
  </map>
  <!-- 按钮 -->
  <view wx:if="{{patrol}}"
    	data-idType="0"
    	bind:tap="handleBtnChange"
    	class="btn-start" >
    	开启定位
  </view >
  <view wx:else
  		data-idType="1"
  		bind:tap="handleBtnChange"
  		class="btn-stop">
  		关闭定位
  </view >
3.2、 js
Page({
    //  页面的初始数据
    data: {
        longitude: 0, // 按需填写
        latitude: 0, // 按需填写
        longitudeCenter: 0, // 按需填写
        latitudeCenter: 0, // 按需填写
        patrol: true,
        markerArr: [],
        polylineArr: []
    },
    // 生命周期函数--监听页面加载
    onLoad(options) {
        this.auth()
    },
    auth() {
        let that = this
        wx.getSetting({
            success(res) {
                if (!res.authSetting['scope.userLocationBackground']) {
                    wx.authorize({
                        scope: 'scope.userLocationBackground',
                        success() {
                            // 用户已授权,可以进行后续操作
                            that.getUserLocation()
                        },
                        fail() {
                            // 用户拒绝授权,提示用户手动开启
                            wx.showModal({
                                title: '授权提示',
                                content: '需要获取您的后台位置权限以提供相关服务,是否前往设置?',
                                success(res) {
                                    if (res.confirm) {
                                        wx.openSetting({
                                            success(settingData) {
                                                if (settingData.authSetting['scope.userLocationBackground']) {
                                                    that.getUserLocation()
                                                }
                                            }
                                        });
                                    }
                                }
                            });
                        }
                    });
                } else {
                    that.getUserLocation()
                }
            }
        });
    },
    controltap(e) {},
    regionchange(e) {},
    // 生命周期函数--监听页面初次渲染完成
    onReady() {},
    // 生命周期函数--监听页面显示
    onShow() {
        if (!this.data.patrol) {
            this.startForegroundTracking();
        }
    },
    // 生命周期函数--监听页面隐藏
    onHide() {
        // 页面进入后台时
        if (!this.data.patrol) {
            this.startBackgroundTracking();
        }
    },
    // 生命周期函数--监听页面卸载
    onUnload() {
        this.stopLocationTracking();
    },
    // 页面相关事件处理函数--监听用户下拉动作
    onPullDownRefresh() {},
    // 页面上拉触底事件的处理函数
    onReachBottom() {},
    // 用户点击右上角分享
    onShareAppMessage() {},
    // 开启 | 关闭 定位
    handleBtnChange(e) {
        this.setData({
            patrol: e.currentTarget.dataset.idtype === '0' ? false : true
        })
        if (e.currentTarget.dataset.idtype === '0') { // 开始定位
            this.startForegroundTracking();
        } else { // 关闭定位
            this.stopLocationTracking();
        }
    },
    // 获取一次当前位置
    getUserLocation() {
        let that = this
        wx.getLocation({
            type: 'wgs84',
            success: (res) => {
                that.setData({
                    latitude: res.latitude,
                    longitude: res.longitude,
                });
                console.log('初始位置:', res);
            },
            fail: () => {
                wx.showToast({
                    title: '无法获取位置',
                    icon: 'none'
                });
            },
        });
    },
    // 前台实时定位
    startForegroundTracking() {
        let that = this
        wx.startLocationUpdate({
            success: () => {
                console.log('已开启前台位置更新');
                that.bindLocationChange('front');
            },
            fail: (err) => {
                console.warn('前台位置更新失败:', err);
            },
        });
    },
    // 后台实时定位
    startBackgroundTracking() {
        let that = this
        wx.startLocationUpdateBackground({
            success: () => {
                console.log('已开启后台位置更新');
                that.bindLocationChange('back');
            },
            fail: (err) => {
                console.warn('后台位置更新失败:', err);
            },
        });
    },
    // 统一绑定位置变化
    bindLocationChange(_type) {
        let that = this
        wx.onLocationChange((res) => {
            console.log(_type + '位置变化:', res);
            that.setData({
                latitude: res.latitude,
                longitude: res.longitude,
            });
        });
    },
    // 停止位置更新
    stopLocationTracking() {
        wx.stopLocationUpdate();
        wx.offLocationChange();
        console.log('已停止位置追踪');
    },
})
3.3 、效果图
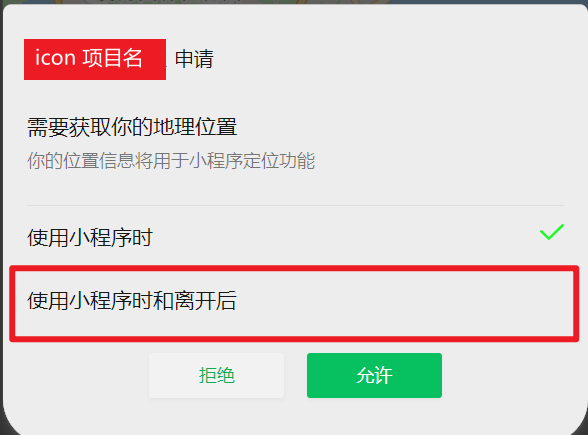
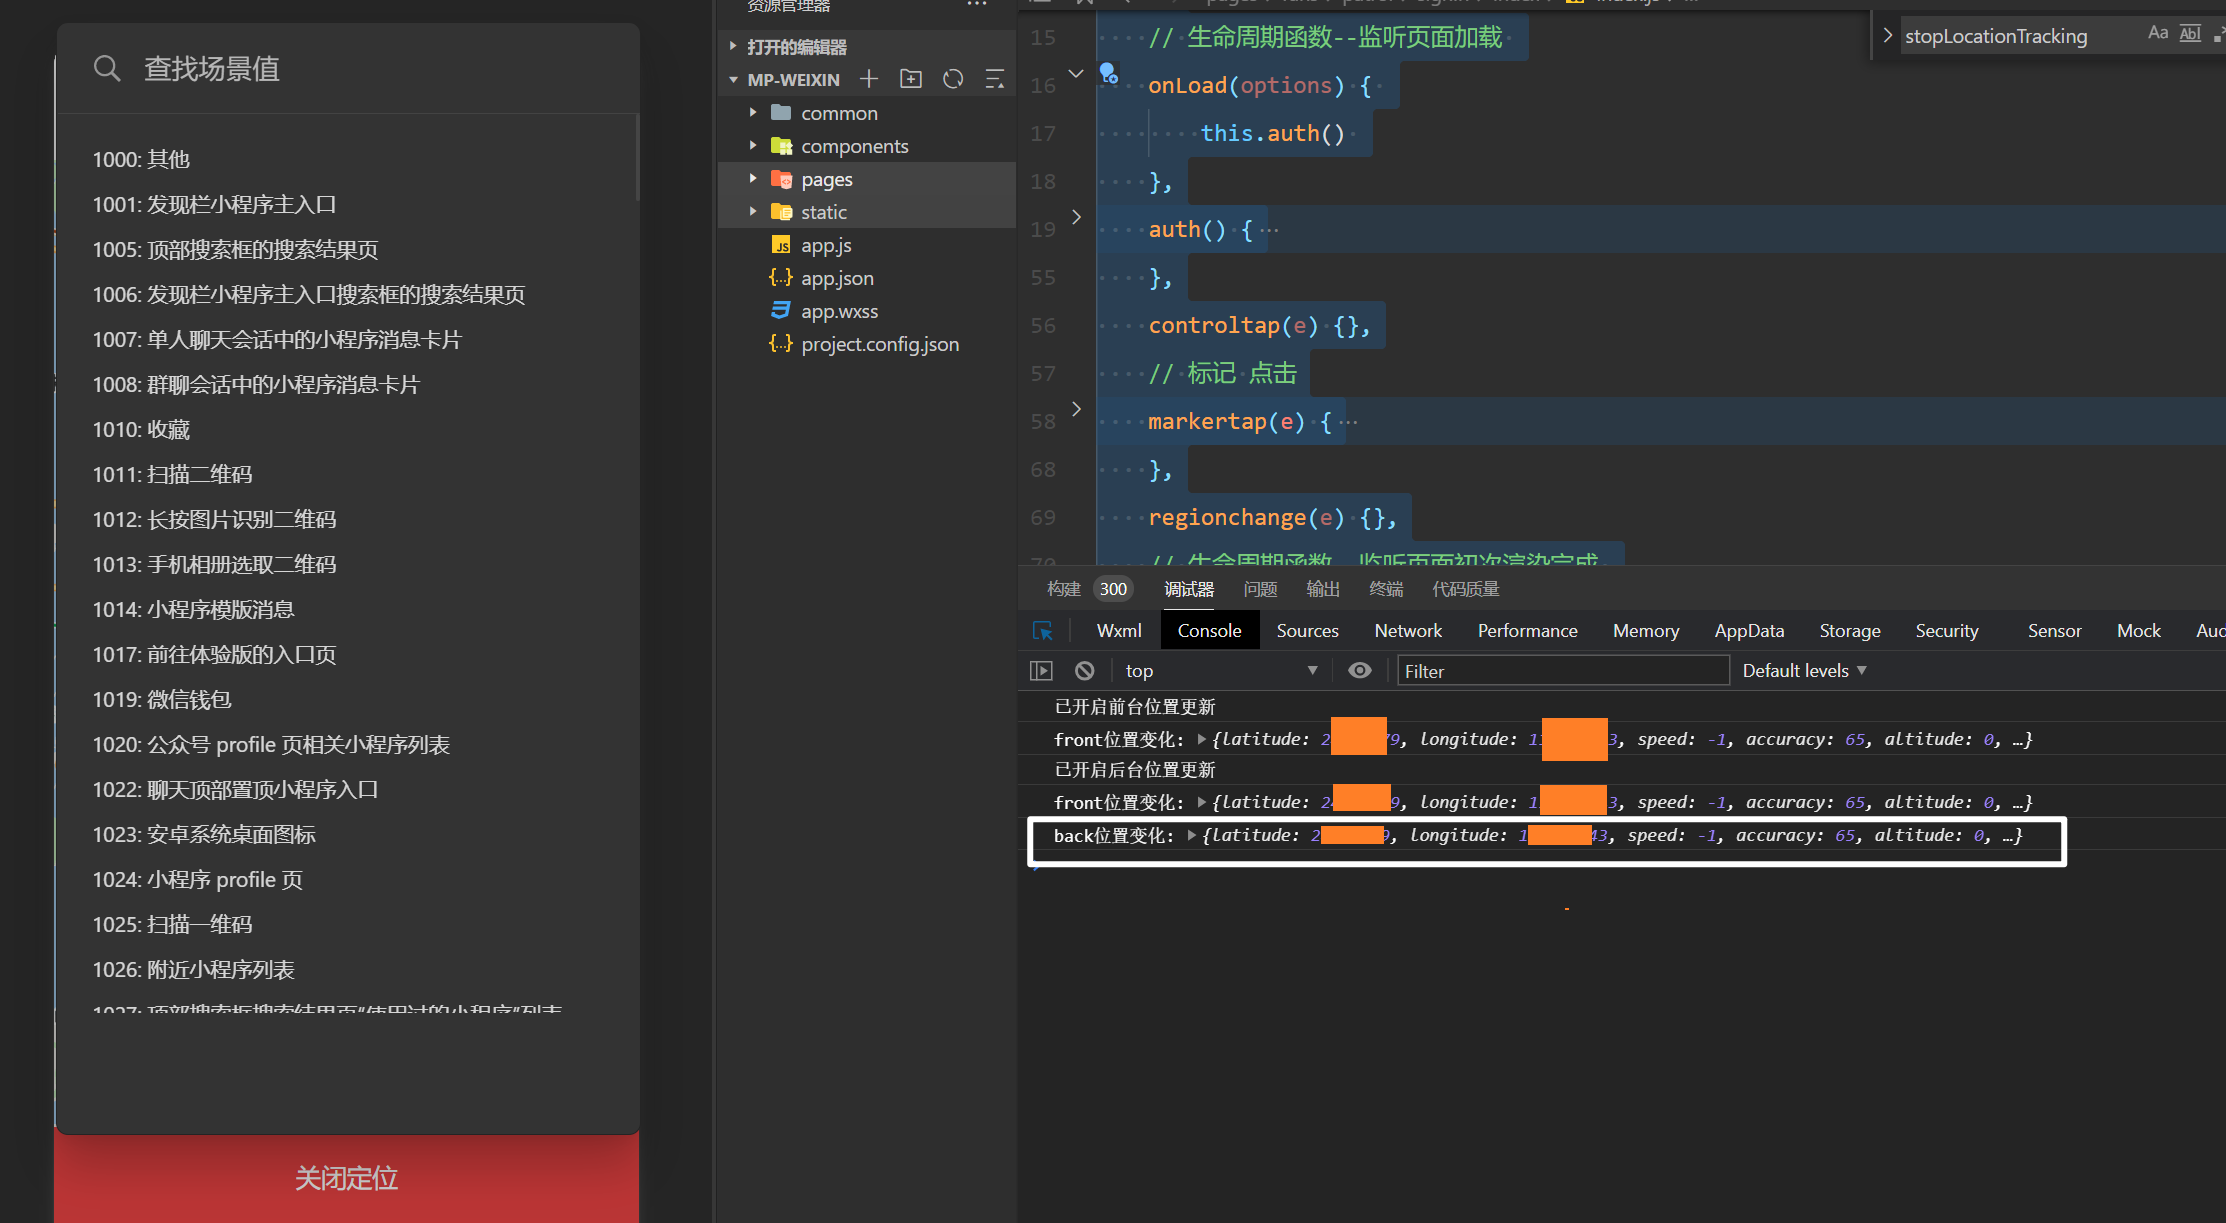
第一次进入页面会出现弹窗,勾选 地理位置授权功能,选择使用小程序时和离开后就能能实现前后台定位功能
点击
开始定位,待按钮变成关闭定位的时候,证明前台定位功能已经打开
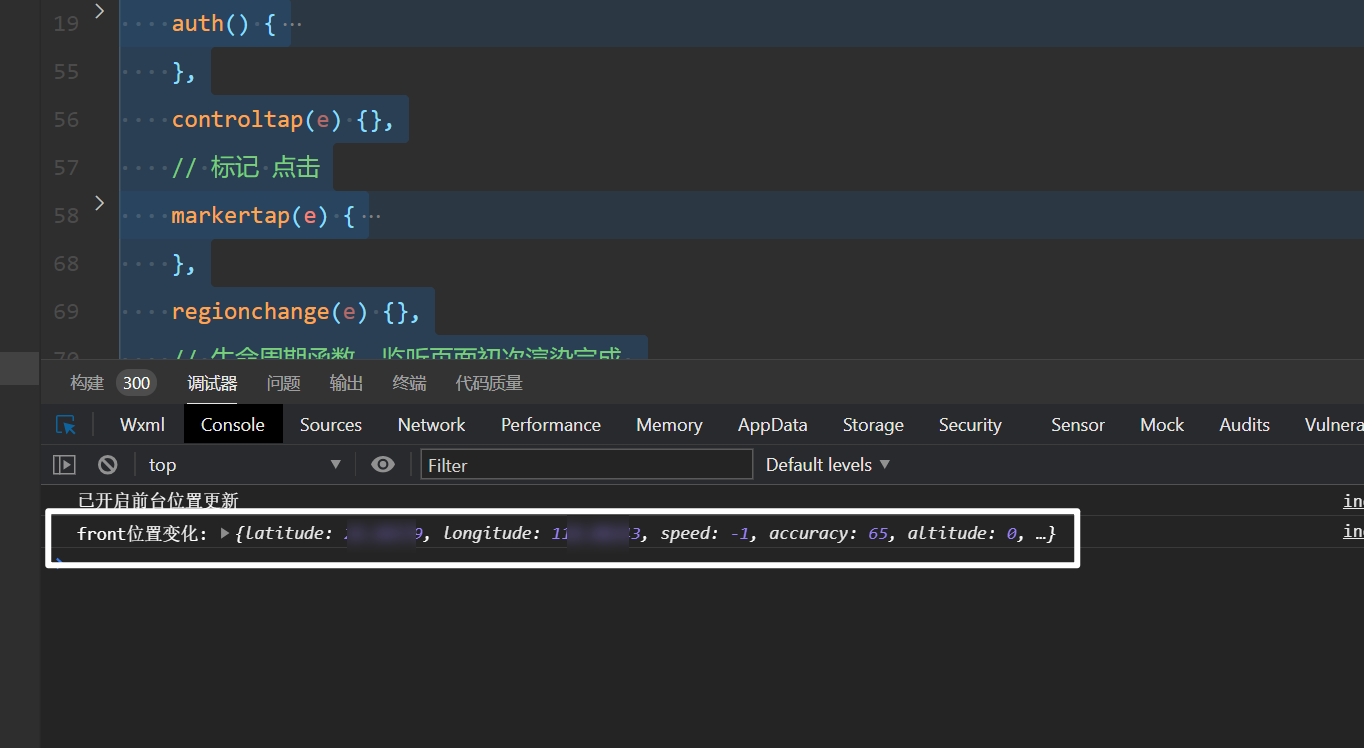
点击右上角同心圆图标进入后台,就能看到后台定位的日志信息
为了更好的区分前后端打印,所以传递front和back用于区分前后台定位信息


4、说明
- iphone 的微信小程序进入后台后,会存在无法获取定位的情况,不知道是机型的问题,还是设计就是这样的
- 接口 、配置 、代码三个要结合起来才能正常使用,否则可能无法正常使用定位功能
更多推荐
 22
22 0
0- 0


 已为社区贡献1条内容

所有评论(0)