
基于FISCOBCOS的springboot与智能合约交互
·
本文章介绍了基于FISCO BCOS的后端(JAVA)与智能合约交互常用的两种方式,分别为”基于WeBASE-Front接口“以及”基于ABI和BIN调用合约(JAVA-SDK)“
一、基于WeBASE-Front接口
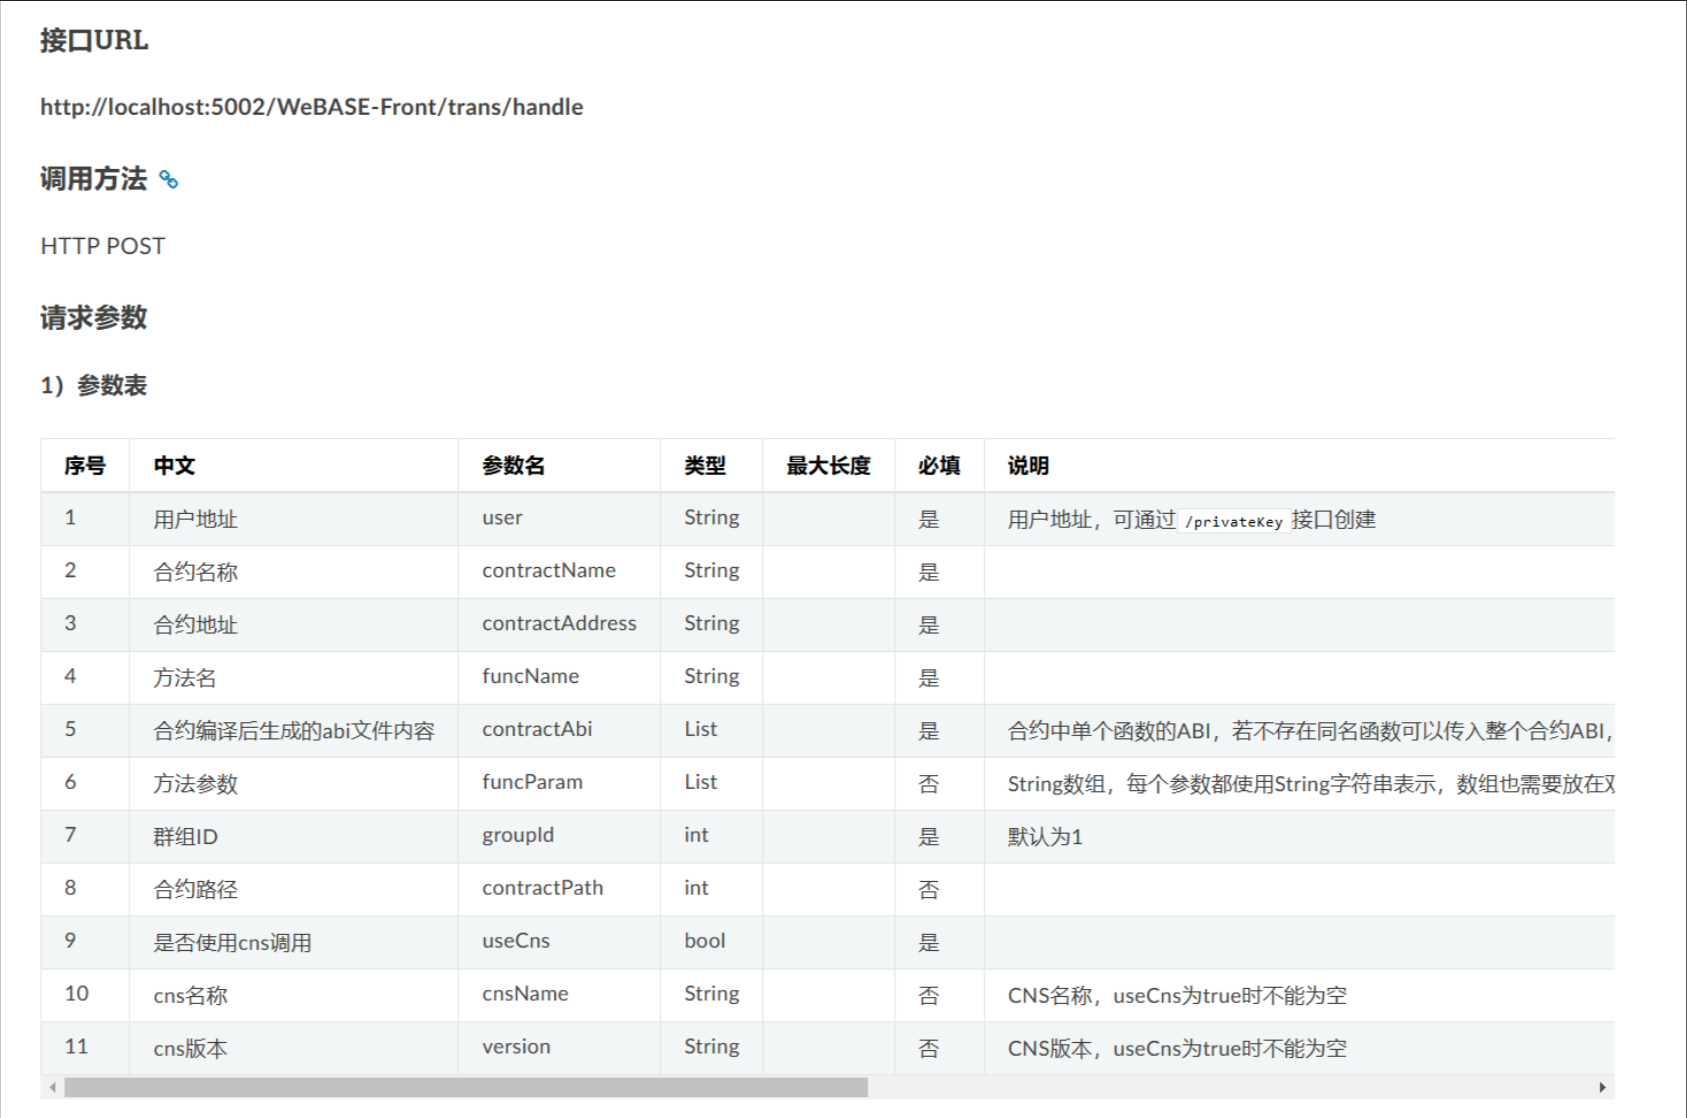
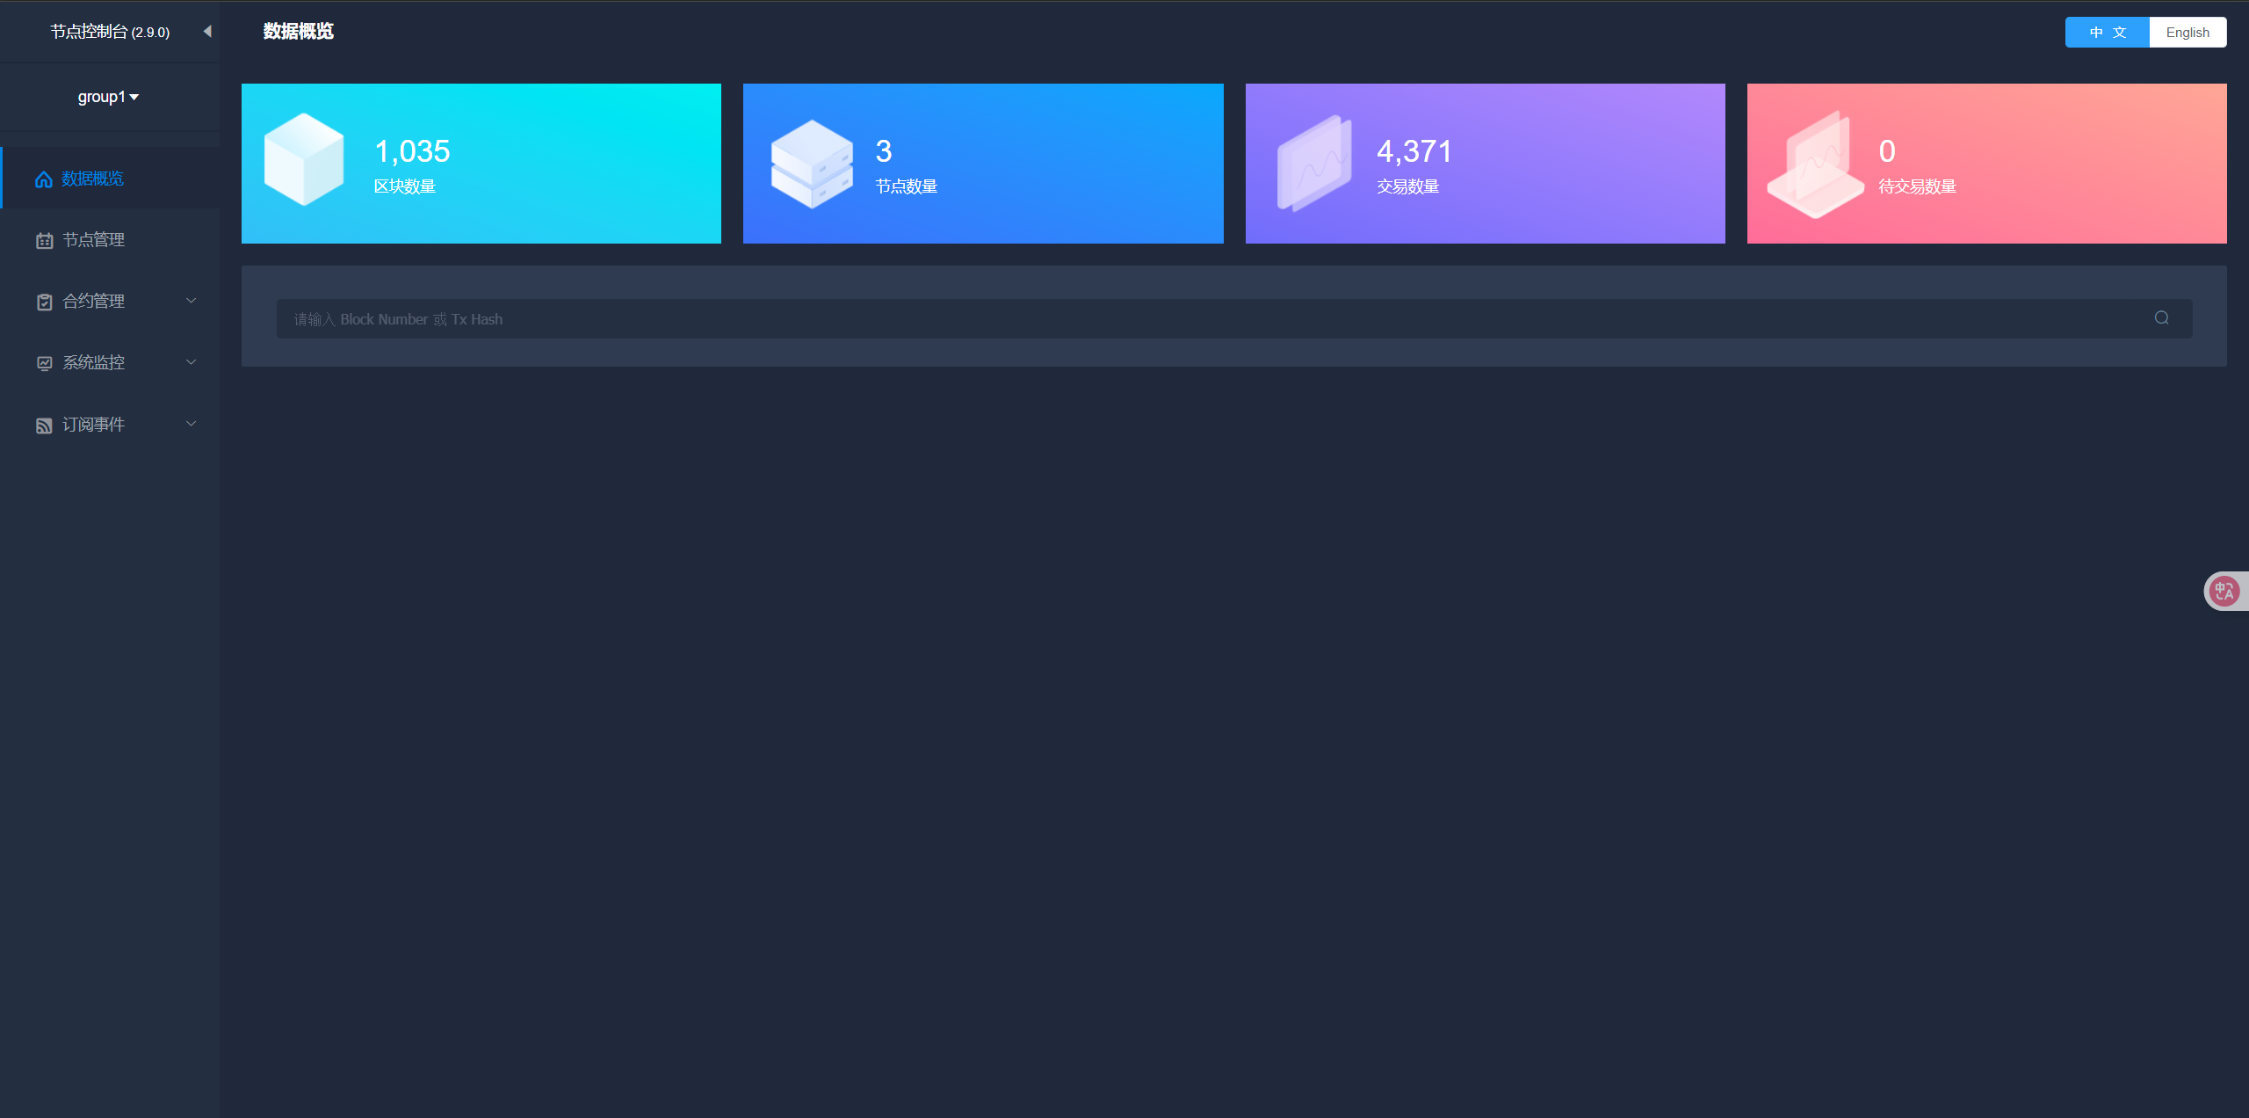
1.1 搭建webase-front
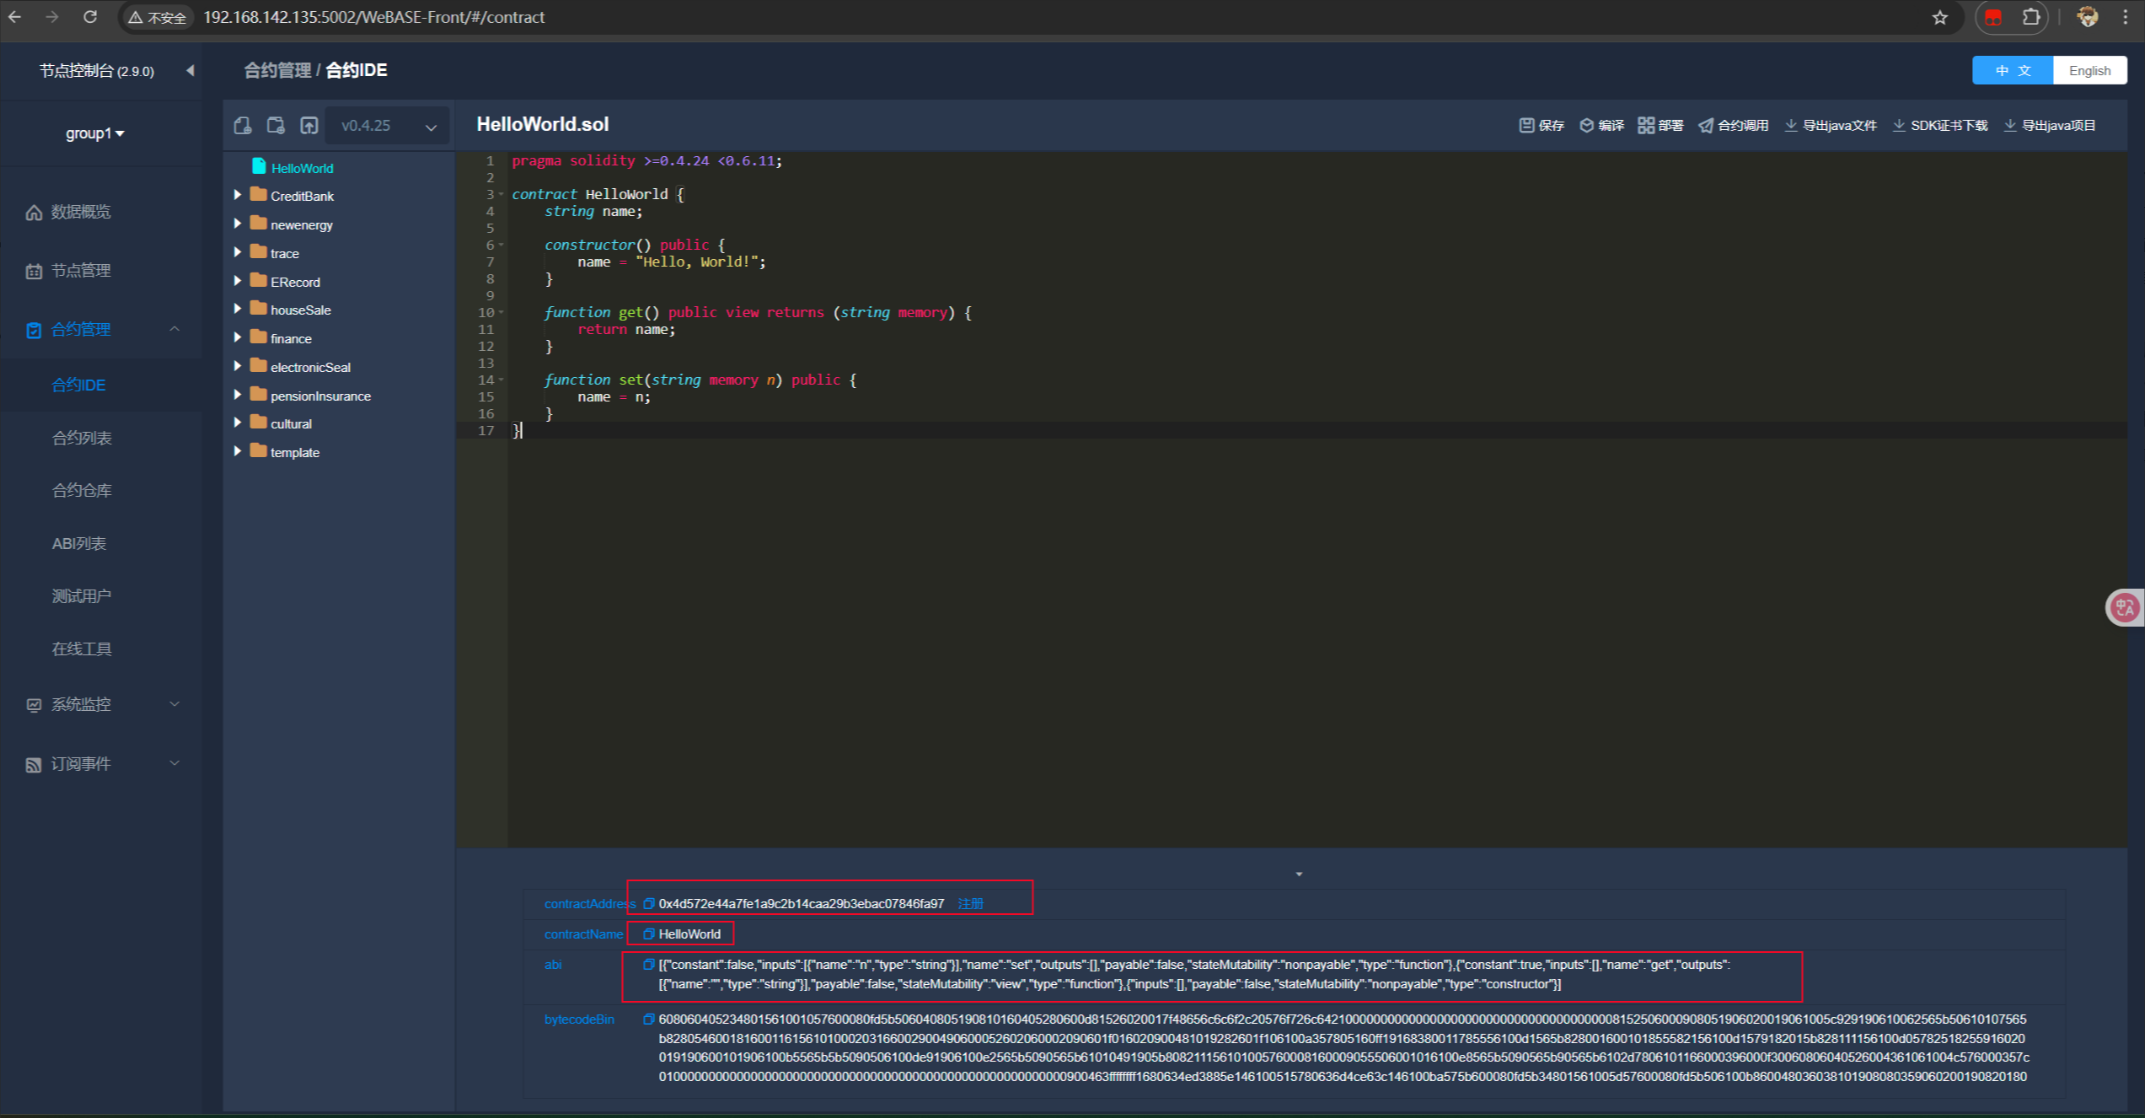
1.2 部署合约(HelloWorld)后,保存合约地址、合约名、合约abi
1.3 编写工具类
引入依赖
        <dependency>
            <groupId>com.alibaba</groupId>
            <artifactId>fastjson</artifactId>
            <version>1.2.79</version>
        </dependency>
        <dependency>
            <groupId>org.apache.httpcomponents</groupId>
            <artifactId>httpclient</artifactId>
            <version>4.5.3</version>
        </dependency>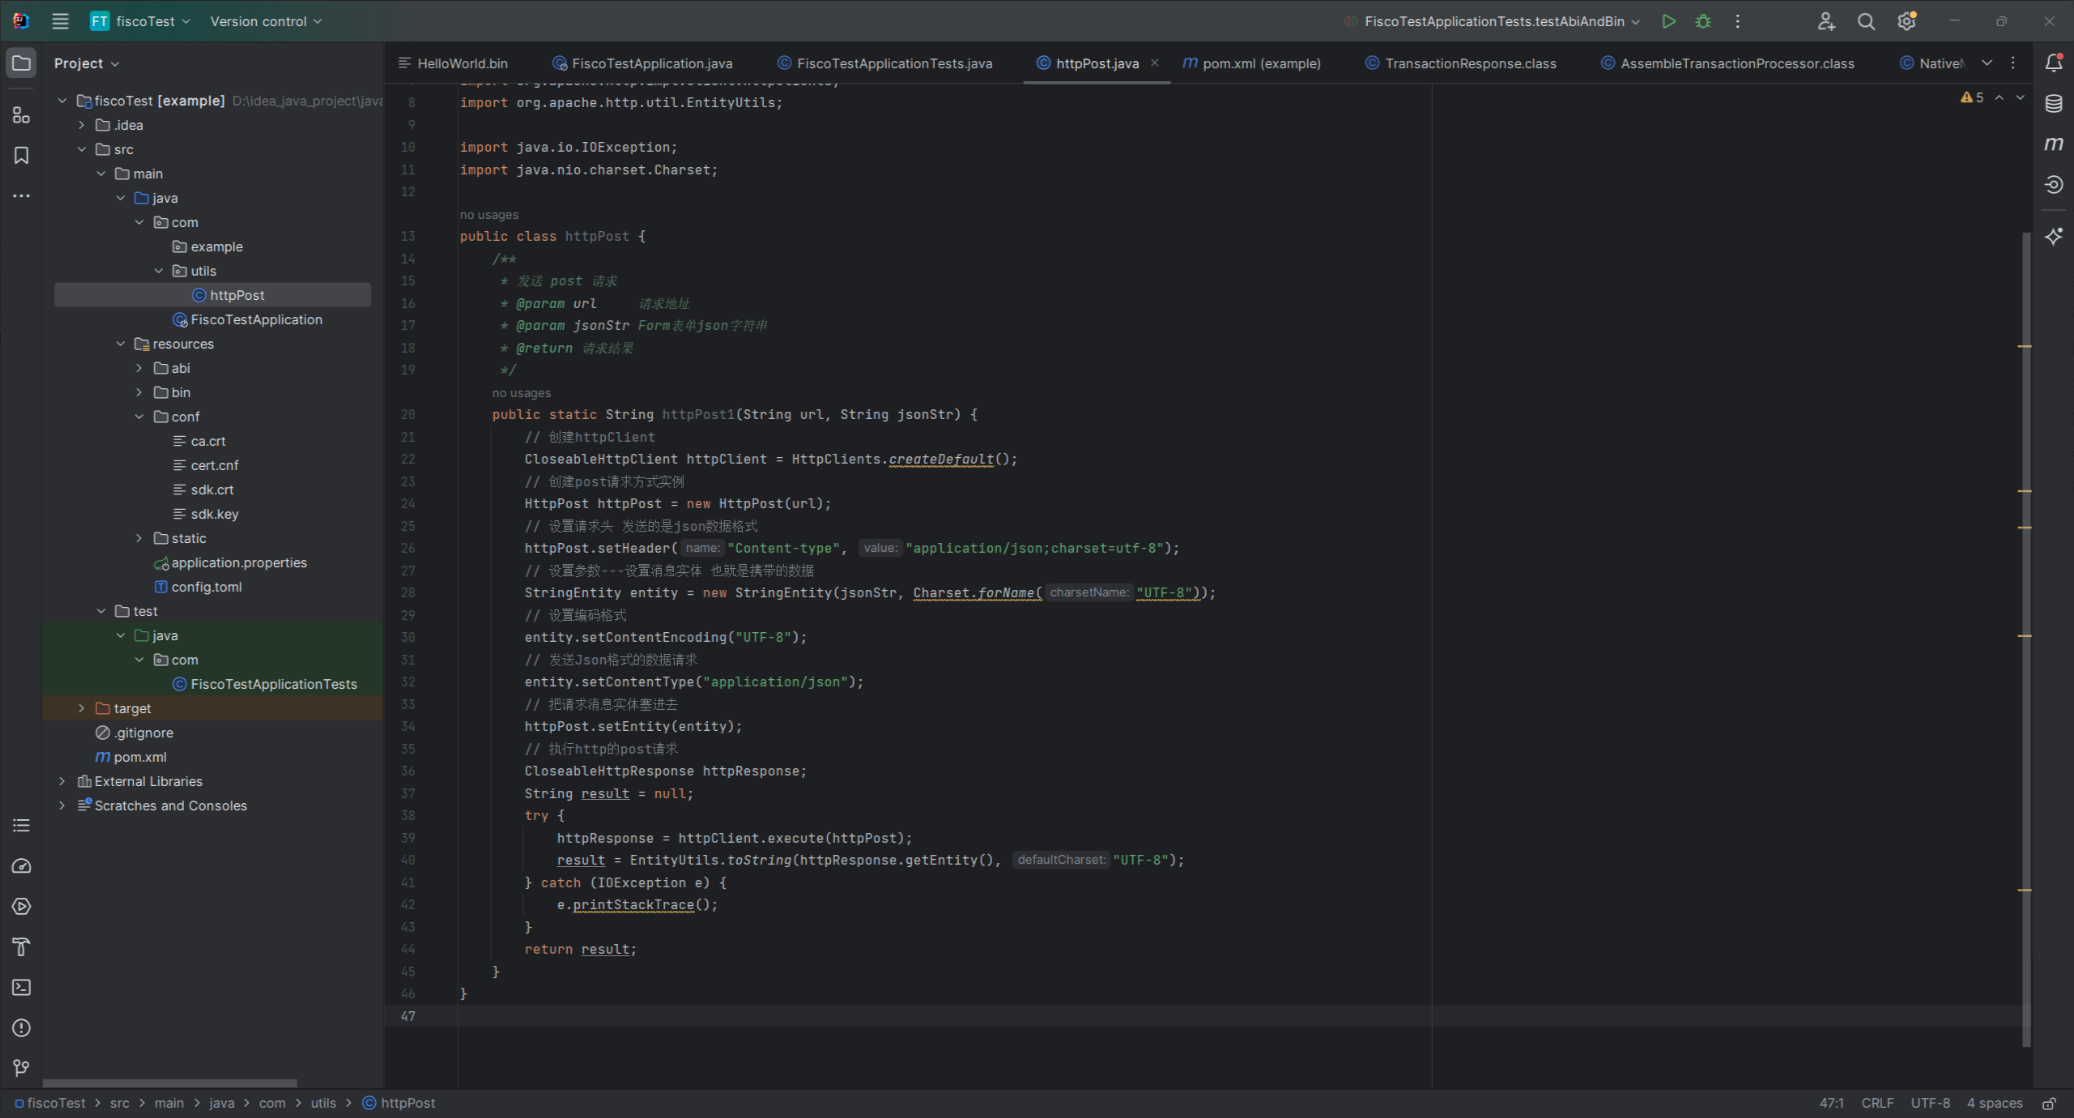
import org.apache.http.client.methods.CloseableHttpResponse;
import org.apache.http.client.methods.HttpPost;
import org.apache.http.entity.StringEntity;
import org.apache.http.impl.client.CloseableHttpClient;
import org.apache.http.impl.client.HttpClients;
import org.apache.http.util.EntityUtils;

import java.io.IOException;
import java.nio.charset.Charset;

public class httpPost {
    /**
     * 发送 post 请求
     * @param url     请求地址
     * @param jsonStr Form表单json字符串
     * @return 请求结果
     */
    public static String httpPost1(String url, String jsonStr) {
        // 创建httpClient
        CloseableHttpClient httpClient = HttpClients.createDefault();
        // 创建post请求方式实例
        HttpPost httpPost = new HttpPost(url);
        // 设置请求头 发送的是json数据格式
        httpPost.setHeader("Content-type", "application/json;charset=utf-8");
        // 设置参数---设置消息实体 也就是携带的数据
        StringEntity entity = new StringEntity(jsonStr, Charset.forName("UTF-8"));
        // 设置编码格式
        entity.setContentEncoding("UTF-8");
        // 发送Json格式的数据请求
        entity.setContentType("application/json");
        // 把请求消息实体塞进去
        httpPost.setEntity(entity);
        // 执行http的post请求
        CloseableHttpResponse httpResponse;
        String result = null;
        try {
            httpResponse = httpClient.execute(httpPost);
            result = EntityUtils.toString(httpResponse.getEntity(), "UTF-8");
        } catch (IOException e) {
            e.printStackTrace();
        }
        return result;
    }
}
1.4 编写测试方法
@SpringBootTest
class FiscoTestApplicationTests {
    public final String CONTRACT_ADDRESS = ""; // 合约地址
    public final String CONTRACT_NAME = "HelloWorld";
    public final String CONTRACT_ABI = "[{\"constant\":false,\"inputs\":[{\"name\":\"n\",\"type\":\"string\"}],\"name\":\"set\",\"outputs\":[],\"payable\":false,\"stateMutability\":\"nonpayable\",\"type\":\"function\"},{\"constant\":true,\"inputs\":[],\"name\":\"get\",\"outputs\":[{\"name\":\"\",\"type\":\"string\"}],\"payable\":false,\"stateMutability\":\"view\",\"type\":\"function\"},{\"inputs\":[],\"payable\":false,\"stateMutability\":\"nonpayable\",\"type\":\"constructor\"}]";
    public final String URL = "http://192.168.142.135:5002/WeBASE-Front/trans/handle"; // 替换IP
    public final String USER_ADDRESS = ""; //调用者的区块链账户地址

   @Test
    public void testWebaseFrontUrl(){
        // set方法
        JSONArray params = new JSONArray();
        params.add("dqs3");

        JSONObject jsonObj = new JSONObject();
        jsonObj.put("contractName", CONTRACT_NAME);
        jsonObj.put("contractAddress", CONTRACT_ADDRESS);
        jsonObj.put("contractAbi", JSONArray.parseArray(CONTRACT_ABI));
        jsonObj.put("user", USER_ADDRESS);
        jsonObj.put("funcName", "set");
        jsonObj.put("funcParam",params);
        String response = httpPost.httpPost1(URL, jsonObj.toJSONString());

        JSONObject setResponse = JSON.parseObject(response);
        System.out.println(setResponse);

        String setMsg = setResponse.getString("message");
        if (setMsg.equals("Success")) {
            System.out.println("合约调用成功");
        }else{
            System.out.println("合约调用失败");
            System.out.println(setResponse.getString("errorMessage"));
        }

        // get方法
        JSONArray params2 = new JSONArray();
        JSONObject jsonObj2 = new JSONObject();
        jsonObj2.put("contractName", CONTRACT_NAME);
        jsonObj2.put("contractAddress", CONTRACT_ADDRESS);
        jsonObj2.put("contractAbi", JSONArray.parseArray(CONTRACT_ABI));
        jsonObj2.put("user", USER_ADDRESS);
        jsonObj2.put("funcName", "get");
        jsonObj2.put("funcParam",params2);
        String response2 = httpPost.httpPost1(URL, jsonObj2.toJSONString());
        System.out.println(response2);
    }
}
二、基于ABI和BIN调用合约(JAVA-SDK)
Java SDK — FISCO BCOS 2.0 v2.11.0 文档
- ABI文件解析:方法签名、参数编码规则
- Java-SDK调用合约方法:
TransactionProcessor与Contract类使用 - 示例代码:调用合约的读写接口(如
set/get方法)
2.1 在后端项目中的resources文件夹下创建config.toml配置文件
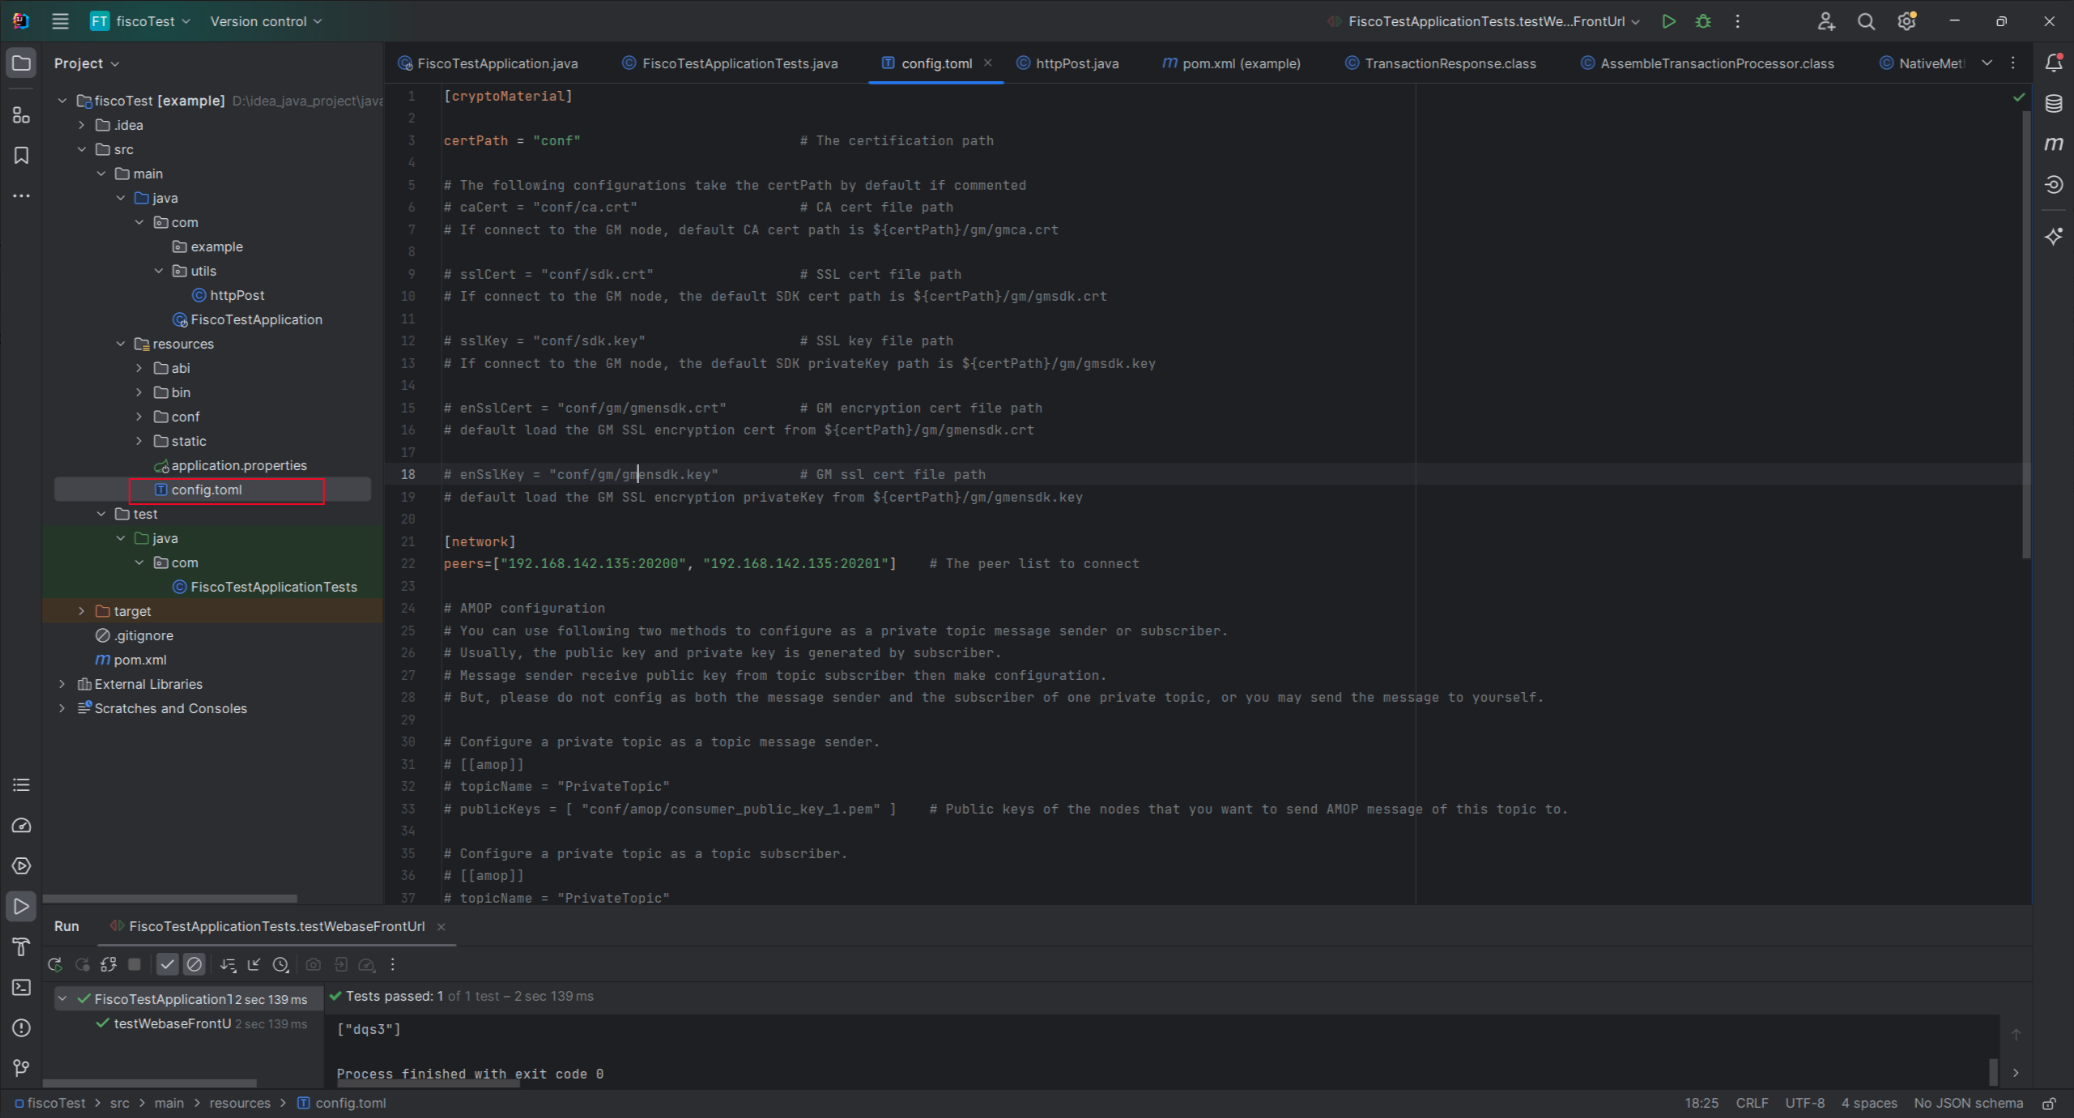
[cryptoMaterial]

certPath = "conf"                           # The certification path

# The following configurations take the certPath by default if commented
# caCert = "conf/ca.crt"                    # CA cert file path
# If connect to the GM node, default CA cert path is ${certPath}/gm/gmca.crt

# sslCert = "conf/sdk.crt"                  # SSL cert file path
# If connect to the GM node, the default SDK cert path is ${certPath}/gm/gmsdk.crt

# sslKey = "conf/sdk.key"                   # SSL key file path
# If connect to the GM node, the default SDK privateKey path is ${certPath}/gm/gmsdk.key

# enSslCert = "conf/gm/gmensdk.crt"         # GM encryption cert file path
# default load the GM SSL encryption cert from ${certPath}/gm/gmensdk.crt

# enSslKey = "conf/gm/gmensdk.key"          # GM ssl cert file path
# default load the GM SSL encryption privateKey from ${certPath}/gm/gmensdk.key

[network]
peers=["192.168.142.135:20200", "192.168.142.135:20201"]    # The peer list to connect

# AMOP configuration
# You can use following two methods to configure as a private topic message sender or subscriber.
# Usually, the public key and private key is generated by subscriber.
# Message sender receive public key from topic subscriber then make configuration.
# But, please do not config as both the message sender and the subscriber of one private topic, or you may send the message to yourself.

# Configure a private topic as a topic message sender.
# [[amop]]
# topicName = "PrivateTopic"
# publicKeys = [ "conf/amop/consumer_public_key_1.pem" ]    # Public keys of the nodes that you want to send AMOP message of this topic to.

# Configure a private topic as a topic subscriber.
# [[amop]]
# topicName = "PrivateTopic"
# privateKey = "conf/amop/consumer_private_key.p12"         # Your private key that used to subscriber verification.
# password = "123456"


[account]
keyStoreDir = "account"         # The directory to load/store the account file, default is "account"
# accountFilePath = ""          # The account file path (default load from the path specified by the keyStoreDir)
accountFileFormat = "pem"       # The storage format of account file (Default is "pem", "p12" as an option)

# accountAddress = ""           # The transactions sending account address
# Default is a randomly generated account
# The randomly generated account is stored in the path specified by the keyStoreDir

# password = ""                 # The password used to load the account file

[threadPool]
# channelProcessorThreadSize = "16"         # The size of the thread pool to process channel callback
# Default is the number of cpu cores

# receiptProcessorThreadSize = "16"         # The size of the thread pool to process transaction receipt notification
# Default is the number of cpu cores

maxBlockingQueueSize = "102400"             # The max blocking queue size of the thread pool
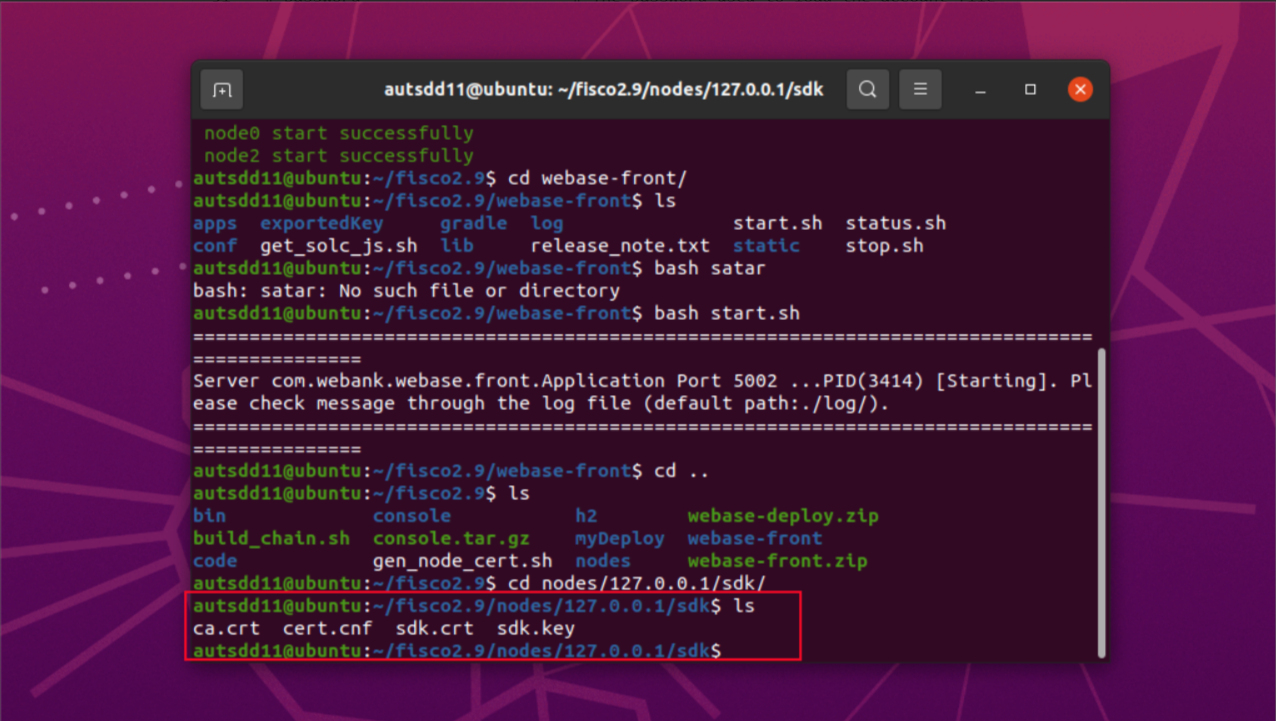
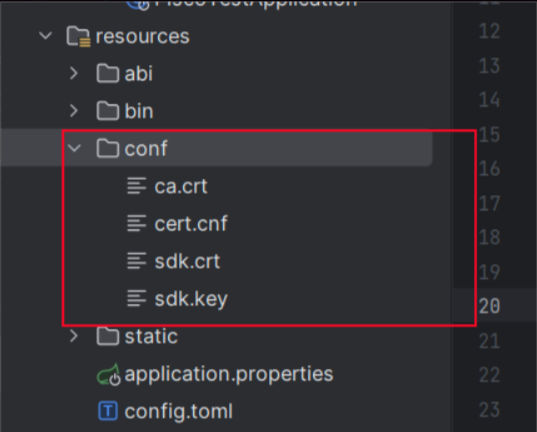
2.2 将区块链的证书拷贝到resources文件夹下
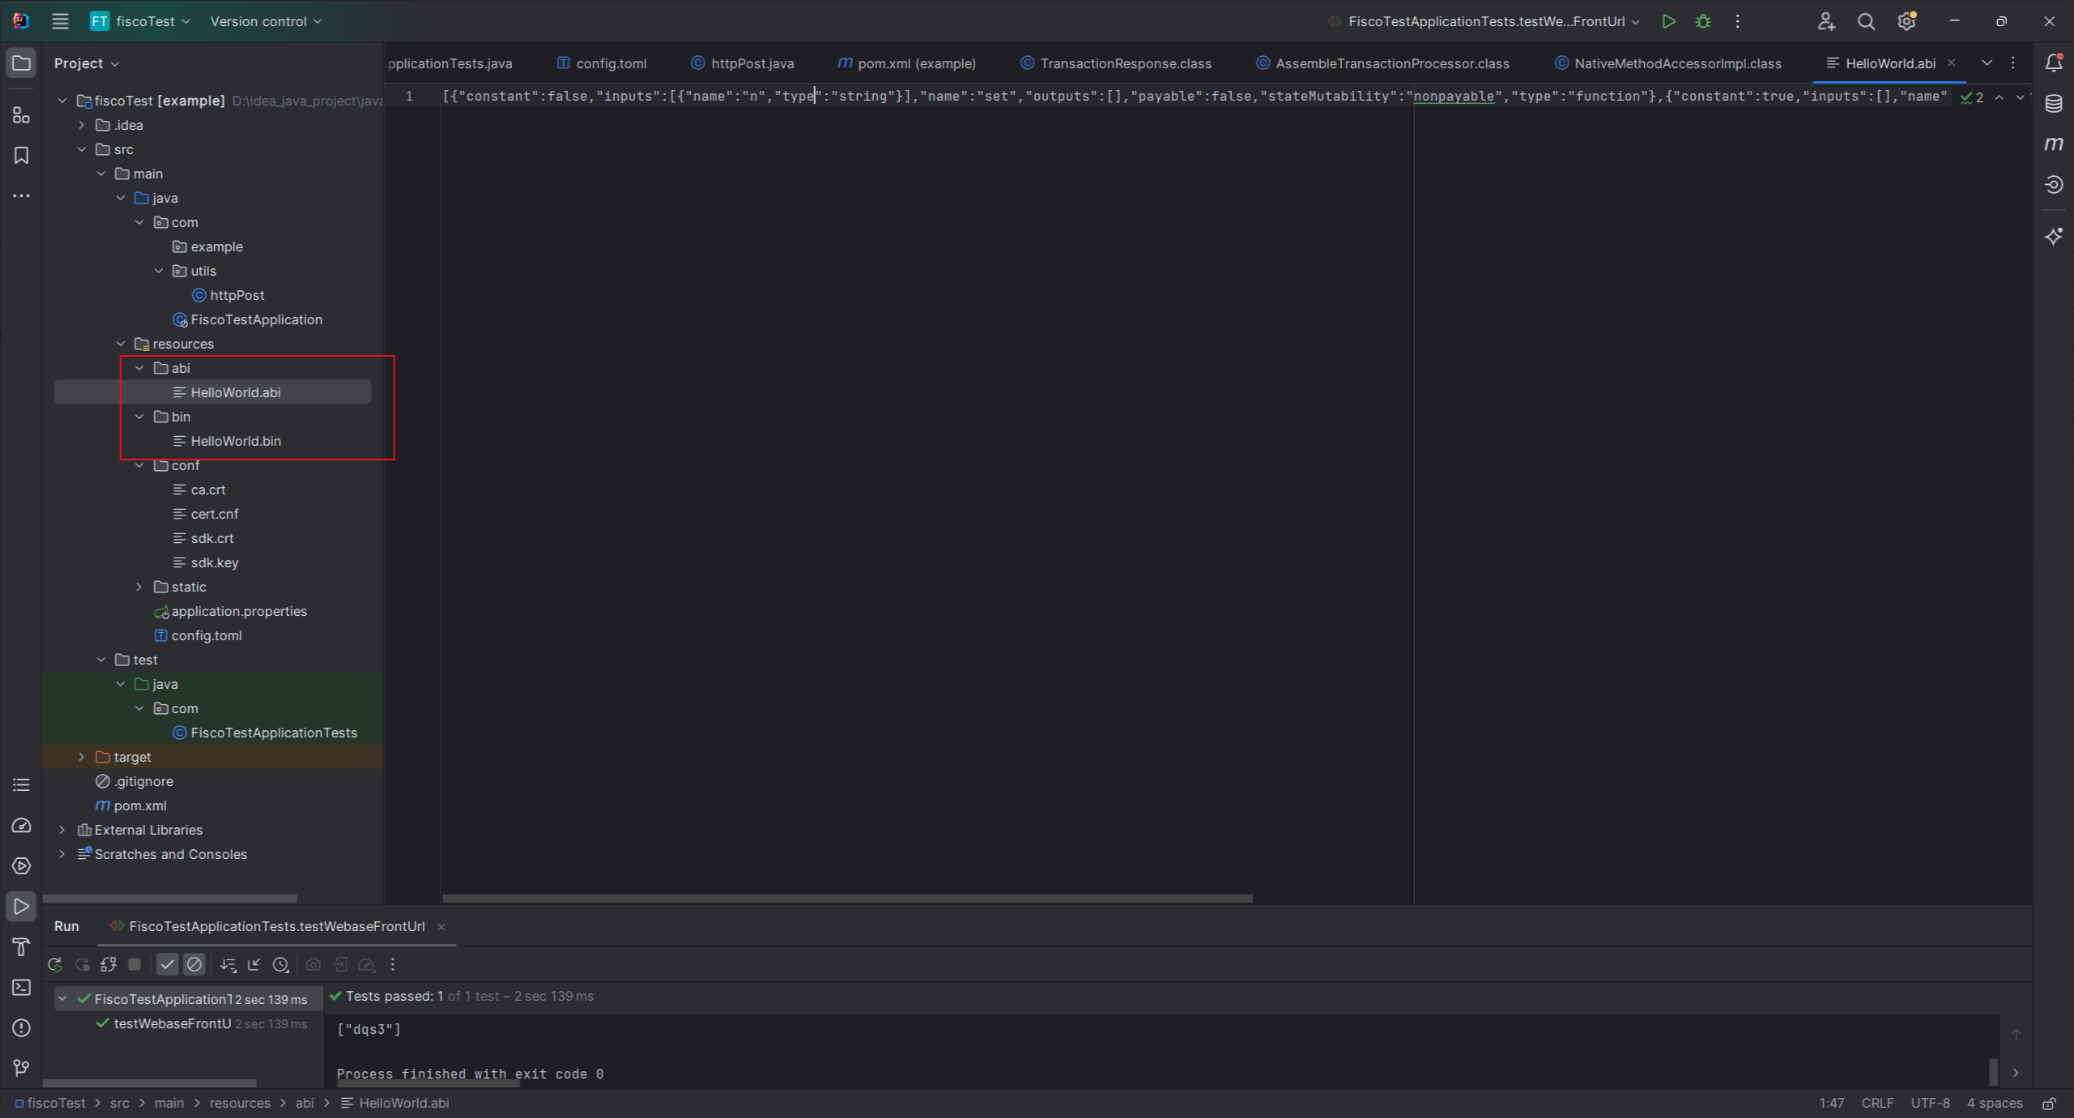
2.3 将合约的abi和bin文件填入进去

2.4 编写测试方法
引入依赖
     <!-- fisco bcos -->
        <dependency>
            <groupId>org.fisco-bcos.java-sdk</groupId>
            <artifactId>fisco-bcos-java-sdk</artifactId>
            <version>2.9.1</version>
        </dependency>
@SpringBootTest
class FiscoTestApplicationTests {
// 获取配置文件路径
public final String configFile = BcosSDK.class.getClassLoader().getResource("config.toml").getPath();
@Test
public void testClient() throws ConfigException {
// 初始化BcosSDK
BcosSDK sdk = BcosSDK.build(configFile);
System.out.println("初始化BcosSDK=============================");
// 为群组1初始化client
Client client = sdk.getClient(Integer.valueOf(1));
// 获取群组1的块高
BlockNumber blockNumber = client.getBlockNumber();
System.out.println("当前块高:"+blockNumber.getBlockNumber());
}
//基于合约abi、bin调用合约
@Test
public void testAbiAndBin() throws Exception {
// 初始化BcosSDK
BcosSDK sdk = BcosSDK.build(configFile);
// 为群组1初始化client
Client client = sdk.getClient(Integer.valueOf(1));
// 构造AssembleTransactionProcessor对象,需要传入client对象,CryptoKeyPair对象和abi、binary文件存放的路径。abi和binary文件需要在上一步复制到定义的文件夹中。
CryptoKeyPair keyPair = client.getCryptoSuite().createKeyPair();
// 构造AssembleTransactionProcessor对象
AssembleTransactionProcessor transactionProcessor = TransactionProcessorFactory.
createAssembleTransactionProcessor(client, keyPair, "src/main/resources/abi/", "src/main/resources/bin/");
// //部署合约
// TransactionResponse DeployResponse = transactionProcessor.deployByContractLoader("HelloWorld", new ArrayList<>());
//
// if (DeployResponse.getReceiptMessages().equals("Success")){
// System.out.println("部署成功,合约地址:"+DeployResponse.getContractAddress());
// }else{
// System.out.println(DeployResponse.getReceiptMessages());
// }
//调用set方法
// 创建调用交易函数的参数,此处为传入一个参数
ArrayList<Object> params = new ArrayList<>();
params.add("hello,csdn");
// 调用HelloWorld合约,合约地址为helloWorldAddress, 调用函数名为『set』,函数参数类型为param
TransactionResponse transactionResponse = transactionProcessor.
sendTransactionAndGetResponseByContractLoader("HelloWorld", CONTRACT_ADDRESS, "set", params);
if (transactionResponse.getReceiptMessages().equals("Success")){
System.out.println("调用set成功");
}else{
System.out.println("调用set失败:"+transactionResponse.getReceiptMessages());
}
//调用get方法
// CallResponse callResponse = transactionProcessor.sendCallByContractLoader("HelloWorld", CONTRACT_ADDRESS, "get", new ArrayList<>());
// System.out.println("调用合约查询接口sendCallByContractLoader,不发生交易:"+callResponse.getReturnObject());
TransactionResponse transactionResponse1 = transactionProcessor.
sendTransactionAndGetResponseByContractLoader("HelloWorld", CONTRACT_ADDRESS, "get", new ArrayList<>());
if (transactionResponse1.getReceiptMessages().equals("Success")){
List<Object> responseValue = transactionResponse1.getReturnObject();
System.out.println("调用get成功:"+responseValue);
}else{
System.out.println("调用get失败:"+transactionResponse1.getReceiptMessages());
}
}
}
TransactionResponse的数据结构如下:
-
returnCode: 返回的响应码。其中0为成功。
-
returnMessages: 返回的错误信息。
-
TransactionReceipt:上链返回的交易回执。
-
ContractAddress: 部署或调用的合约地址。
-
values: 如果调用的函数存在返回值,则返回解析后的交易返回值,返回Json格式的字符串。
-
events: 如果有触发日志记录,则返回解析后的日志返回值,返回Json格式的字符串。
-
receiptMessages: 返回解析后的交易回执信息。
更多推荐



 5
5 0
0- 0


 已为社区贡献1条内容

所有评论(0)