
zabbix监控Tongweb7企业版
此贴参考zabbix通过jmx监控Tongweb7企业版(by lqw),是在此帖子的基础和同事整理的文档基础上重新部署验证的优化版,使用的是centos7。
优点: 1.不需要通过jmx配置进行监控。(jmx配置需要修改tongweb的配置,并且zabbix还要安装zabbix-getaway进行识别,比较麻烦) 2.使用tongwbe自带的reset接口,这方面有对应的开发接口手册进行参考。
思路:zabbix可通过tongweb的reset接口获取相关信息,然后根据获取的json信息,提取出需要监控的数据。
一.安装部署zabbix
参考zabbix分布式平台
(1)安装 Zabbix 源
# 获取 zabbix 的下载源

rpm -ivh https://mirrors.aliyun.com/zabbix/zabbix/5.0/rhel/7/x86_64/zabbix-release-5.0-1.el7.noarch.rpm
# 更换 zabbix.repo 为阿里云

sed -i 's#http://repo.zabbix.com#https://mirrors.aliyun.com/zabbix#' /etc/yum.repos.d/zabbix.repo
# 清除yum缓存及创建缓存元数据

yum clean all && yum makecache
(2)安装 Zabbix服务端及mysql客户端
yum -y install zabbix-server-mysql zabbix-agent


yum install zabbix-server-mysql
(3)安装SCL(Software Collections),便于后续安装高版本的 php,默认 yum 安装的 php 版本为 5.4,版本过低,zabbix 5.0 版本对 php 版本最低要 7.2.0 版本。SCL 可以使得在同一台机器上使用多个版本的软件,而又不会影响整个系统的依赖环境。软件包会安装在 /opt/rh 目录下。
# 开启安装源

sed -i 's/enabled=0/enabled=1/' /etc/yum.repos.d/zabbix.repo


yum install -y zabbix-web-mysql-scl zabbix-apache-conf-scl
如果有下图的报错:
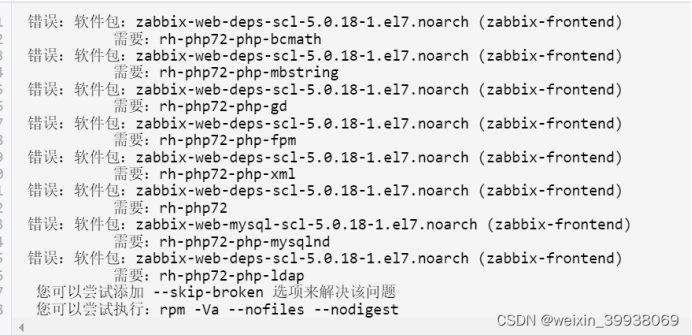
根据错误提示,需要安装高版本的php,解决方法是安装 Software Collections,再去安装SCL
# yum install centos-release-scl -y


# yum install zabbix-web-mysql-scl zabbix-apache-conf-scl
4)安装 zbbix 所需的数据库
yum -y install mariadb-server mariadb

systemctl enable --now mariadb
# 初始化数据数据库,并设置密码,如 123123

mysql_secure_installation
初始化数据库的时候,第一个按回车
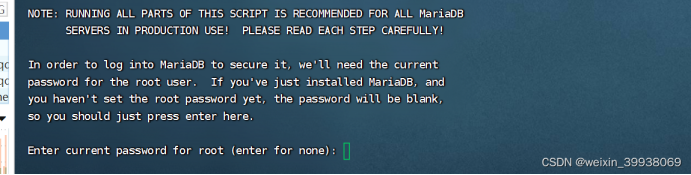
第二个输y
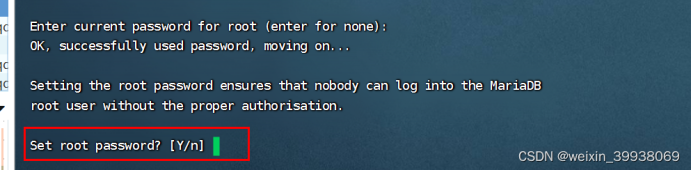
输入新密码,这里用的123123,需要输入两次,然后提示成功:
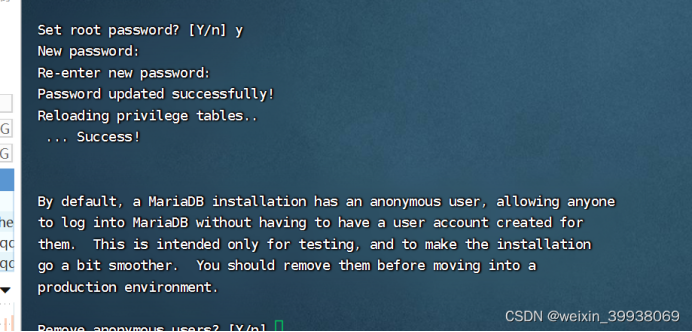
由于是本地测试,剩余的一直输入n
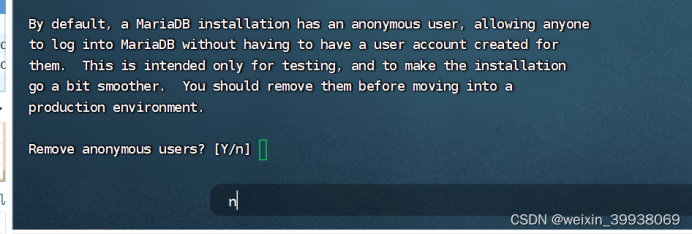
5)添加数据库用户以及 zabbix 所需的数据库信息
# 登录数据库

mysql -u root -p123123
# 创建zabbix数据库并设置编码为utf-8

create database zabbix character set utf8 collate utf8_bin;
# 给用户赋权

grant all on zabbix.* to 'zabbix'@'%' identified by 'zabbix';


CREATE USER 'zabbix'@'localhost' IDENTIFIED BY 'zabbix';

GRANT ALL PRIVILEGES ON zabbix.* TO 'zabbix'@'localhost';
# 刷新

flush privileges;
# 退出数据库界面

\q
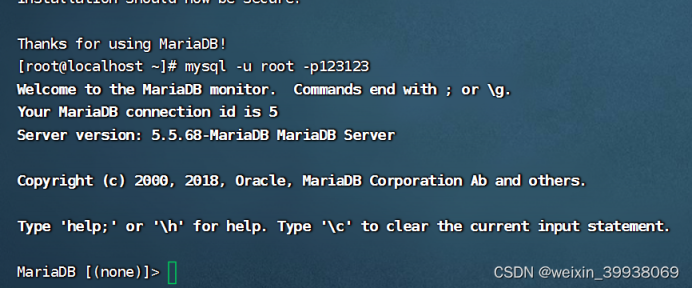
导入数据库信息(注意查到sql文件路径后要对比和替换掉,不然会报错)
# 查询sql文件的位置

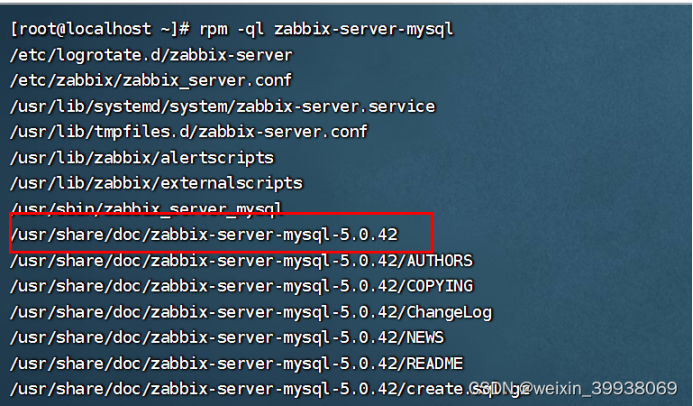
rpm -ql zabbix-server-mysql
# 导入数据库信息

zcat /usr/share/doc/zabbix-server-mysql-5.0.42/create.sql.gz | mysql -u root -p123123 zabbix
如下图所示,通过rpm -ql zabbix-server-mysql可以看到用的版本是5.0.42,所以导入数据库信息的时候,mysql-xxx这里得调整到对应版本,例如zcat /usr/share/doc/zabbix-server-mysql-5.0.42/create.sql.gz | mysql -u root -p123123 zabbix:
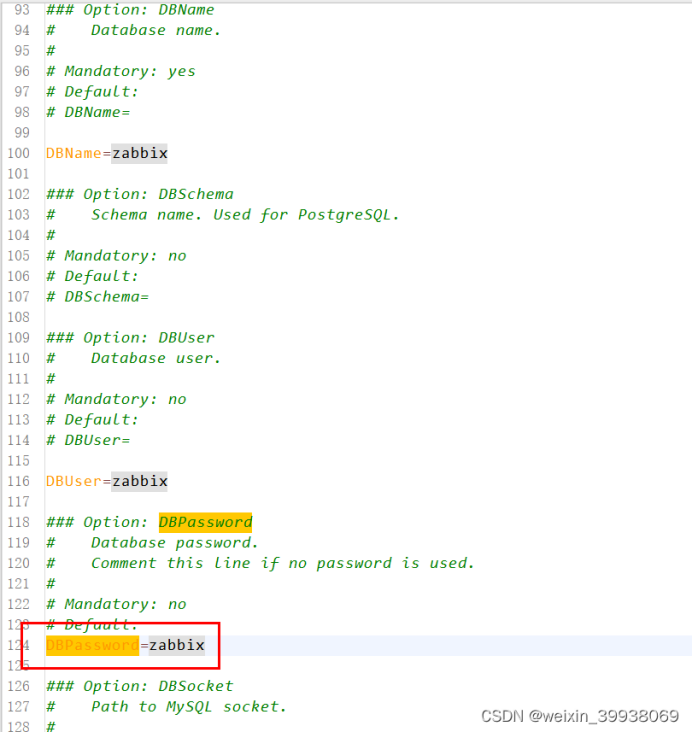
server 配置文件,修改数据库密码
vi /etc/zabbix/zabbix_server.conf
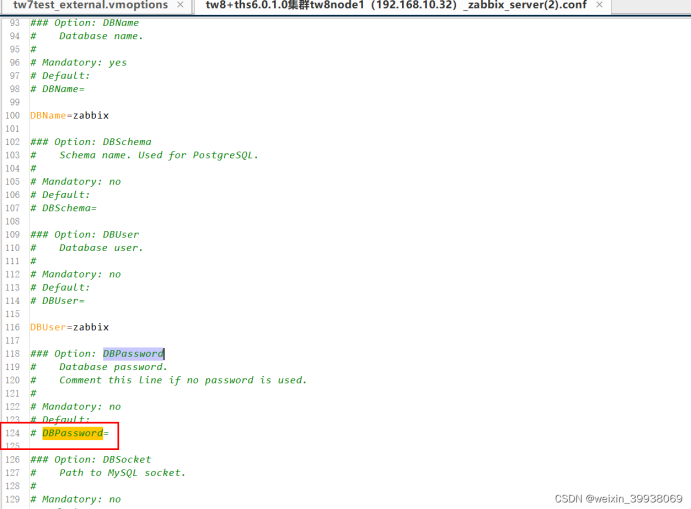
把注释去掉,配成下图所示:
zabbix 的 php 配置文件
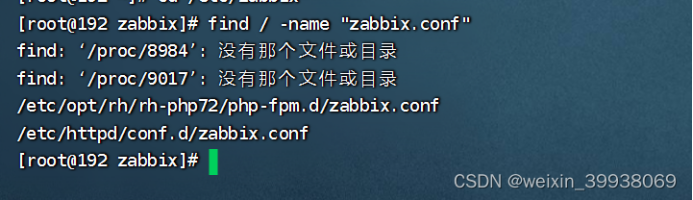
# 找到对应的zabbix.conf文件

find / -name "zabbix.conf"
# 修改下述文件

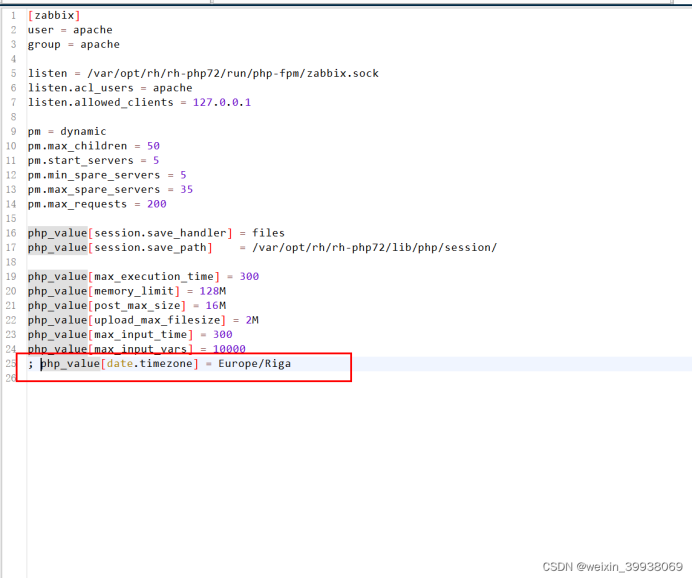
vim /etc/opt/rh/rh-php72/php-fpm.d/zabbix.conf
# 25行,取消;号,修改时区

php_value[date.timezone] = Asia/Shanghai
(9)赋权,然后启动 zabbix 相关服务
sudo chown zabbix:zabbix /var/run/zabbix

sudo chmod 755 /var/run/zabbix

systemctl restart zabbix-server zabbix-agent httpd rh-php72-php-fpm

systemctl enable zabbix-server zabbix-agent httpd rh-php72-php-fpm
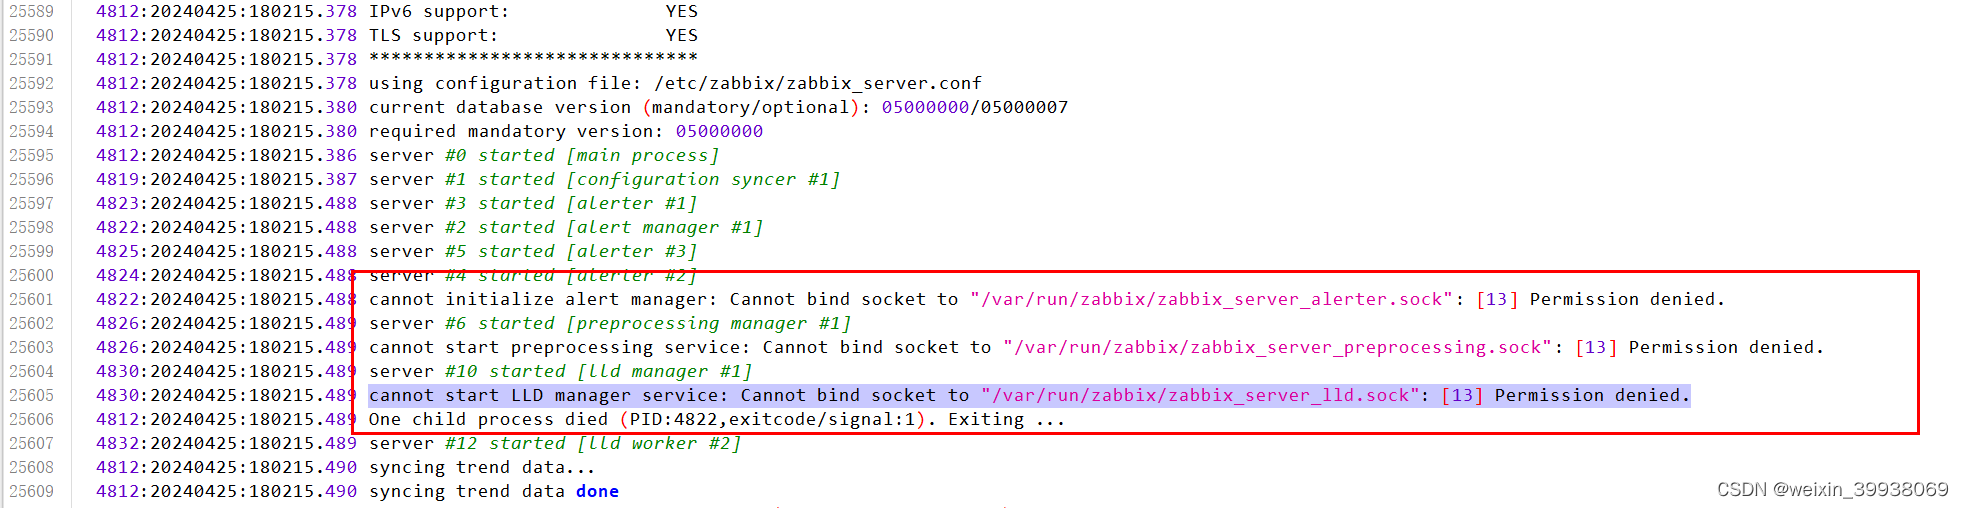
查看日志
cat /var/log/zabbix/zabbix_server.log

journalctl -xe
如果有下图的提示,关闭防火墙和修改SELINUX=disabled修改配置文件永久关闭(修改后需要reboot)
setenforce 0 && sed -i 's/^SELINUX=.*/SELINUX=disabled/' /etc/selinux/config
访问服务器ip/zabbix,直接點nextstep
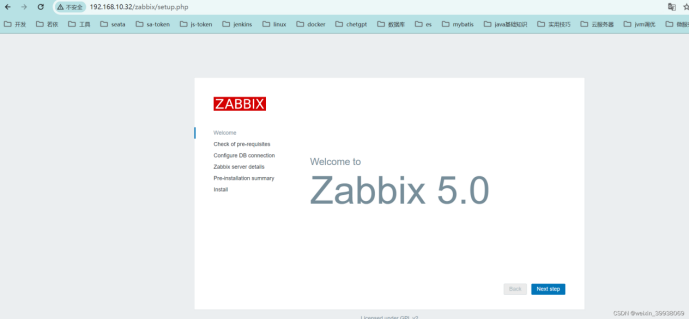
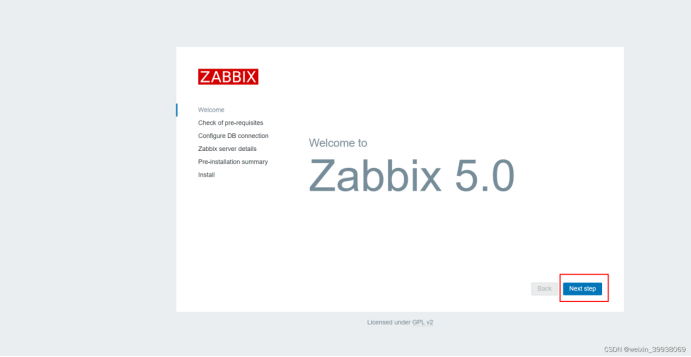
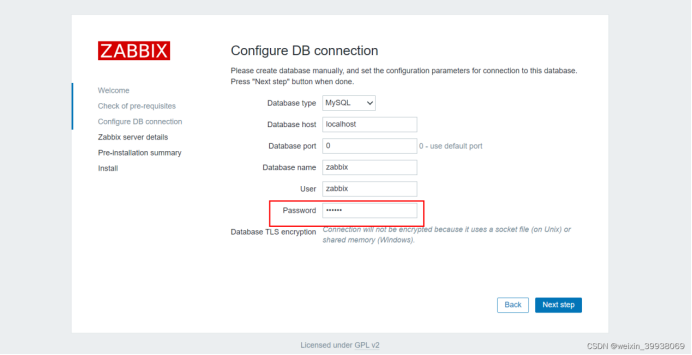
输入zabbix,然后next:
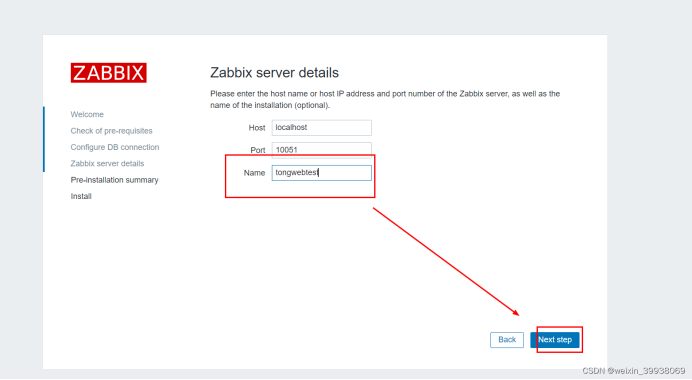
输入名称,其他别动,next
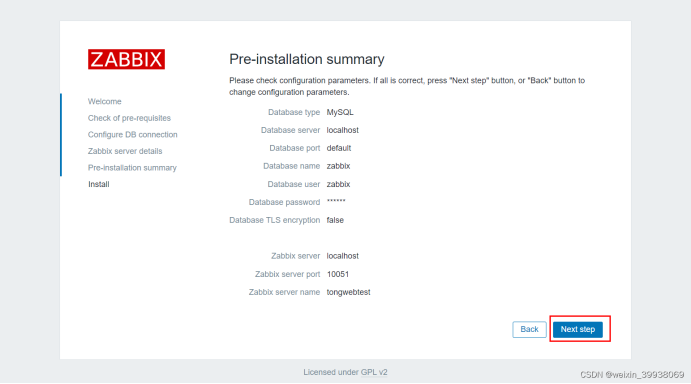
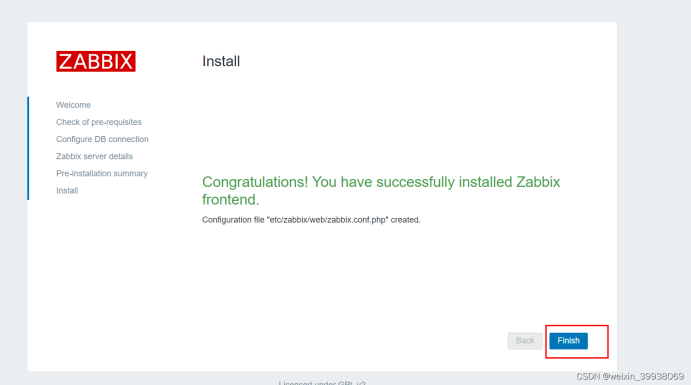
账号:Admin
密码:zabbix
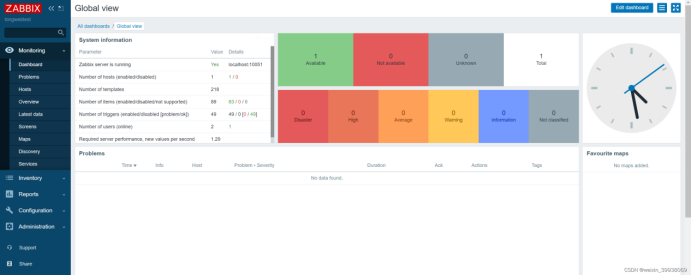
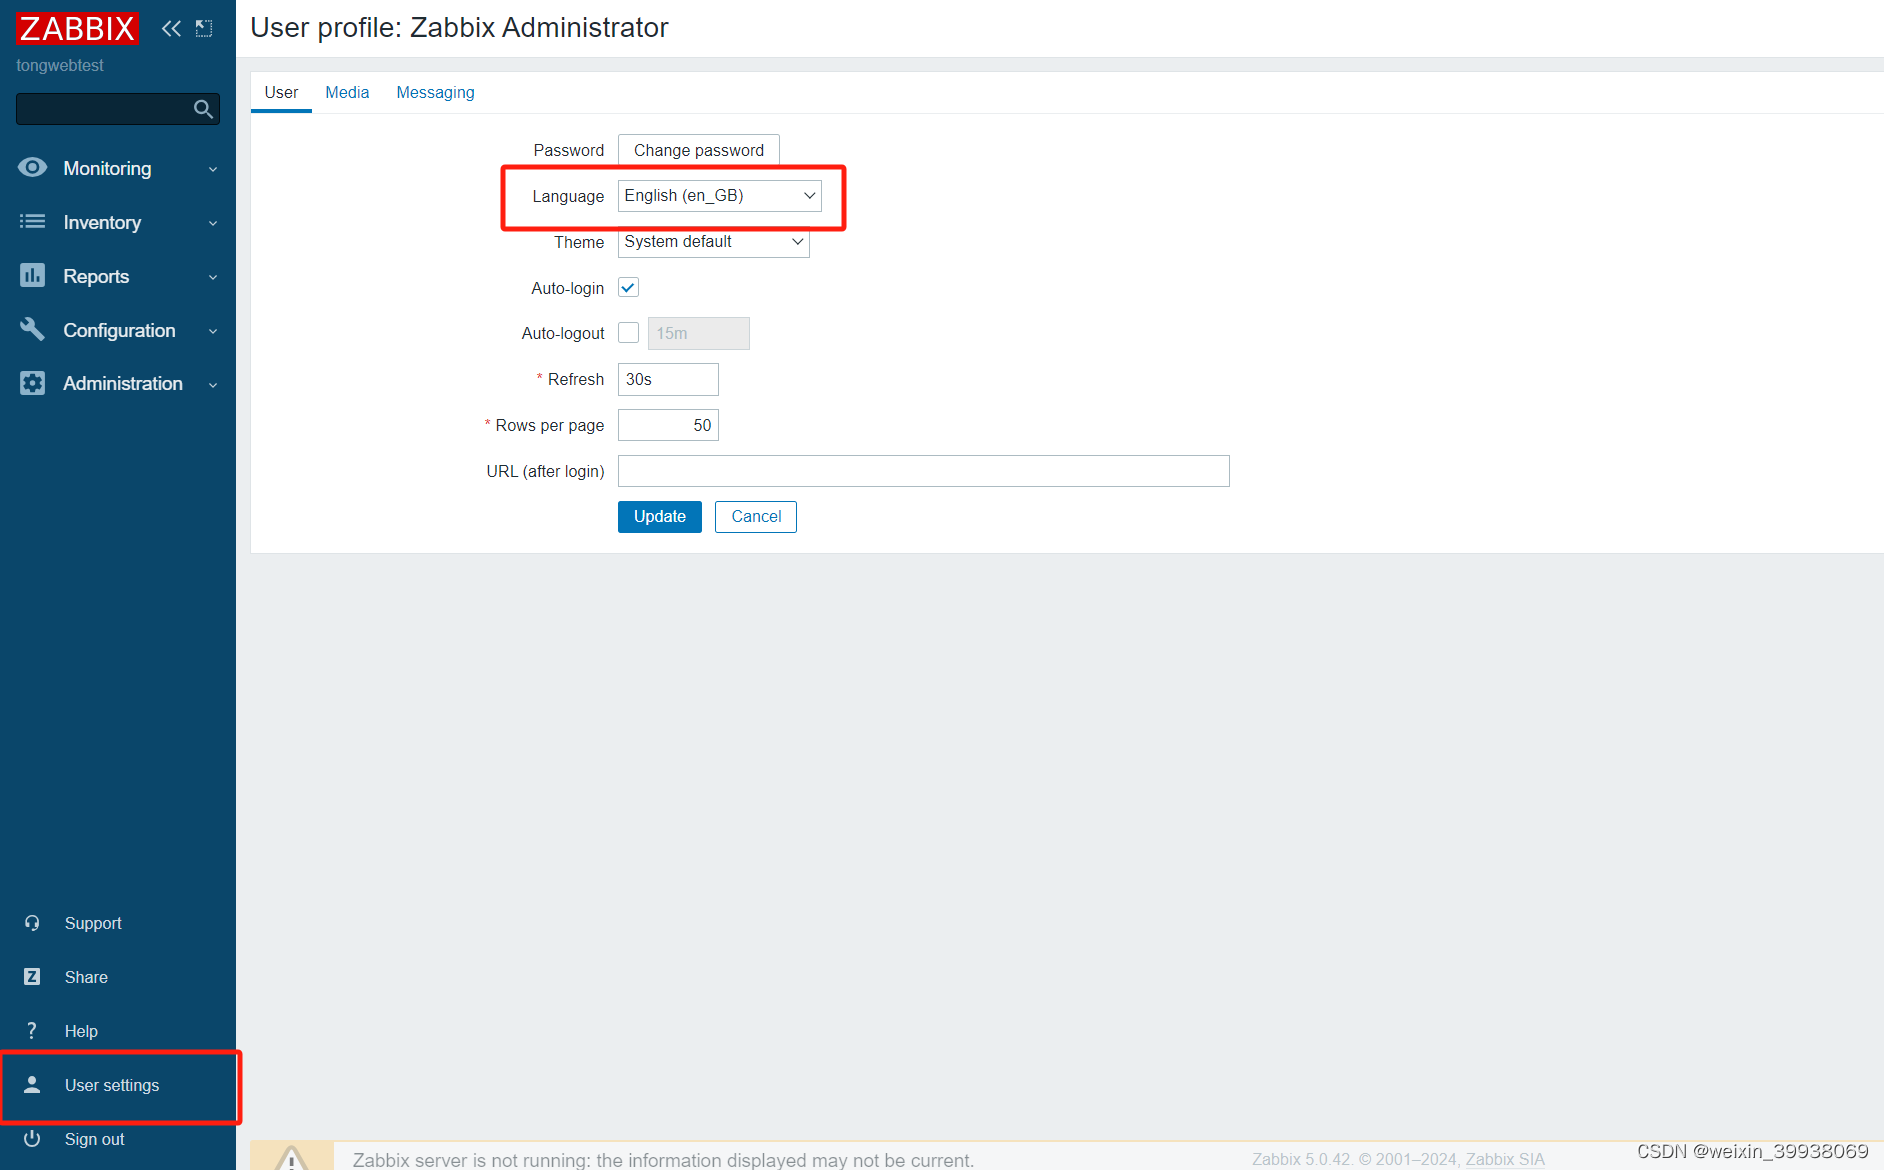
切换中文
二、创建主机
由于我们要监控的是tongweb,而不是zabbix,所以需要先创建主机:
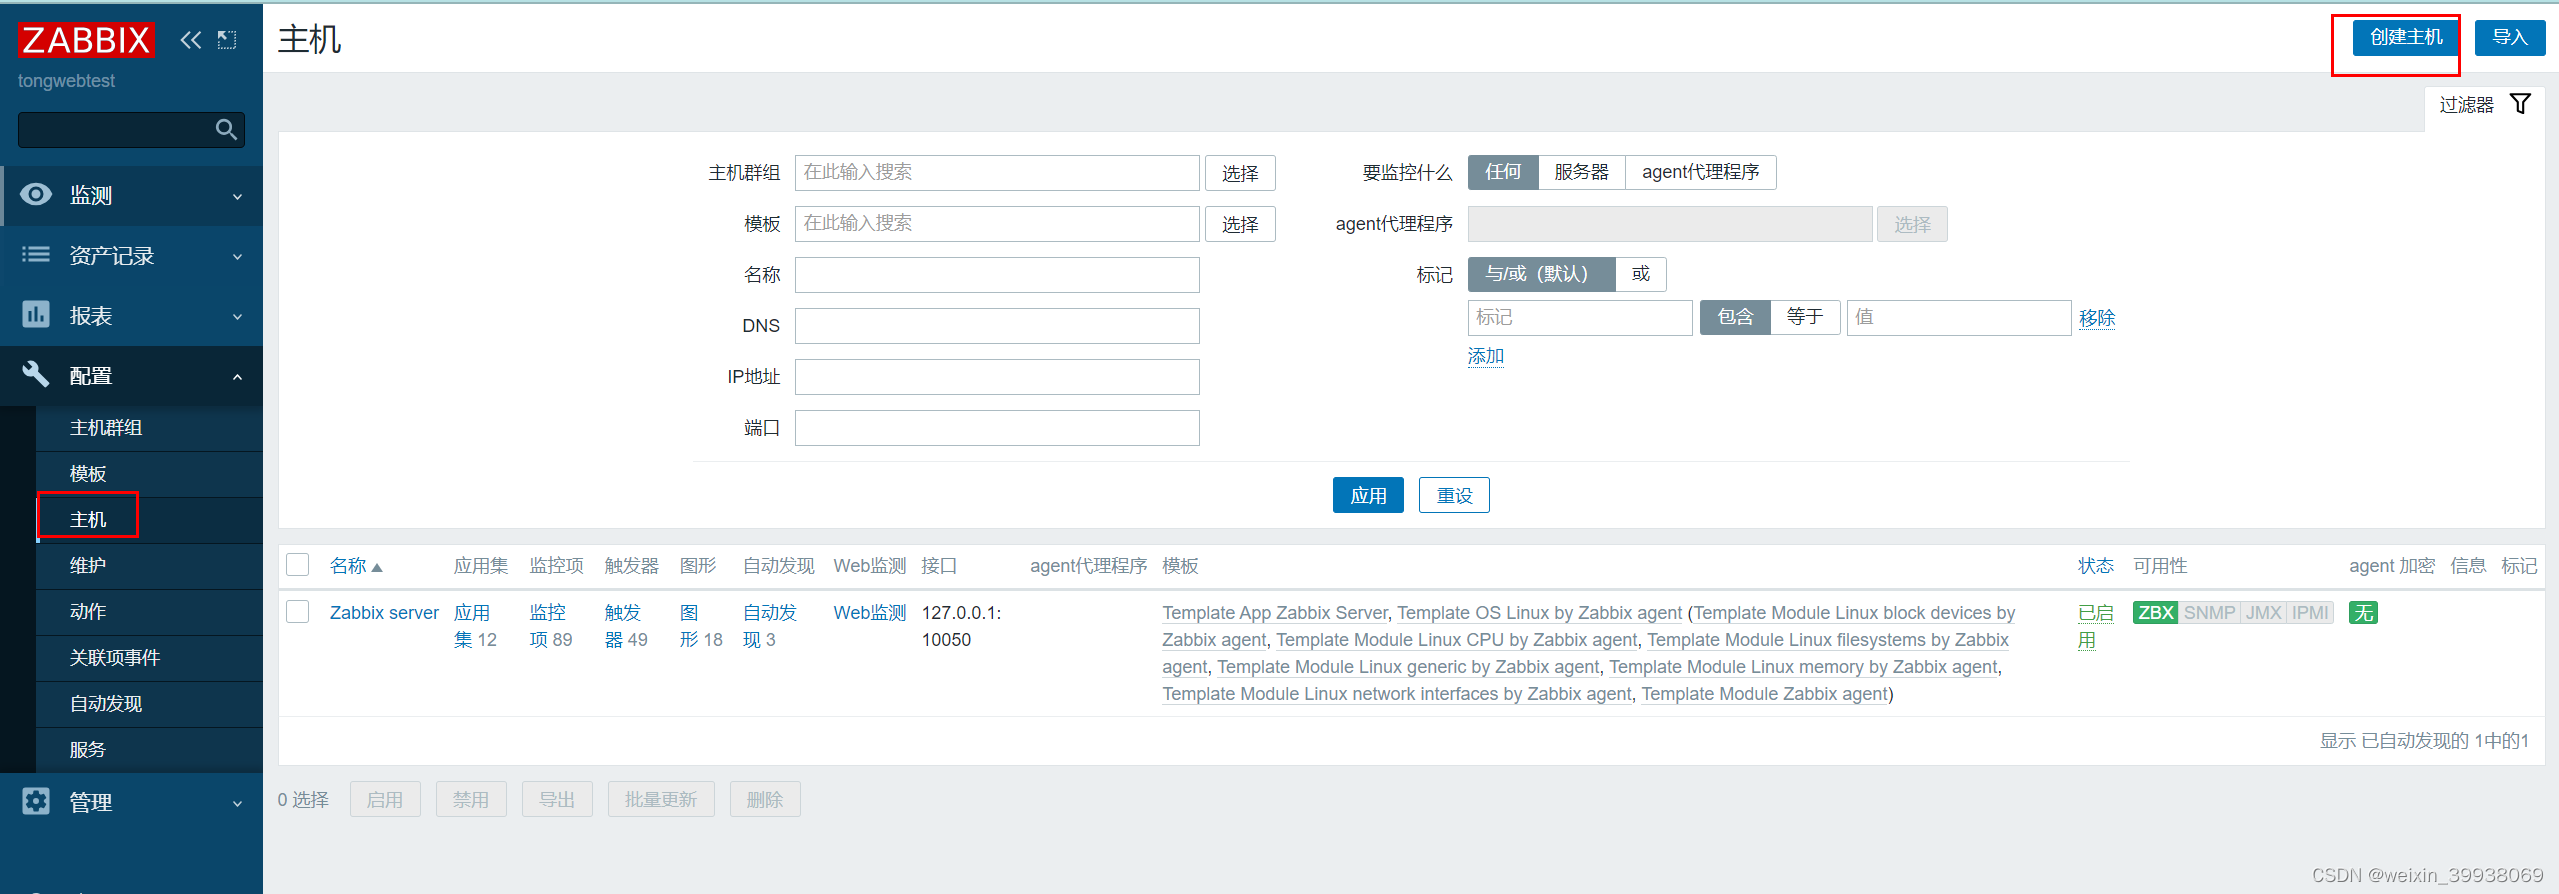
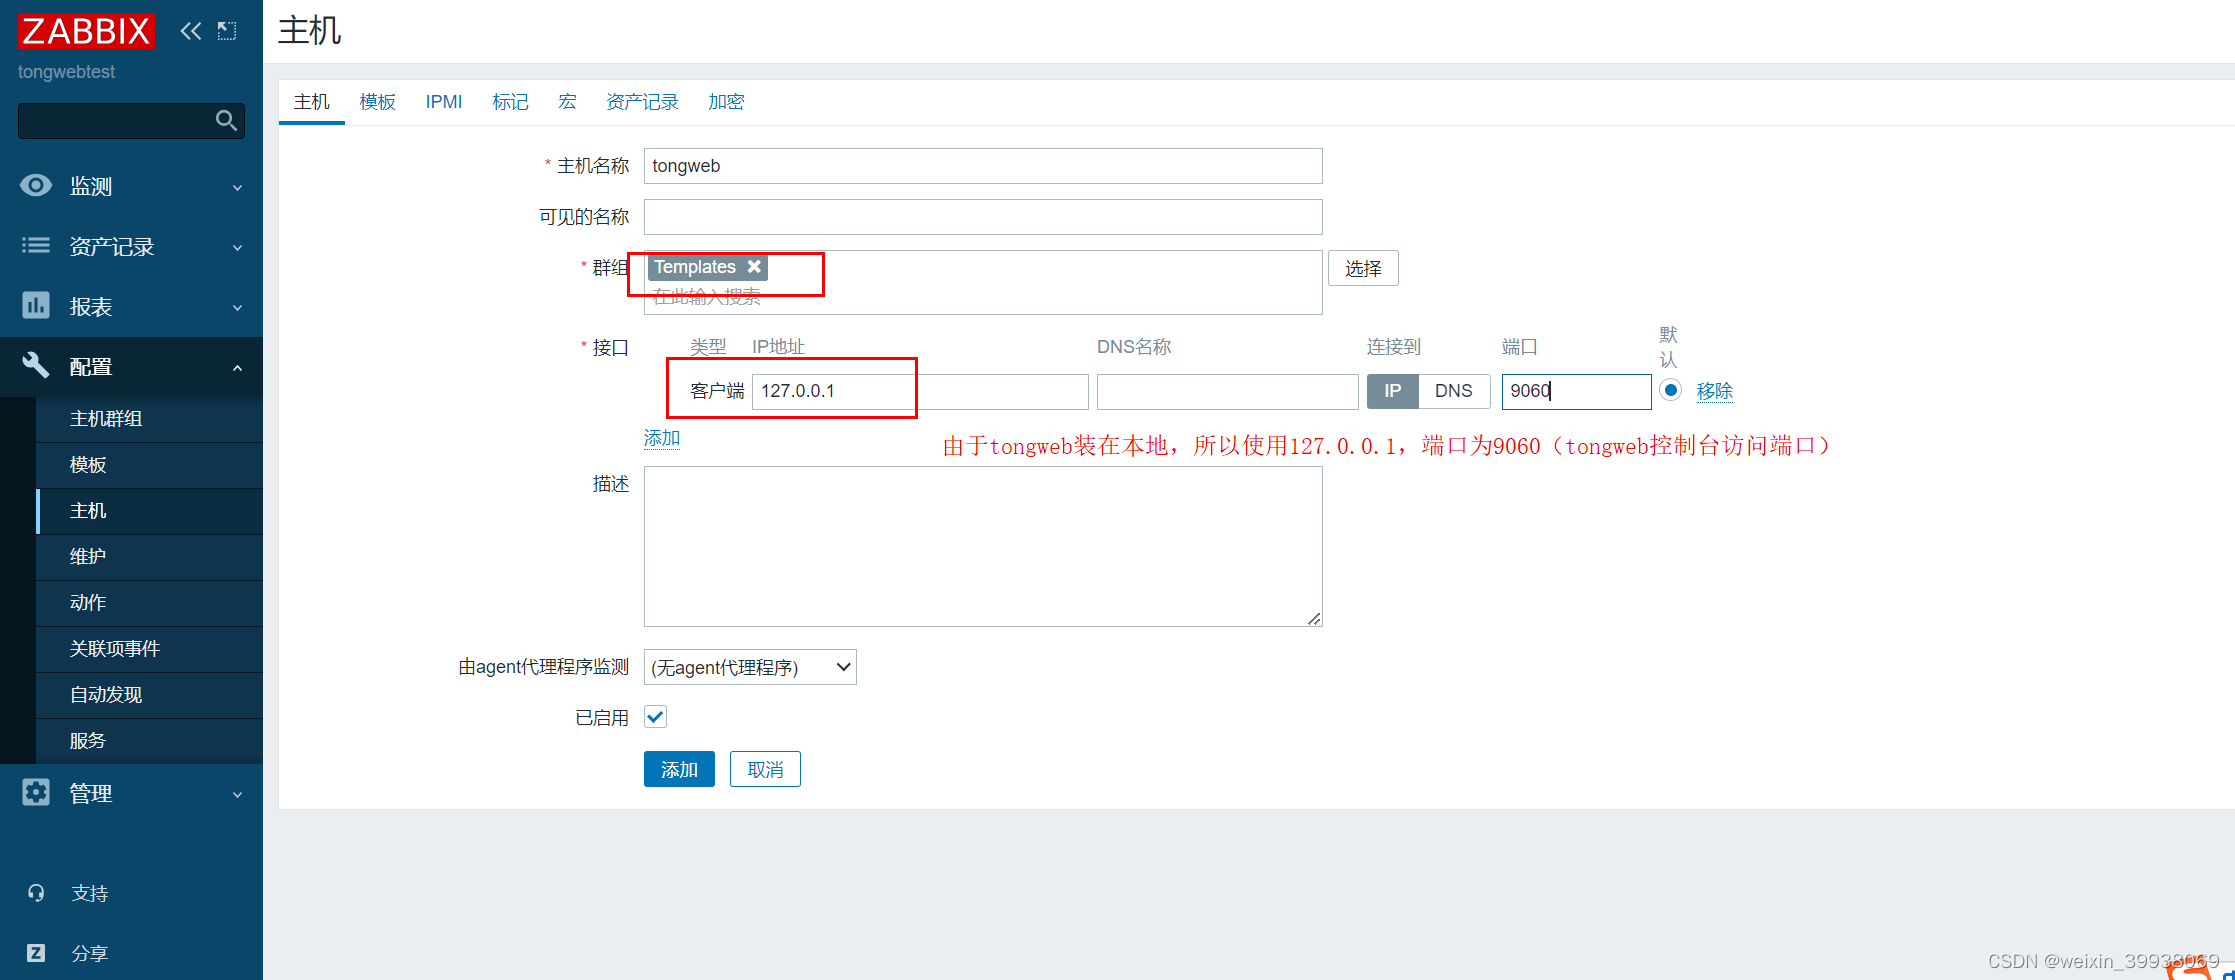
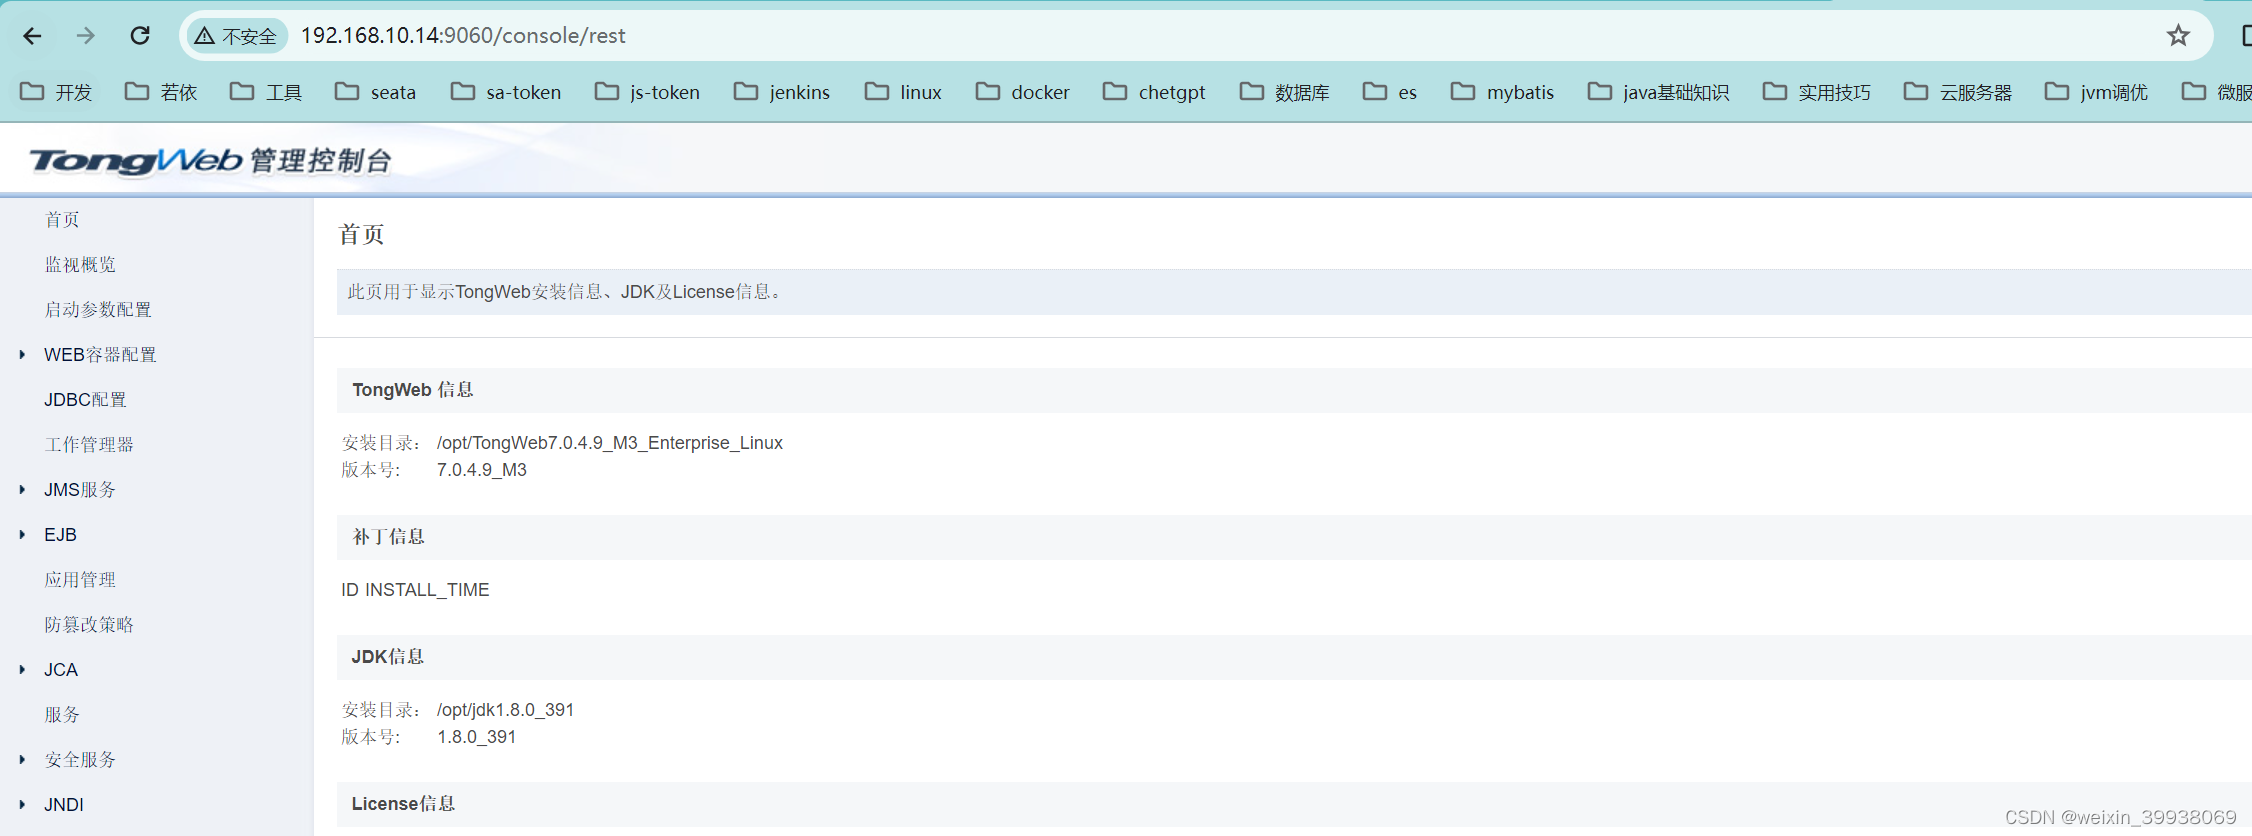
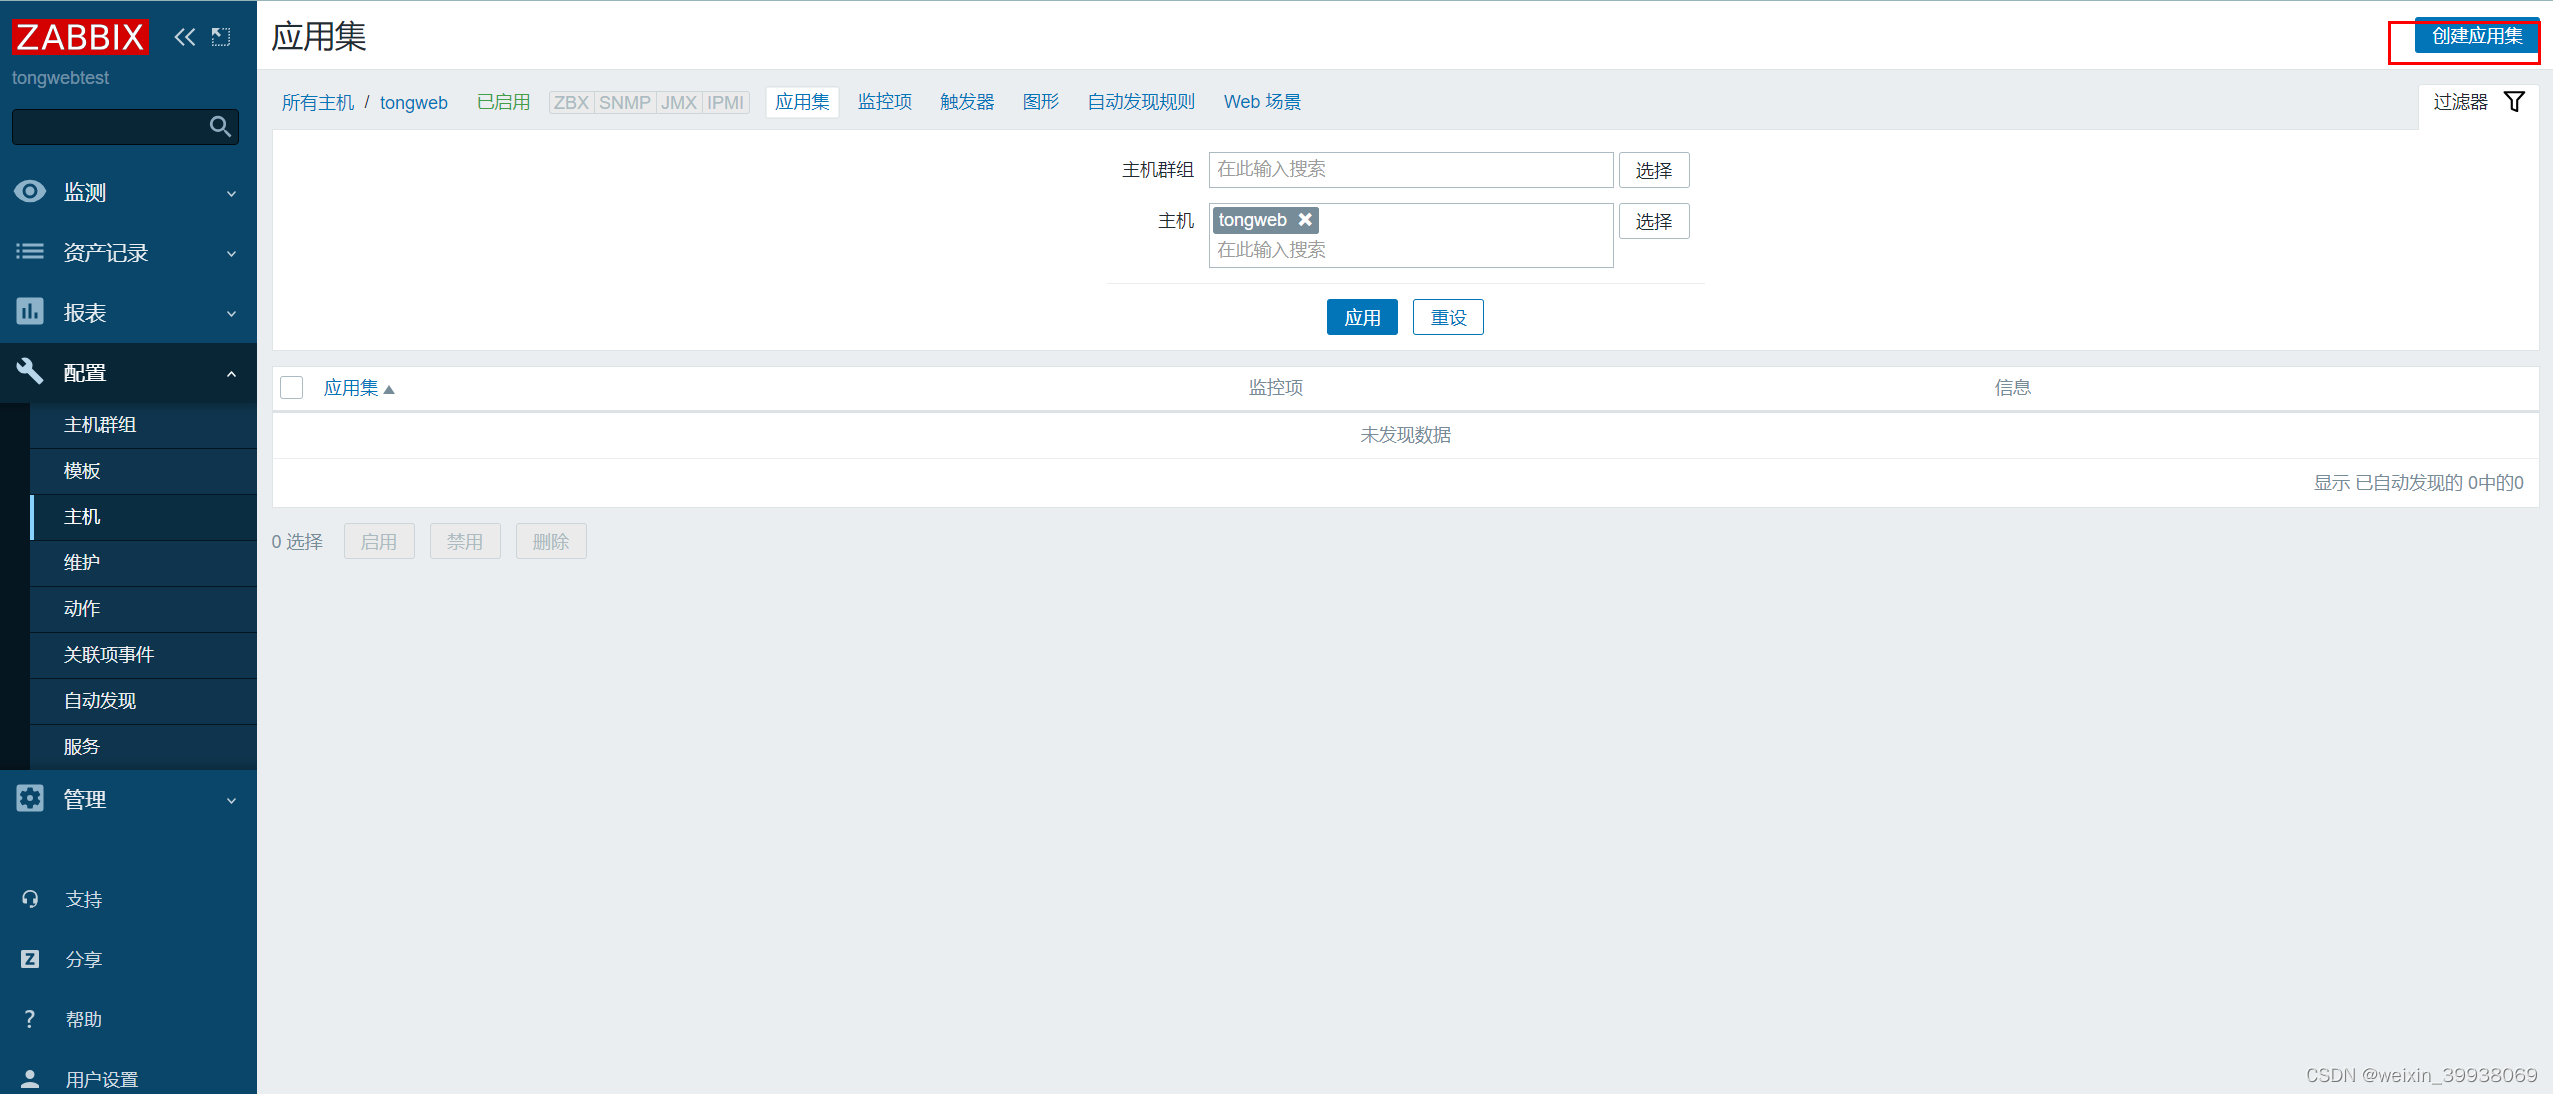
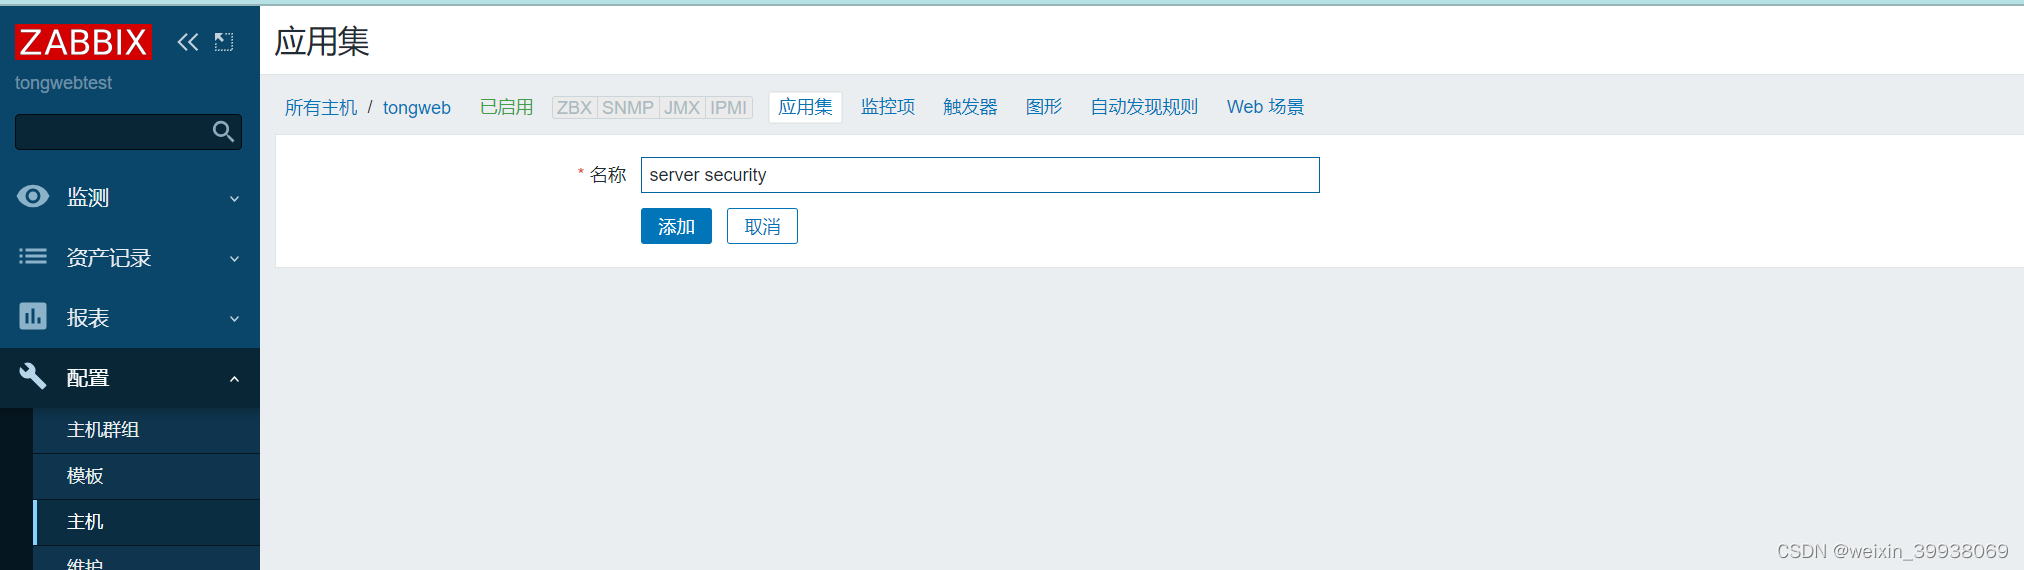
三、创建应用集
点击应用集
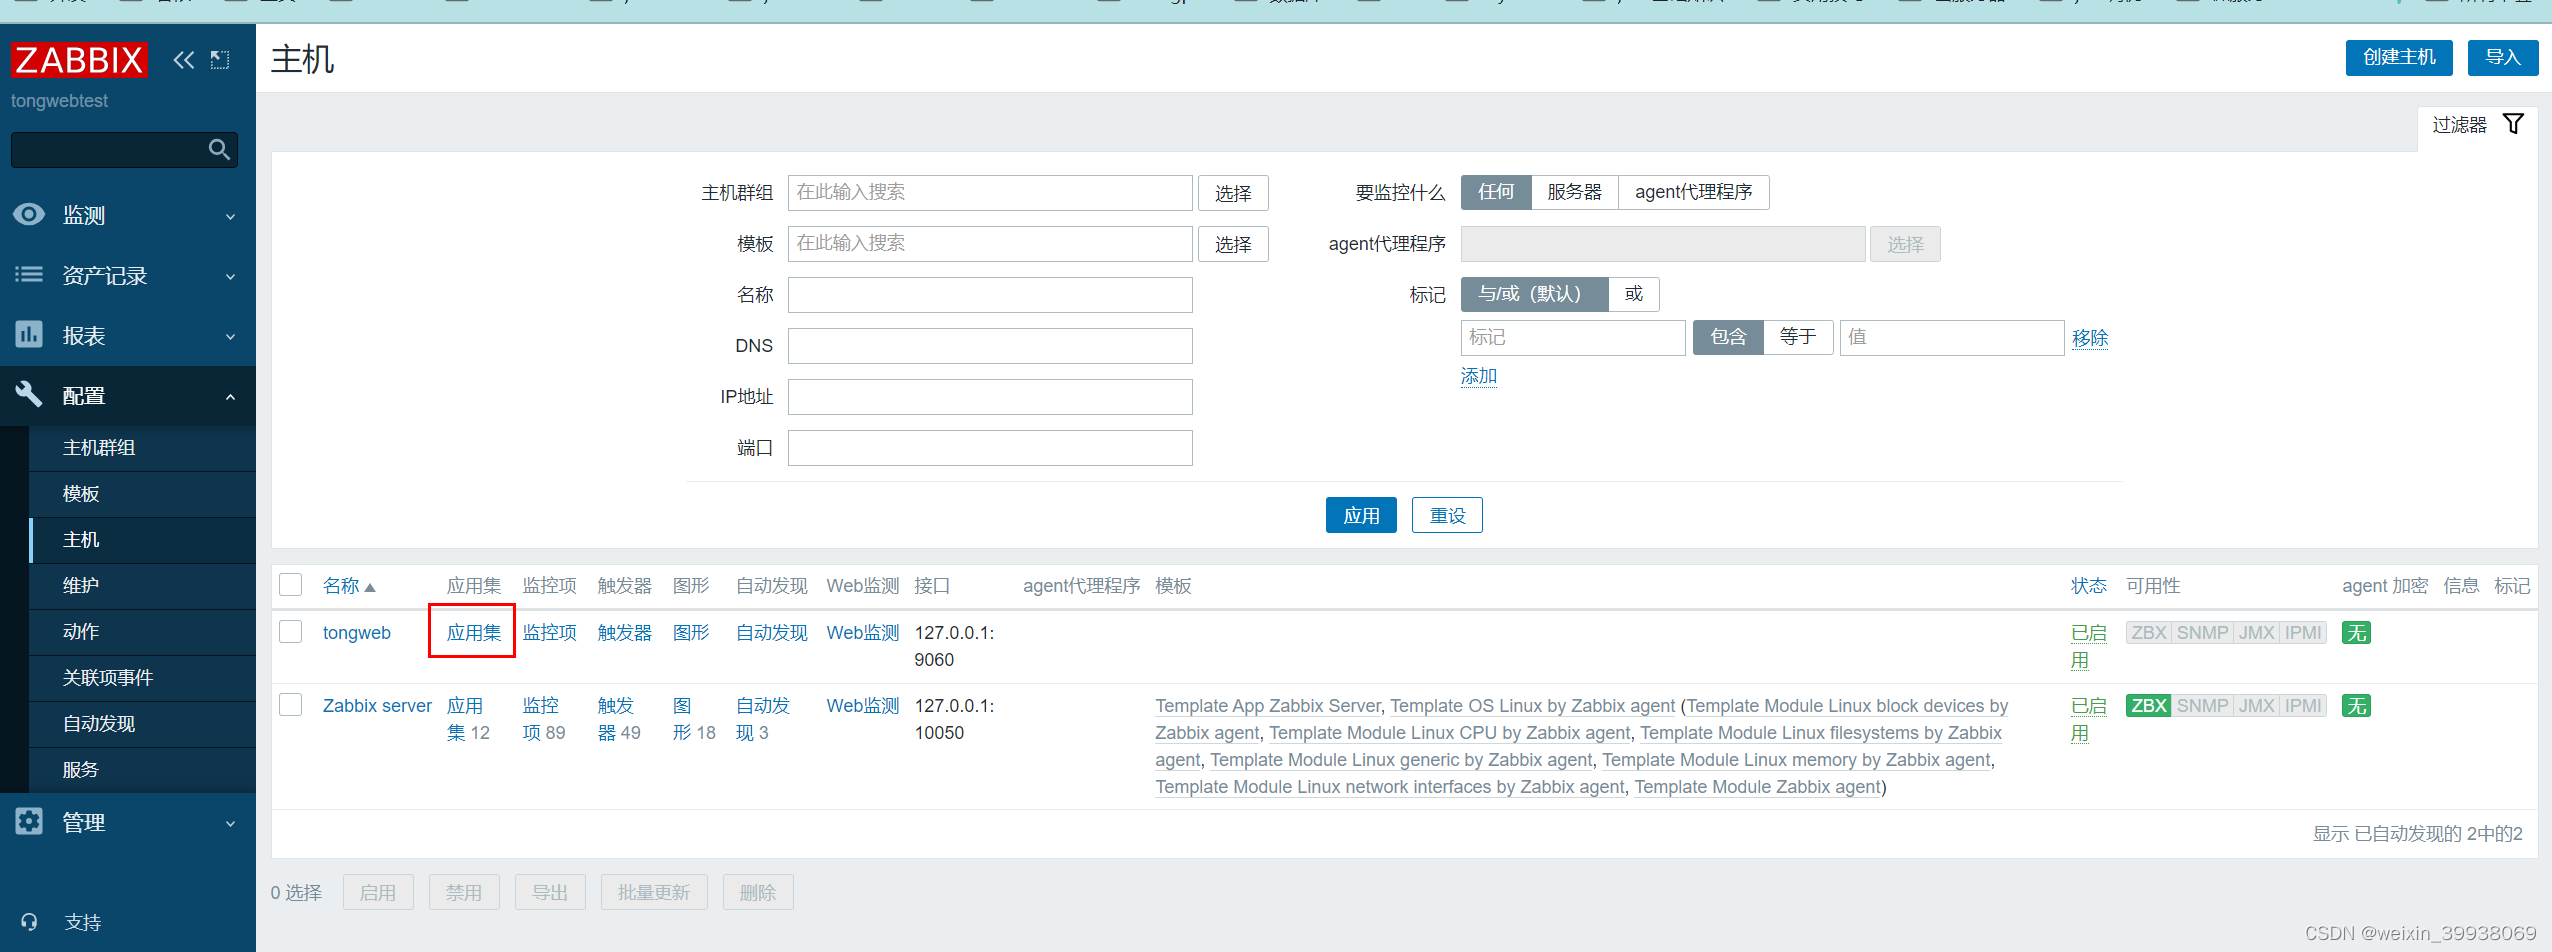
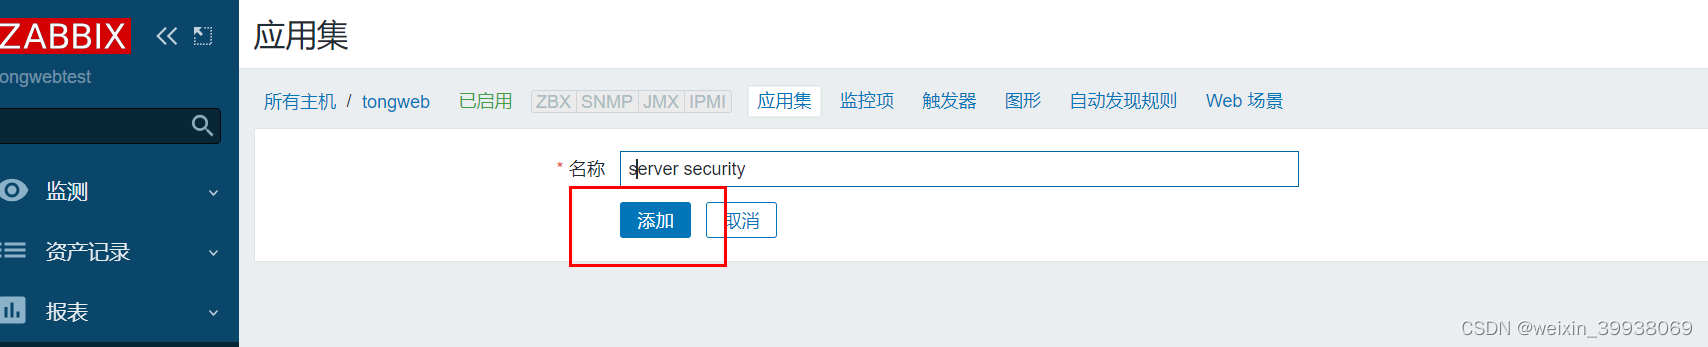
点击创建应用集
四、创建和导入模版
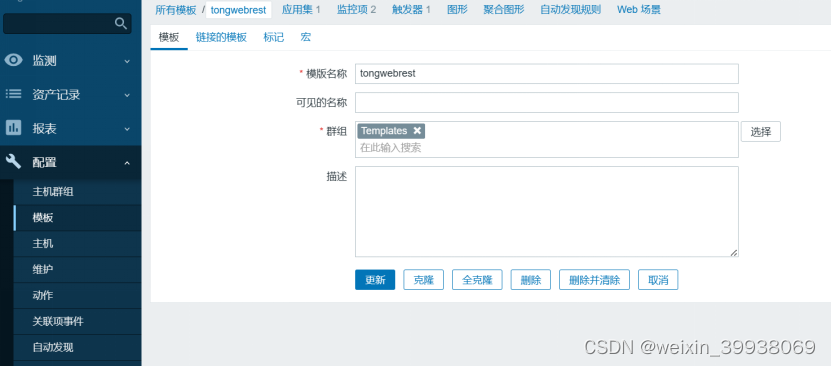
点击模版,创建模版
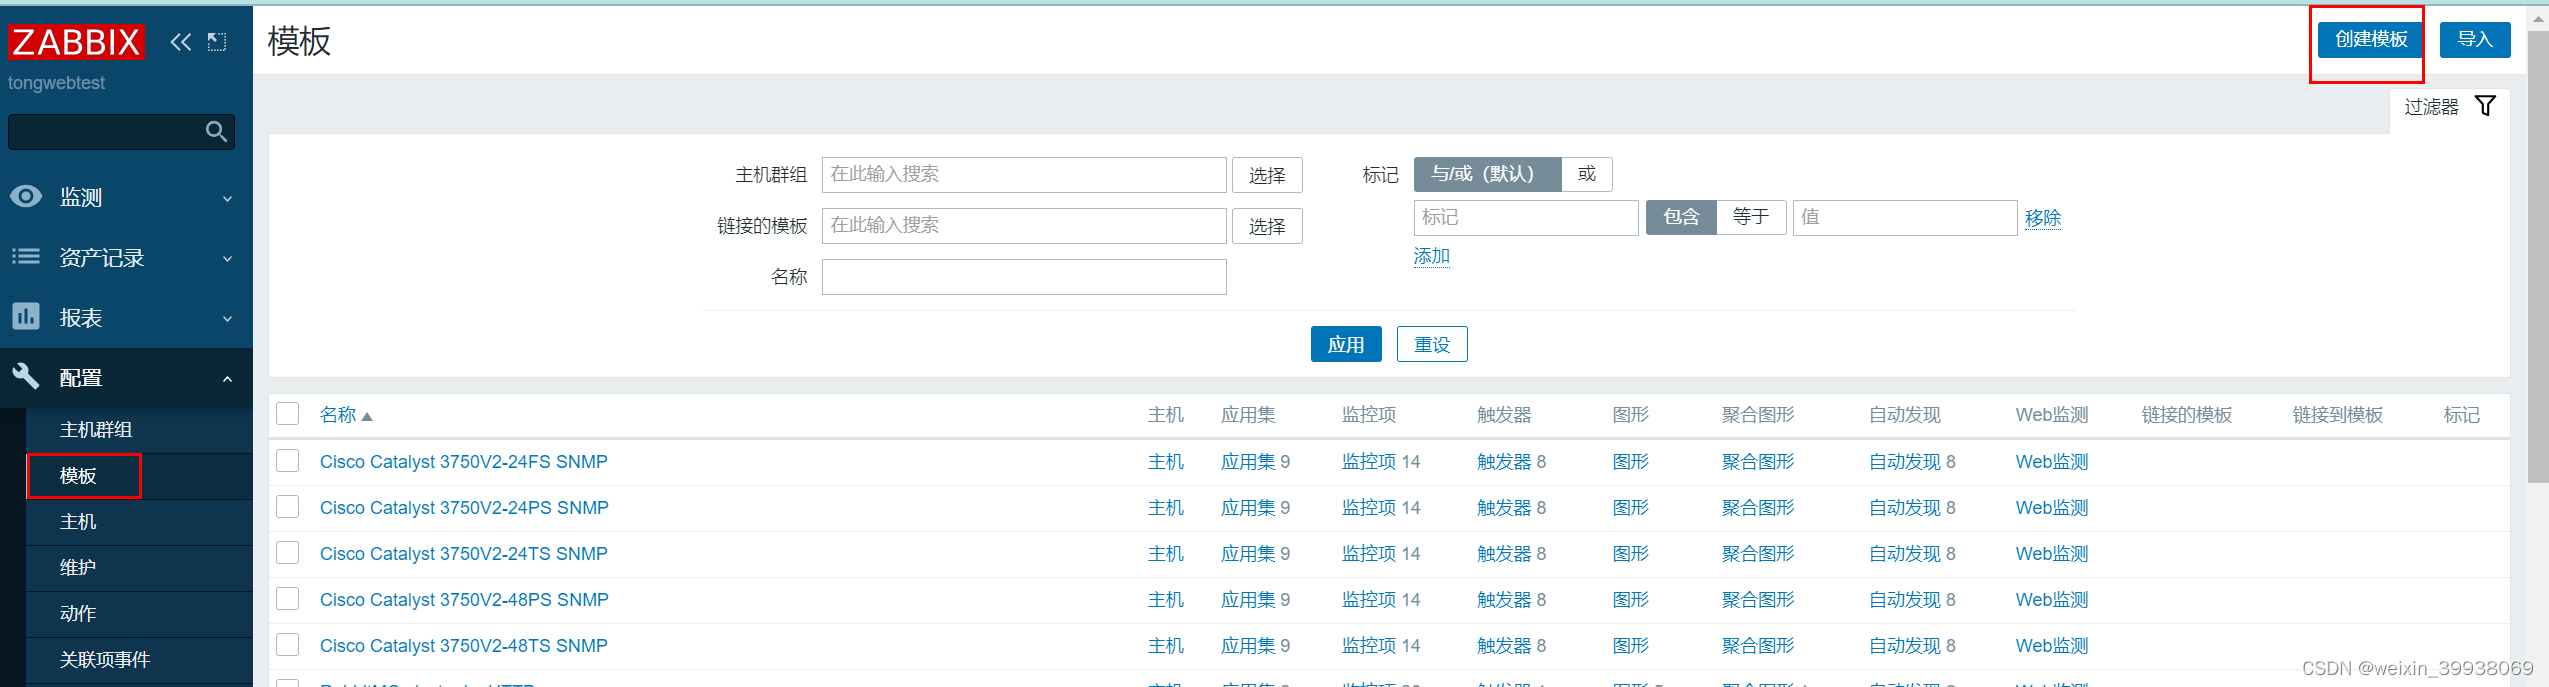
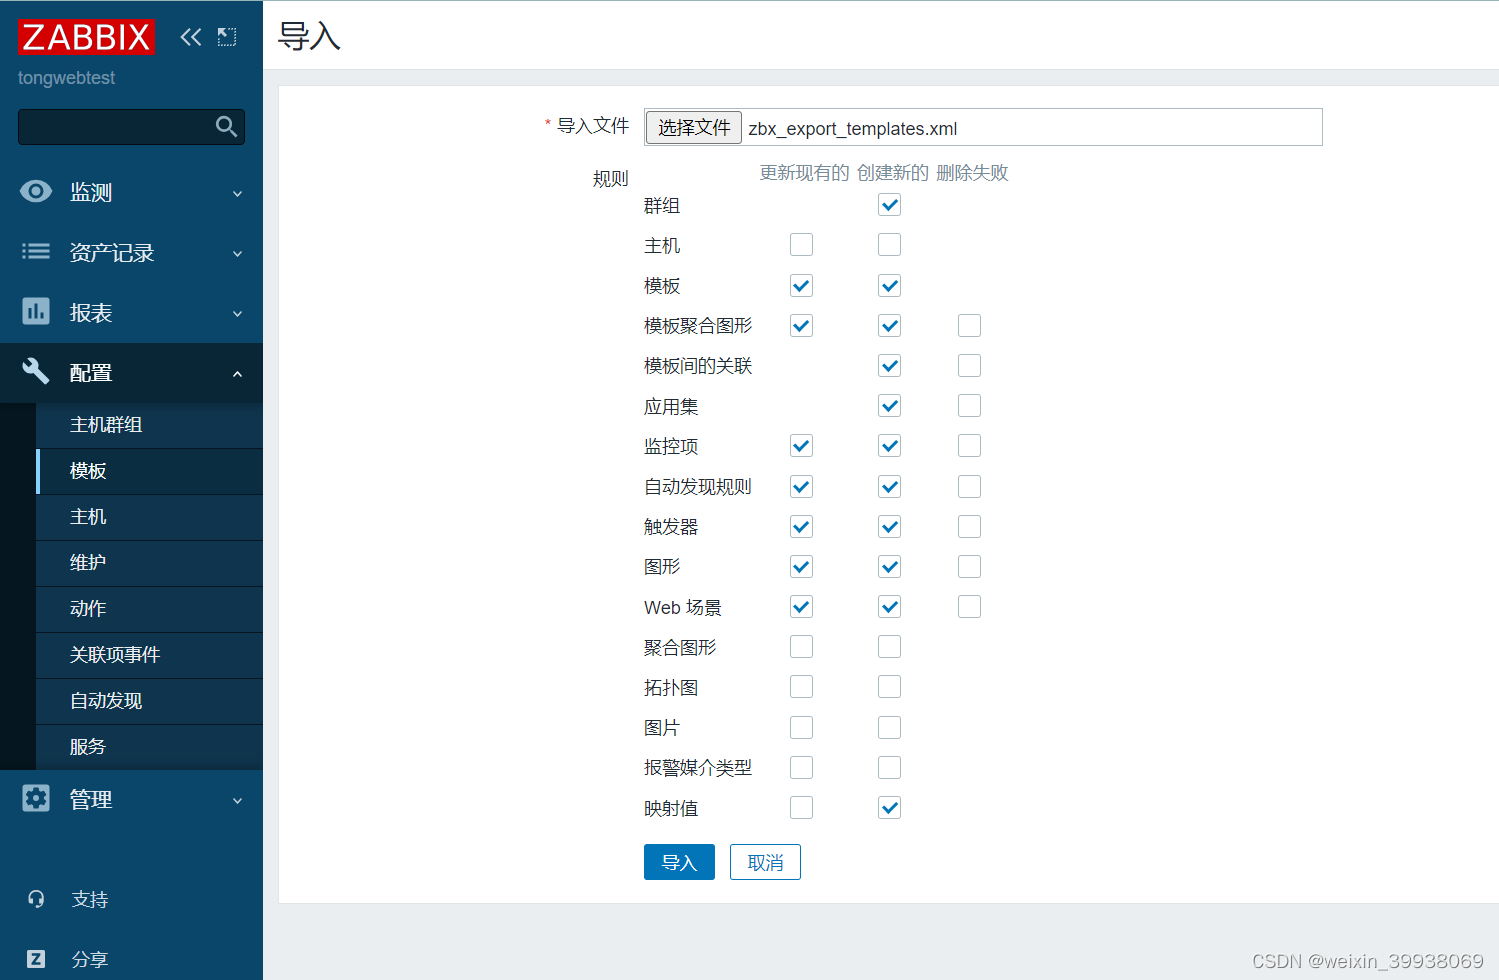
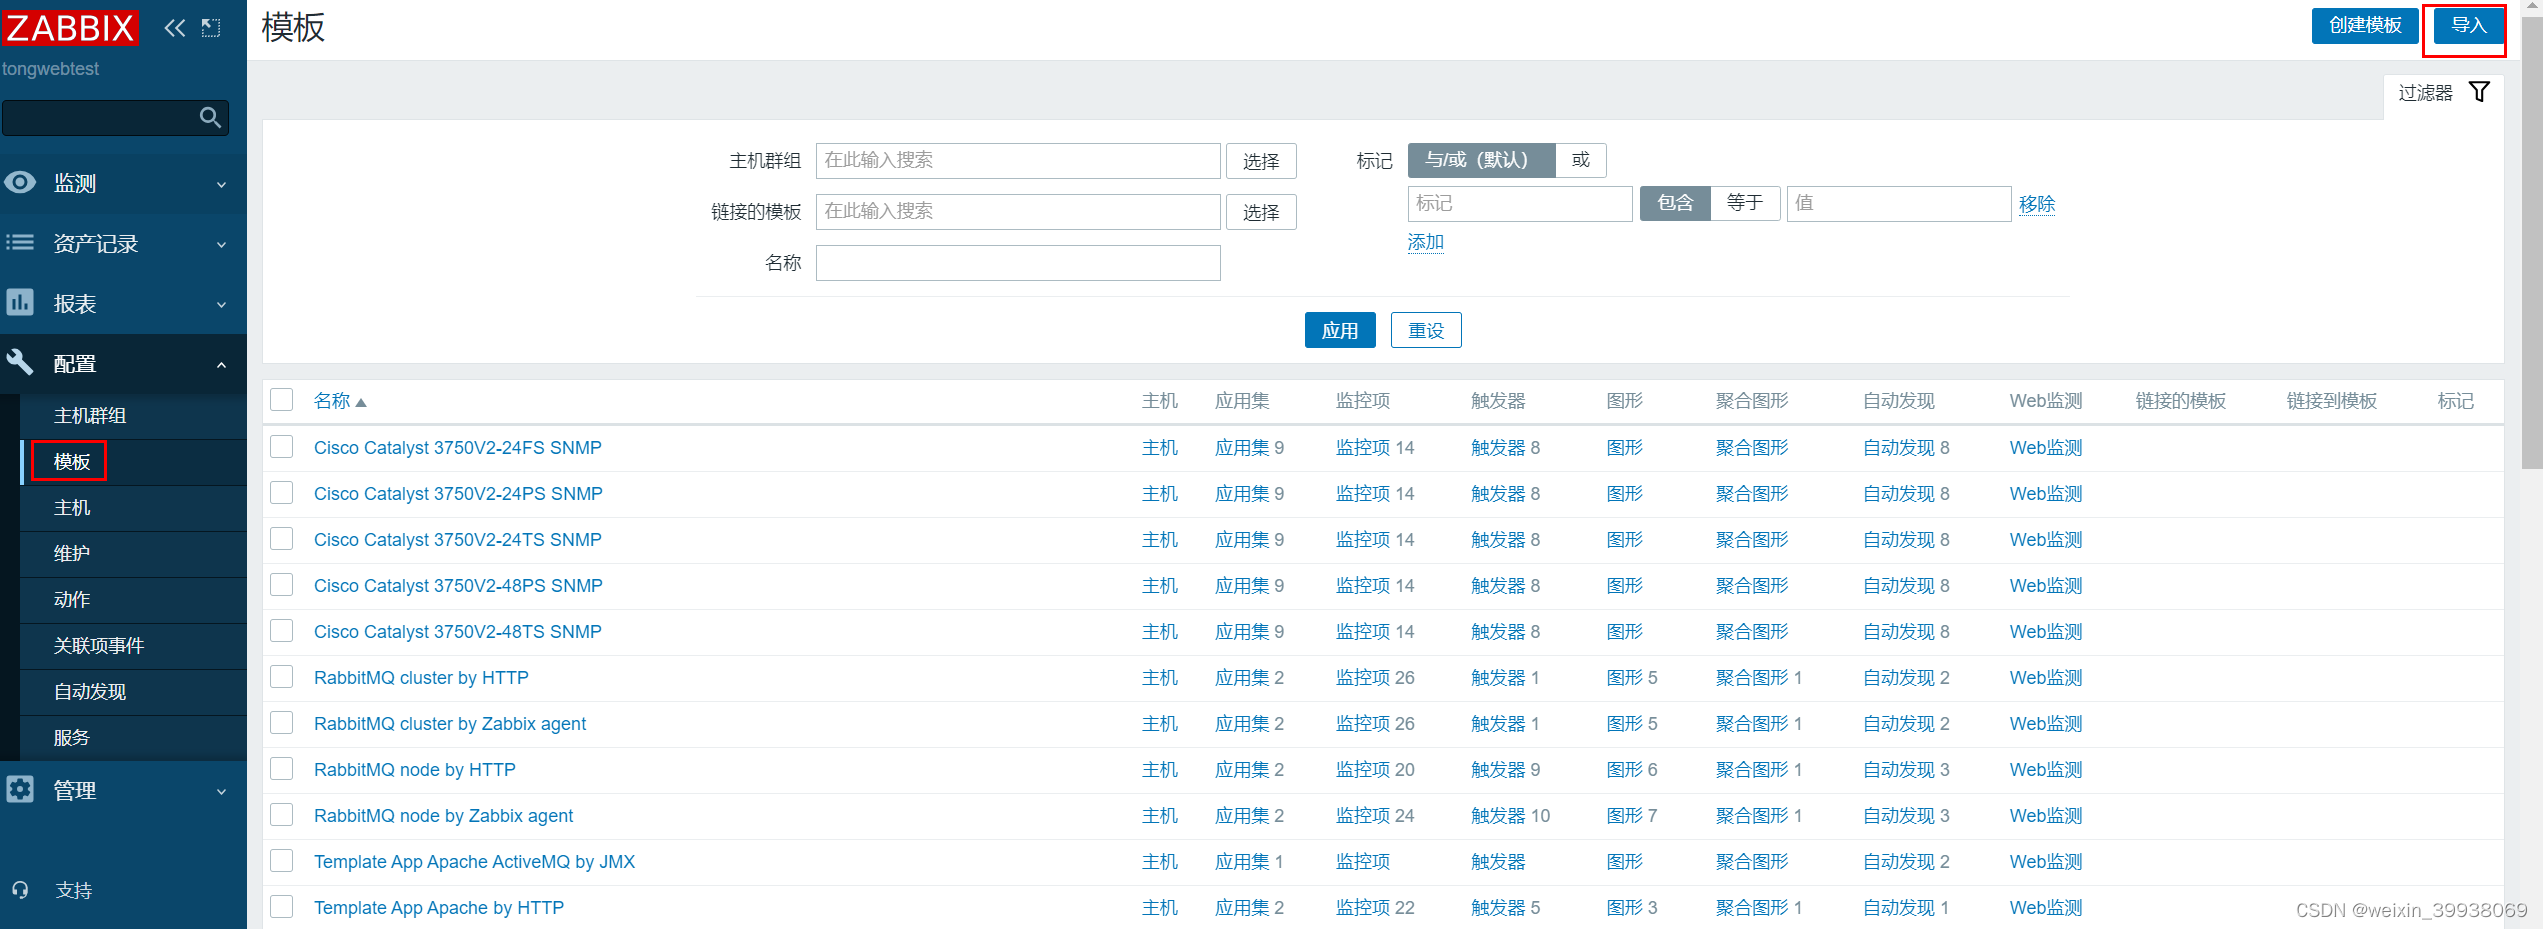
点击模版,点击导入模版
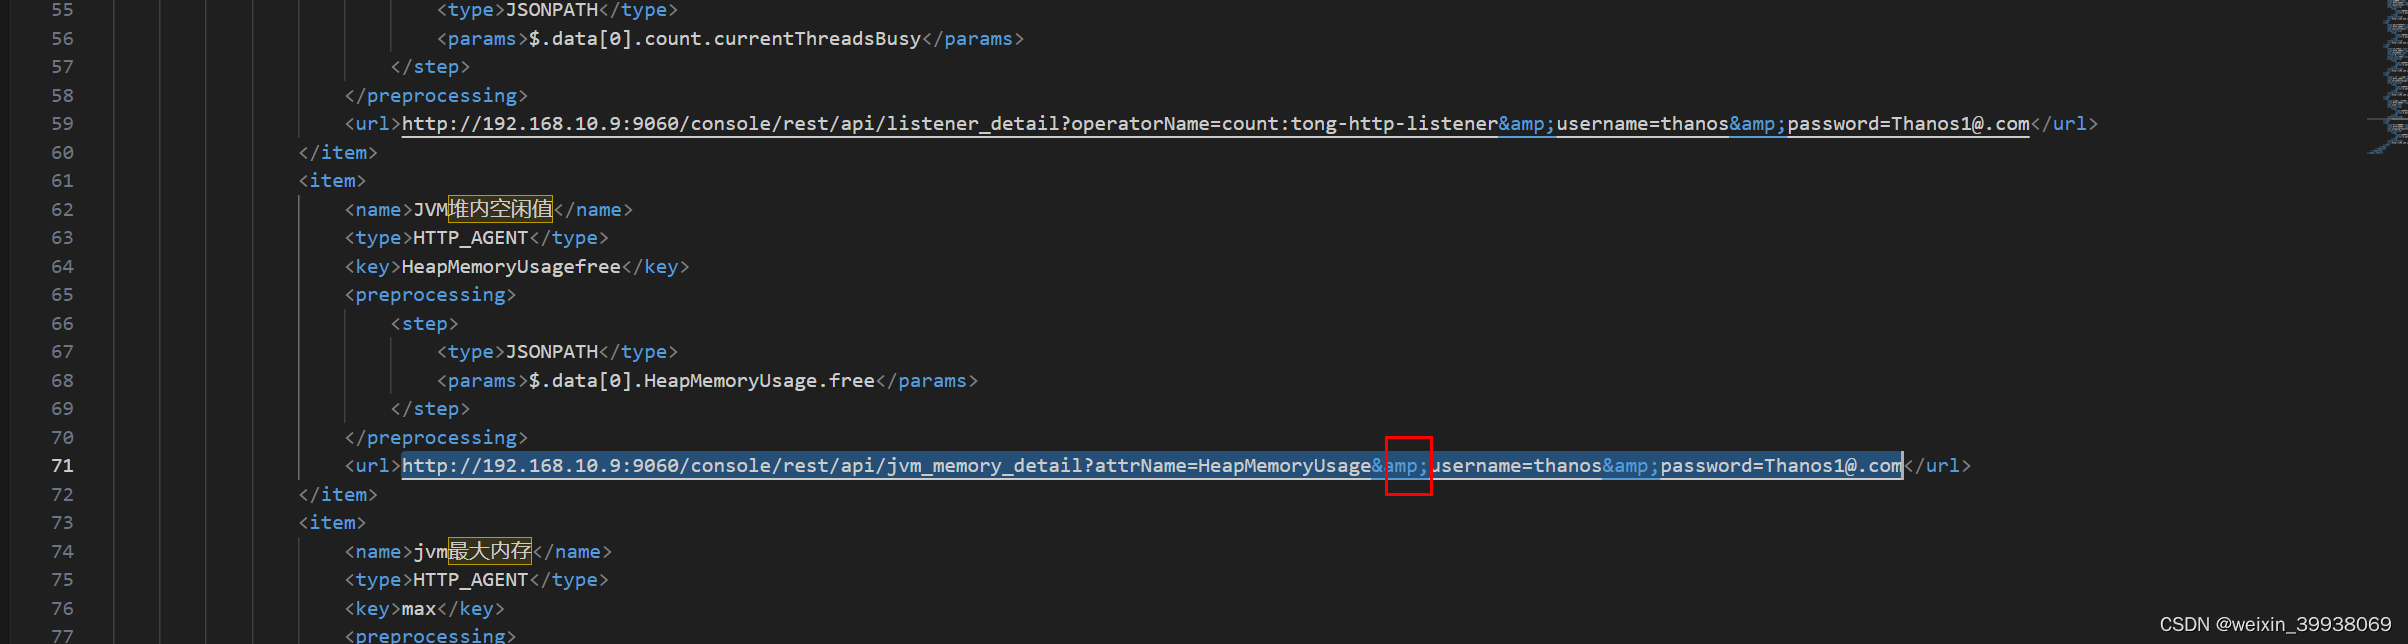
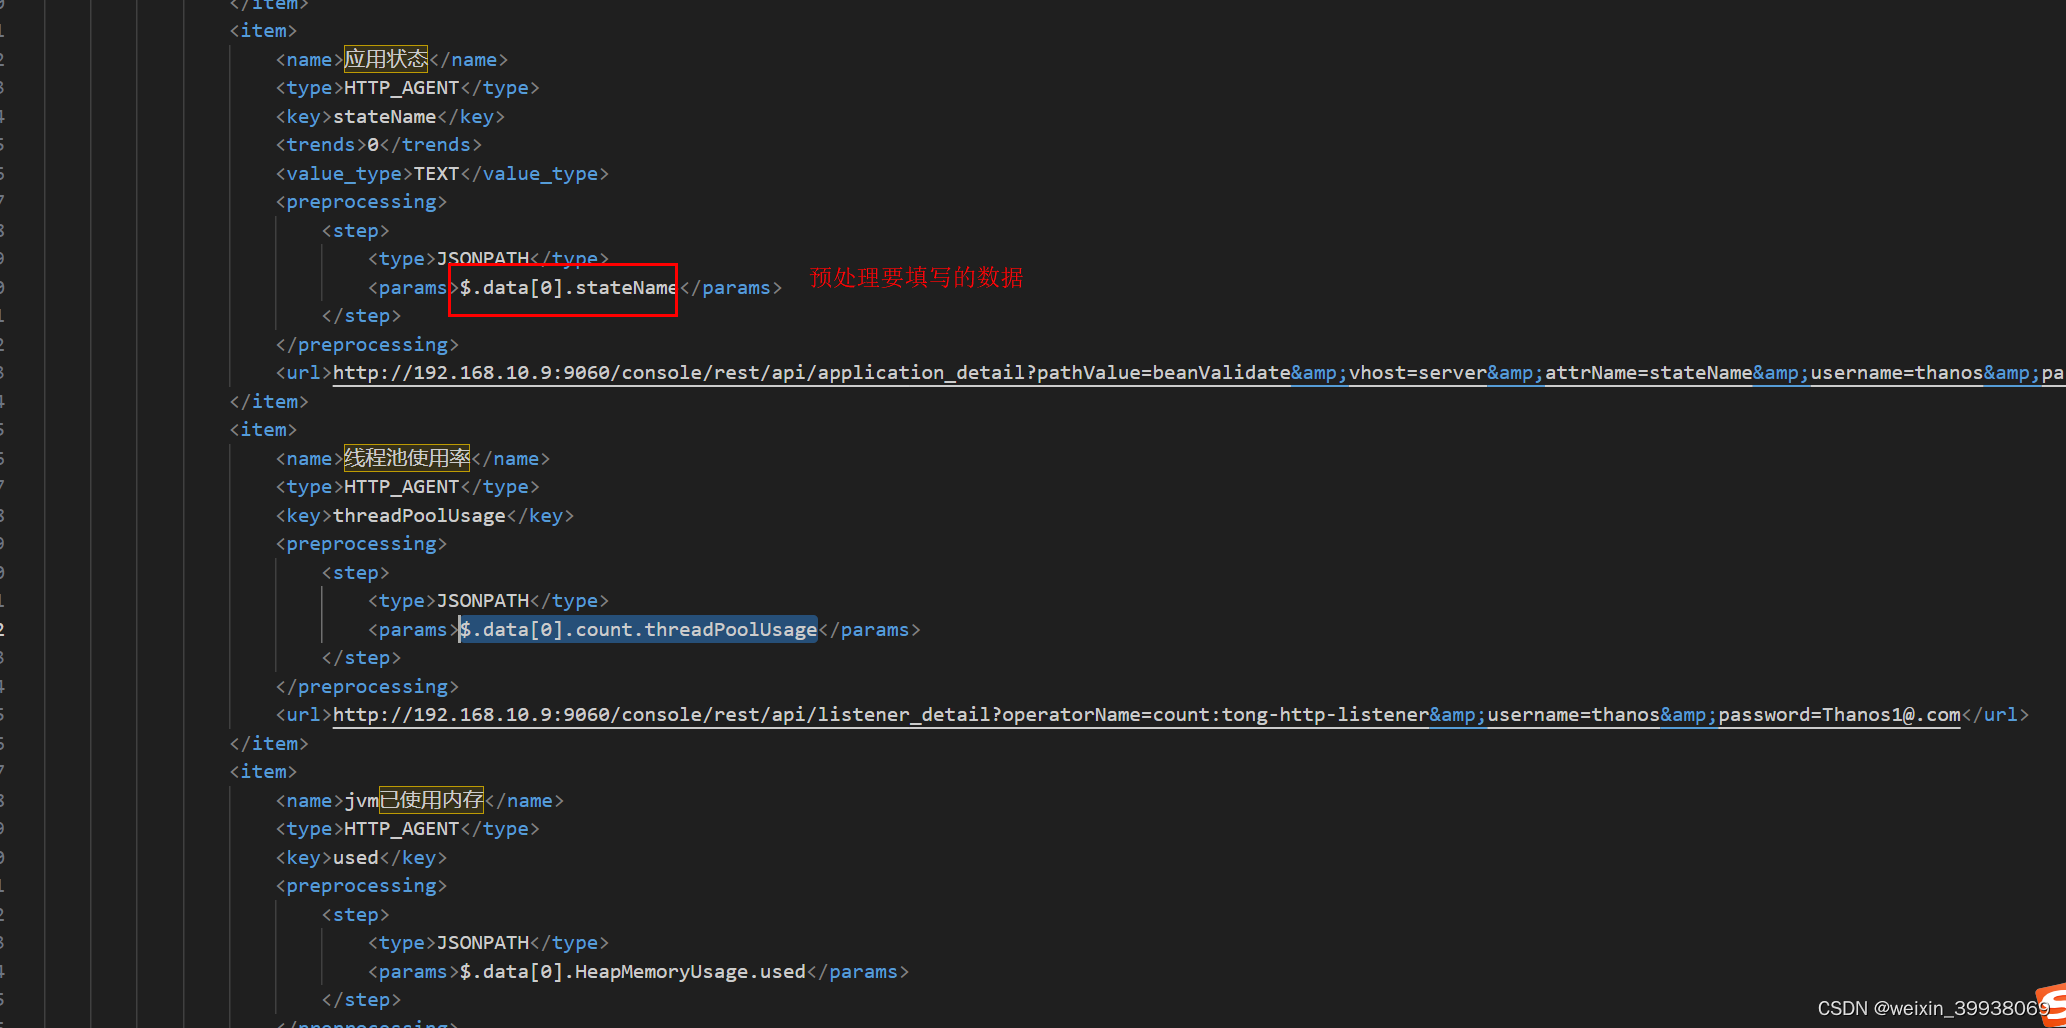
以下是sy老师提供的模版,大家在测试的话,复制url后,去掉以下内容(amp;这个是zabbix的分割符号),替换ip,访问端口号,应用名称,账号和密码(该内容跟监控项有关,具体会在下一节详细说明):
<?xml version="1.0" encoding="UTF-8"?>

<zabbix_export>

    <version>5.0</version>

    <date>2024-04-23T10:33:56Z</date>

    <groups>

        <group>

            <name>Templates</name>

        </group>

    </groups>

    <templates>

        <template>

            <template>tongwebrest</template>

            <name>tongwebrest</name>

            <groups>

                <group>

                    <name>Templates</name>

                </group>

            </groups>

            <applications>

                <application>

                    <name>Server Security</name>

                </application>

            </applications>

            <items>

                <item>

                    <name>当前连接数</name>

                    <type>HTTP_AGENT</type>

                    <key>connectionCount</key>

                    <preprocessing>

                        <step>

                            <type>JSONPATH</type>

                            <params>$.data[0].count.connectionCount</params>

                        </step>

                    </preprocessing>

                    <url>http://192.168.10.9:9060/console/rest/api/listener_detail?operatorName=count:tong-http-listener&username=thanos&password=Thanos1@.com</url>

                </item>

                <item>

                    <name>当前线程池线程数</name>

                    <type>HTTP_AGENT</type>

                    <key>currentThreadCount</key>

                    <preprocessing>

                        <step>

                            <type>JSONPATH</type>

                            <params>$.data[0].count.currentThreadCount</params>

                        </step>

                    </preprocessing>

                    <url>http://192.168.10.9:9060/console/rest/api/listener_detail?operatorName=count:tong-http-listener&username=thanos&password=Thanos1@.com</url>

                </item>

                <item>

                    <name>正在执行的线程数</name>

                    <type>HTTP_AGENT</type>

                    <key>currentThreadsBusy</key>

                    <preprocessing>

                        <step>

                            <type>JSONPATH</type>

                            <params>$.data[0].count.currentThreadsBusy</params>

                        </step>

                    </preprocessing>

                    <url>http://192.168.10.9:9060/console/rest/api/listener_detail?operatorName=count:tong-http-listener&username=thanos&password=Thanos1@.com</url>

                </item>

                <item>

                    <name>JVM堆内空闲值</name>

                    <type>HTTP_AGENT</type>

                    <key>HeapMemoryUsagefree</key>

                    <preprocessing>

                        <step>

                            <type>JSONPATH</type>

                            <params>$.data[0].HeapMemoryUsage.free</params>

                        </step>

                    </preprocessing>

                    <url>http://192.168.10.9:9060/console/rest/api/jvm_memory_detail?attrName=HeapMemoryUsage&username=thanos&password=Thanos1@.com</url>

                </item>

                <item>

                    <name>jvm最大内存</name>

                    <type>HTTP_AGENT</type>

                    <key>max</key>

                    <preprocessing>

                        <step>

                            <type>JSONPATH</type>

                            <params>$.data[0].HeapMemoryUsage.max</params>

                        </step>

                    </preprocessing>

                    <url>http://192.168.10.9:9060/console/rest/api/jvm_memory_detail?attrName=HeapMemoryUsage&username=thanos&password=Thanos1@.com</url>

                </item>

                <item>

                    <name>最大处理线程数</name>

                    <type>HTTP_AGENT</type>

                    <key>maxThreads</key>

                    <preprocessing>

                        <step>

                            <type>JSONPATH</type>

                            <params>$.data[0].count.maxThreads</params>

                        </step>

                    </preprocessing>

                    <url>http://192.168.10.9:9060/console/rest/api/listener_detail?operatorName=count:tong-http-listener&username=thanos&password=Thanos1@.com</url>

                </item>

                <item>

                    <name>请求数</name>

                    <type>HTTP_AGENT</type>

                    <key>requestCount</key>

                    <preprocessing>

                        <step>

                            <type>JSONPATH</type>

                            <params>$.data[0].stat.requestCount</params>

                        </step>

                    </preprocessing>

                    <url>http://192.168.10.9:9060/console/rest/api/listener_detail?operatorName=stat:tong-http-listener&username=thanos&password=Thanos1@.com</url>

                </item>

                <item>

                    <name>会话超时时间</name>

                    <type>HTTP_AGENT</type>

                    <key>sessionTimeout</key>

                    <preprocessing>

                        <step>

                            <type>JSONPATH</type>

                            <params>$.data[0].sessionTimeout</params>

                        </step>

                    </preprocessing>

                    <url>http://192.168.10.9:9060/console/rest/api/application_detail?pathValue=beanValidate&vhost=server&attrName=sessionTimeout&username=thanos&password=Thanos1@.com</url>

                </item>

                <item>

                    <name>应用状态</name>

                    <type>HTTP_AGENT</type>

                    <key>stateName</key>

                    <trends>0</trends>

                    <value_type>TEXT</value_type>

                    <preprocessing>

                        <step>

                            <type>JSONPATH</type>

                            <params>$.data[0].stateName</params>

                        </step>

                    </preprocessing>

                    <url>http://192.168.10.9:9060/console/rest/api/application_detail?pathValue=beanValidate&vhost=server&attrName=stateName&username=thanos&password=Thanos1@.com</url>

                </item>

                <item>

                    <name>线程池使用率</name>

                    <type>HTTP_AGENT</type>

                    <key>threadPoolUsage</key>

                    <preprocessing>

                        <step>

                            <type>JSONPATH</type>

                            <params>$.data[0].count.threadPoolUsage</params>

                        </step>

                    </preprocessing>

                    <url>http://192.168.10.9:9060/console/rest/api/listener_detail?operatorName=count:tong-http-listener&username=thanos&password=Thanos1@.com</url>

                </item>

                <item>

                    <name>jvm已使用内存</name>

                    <type>HTTP_AGENT</type>

                    <key>used</key>

                    <preprocessing>

                        <step>

                            <type>JSONPATH</type>

                            <params>$.data[0].HeapMemoryUsage.used</params>

                        </step>

                    </preprocessing>

                    <url>http://192.168.10.9:9060/console/rest/api/jvm_memory_detail?attrName=HeapMemoryUsage&username=thanos&password=Thanos1@.com</url>

                </item>

                <item>

                    <name>应用请求数</name>

                    <type>HTTP_AGENT</type>

                    <key>yingyongrequestCount</key>

                    <preprocessing>

                        <step>

                            <type>JSONPATH</type>

                            <params>$.data[0].requestCount</params>

                        </step>

                    </preprocessing>

                    <url>http://192.168.10.9:9060/console/rest/api/application_detail?pathValue=beanValidate&vhost=server&attrName=requestCount&username=thanos&password=Thanos1@.com</url>

                </item>

            </items>

        </template>

    </templates>

</zabbix_export>
五、给模版添加监控项
该部分如果需要自行配置新的监控项,请参考008_TongWeb V7.0 二次开发接口_7049_M1A01.pdf(该文件位于tongweb安装目录的doc目录下)。
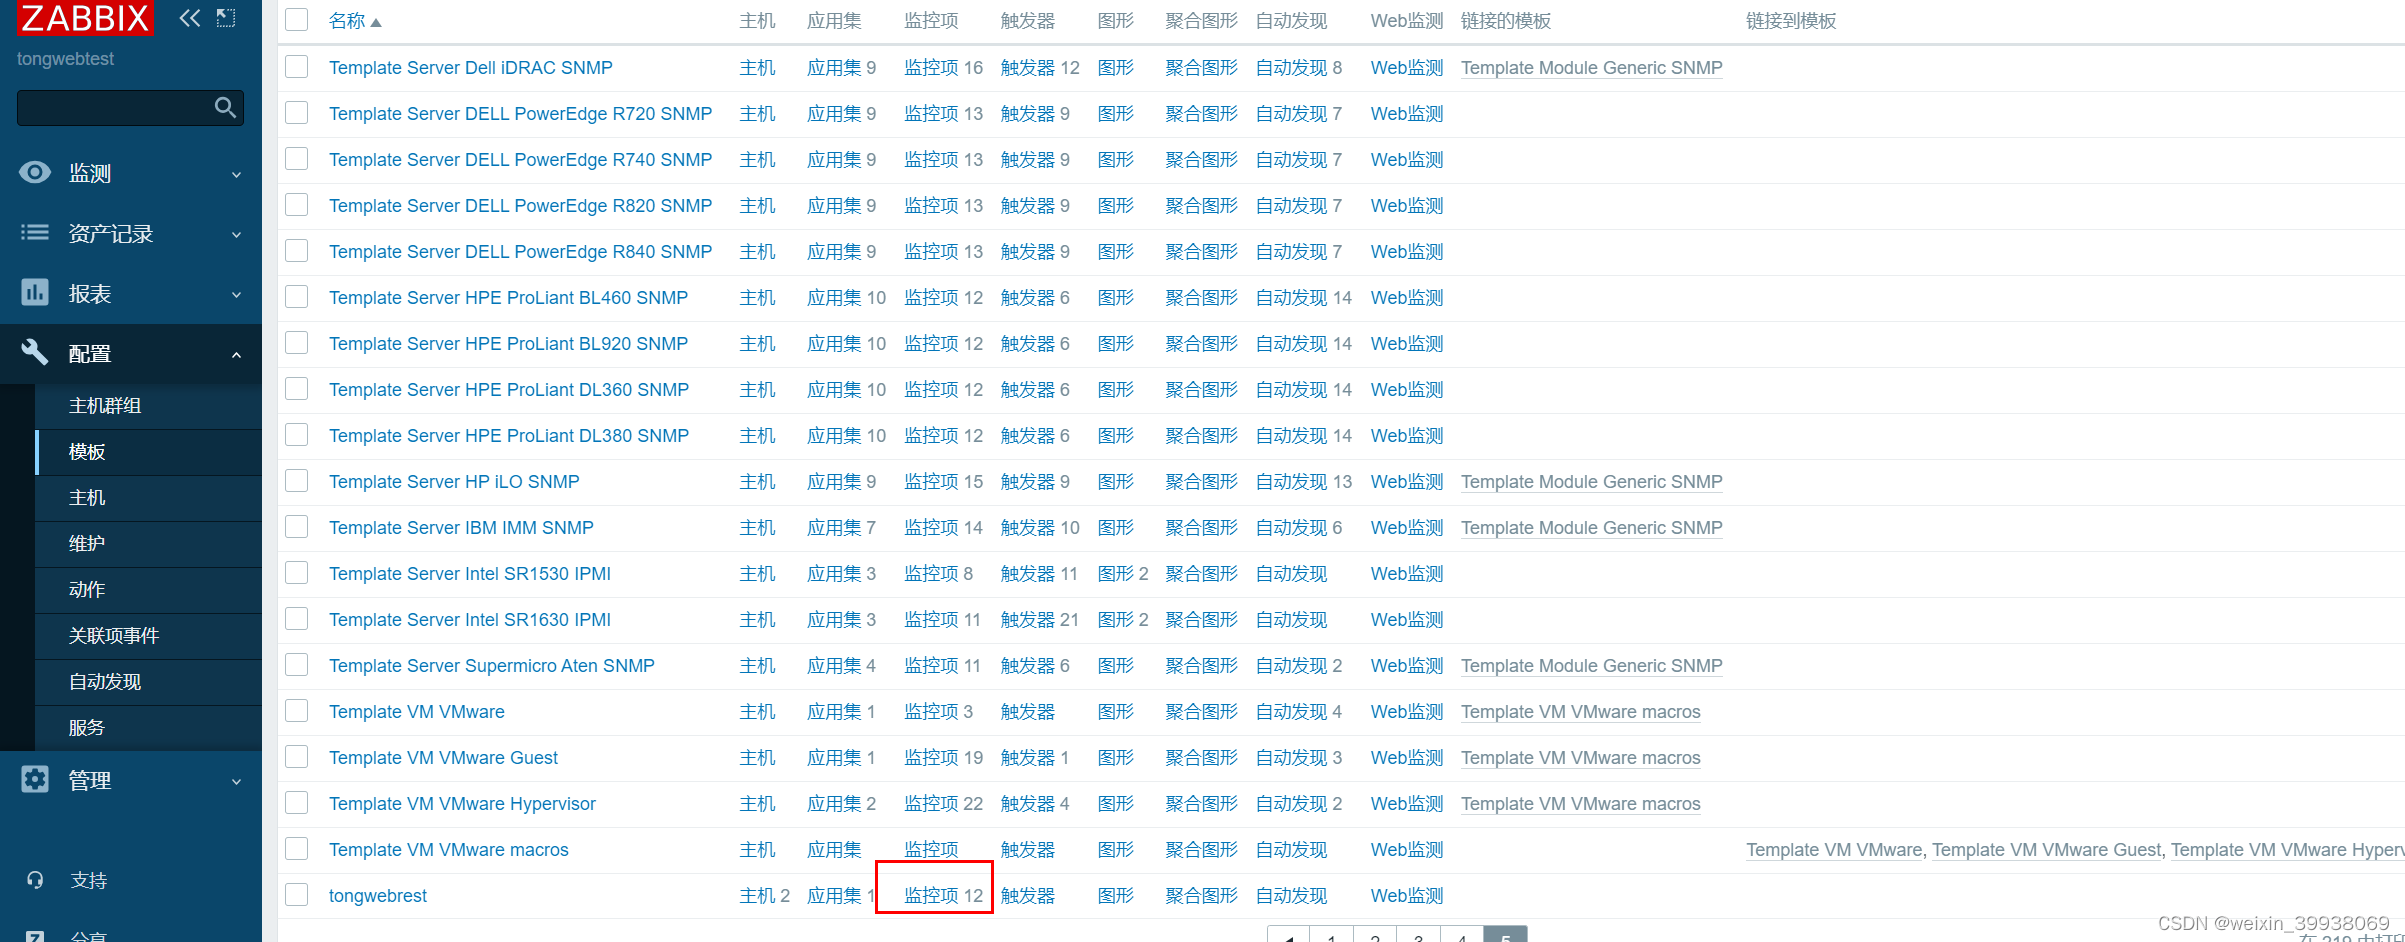
添加成功后点击模版下的监控项:
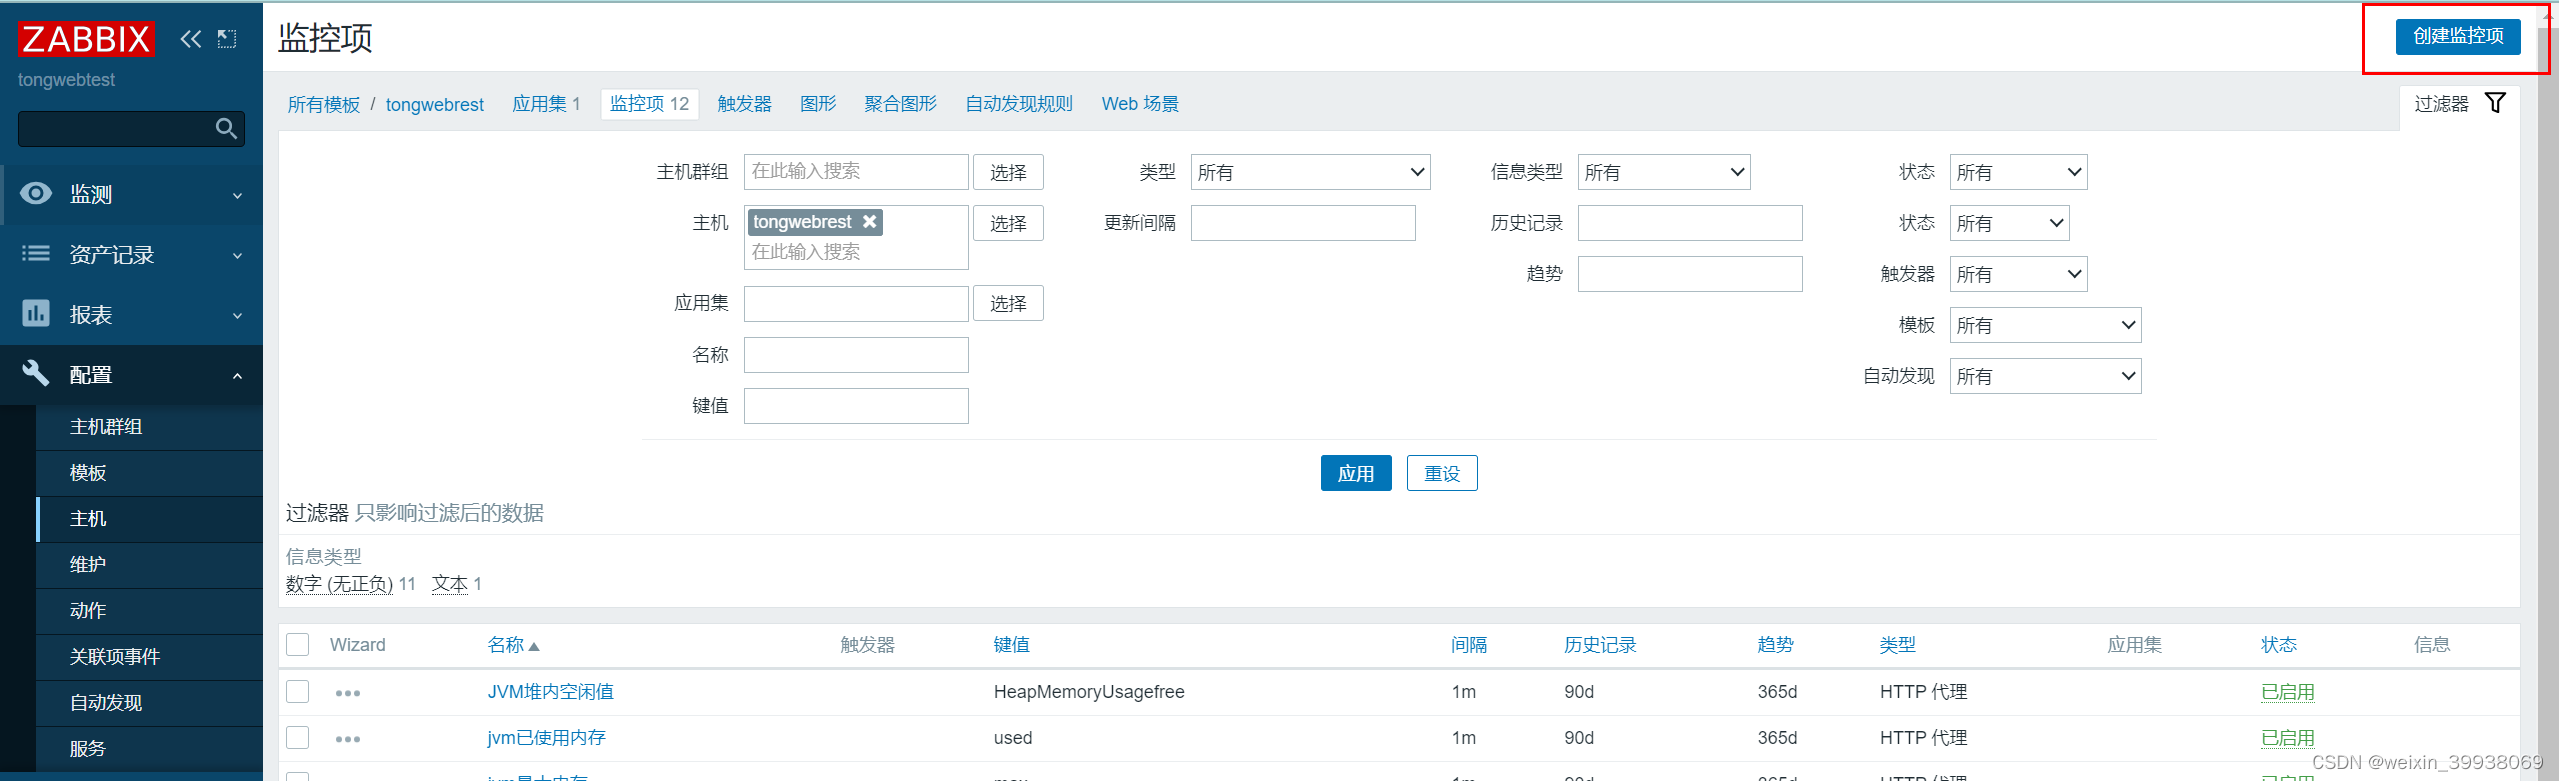
创建监控项
测试访问以下url
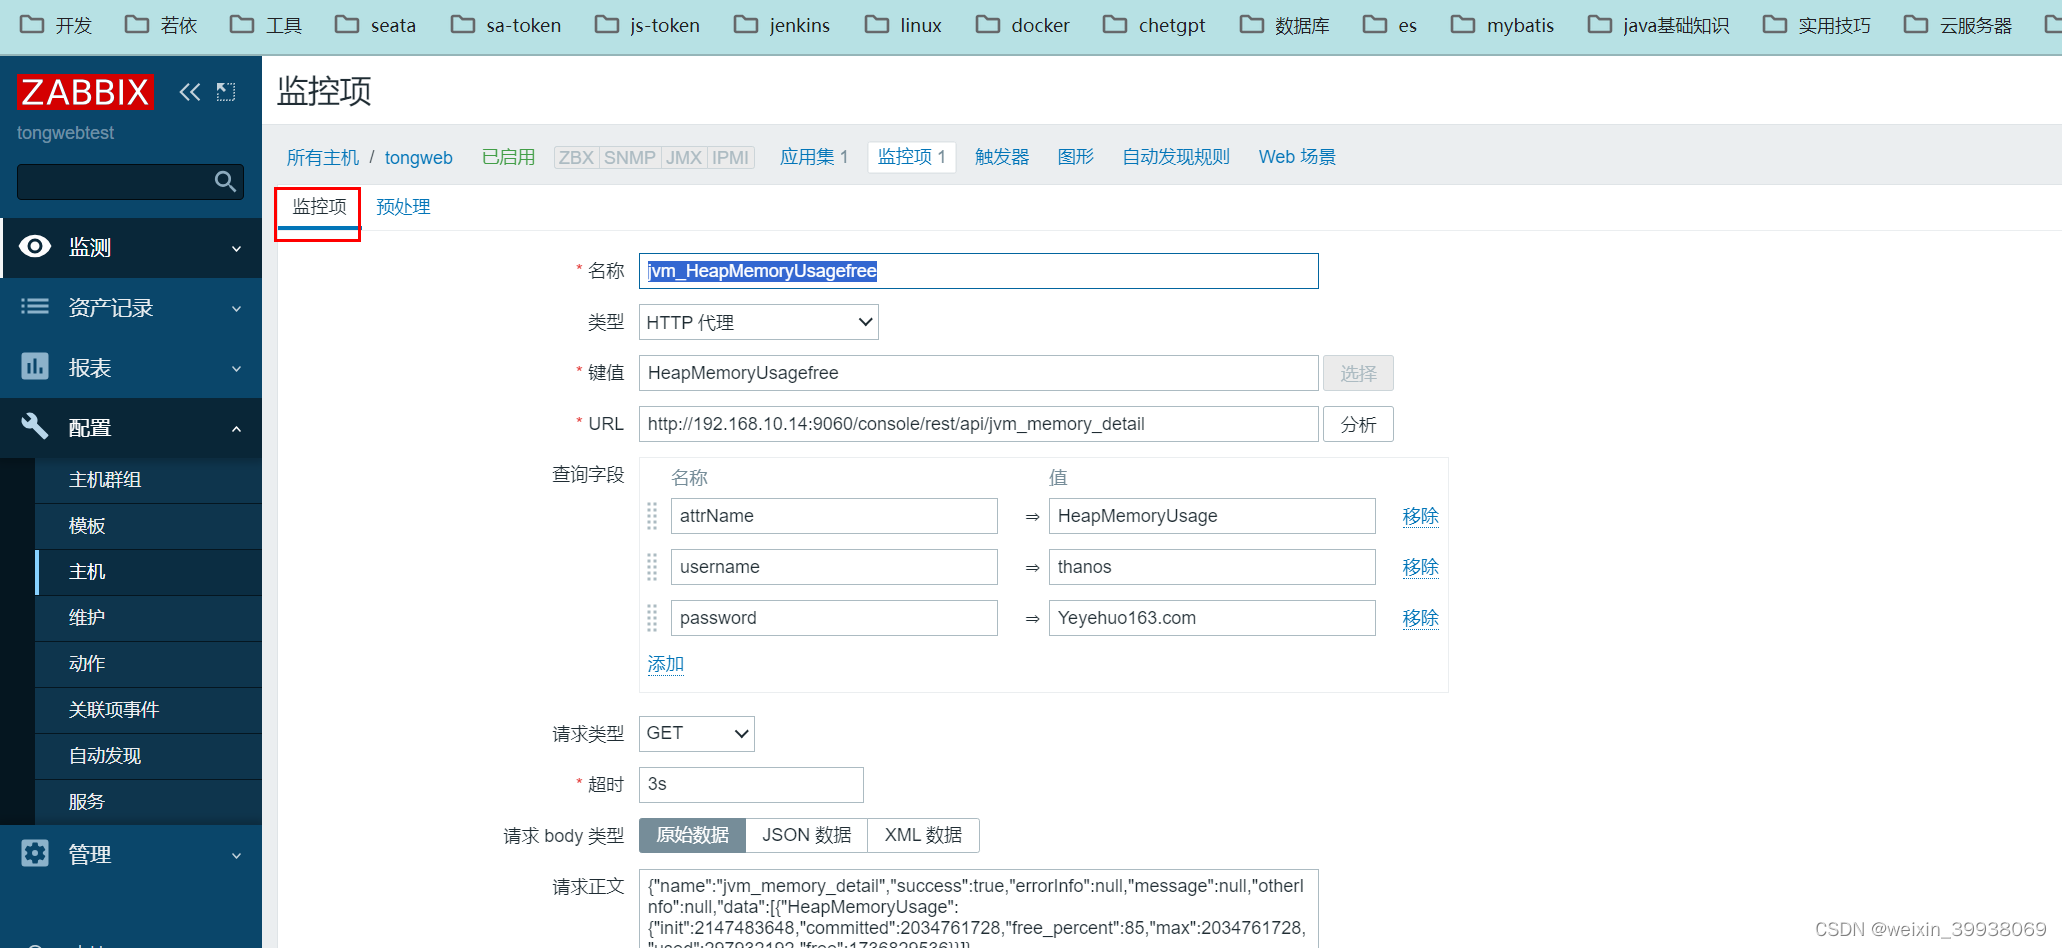
http://192.168.10.14:9060/console/rest/api/jvm_memory_detail?attrName=HeapMemoryUsage&username=thanos&password=Yeyehuo163.com
其中192.168.10.14:9060/console是tongweb的控制台访问url,Yeyehuo163.com是我本地控制台设置的密码,请根据自身情况进行替换

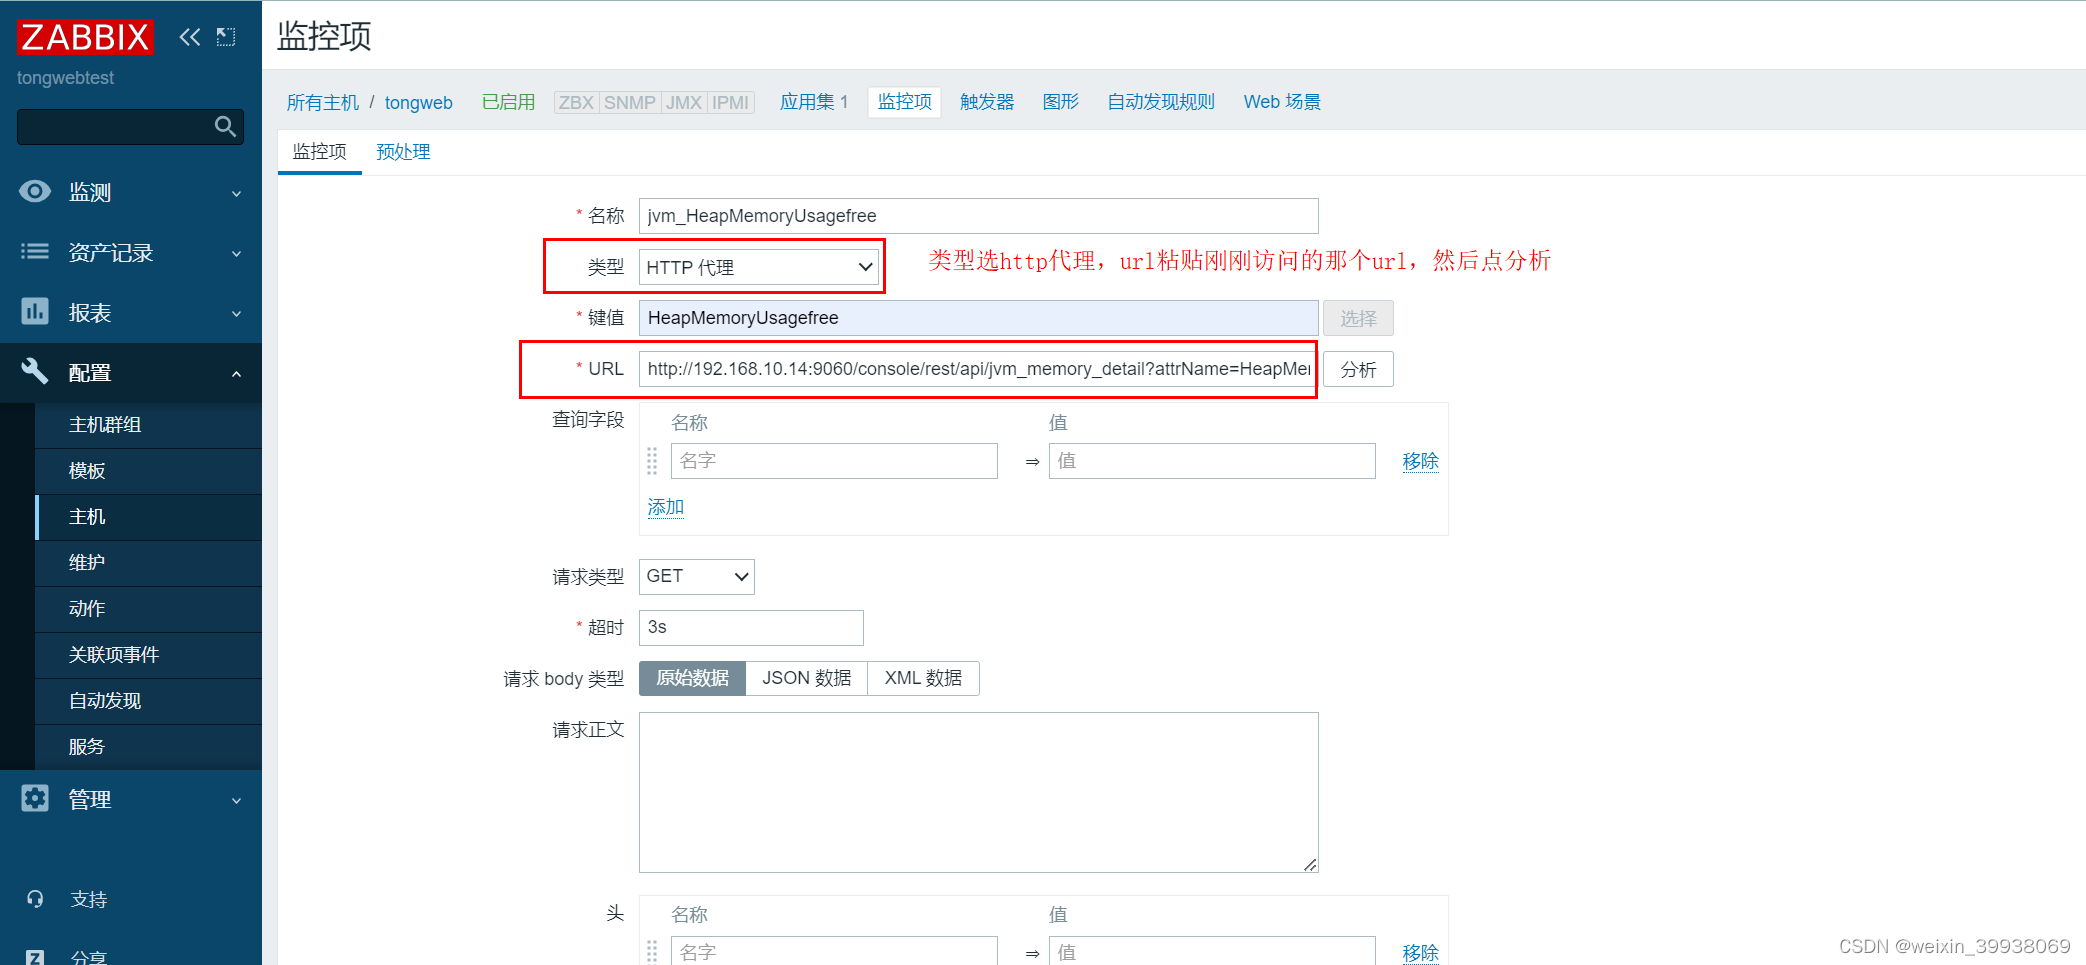
在监控项页面填写名称(别用中文,测试过中文的话,图形的名称会有乱码),选择http代理,复制粘贴测试的url,点击分析:
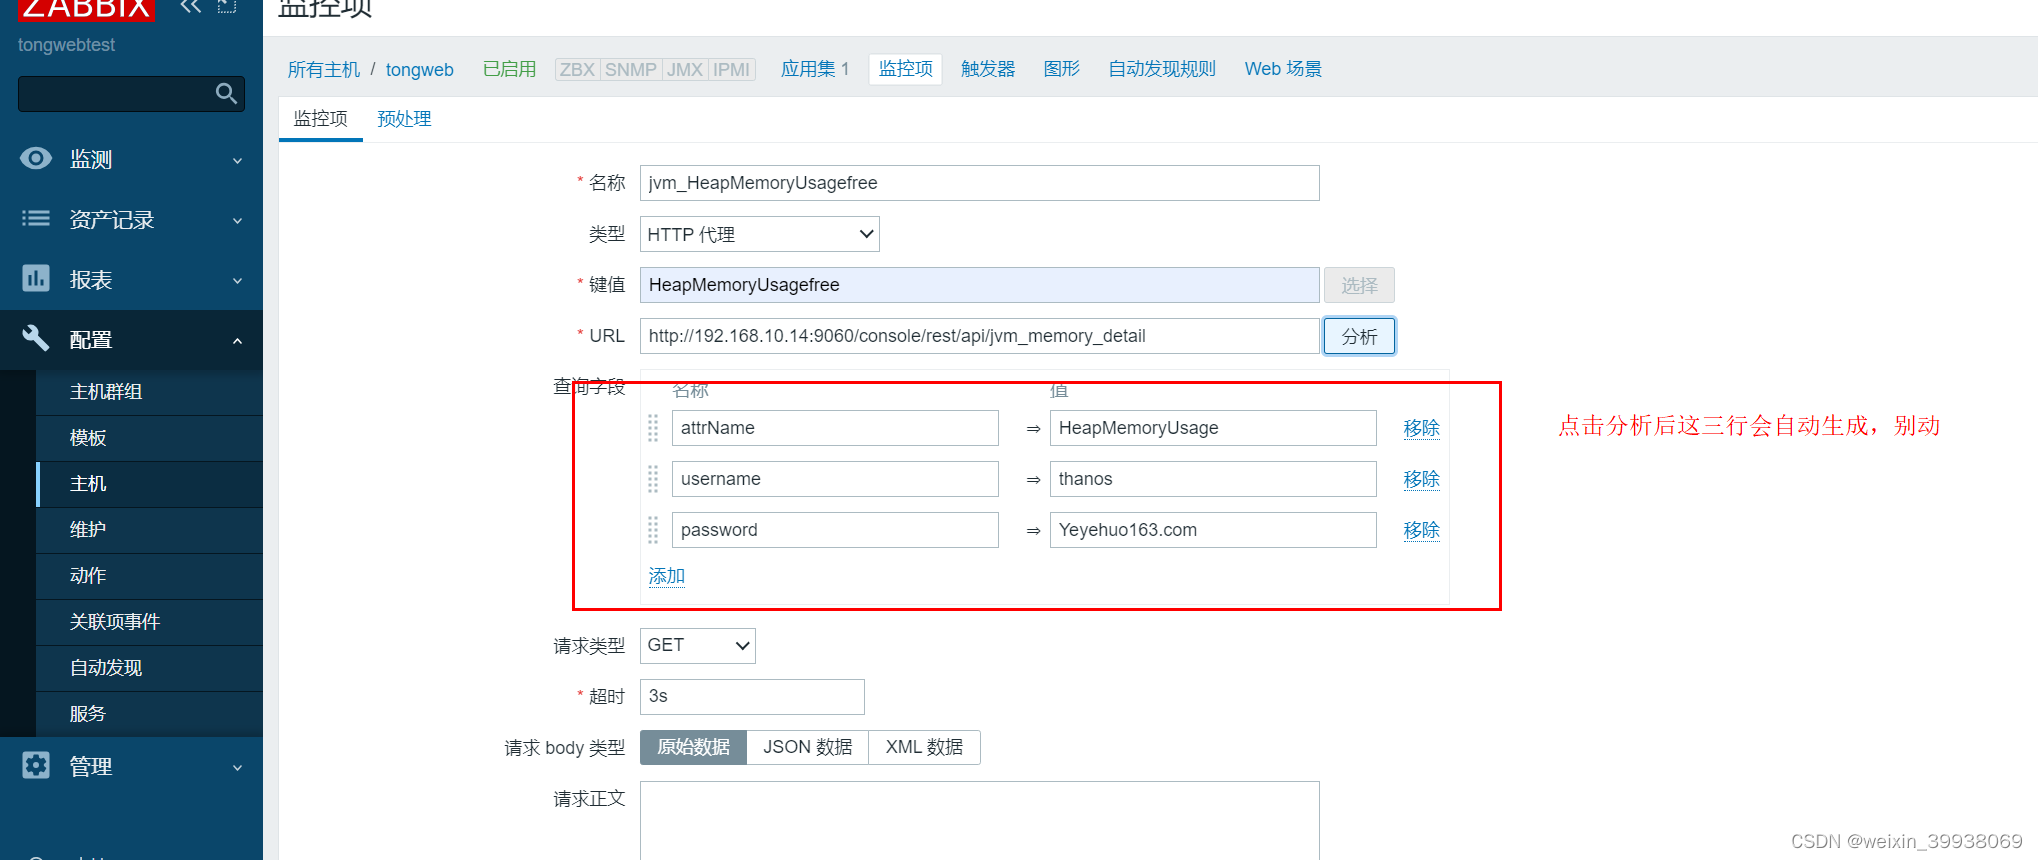
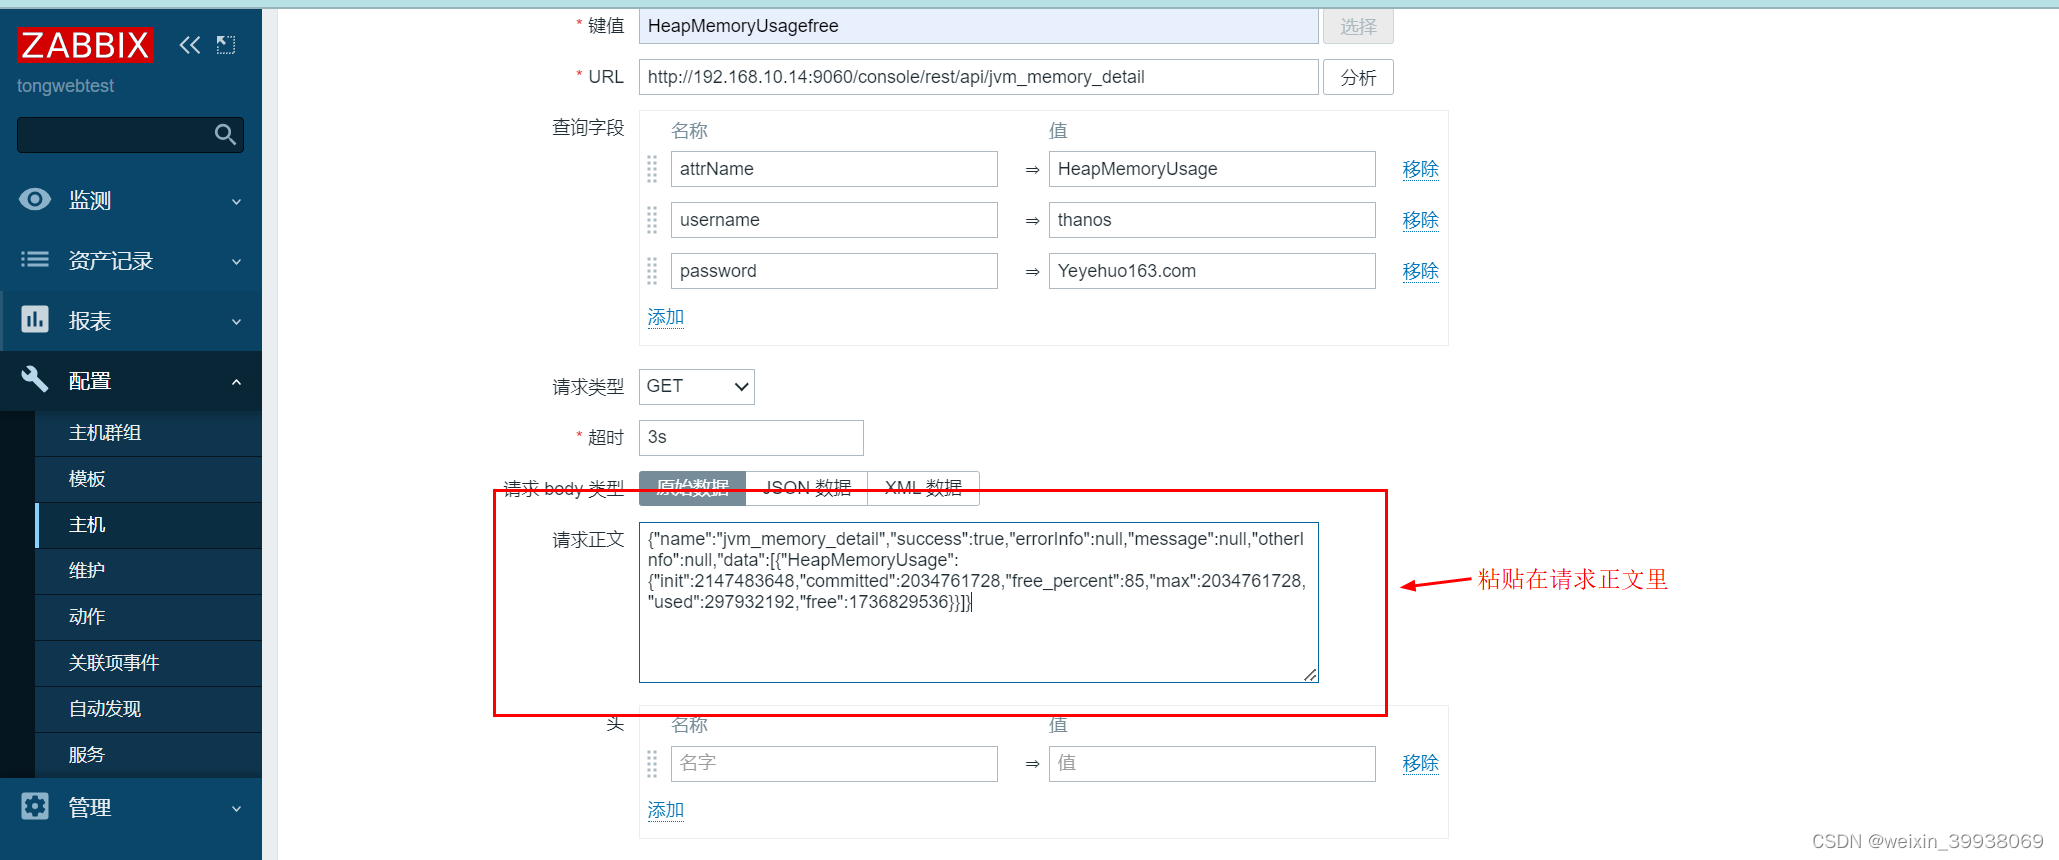
然后将访问url页面里的那串json字符串复制过来,粘贴在请求正文里

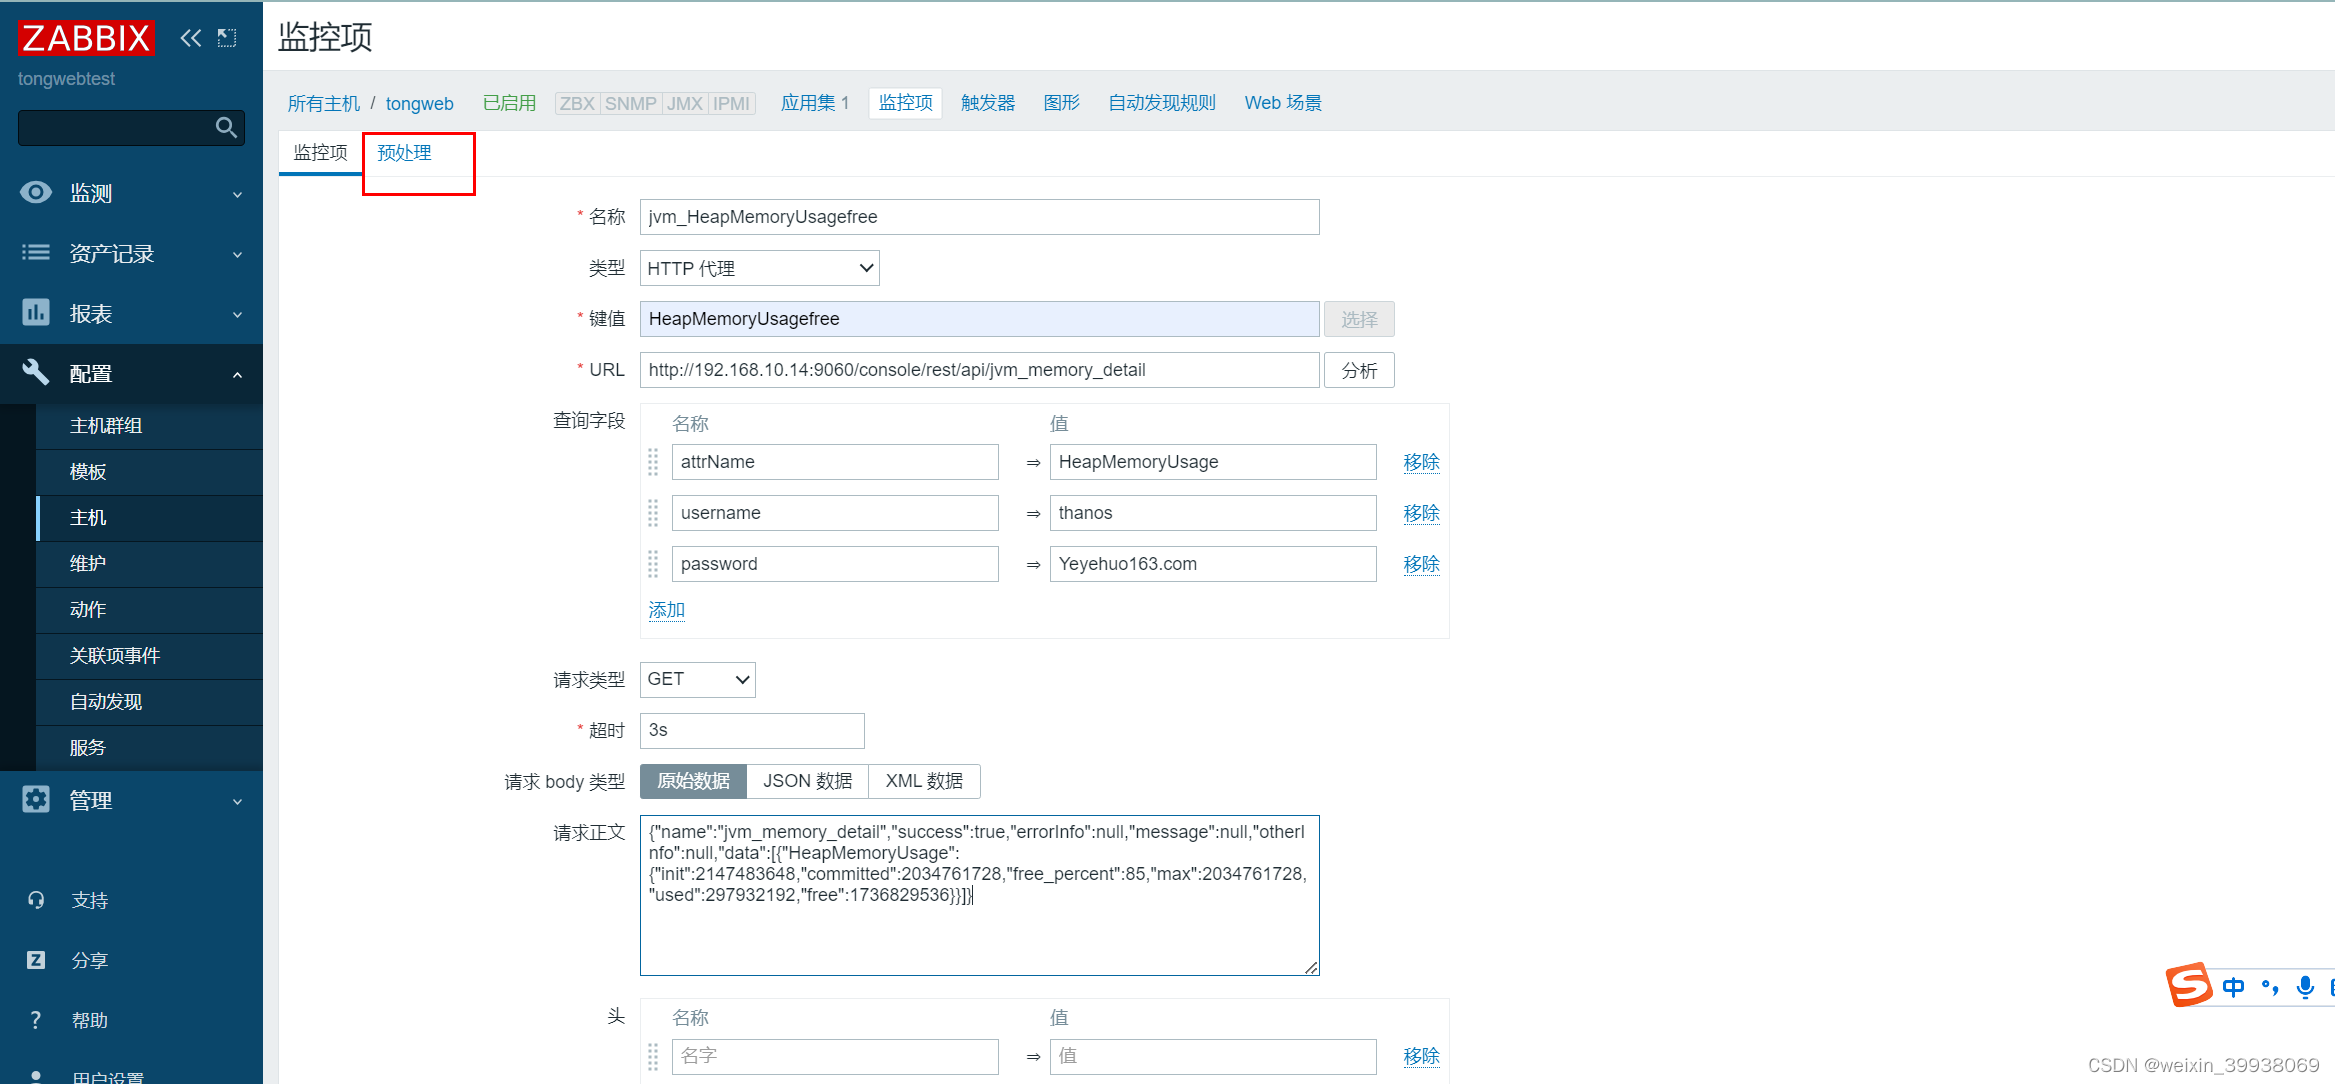
点击预处理,点击添加,选择json路径,填写信息:
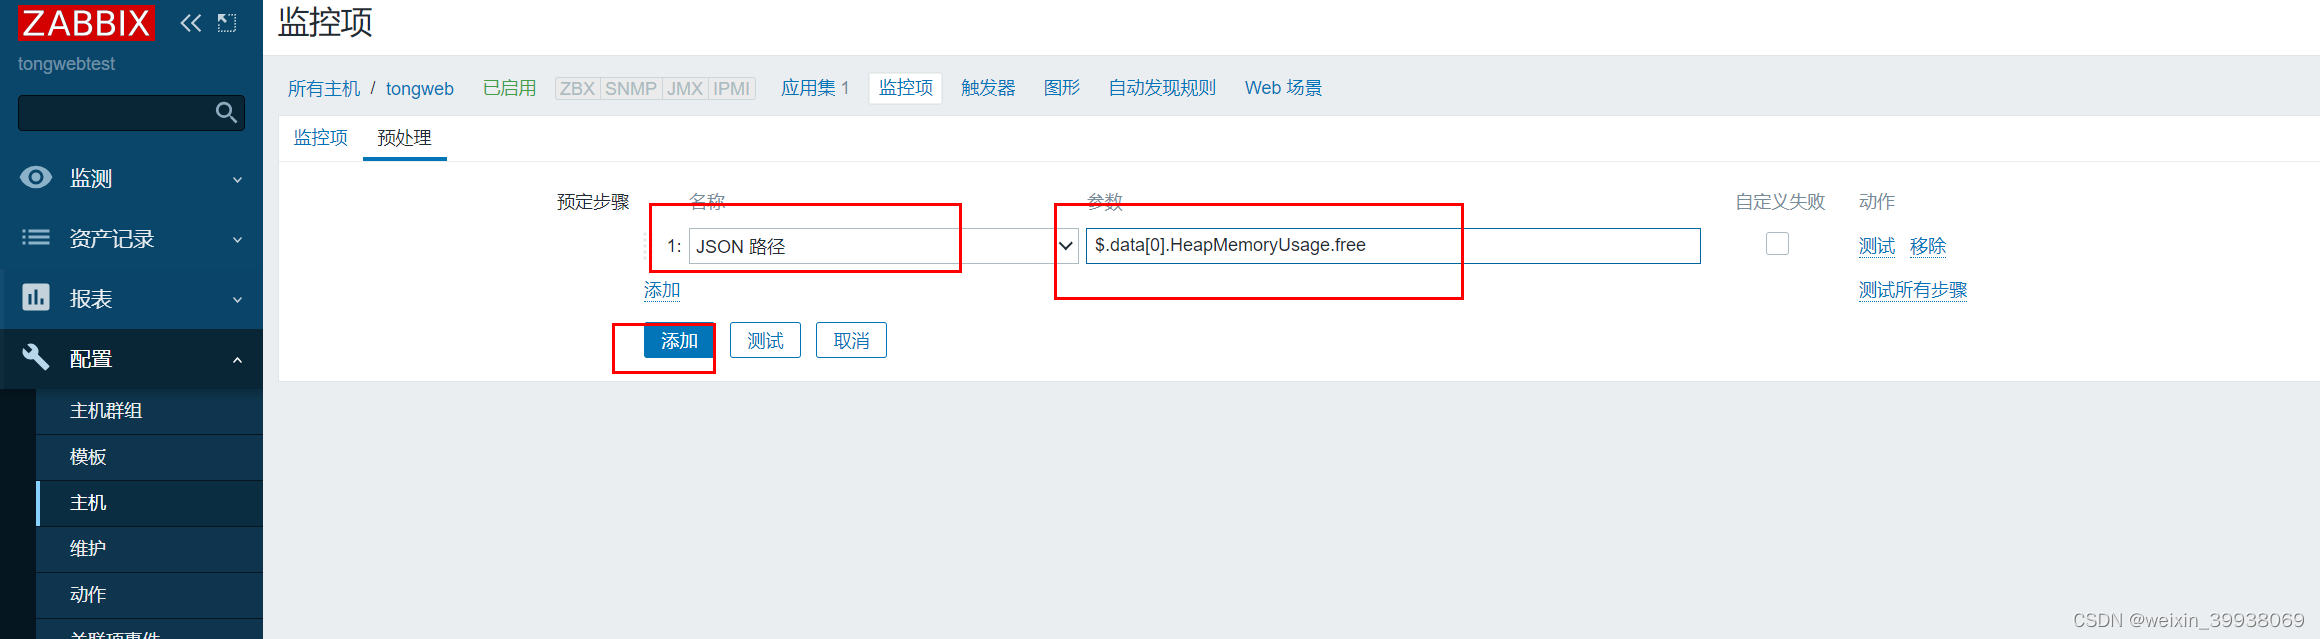
填写的内容结构一般为$.data[0].+下图所示的两个参数,以.作为层级关系,例如:
$.data[0].HeapMemoryUsage.free

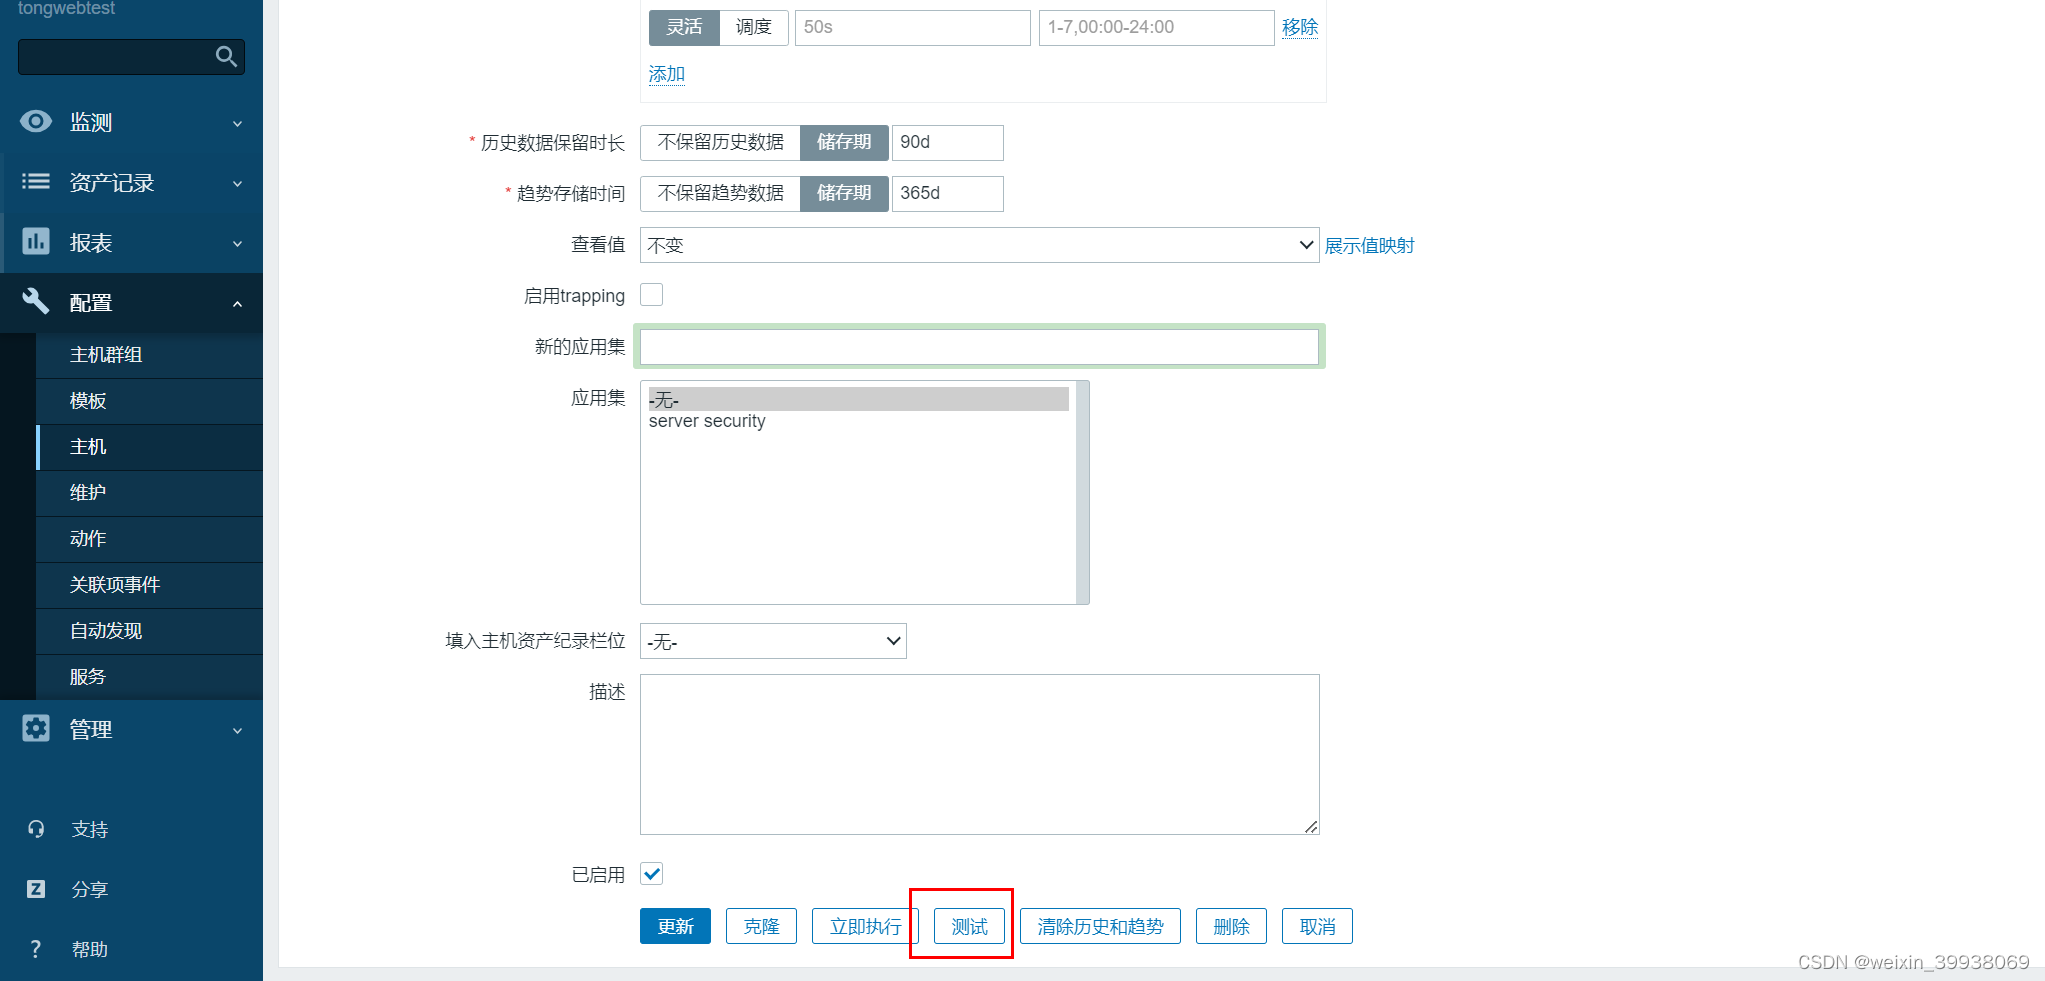
填写完点击添加,然后回到监控项,点击测试:
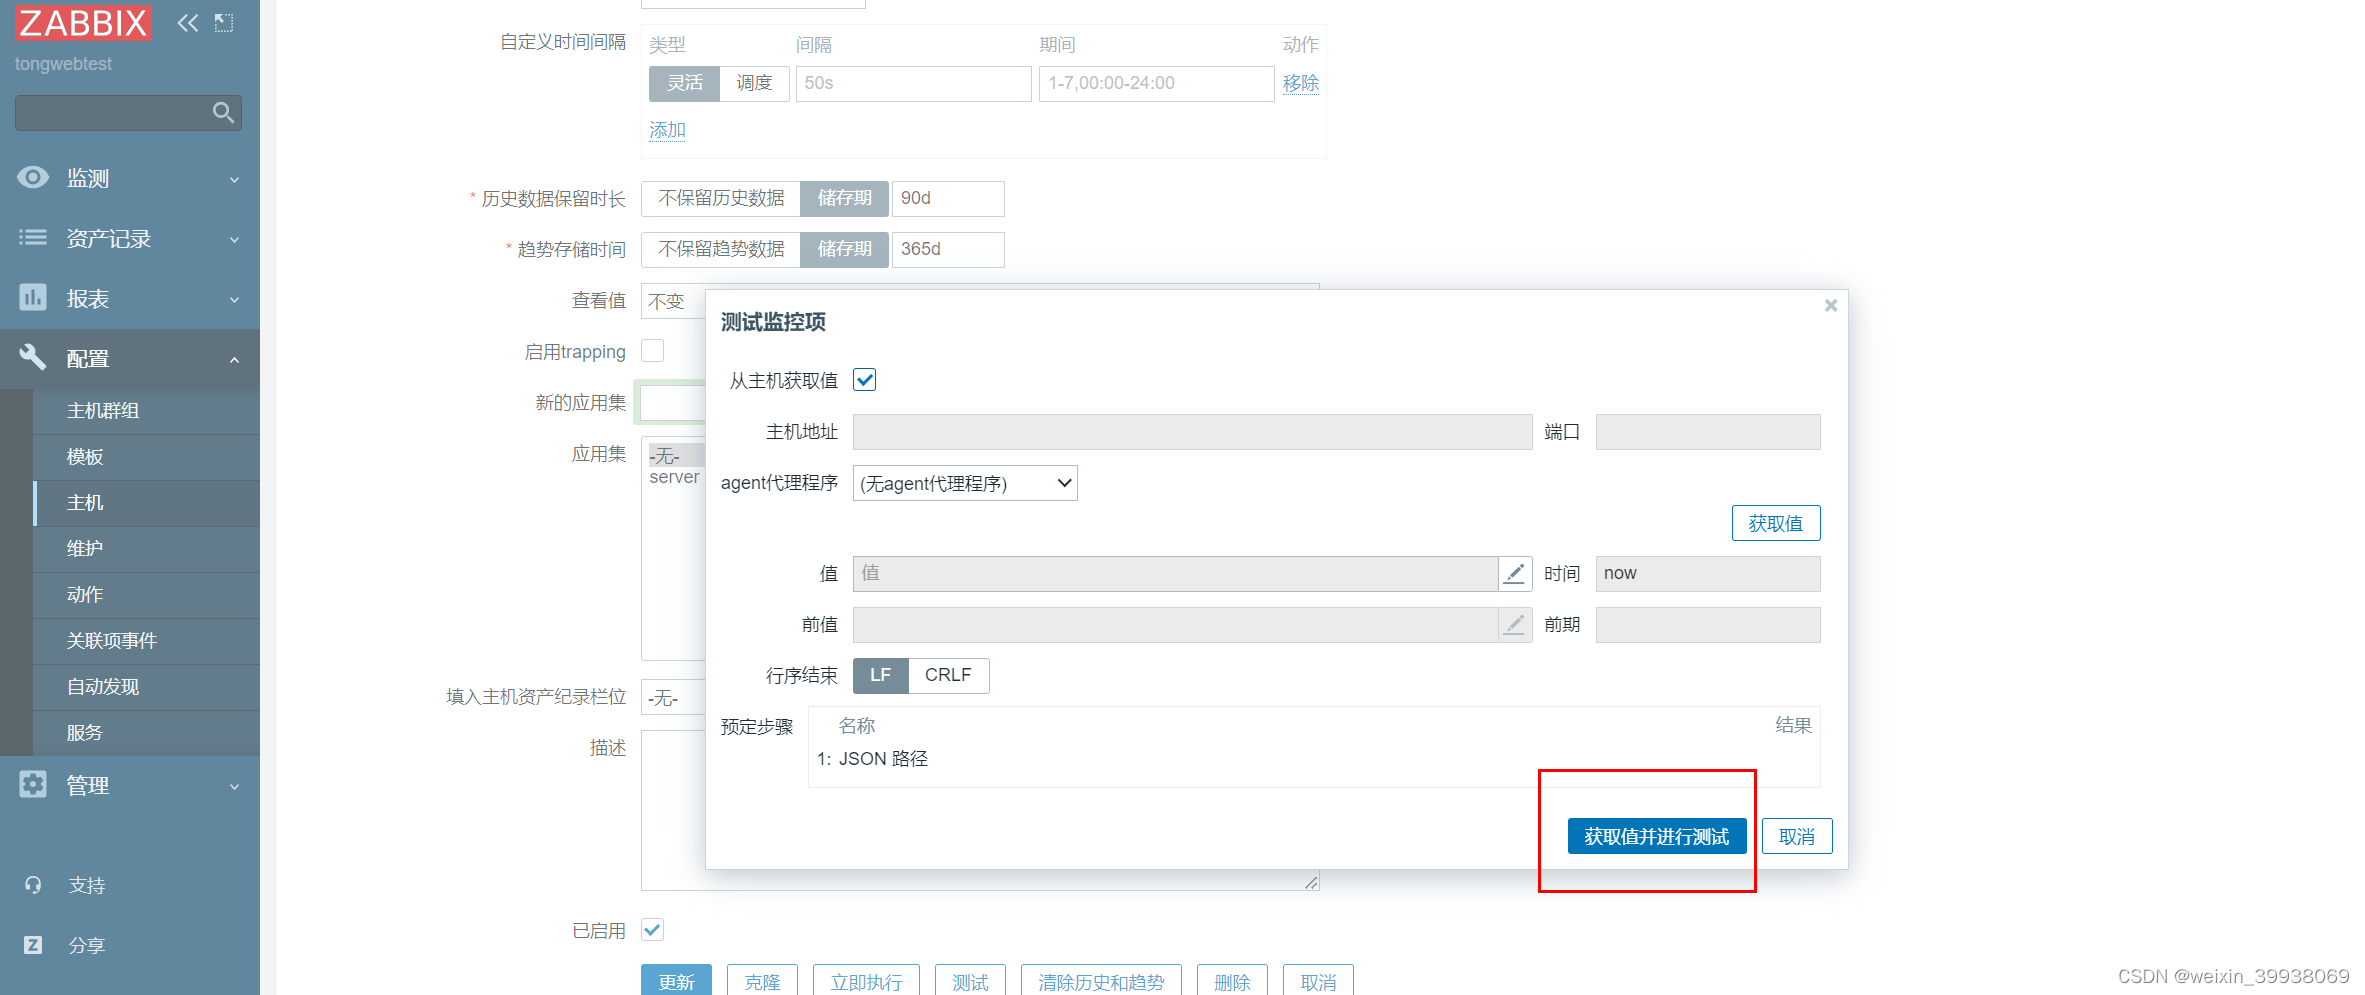
点击获取值并进行测试:
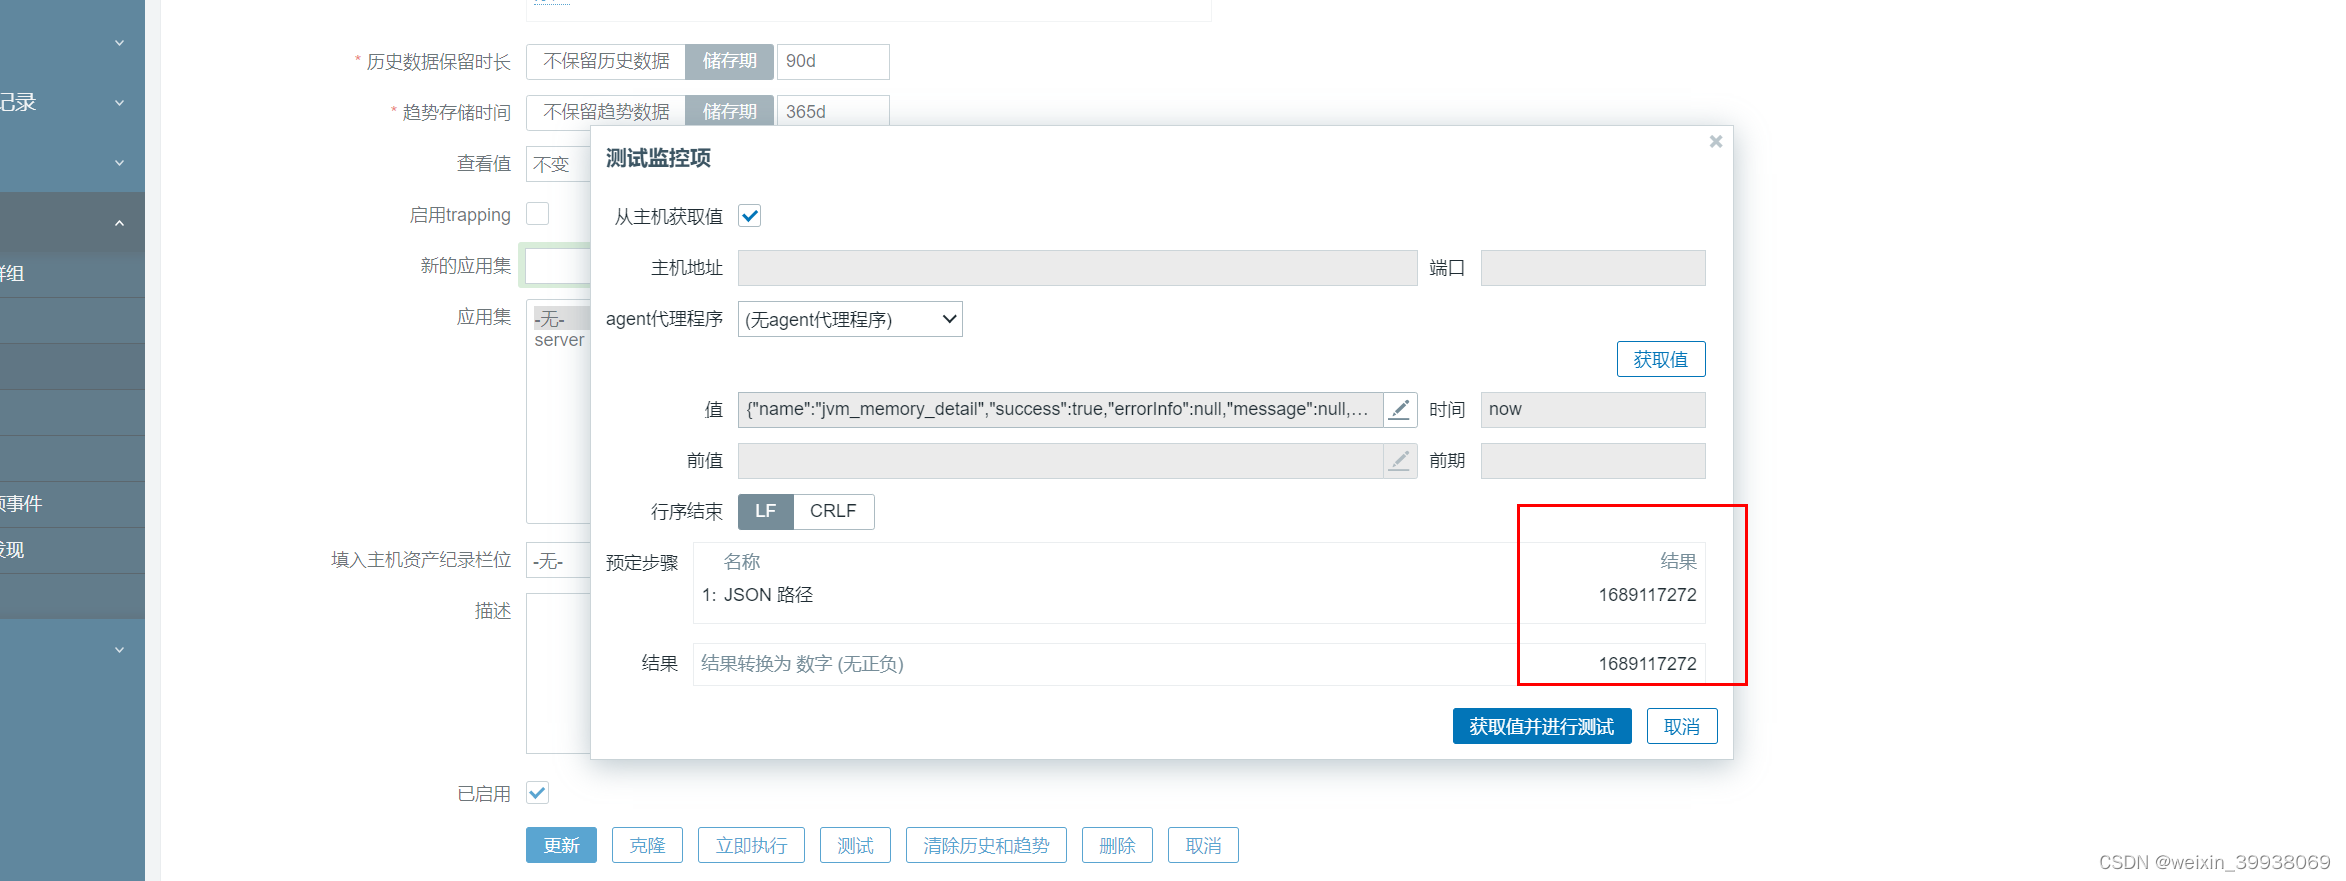
能得到数值,说明测试成功
六、模版绑定主机
回到主机页面,点击要配置的主机
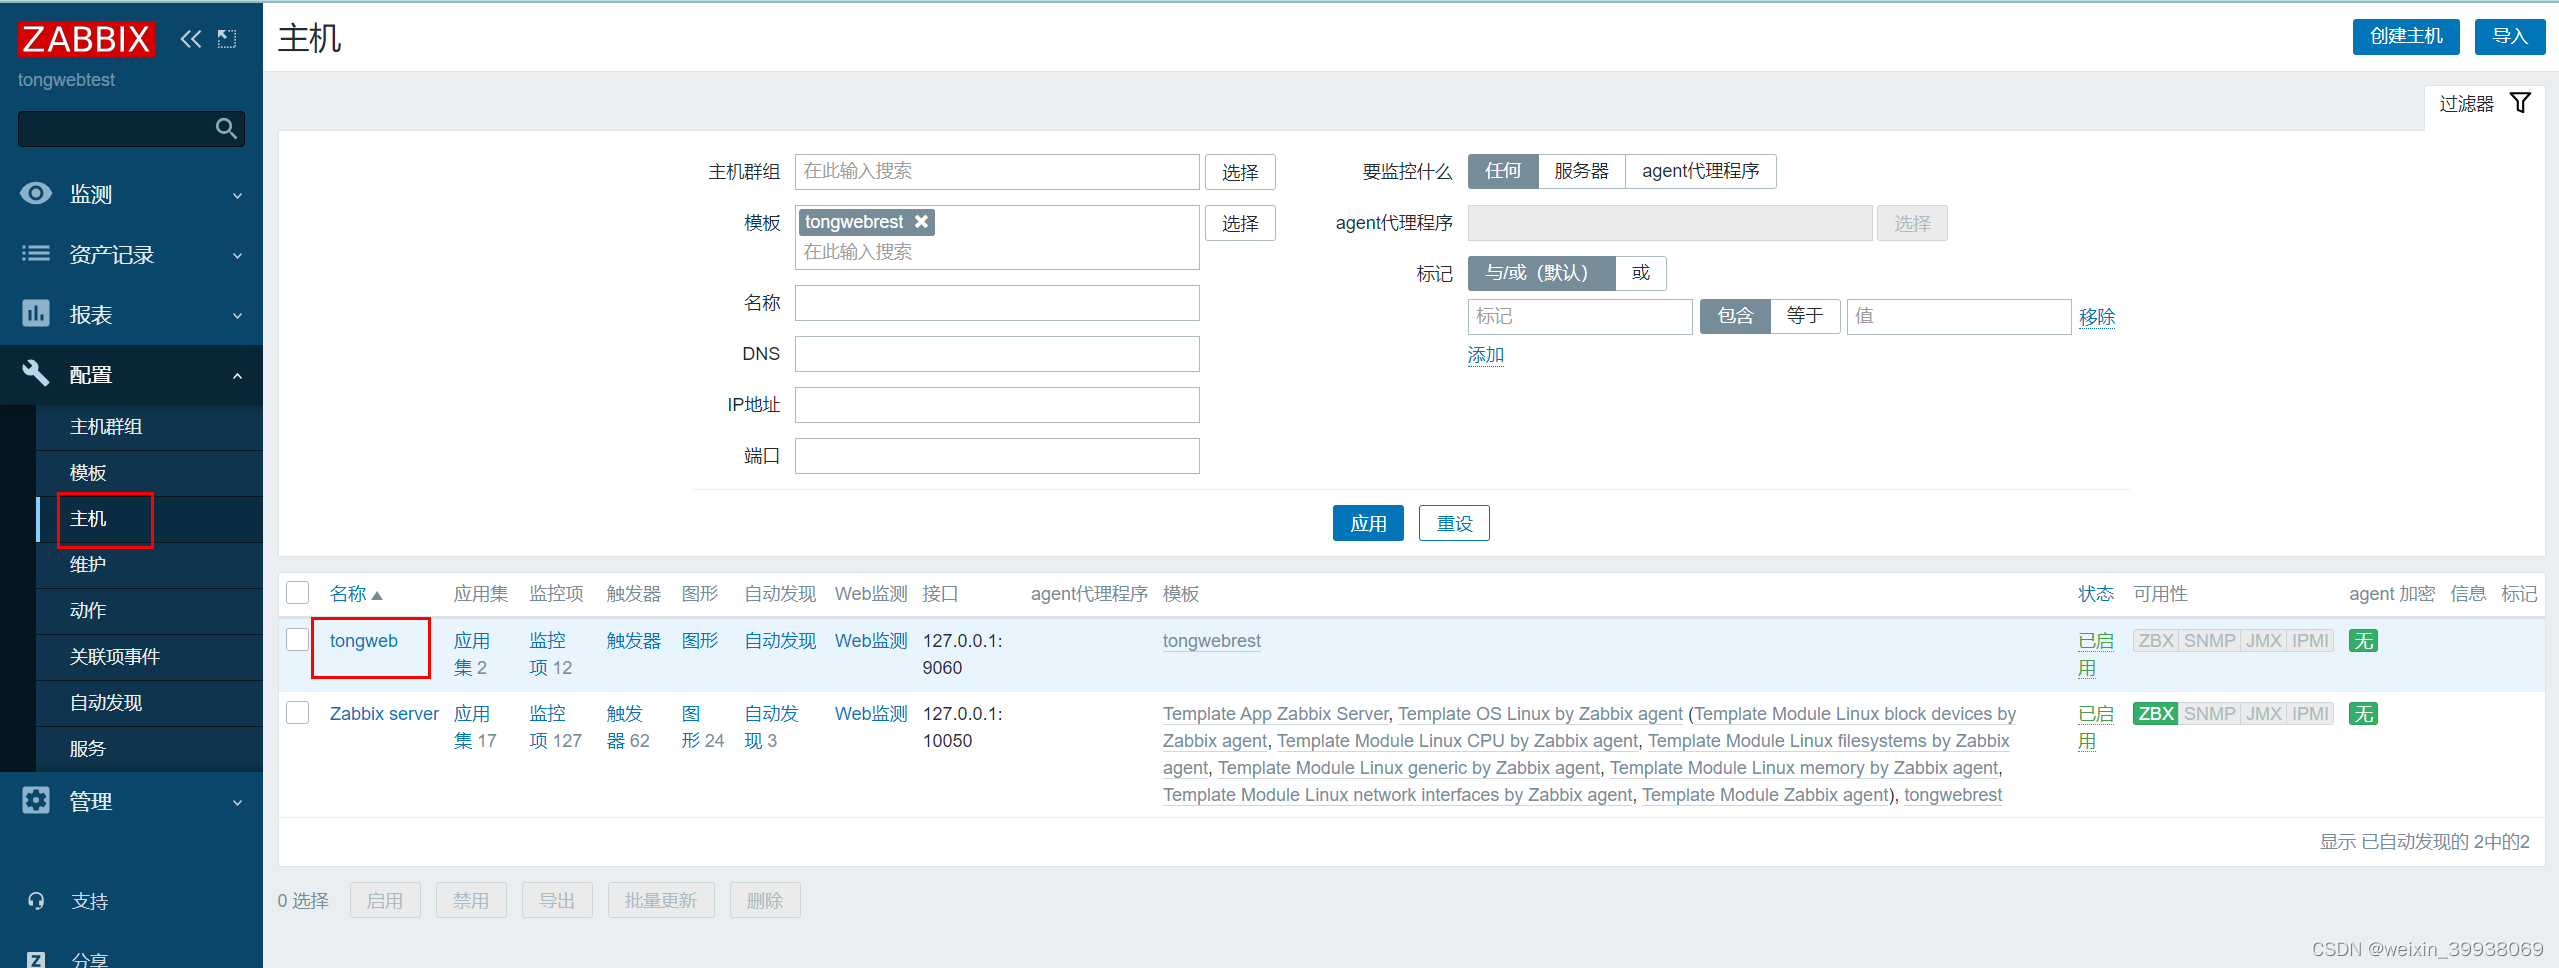
点击模版,选择新的模版:
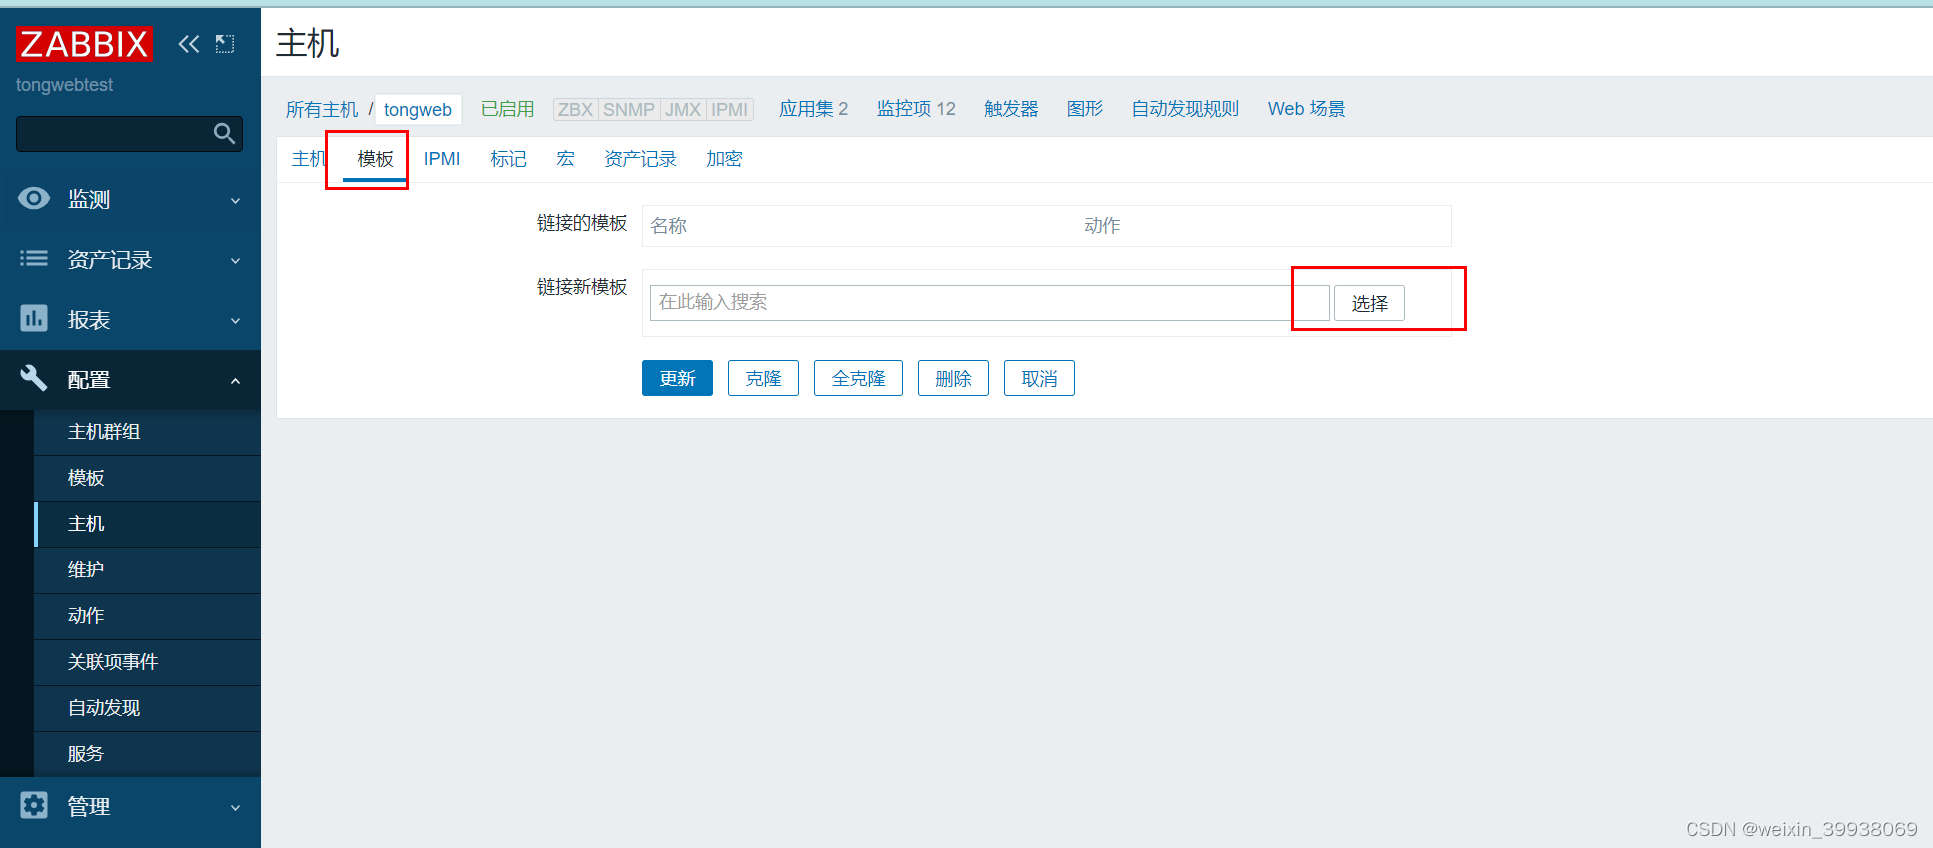
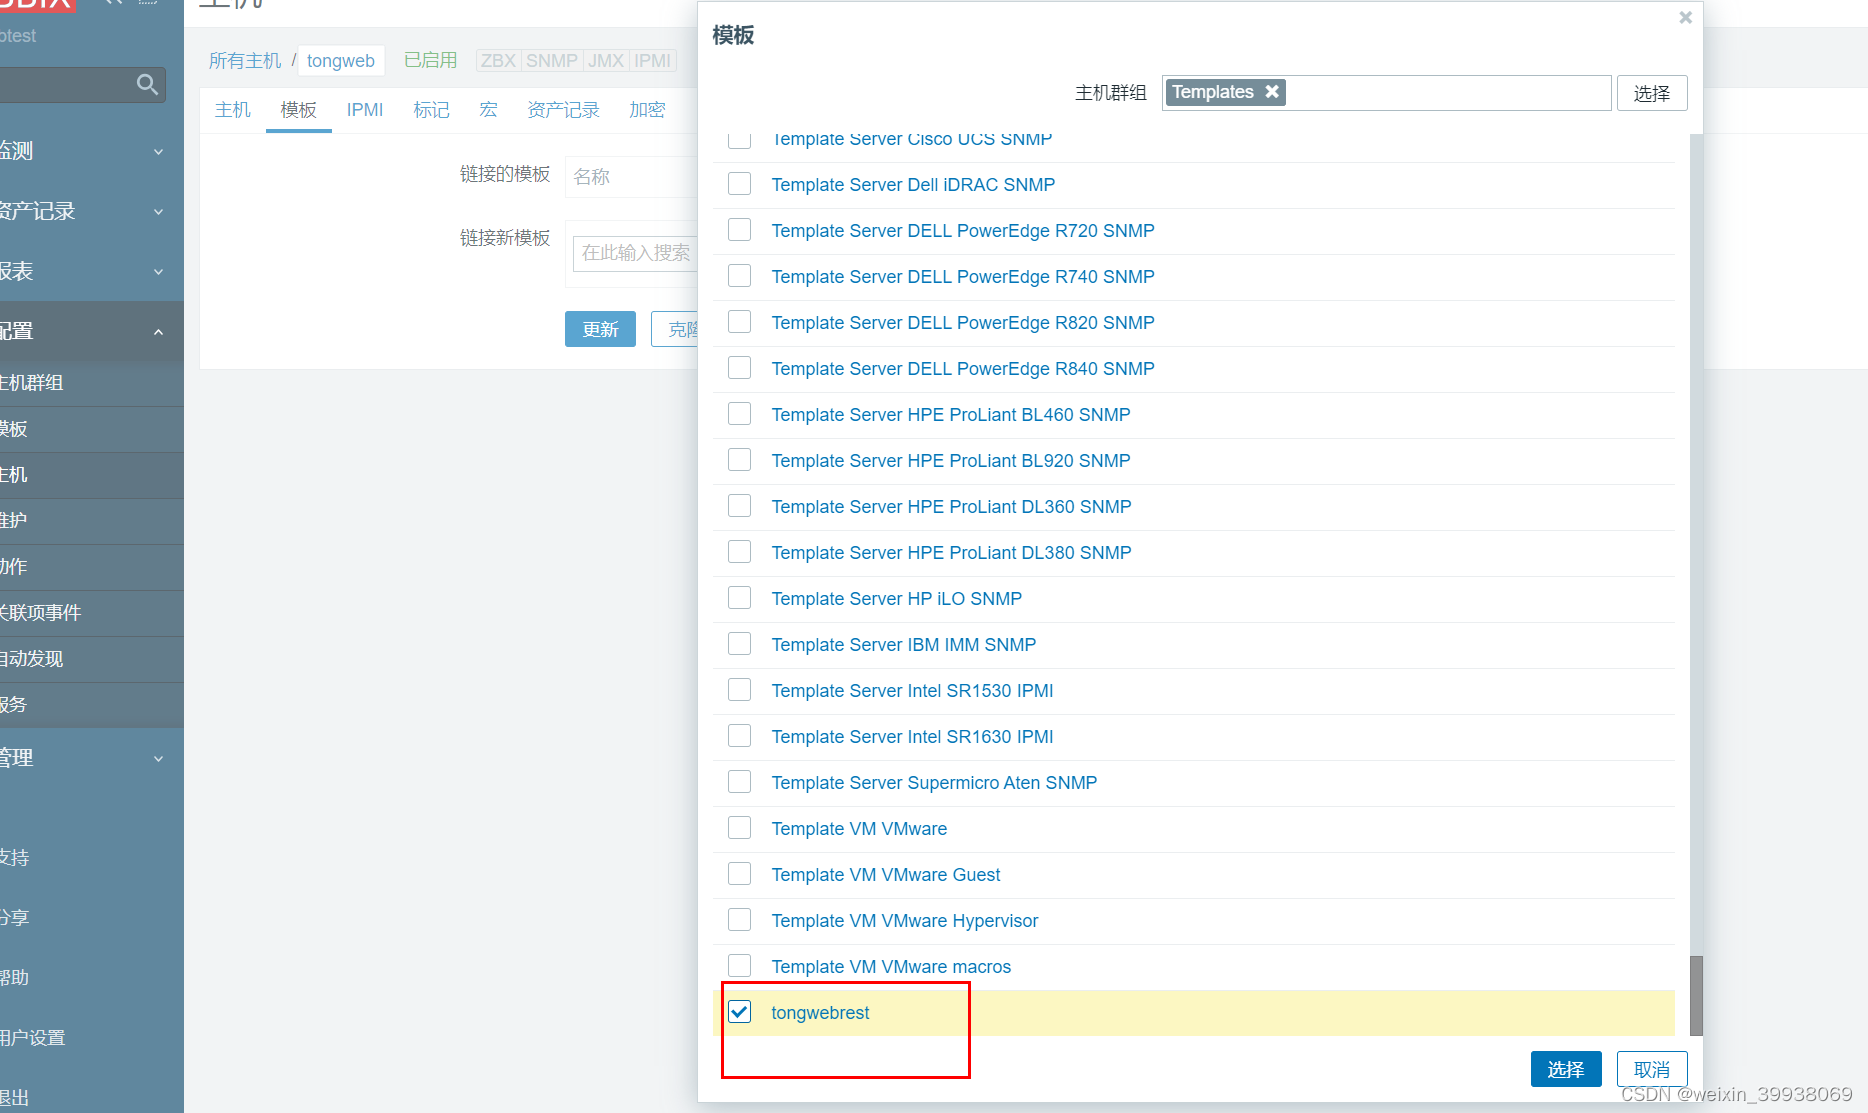
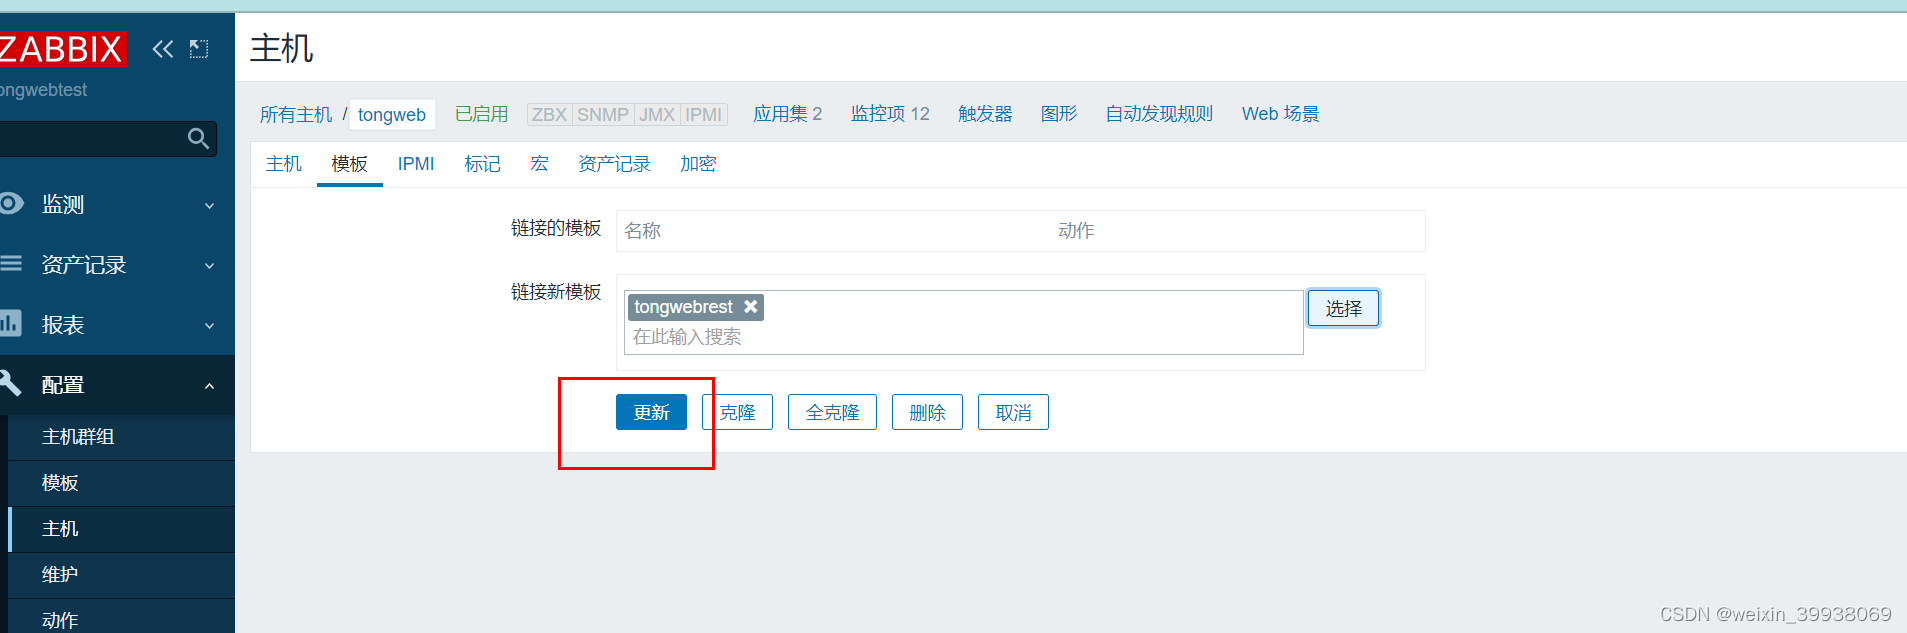
然后点击更新
七、查看监控数据
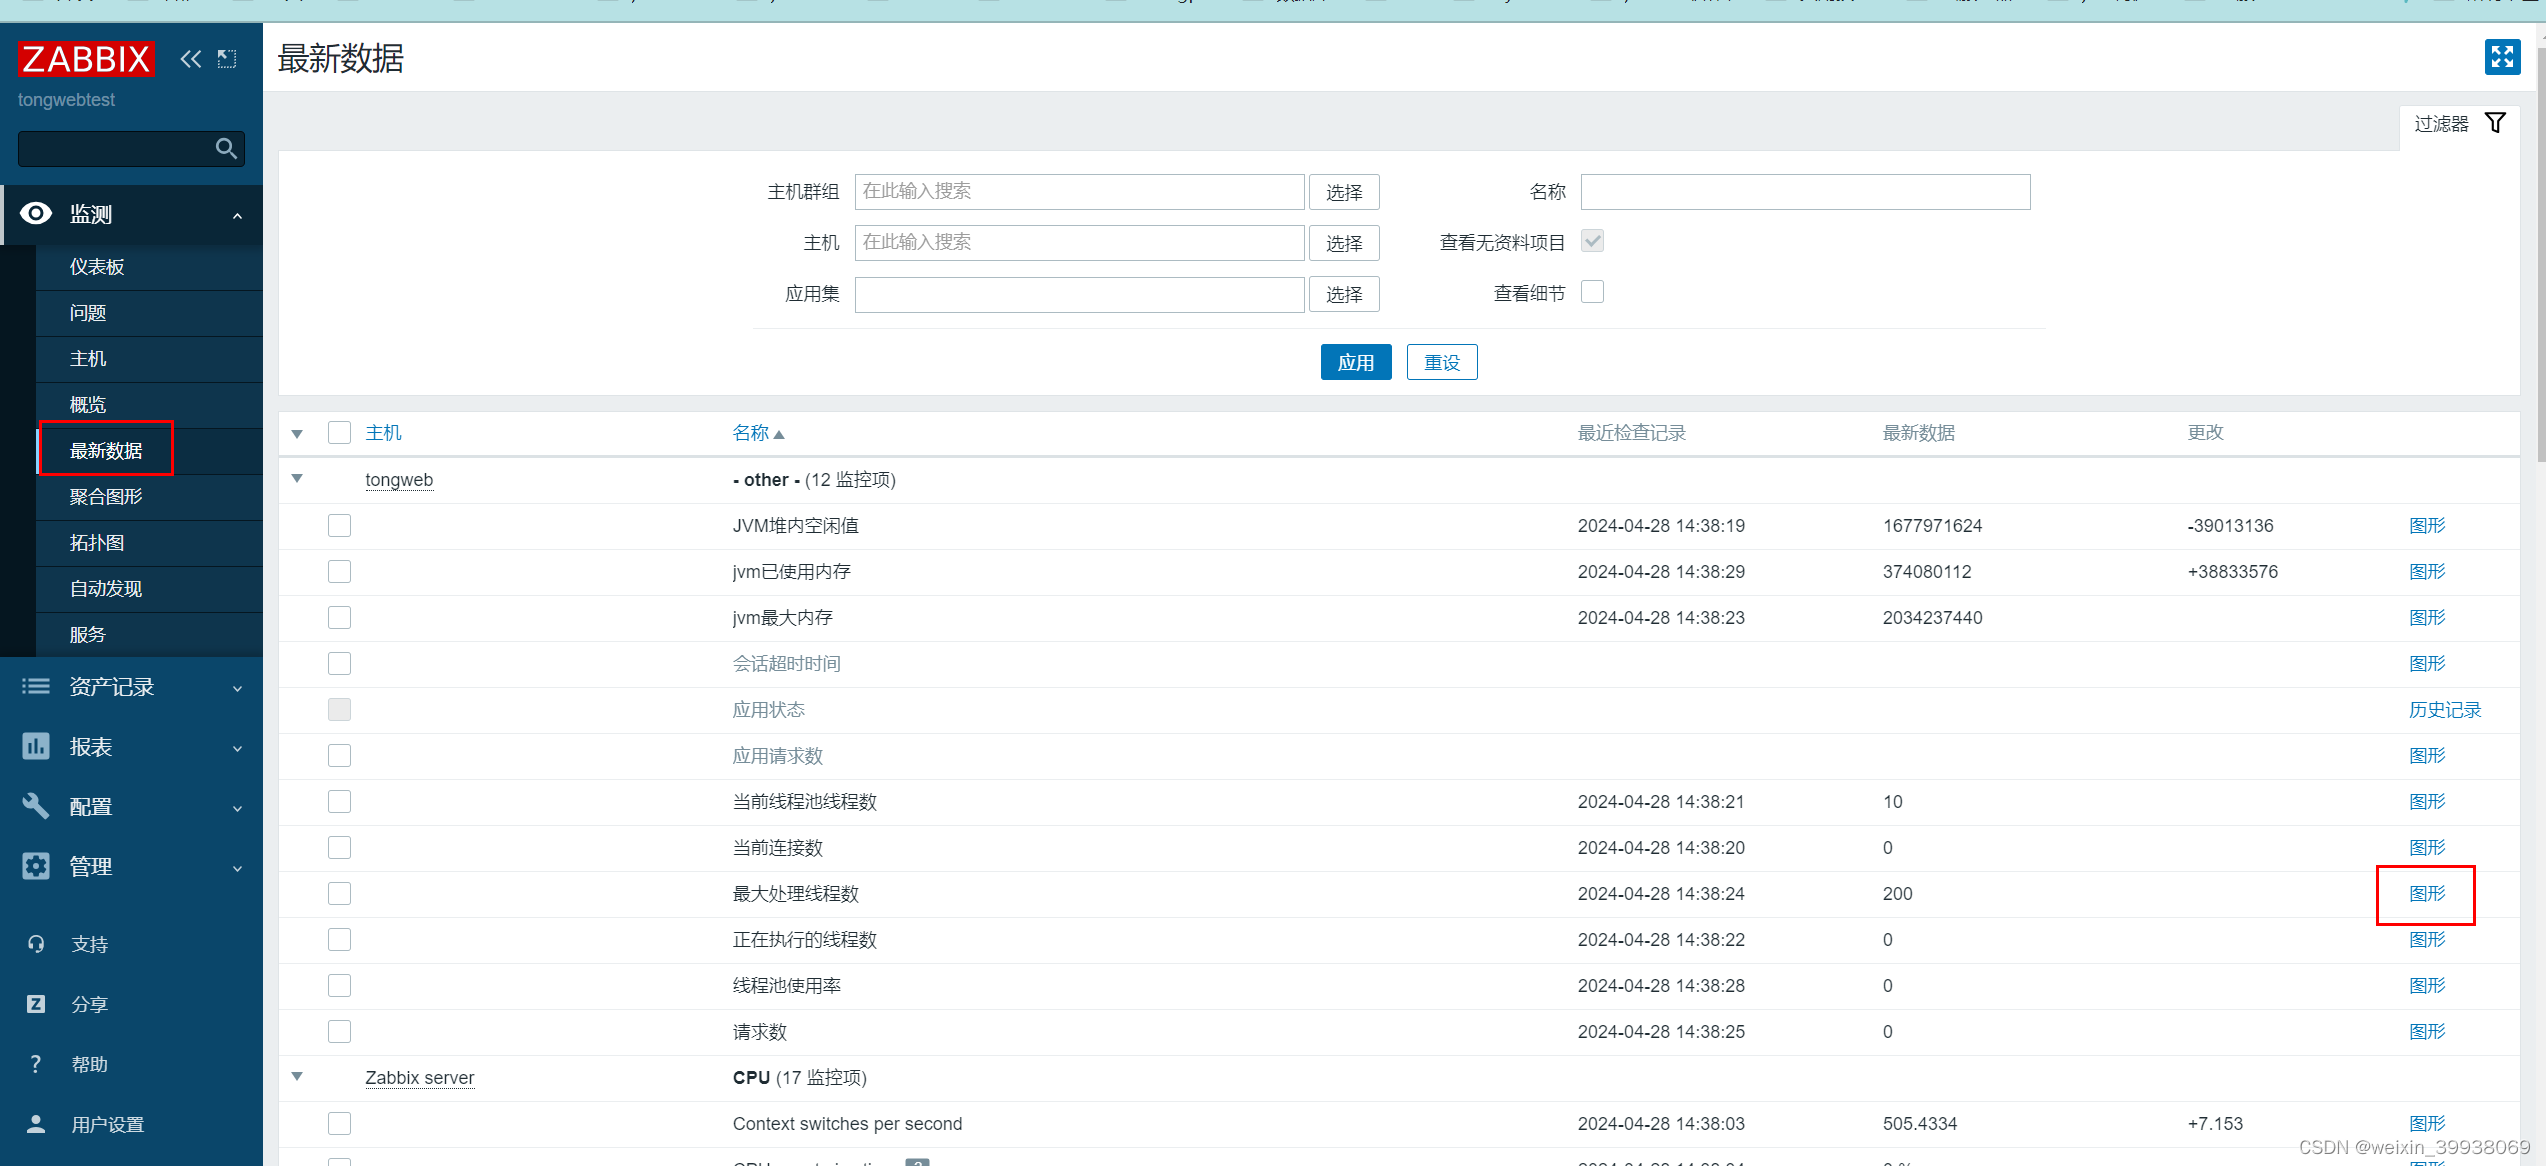
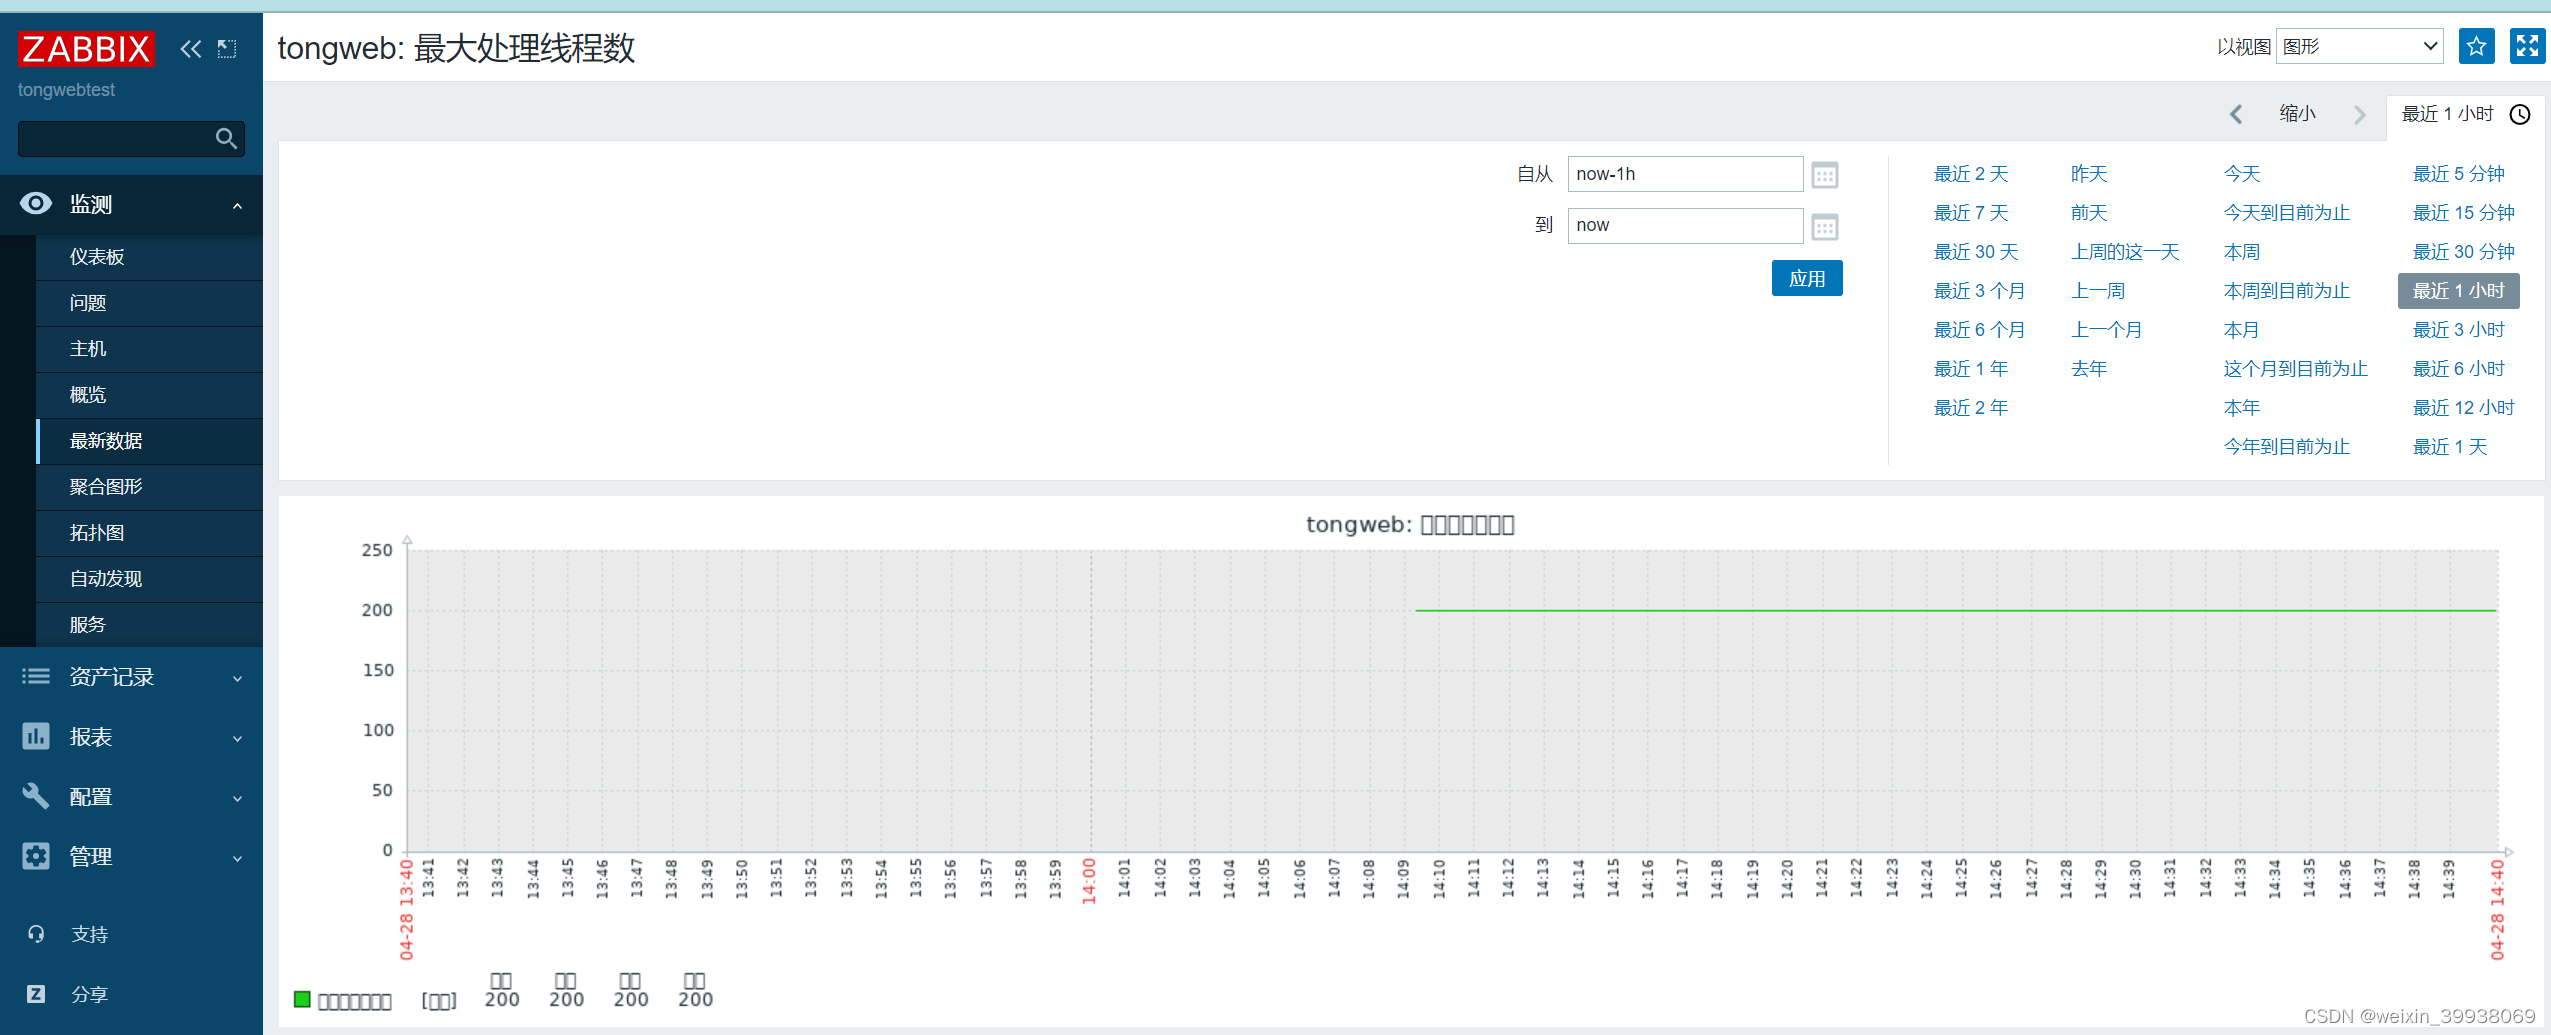
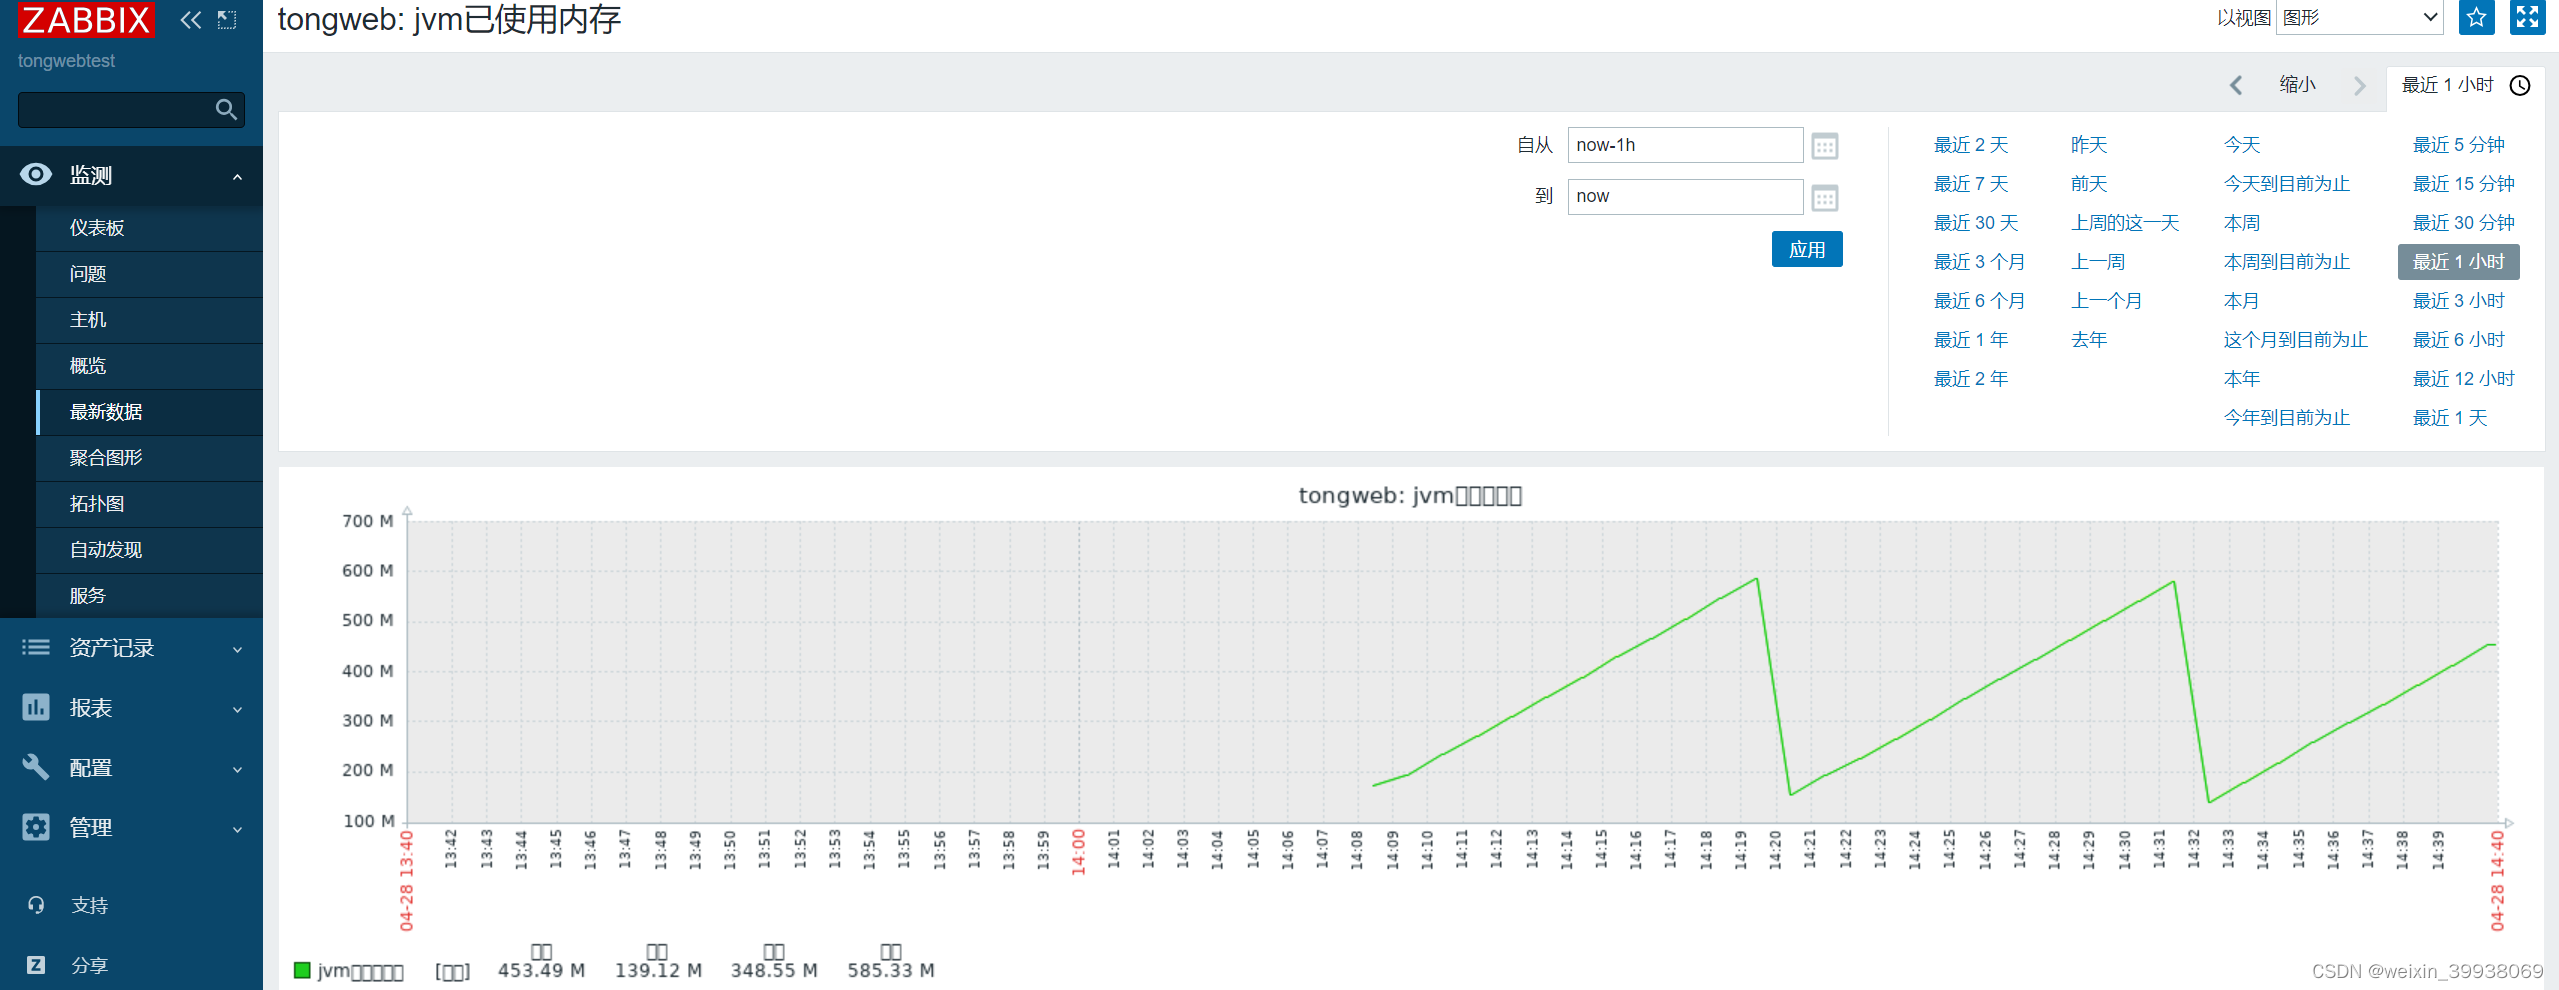
点击监控里的最新数据,点击要看的图形,如下图所示(有几个因为tongweb没有部署应用,所以名称被zabbix标记为灰色,意思是无法识别):
更多推荐



 23
23 0
0- 0


 已为社区贡献8条内容

所有评论(0)