
nginx负载均衡配置实现动静分离
| proxy | 192.168.129.33 | nginx |
| httpd | 192.168.129.133 | httpd |
注:nginx服务都是源码安装 、httpd为yum安装
nginx安装(3、33主机)
nginx安装两遍:3主机与33主机各安装一遍nginx
//关闭防火墙与SELINUX
[root@nginx ~]# systemctl disable --now firewalld.service
Removed /etc/systemd/system/multi-user.target.wants/firewalld.service.
Removed /etc/systemd/system/dbus-org.fedoraproject.FirewallD1.service.
[root@nginx ~]# sed -ri ‘s/^(SELINUX=).*/\1disabled/g’ /etc/sysconfig/selinux
[root@nginx ~]# setenforce 0
//创建用户和组
[root@nginx ~]# useradd -r -M -s /sbin/nologin nginx
//安装依赖、工具、所需包组
[root@nginx ~]# yum -y install pcre-devel openssl openssl-devel gd-devel gcc gcc-c++
[root@nginx ~]# yum -y groups mark install ‘Development Tools’
//创建日志存放目录
[root@nginx ~]# mkdir -p /var/log/nginx
[root@nginx ~]# chown -R nginx.nginx /var/log/nginx
//下载nginx
[root@nginx ~]# cd /usr/src/
[root@nginx src]# wget http://nginx.org/download/nginx-1.20.1.tar.gz
//编译安装
[root@nginx src]# ls
debug kernels nginx-1.20.1.tar.gz
[root@nginx src]# tar xf nginx-1.20.1.tar.gz
[root@nginx src]# cd nginx-1.20.1
[root@nginx nginx-1.20.1]# ./configure \
–prefix=/usr/local/nginx \
–user=nginx \
–group=nginx \
–with-debug \
–with-http_ssl_module \
–with-http_realip_module \
–with-http_image_filter_module \
–with-http_gunzip_module \
–with-http_gzip_static_module \
–with-http_stub_status_module \
–http-log-path=/var/log/nginx/access.log \
–error-log-path=/var/log/nginx/error.log
[root@nginx nginx-1.20.1]# make -j $(grep ‘processor’ /proc/cpuinfo | wc -l) && make install
//配置环境变量
[root@nginx ~]# echo ‘export PATH=/usr/local/nginx/sbin:$PATH’ > /etc/profile.d/nginx.sh
[root@nginx ~]# . /etc/profile.d/nginx.sh
[root@nginx ~]# which nginx
/usr/local/nginx/sbin/nginx
//启动nginx
[root@nginx ~]# nginx
[root@nginx ~]# ss -anlt
State Recv-Q Send-Q Local Address:Port Peer Address:Port
LISTEN 0 128 0.0.0.0:80 0.0.0.0:*
LISTEN 0 128 0.0.0.0:22 0.0.0.0:*
LISTEN 0 128 [::]:22 [::]😗
在proxy主机上修改配置
[root@proxy ~]# vim /usr/local/nginx/conf/nginx.conf
…
#gzip on;
#在以下添加这一段
upstream webservers { #配置负载均衡
server 192.168.129.3;
server 192.168.129.133;
}
server {
listen 80;
server_name localhost;
#charset koi8-r;
#access_log logs/host.access.log main;
location / { #配置反向代理
proxy_pass http://webservers;
}
#error_page 404 /404.html;
…
[root@proxy ~]# nginx -t
nginx: the configuration file /usr/local/nginx/conf/nginx.conf syntax is ok
nginx: configuration file /usr/local/nginx/conf/nginx.conf test is successful
[root@proxy ~]# nginx -s reload
httpd安装(133主机)
[root@httpd ~]# yum -y install httpd
测试
使用proxy主机IP地址访问,并刷新测试


===================================================================
-
静态资源:可以理解为前端的固定页面,这里面包含HTML、CSS、JS、图片等等,不需要查数据库也不需要程序处理,直接就能够显示的页面,如果想修改内容则必须修改页面,但是访问效率相当高。 -
动态资源:需要程序处理或者从数据库中读数据,能够根据不同的条件在页面显示不同的数据,内容更新不需要修改页面但是访问速度不及静态页面。
-
动静分离是让动态网站里的动态网页根据一定规则把不变的资源和经常变的资源区分开来,动静资源做好了拆分以后,我们就可以根据静态资源的特点将其做缓存操作,这就是网站静态化处理的核心思路
-
动静分离简单的概括是:动态文件与静态文件的分离。
-
伪静态:网站如果想被搜索引擎搜素到,动态页面静态技术freemarker等模版引擎技术
-
在我们的软件开发中,有些请求是需要后台处理的(如:.jsp,.do等等),有些请求是不需要经过后台处理的(如:css、html、jpg、js等等文件),这些不需要经过后台处理的文件称为静态文件,否则动态文件。因此我们后台处理忽略静态文件。这会有人又说那我后台忽略静态文件不就完了吗。当然这是可以的,但是这样后台的请求次数就明显增多了。在我们对资源的响应速度有要求的时候,我们应该使用这种动静分离的策略去解决。
-
动静分离将网站静态资源(HTML,JavaScript,CSS,img等文件)与后台应用分开部署,提高用户访问静态代码的速度,降低对后台应用访问。这里我们将静态资源放到nginx中,动态资源转发到tomcat服务器中。
-
因此,动态资源转发到tomcat服务器我们就使用到了前面讲到的反向代理了。
环境说明
| 主机名 | IP | 服务 |
| — | — | — |
| lnmp | 192.168.129.135 | lnmp架构 |
| proxy | 192.168.129.33 | nginx |
| httpd | 192.168.153.133 | httpd |
lnmp(135主机)
- nginx部署
//关闭防火墙与SELINUX
[root@lnmp ~]# systemctl disable --now firewalld.service
Removed /etc/systemd/system/multi-user.target.wants/firewalld.service.
Removed /etc/systemd/system/dbus-org.fedoraproject.FirewallD1.service.
[root@lnmp ~]# sed -ri ‘s/^(SELINUX=).*/\1disabled/g’ /etc/sysconfig/selinux
[root@lnmp ~]# setenforce 0
//创建用户和组
[root@lnmp ~]# useradd -r -M -s /sbin/nologin nginx
//安装依赖、工具、所需包组
[root@lnmp ~]# yum -y install pcre-devel openssl openssl-devel gd-devel gcc gcc-c++
[root@lnmp ~]# yum -y groups mark install ‘Development Tools’
//创建日志存放目录
[root@lnmp ~]# mkdir -p /var/log/nginx
[root@lnmp ~]# chown -R nginx.nginx /var/log/nginx
//下载nginx
[root@lnmp ~]# cd /usr/src/
[root@nginx src]# wget http://nginx.org/download/nginx-1.20.1.tar.gz
//编译安装
[root@lnmp src]# ls
debug kernels nginx-1.20.1.tar.gz
[root@lnmp src]# tar xf nginx-1.20.1.tar.gz
[root@lnmp src]# cd nginx-1.20.1
[root@lnmp nginx-1.20.1]# ./configure \
–prefix=/usr/local/nginx \
–user=nginx \
–group=nginx \
–with-debug \
–with-http_ssl_module \
–with-http_realip_module \
–with-http_image_filter_module \
–with-http_gunzip_module \
–with-http_gzip_static_module \
–with-http_stub_status_module \
–http-log-path=/var/log/nginx/access.log \
–error-log-path=/var/log/nginx/error.log
[root@lnmp nginx-1.20.1]# make -j $(grep ‘processor’ /proc/cpuinfo | wc -l) && make install
//配置环境变量
[root@lnmp ~]# echo ‘export PATH=/usr/local/nginx/sbin:$PATH’ > /etc/profile.d/nginx.sh
[root@lnmp ~]# . /etc/profile.d/nginx.sh
[root@lnmp ~]# which nginx
/usr/local/nginx/sbin/nginx
//启动nginx
[root@lnmp ~]# nginx
[root@lnmp ~]# ss -anlt
State Recv-Q Send-Q Local Address:Port Peer Address:Port
LISTEN 0 128 0.0.0.0:80 0.0.0.0:*
LISTEN 0 128 0.0.0.0:22 0.0.0.0:*
LISTEN 0 128 [::]:22 [::]😗
//创建PHP访问页面
[root@lnmp ~]# cat > /usr/local/nginx/html/index.php <<EOF
<?php phpinfo(); ?>EOF
//修改nginx配置文件
[root@lnmp ~]# vim /usr/local/nginx/conf/nginx.conf
…
location / {
root html;
index index.php index.html index.htm; #在45行中添加index.php
}
…
#取消location ~ .php$ 大括号前的注释(65~71)行
location ~ .php$ {
root html;
fastcgi_pass 127.0.0.1:9000;
fastcgi_index index.php;
fastcgi_param SCRIPT_FILENAME d o c u m e n t r o o t document_root documentrootfastcgi_script_name; #将/script改为$document_root
include fastcgi_params;
}
//重启nginx服务
[root@lnmp ~]# nginx -s reload
- mysql部署
//创建用户和组
[root@lnmp ~]# useradd -r -M -s /sbin/nologin mysql
//安装依赖包
[root@lnmp ~]# yum -y install ncurses-devel openssl-devel openssl cmake mariadb-devel ncurses-compat-libs
//下载二进制格式的mysql软件包
[root@lnmp ~]# cd /usr/src/
[root@lnmp src]# wget https://downloads.mysql.com/archives/get/p/23/file/mysql-5.7.34-linux-glibc2.12-x86_64.tar.gz
[root@lnmp src]# ls mysql*
mysql-5.7.34-linux-glibc2.12-x86_64.tar.gz
//解压
[root@lnmp src]# tar xf mysql-5.7.34-linux-glibc2.12-x86_64.tar.gz -C /usr/local/
[root@lnmp src]# ls /usr/local/
bin etc games include lib lib64 libexec mysql-5.7.34-linux-glibc2.12-x86_64 nginx sbin share src
//创建软连接
[root@lnmp src]# cd /usr/local/
[root@lnmp local]# ln -s mysql-5.7.34-linux-glibc2.12-x86_64/ mysql
//修改属主属组
[root@lnmp ~]# chown -R mysql.mysql /usr/local/mysql
//添加环境变量
[root@lnmp ~]# echo ‘export PATH=/usr/local/mysql/bin:$PATH’ > /etc/profile.d/mysql.sh
[root@lnmp ~]# source /etc/profile.d/mysql.sh
[root@lnmp ~]# which mysql
/usr/local/mysql/bin/mysql
//头文件(include)、读取lib
[root@lnmp ~]# ln -s /usr/local/mysql/include/ /usr/local/include/mysql
[root@lnmp ~]# echo ‘/usr/local/mysql/lib’ > /etc/ld.so.conf.d/mysql.conf
[root@lnmp ~]# ldconfig
//创建数据存放目录
[root@lnmp ~]# mkdir -p /opt/data
[root@lnmp ~]# chown -R mysql.mysql /opt/data/
[root@lnmp ~]# ll /opt/data/
总用量 0
//初始化数据库
[root@localhost ~]# /usr/local/mysql/bin/mysqld --initialize-insecure --user=mysql --datadir=/opt/data/ #这种方法初始化完成后是没有密码
2021-10-26T13:44:15.653137Z 0 [Warning] TIMESTAMP with implicit DEFAULT value is deprecated. Please use --explicit_defaults_for_timestamp server option (see documentation for more details).
2021-10-26T13:44:15.802617Z 0 [Warning] InnoDB: New log files created, LSN=45790
2021-10-26T13:44:15.877996Z 0 [Warning] InnoDB: Creating foreign key constraint system tables.
2021-10-26T13:44:15.934051Z 0 [Warning] No existing UUID has been found, so we assume that this is the first time that this server has been started. Generating a new UUID: cf9a66e7-3662-11ec-b2ef-000c29aa87a6.
2021-10-26T13:44:15.935817Z 0 [Warning] Gtid table is not ready to be used. Table ‘mysql.gtid_executed’ cannot be opened.
2021-10-26T13:44:16.451993Z 0 [Warning] CA certificate ca.pem is self signed.
2021-10-26T13:44:16.479129Z 1 [Warning] root@lnmp is created with an empty password ! Please consider switching off the --initialize-insecure option.
//生成配置文件
[root@lnmp ~]# cat > /etc/my.cnf <<EOF
[mysqld]
basedir = /usr/local/mysql
datadir = /opt/data
socket = /tmp/mysql.sock
port = 3306
pid-file = /opt/data/mysql.pid
user = mysql
skip-name-resolve
EOF
//配置service服务启动文件
[root@lnmp ~]# sed -ri ‘s#^(basedir=).*#\1/usr/local/mysql#g’ /usr/local/mysql/support-files/mysql.server
[root@lnmp ~]# sed -ri ‘s#^(datadir=).*#\1/opt/data#g’ /usr/local/mysql/support-files/mysql.server
[root@lnmp ~]# cat > /usr/lib/systemd/system/mysqld.service <<EOF
[Unit]
Description=Mysqld server daemon
After=network.target
[Service]
Type=forking
ExecStart=/usr/local/mysql/support-files/mysql.server start
ExecStop=/usr/local/mysql/support-files/mysql.server stop
[Install]
WantedBy=multi-user.target
EOF
//重新加载
[root@lnmp ~]# systemctl daemon-reload
//启动mysql
[root@lnmp ~]# systemctl start mysqld
[root@lnmp ~]# ss -anlt
State Recv-Q Send-Q Local Address:Port Peer Address:Port
LISTEN 0 128 0.0.0.0:80 0.0.0.0:*
LISTEN 0 128 0.0.0.0:22 0.0.0.0:*
LISTEN 0 80 *:3306 :
LISTEN 0 128 [::]:22 [::]😗
//修改密码
[root@lnmp ~]# mysql
Welcome to the MySQL monitor. Commands end with ; or \g.
Your MySQL connection id is 2
Server version: 5.7.34 MySQL Community Server (GPL)
Copyright © 2000, 2021, Oracle and/or its affiliates.
Oracle is a registered trademark of Oracle Corporation and/or its
affiliates. Other names may be trademarks of their respective
owners.
Type ‘help;’ or ‘\h’ for help. Type ‘\c’ to clear the current input statement.
mysql> set password = password(‘123456’);
Query OK, 0 rows affected, 1 warning (0.00 sec)
mysql> quit
Bye
- PHP部署
//安装依赖包
[root@lnmp ~]# yum -y install sqlite-devel libzip-devel libxml2 libxml2-devel openssl openssl-devel bzip2 bzip2-devel libcurl libcurl-devel libicu-devel libjpeg libjpeg-devel libpng libpng-devel openldap-devel pcre-devel freetype freetype-devel gmp gmp-devel readline readline-devel libxslt libxslt-devel
[root@lnmp ~]# yum -y install http://mirror.centos.org/centos/8-stream/PowerTools/x86_64/os/Packages/oniguruma-devel-6.8.2-2.el8.x86_64.rpm
//下载php软件包并解压
[root@lnmp ~]# cd /usr/src/
[root@lnmp src]# wget https://www.php.net/distributions/php-8.0.10.tar.gz
[root@lnmp src]# tar xf php-8.0.10.tar.gz
//编译及安装
[root@lnmp ~]# cd /usr/src/php-8.0.10
[root@lnmp php-8.0.10]# ./configure --prefix=/usr/local/php8 \
–with-config-file-path=/etc \
–enable-fpm \
–disable-debug \
–disable-rpath \
–enable-shared \
–enable-soap \
–with-openssl \
–enable-bcmath \
–with-iconv \
–with-bz2 \
–enable-calendar \
–with-curl \
–enable-exif \
–enable-ftp \
–enable-gd \
–with-jpeg \
–with-zlib-dir \
–with-freetype \
–with-gettext \
–enable-mbstring \
–enable-pdo \
–with-mysqli=mysqlnd \
–with-pdo-mysql=mysqlnd \
–with-readline \
–enable-shmop \
–enable-simplexml \
–enable-sockets \
–with-zip \
–enable-mysqlnd-compression-support \
–with-pear \
–enable-pcntl \
–enable-posix
[root@lnmp php-8.0.10]# make && make install
//配置环境变量
[root@lnmp ~]# echo ‘export PATH=/usr/local/php8/bin:$PATH’ > /etc/profile.d/php.sh
[root@lnmp ~]# source /etc/profile.d/php.sh
[root@lnmp ~]# which php
/usr/local/php8/bin/php
//配置php-fpm文件
[root@lnmp ~] # cd /usr/src/php-8.0.10
[root@lnmp php-8.0.10]# \cp php.ini-production /etc/php.ini
[root@lnmp php-8.0.10]# cp sapi/fpm/init.d.php-fpm /etc/init.d/php-fpm
[root@lnmp php-8.0.10]# chmod +x /etc/init.d/php-fpm
[root@lnmp php-8.0.10]# cp /usr/local/php8/etc/php-fpm.conf.default /usr/local/php8/etc/php-fpm.conf
[root@lnmp php-8.0.10]# cp /usr/local/php8/etc/php-fpm.d/www.conf.default /usr/local/php8/etc/php-fpm.d/www.conf
//配置.service服务启动文件
[root@lnmp ~]# cat > /usr/lib/systemd/system/php-fpm.service <<EOF
[Unit]
Description=Php-fpm server daemon
After=network.target
[Service]
Type=forking
ExecStart=service php-fpm start
ExecStop=service php-fpm stop
[Install]
WantedBy=multi-user.target
EOF
//重新加载
[root@lnmp ~]# systemctl daemon-reload
//启动服务
[root@lnmp ~]# systemctl start php-fpm
[root@lnmp ~]# ss -anlt
State Recv-Q Send-Q Local Address:Port Peer Address:Port
LISTEN 0 128 127.0.0.1:9000 0.0.0.0:*
LISTEN 0 128 0.0.0.0:80 0.0.0.0:*
LISTEN 0 128 0.0.0.0:22 0.0.0.0:*
LISTEN 0 80 *:3306 :
LISTEN 0 128 [::]:22 [::]😗
proxy(33主机)
//关闭防火墙与SELINUX
[root@proxy ~]# systemctl disable --now firewalld.service
Removed /etc/systemd/system/multi-user.target.wants/firewalld.service.
Removed /etc/systemd/system/dbus-org.fedoraproject.FirewallD1.service.
[root@proxy ~]# sed -ri ‘s/^(SELINUX=).*/\1disabled/g’ /etc/sysconfig/selinux
[root@proxy ~]# setenforce 0
//创建用户和组
[root@proxy ~]# useradd -r -M -s /sbin/nologin nginx
//安装依赖、工具、所需包组
[root@proxy ~]# yum -y install pcre-devel openssl openssl-devel gd-devel gcc gcc-c++
[root@proxy ~]# yum -y groups mark install ‘Development Tools’
//创建日志存放目录
[root@proxy ~]# mkdir -p /var/log/nginx
[root@proxy ~]# chown -R nginx.nginx /var/log/nginx
//下载proxy
[root@proxy ~]# cd /usr/src/
[root@nginx src]# wget http://nginx.org/download/nginx-1.20.1.tar.gz
//编译安装
[root@proxy src]# ls
debug kernels nginx-1.20.1.tar.gz
[root@proxy src]# tar xf nginx-1.20.1.tar.gz
[root@proxy src]# cd nginx-1.20.1
[root@proxy nginx-1.20.1]# ./configure \
–prefix=/usr/local/nginx \
–user=nginx \
–group=nginx \
–with-debug \
–with-http_ssl_module \
–with-http_realip_module \
–with-http_image_filter_module \
–with-http_gunzip_module \
–with-http_gzip_static_module \
–with-http_stub_status_module \
–http-log-path=/var/log/nginx/access.log \
–error-log-path=/var/log/nginx/error.log
[root@proxy nginx-1.20.1]# make -j $(grep ‘processor’ /proc/cpuinfo | wc -l) && make install
//配置环境变量
[root@proxy ~]# echo ‘export PATH=/usr/local/nginx/sbin:$PATH’ > /etc/profile.d/nginx.sh
[root@proxy ~]# . /etc/profile.d/nginx.sh
[root@proxy ~]# which nginx
/usr/local/nginx/sbin/nginx
//启动nginx
[root@proxy ~]# nginx
[root@proxy ~]# ss -anlt
State Recv-Q Send-Q Local Address:Port Peer Address:Port
LISTEN 0 128 0.0.0.0:80 0.0.0.0:*
LISTEN 0 128 0.0.0.0:22 0.0.0.0:*
LISTEN 0 128 [::]:22 [::]😗
httpd(133主机)
- apache部署
[root@httpd ~]# systemctl disable --now firewalld.service
[root@httpd ~]# sed -i s/SELINUX=enforing/SELINUX=disabled/g /etc/selinux/config
[root@httpd ~]# setenforce 0
//配置源和工具
[root@httpd ~]# curl -o /etc/yum.repos.d/CentOS-Base.repo https://mirrors.aliyun.com/repo/Centos-7.repo
[root@httpd ~]# sed -i -e ‘/mirrors.cloud.aliyuncs.com/d’ -e ‘/mirrors.aliyuncs.com/d’ /etc/yum.repos.d/CentOS-Base.repo
[root@httpd ~]# curl -0 /etc/yum.repos.d/epel.repo http://mirrors.aliyun.com/repo/epel-7.repo
//安装依赖包
[root@httpd ~]# yum -y install epel-release vim wget openssl-devel pcre-devel expat-devel libtool gcc gcc-c++ make
//安装包组
[root@httpd ~]# yum groups mark install ‘Development Tools’
[root@httpd ~]# yum clean all
[root@httpd ~]# yum makecache
//创建apache服务的用户和组
[root@httpd ~]# useradd -r -M -s /sbin/nologin apache
//依赖包apr
[root@httpd ~]# cd /usr/src/
[root@httpd src]# wget https://mirrors.tuna.tsinghua.edu.cn/apache/apr/apr-1.7.0.tar.gz
[root@httpd src]# tar -xf apr-1.7.0.tar.gz
//依赖包apr-util
最后
自我介绍一下,小编13年上海交大毕业,曾经在小公司待过,也去过华为、OPPO等大厂,18年进入阿里一直到现在。
深知大多数Java工程师,想要提升技能,往往是自己摸索成长,自己不成体系的自学效果低效漫长且无助。
因此收集整理了一份《2024年Java开发全套学习资料》,初衷也很简单,就是希望能够帮助到想自学提升又不知道该从何学起的朋友,同时减轻大家的负担。
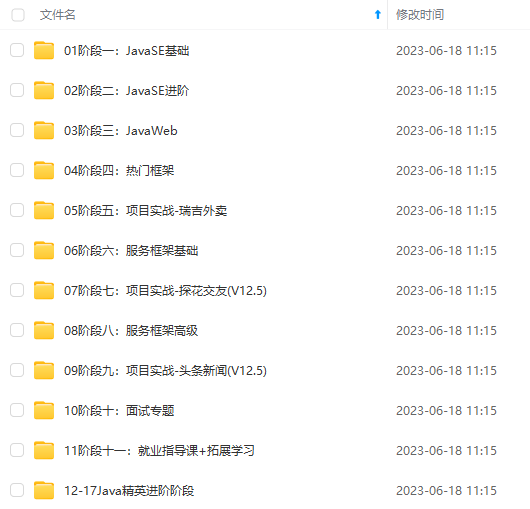
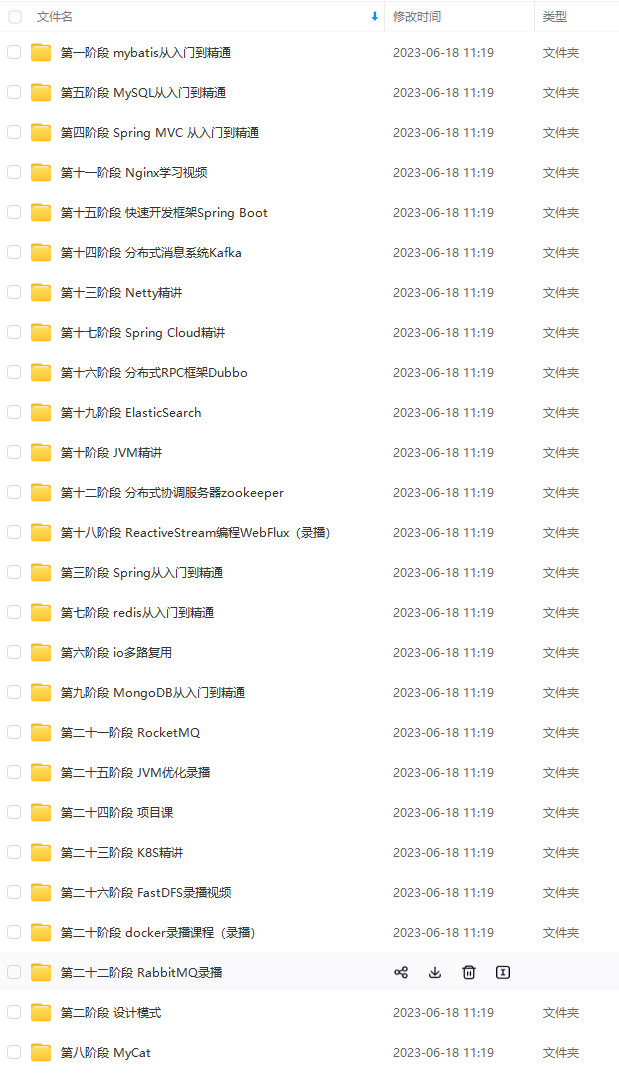
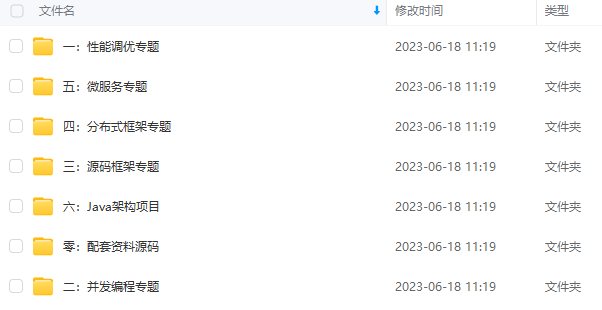
既有适合小白学习的零基础资料,也有适合3年以上经验的小伙伴深入学习提升的进阶课程,基本涵盖了95%以上Java开发知识点,不论你是刚入门Android开发的新手,还是希望在技术上不断提升的资深开发者,这些资料都将为你打开新的学习之门!
如果你觉得这些内容对你有帮助,需要这份全套学习资料的朋友可以戳我获取!!
由于文件比较大,这里只是将部分目录截图出来,每个节点里面都包含大厂面经、学习笔记、源码讲义、实战项目、讲解视频,并且会持续更新!
pcre-devel expat-devel libtool gcc gcc-c++ make
//安装包组
[root@httpd ~]# yum groups mark install ‘Development Tools’
[root@httpd ~]# yum clean all
[root@httpd ~]# yum makecache
//创建apache服务的用户和组
[root@httpd ~]# useradd -r -M -s /sbin/nologin apache
//依赖包apr
[root@httpd ~]# cd /usr/src/
[root@httpd src]# wget https://mirrors.tuna.tsinghua.edu.cn/apache/apr/apr-1.7.0.tar.gz
[root@httpd src]# tar -xf apr-1.7.0.tar.gz
//依赖包apr-util
最后
自我介绍一下,小编13年上海交大毕业,曾经在小公司待过,也去过华为、OPPO等大厂,18年进入阿里一直到现在。
深知大多数Java工程师,想要提升技能,往往是自己摸索成长,自己不成体系的自学效果低效漫长且无助。
因此收集整理了一份《2024年Java开发全套学习资料》,初衷也很简单,就是希望能够帮助到想自学提升又不知道该从何学起的朋友,同时减轻大家的负担。
[外链图片转存中…(img-P3LBm8Au-1715555853842)]
[外链图片转存中…(img-l7NxBk3h-1715555853842)]
[外链图片转存中…(img-h2mHXiQ6-1715555853843)]
既有适合小白学习的零基础资料,也有适合3年以上经验的小伙伴深入学习提升的进阶课程,基本涵盖了95%以上Java开发知识点,不论你是刚入门Android开发的新手,还是希望在技术上不断提升的资深开发者,这些资料都将为你打开新的学习之门!
如果你觉得这些内容对你有帮助,需要这份全套学习资料的朋友可以戳我获取!!
由于文件比较大,这里只是将部分目录截图出来,每个节点里面都包含大厂面经、学习笔记、源码讲义、实战项目、讲解视频,并且会持续更新!
更多推荐


 29
29 0
0- 0


 已为社区贡献2条内容

所有评论(0)