
Spring Security 自定义登录页并开启CSRF防御,http.csrf()源码分析
Spring Security 自定义登录页并开启CSRF防御,http.csrf()源码分析
环境Spring boot+Spring security+Thymeleaf+Maven
1.依赖
    <parent>
        <groupId>org.springframework.boot</groupId>
        <artifactId>spring-boot-starter-parent</artifactId>
        <version>2.5.5</version>
        <relativePath/> <!-- lookup parent from repository -->
    </parent>
    <dependencies>
	 	 <!--spring security-->
	     <dependency>
	         <groupId>org.springframework.boot</groupId>
	         <artifactId>spring-boot-starter-security</artifactId>
	     </dependency>
	      <!--        模板引擎-->
	     <dependency>
	         <groupId>org.springframework.boot</groupId>
	         <artifactId>spring-boot-starter-thymeleaf</artifactId>
	     </dependency>
	     <!--        web依赖-->
	     <dependency>
	         <groupId>org.springframework.boot</groupId>
	         <artifactId>spring-boot-starter-web</artifactId>
	     </dependency>
    </dependencies>
2.使用
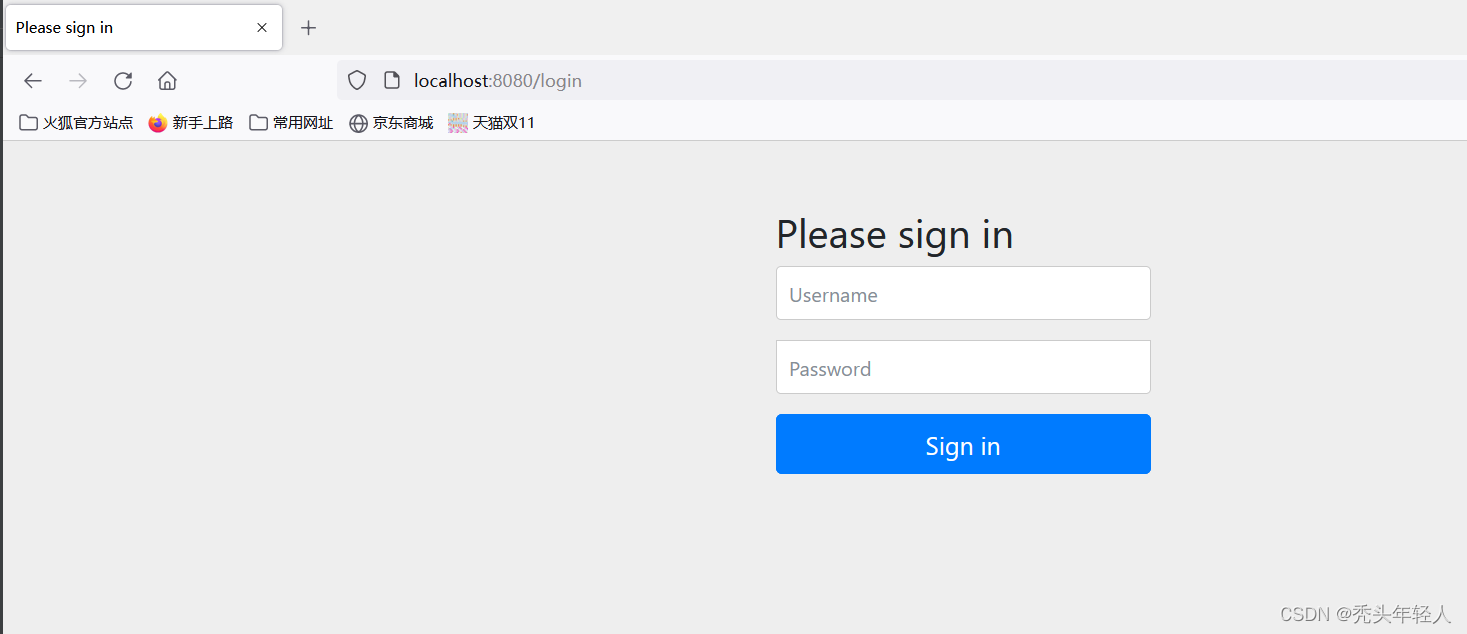
导入Spring Security依赖之后,无需配置,Spring Security自动加入了默认的认证拦截,导入依赖后再启动服务器,访问任意路径会被拦截并跳到默认登录页"/login",该登录页是Spring Security自动生成的
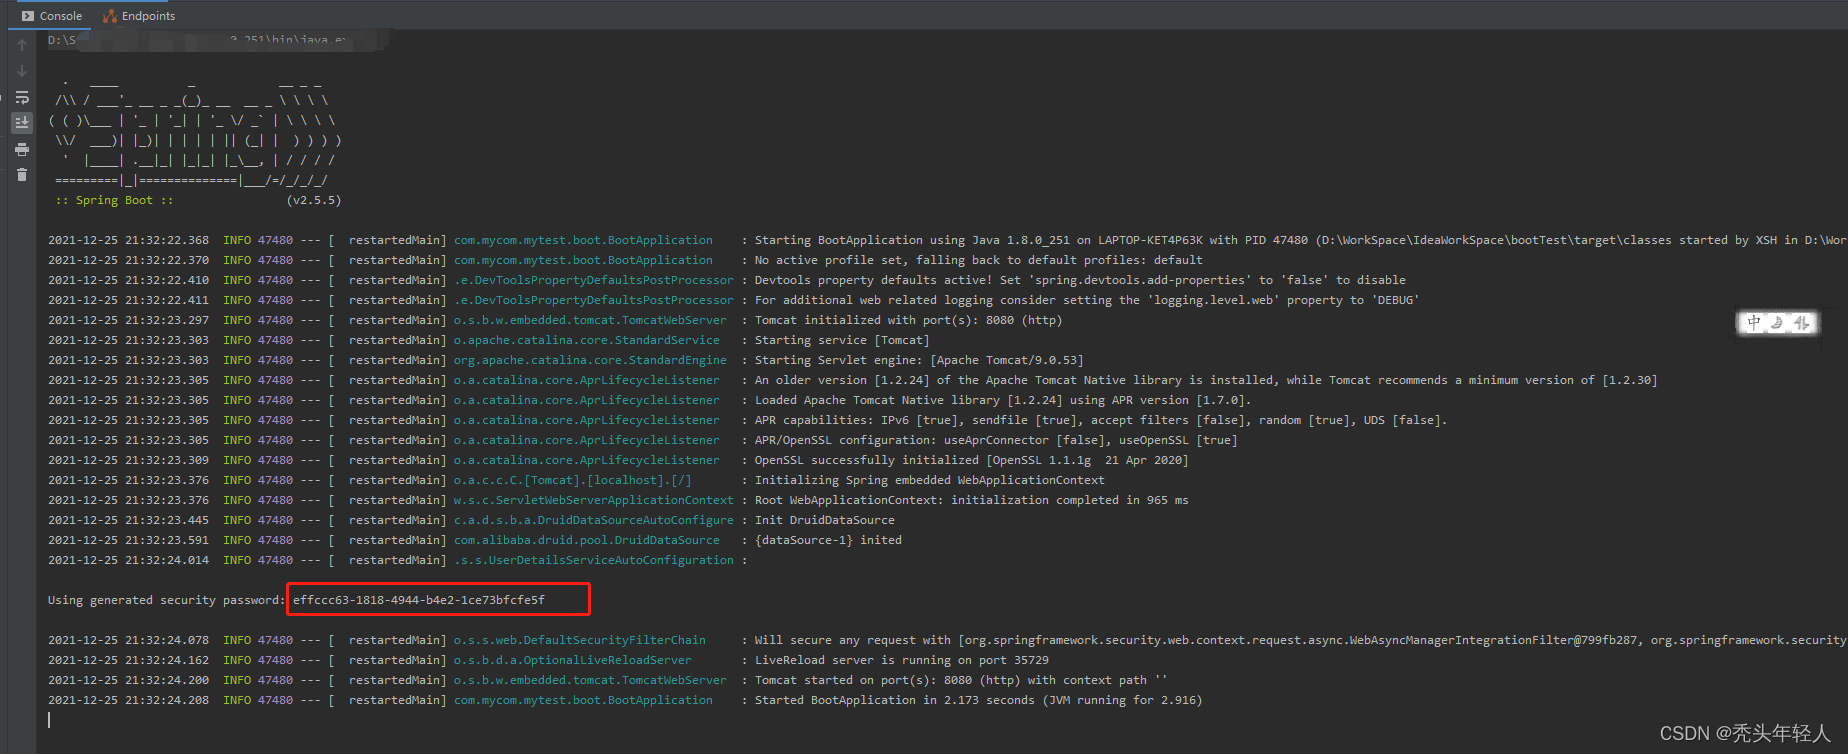
默认用户名为"user",随机密码会自动在控制台输出"effccc63-1818-4944-b4e2-1ce73bfcfe5f"
登录后才可以正常访问其他路径
3.自定义配置
- 建一个类并继承WebSecurityConfigurerAdapter(网络安全适配器)
- 在类上加上@EnableWebSecurity注解
- 重写父类方法即完成自定义配置,如:
@EnableWebSecurity
public class WebSecurityConfig extends WebSecurityConfigurerAdapter {
 //拦截路径+对应权限
    @Override
    protected void configure(HttpSecurity http) throws Exception {
    //自定义
    }
}
4.自定义登录页
1. 先创建登录用户信息
重写这个方法,创建了root用户和guest用户,密码都为123456
    @Override
    protected void configure(AuthenticationManagerBuilder auth) throws Exception {
        //在内存中定义,也可以在jdbc中去拿....
        auth.inMemoryAuthentication().passwordEncoder(new BCryptPasswordEncoder())
                .withUser("root").password(new BCryptPasswordEncoder().encode("123456")).roles("vip1", "vip2", "vip3")
                .and()
                .withUser("guest").password(new BCryptPasswordEncoder().encode("123456")).roles("vip1", "vip2");
    }
2.放行静态资源
//    放行静态资源
    @Override
    public void configure(WebSecurity web) throws Exception {
        web.ignoring()
                .antMatchers("/bootstrap-4.0.0/**")
        ;
    }
3. 自定义安全配置(登录,登出,放行,授权等)
    //拦截路径+对应权限
    @Override
    protected void configure(HttpSecurity http) throws Exception {
	    http.formLogin()
	                .usernameParameter("username")//表单里的用户名  <input name="username">
	                .passwordParameter("password")//密码凭证        <input name="password">
	                .loginPage("/loginPage")//登录显示页面的路径
	                .loginProcessingUrl("/login")//提交登录信息表弟的路径 <form action="/login">
	                .successForwardUrl("/")//登录成功后跳转的页面
	                .and()
	                .authorizeRequests()
	                .antMatchers("/loginPage").permitAll()//放行登录界面
	                .anyRequest()//其他请求
	                .authenticated()//都需要登录后才可以访问
	                .and()
	                .logout()//退出功能 默认访问"/logout"退出
	                .and()
	                .csrf().disable();//关闭csrf防御,不然访问不成功
     }
4.效果
访问任意路径会跳转到自定义登录页"/loginPage"
自定义登录页内容:form表单action=“/login”,method=“post”,
输入用户名"root",密码"123456"
提交表单登录后跳转到"/“根目录,且能成功访问其他资源,登录成功
访问”/logout"退出登录并跳到登录页"/loginPage"
5.开启CSRF防御
默认情况下,csrf防御是开启的,所以不使用.csrf().disable();这个代码去关闭他了
开启CSRF防御后,访问"/login",“/logout”,都需要以post的方式,所以要想直接通过链接访问"/logout",需修改代码为: “.logout(logout -> logout
.logoutRequestMatcher(new AntPathRequestMatcher(”/logout")).logoutSuccessUrl(“/”)
);"
    //拦截路径+对应权限
    @Override
    protected void configure(HttpSecurity http) throws Exception {
	     http.formLogin()
                .usernameParameter("username")//表单里的用户名  <input name="username">
                .passwordParameter("password")//密码凭证        <input name="password">
                .loginPage("/loginPage")//登录显示页面的路径
                .loginProcessingUrl("/login")//提交登录信息表单的路径 <form action="/login">
                .successForwardUrl("/")//登录成功后跳转的页面
                .and()
                .authorizeRequests()
                .antMatchers("/loginPage").permitAll()//放行登录界面
                .anyRequest()//其他请求
                .authenticated()//都需要登录后才可以访问
                .and()
                .logout(logout -> logout
                        .logoutRequestMatcher(new AntPathRequestMatcher("/logout")).logoutSuccessUrl("/")
                );//运行用get而不是表单post方式请求"/logout",不推荐,推荐用表单post
     }
这时,如果表单里没有带_csrf参数和token值,且action没有使用thymeleaf模板语法的" th:action=‘/login’ "时,再次输入账号密码,会登录失败
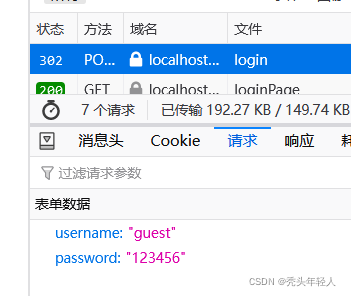
原因
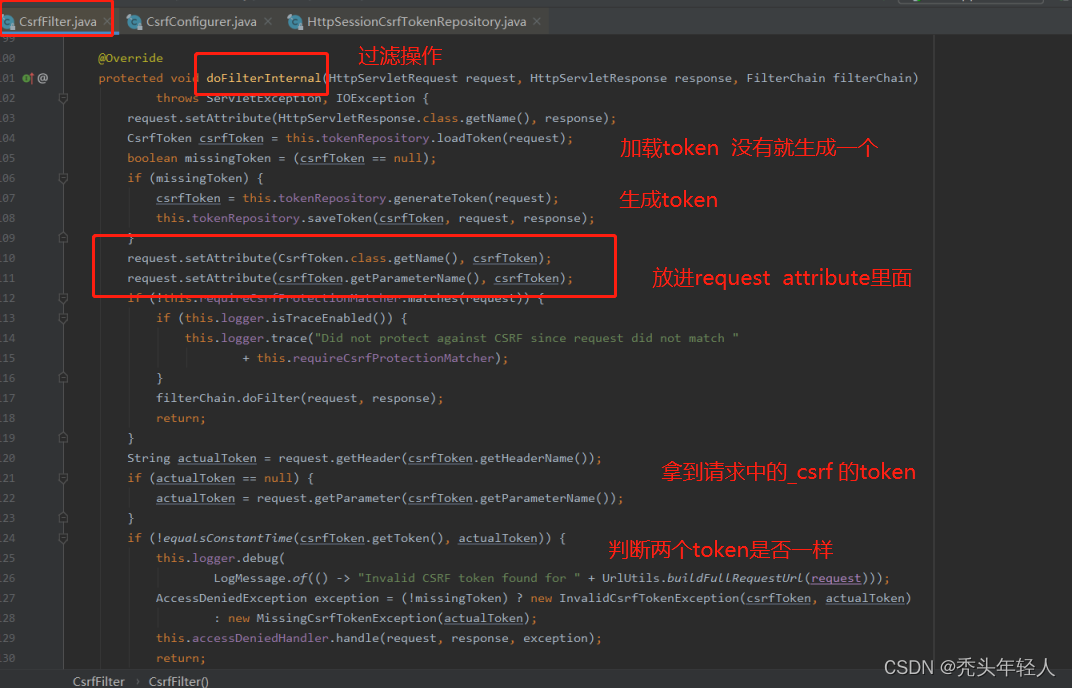
开启CSRF防御后,post访问的请求需要验证请求中name为"_csrf"的值是否与当前session中存储的"_csrf"的token相同,所以我们需要携带一个隐藏域名为"_csrf"值为token
token由spring Security自动生成并放在request的attribute中和session里面
解决方法
1️⃣往表单里加入一个隐藏域来携带_csrf token
<input type="hidden" name="_csrf" th:value="${_csrf.getToken()}">
2️⃣表单中用"th:action=‘@{/login}‘替代action=’/login’,thymeleaf模板会自动加入1️⃣
<form class="form-signin" action="@{/login}" method="post" >
源码分析
调用适配器的init()->getHttp()->
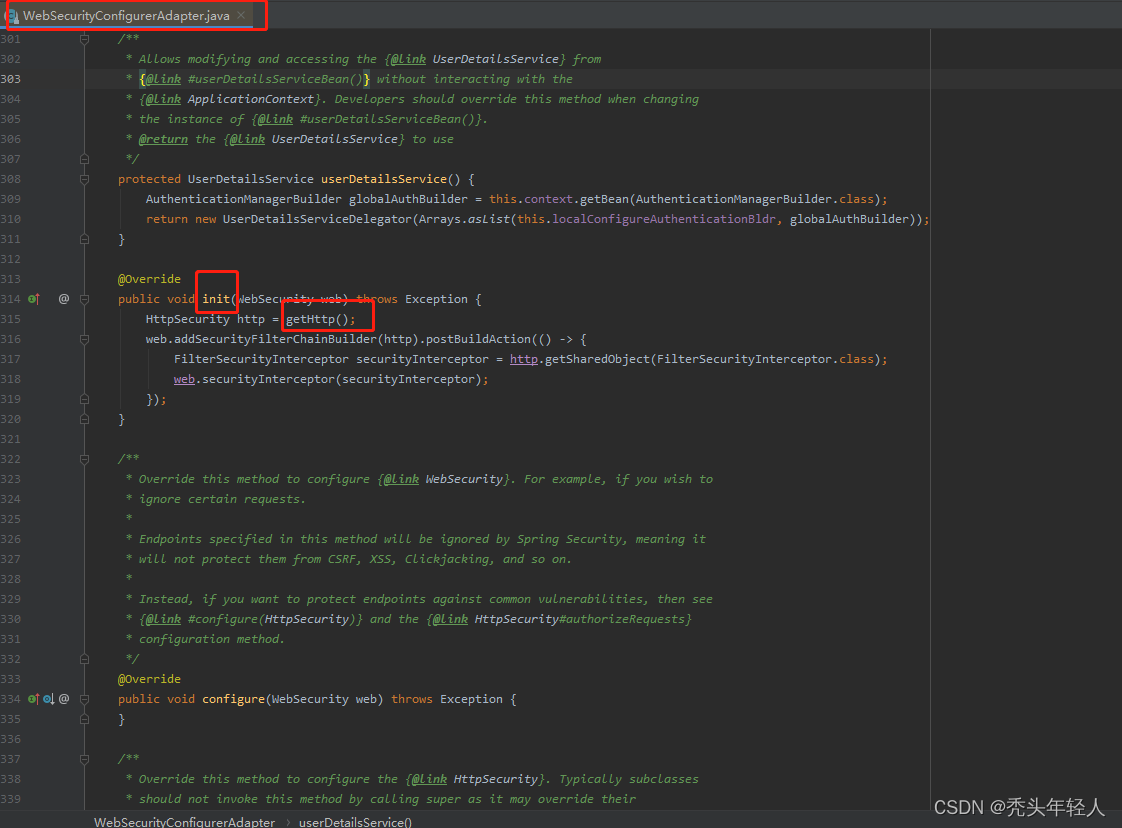
getHttp()->applyDefaultConfiguration(this.http)->
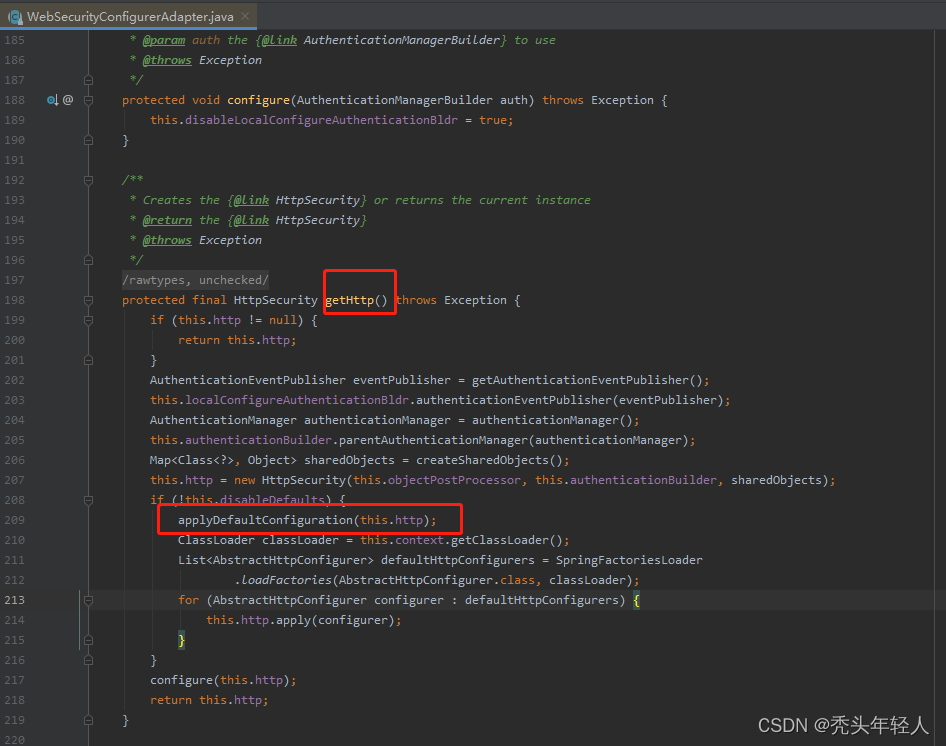
applyDefaultConfiguration(this.http)->http.crsf()->
还有其他默认配置,例如logout()也是默认开的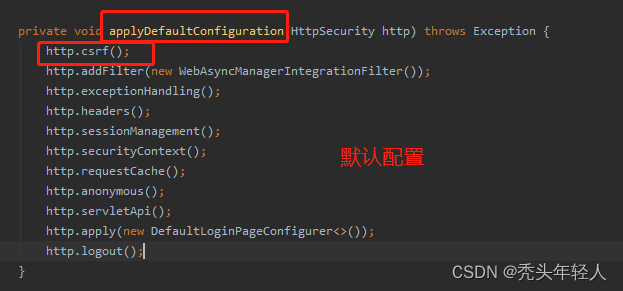
csrf()->new CsrfConfigurer<>(context)->
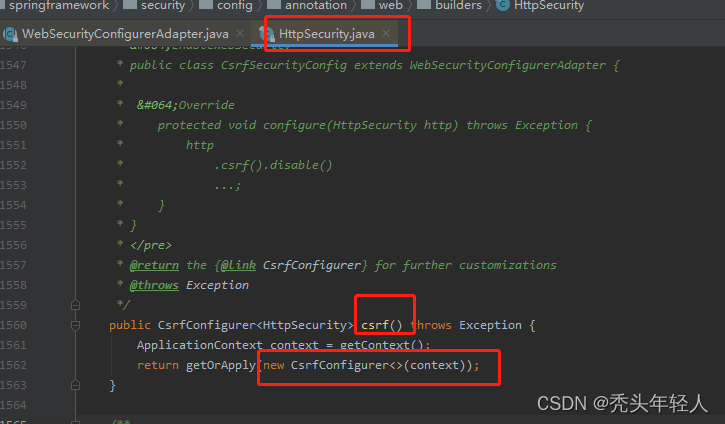
new CsrfConfigurer<>(context)->configure(H http)->new CsrfFilter(this.csrfTokenRepository);
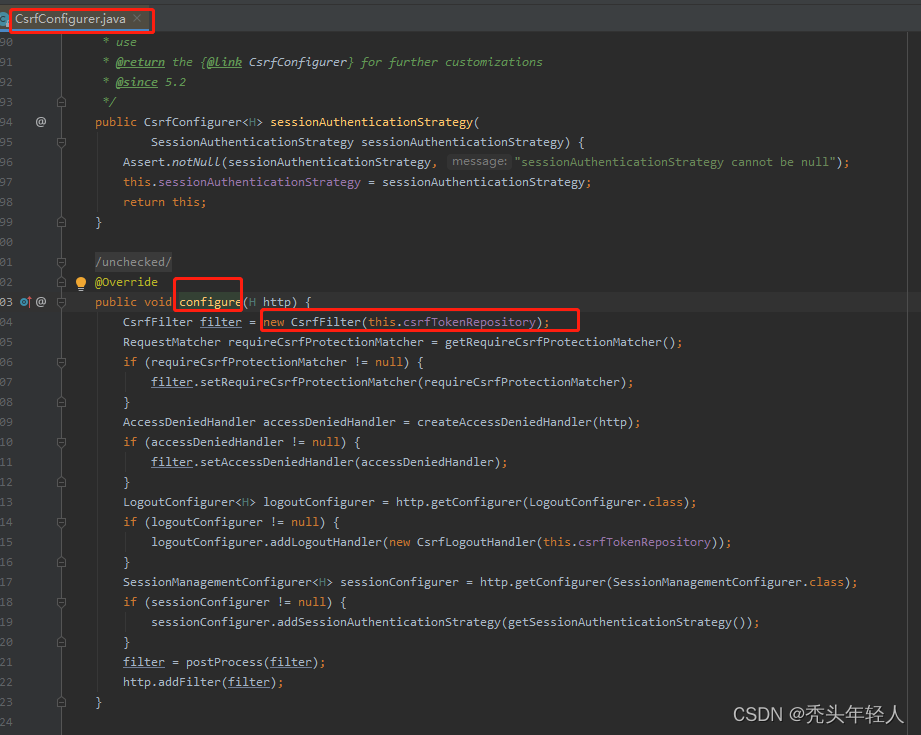
this.csrfTokenRepository在成员变量中被new
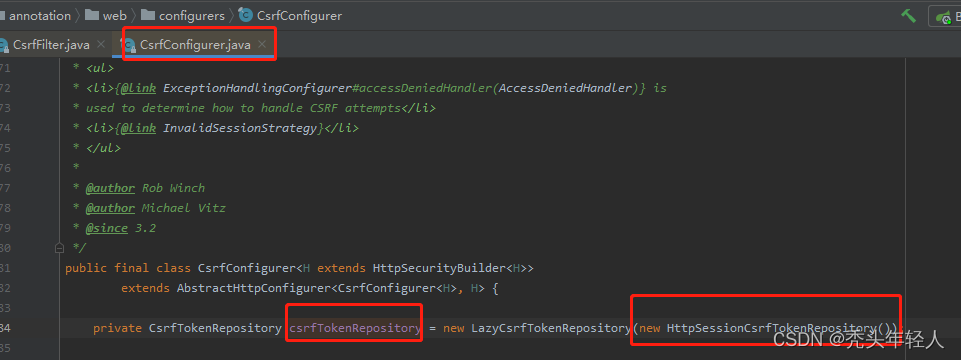
this.csrfTokenRepository->new HttpSessionCsrfTokenRepository()
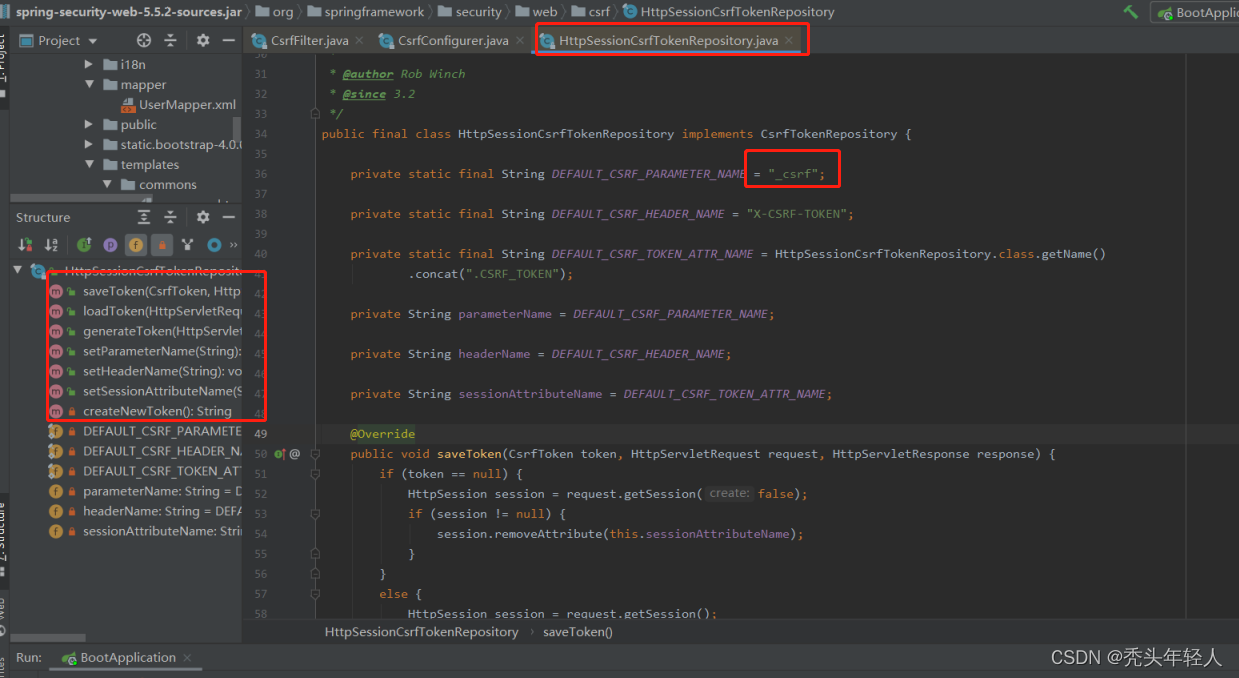
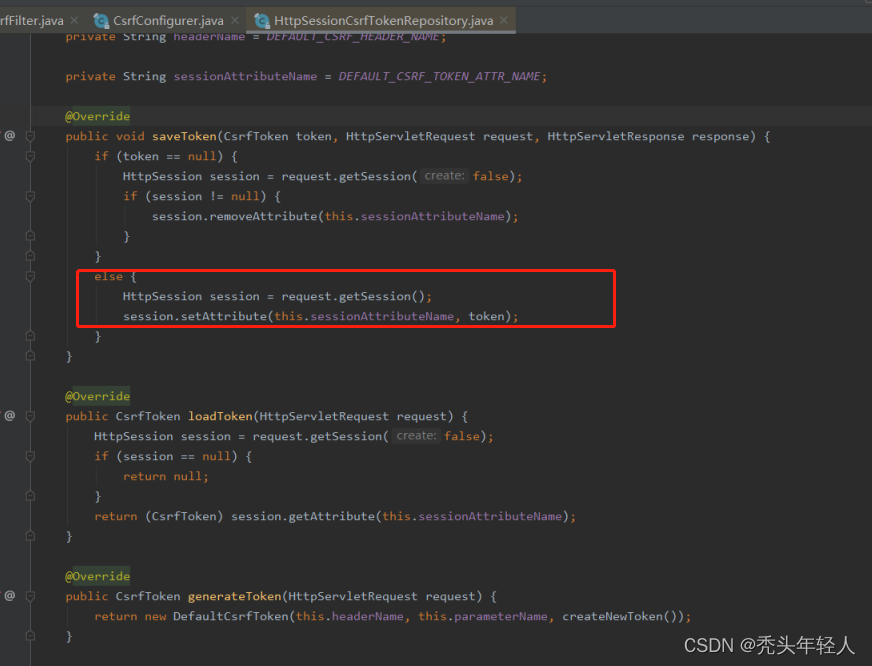
回到new CsrfFilter()->
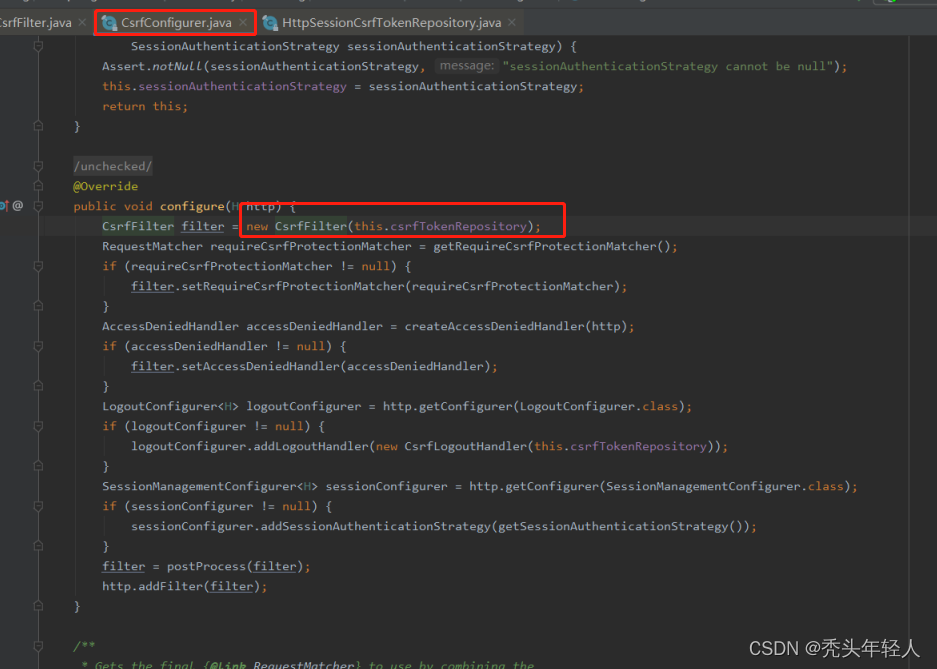
new CsrfFilter()->doFilterInternal()
更多推荐


 2
2 0
0- 0


 已为社区贡献1条内容

所有评论(0)