
Nexus仓库(maven仓库、Yum仓库、APT仓库)
·
文章目录
Nexus私服
- 背景:
- maven编译的时候,npm/cnpm编译,需要下载大量的依赖包
- 这些依赖包在每一次构建的时候都需要使用
- 每次都从公网下载很麻烦(maven阿里云) npm(国内)
- 可以搭建内部软件仓库:存放着依赖包
- 存放依赖包的仓库可以通过nexus实现
Nexus下载地址:Download
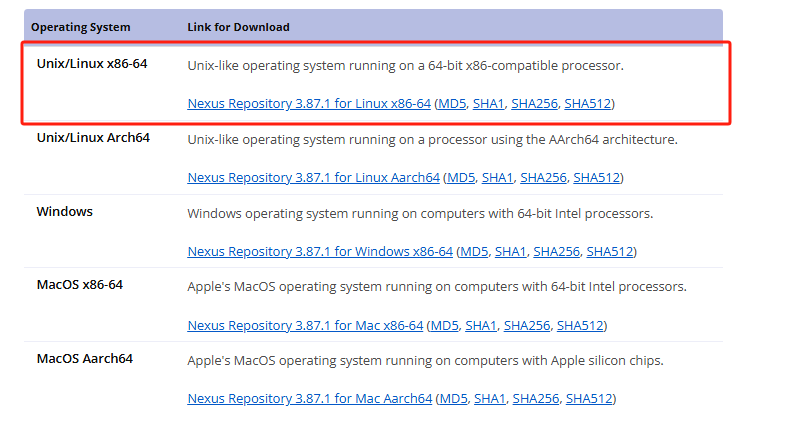
部署Nexus
(1)部署JDK21
#1.检查是否已安装 Java
java --version

#2.若未安装(根据 Tomcat 版本选择兼容的 Java 版本)
yum install -y wget ; mkdir -p /download ; wget https://download.java.net/java/GA/jdk21.0.2/f2283984656d49d69e91c558476027ac/13/GPL/openjdk-21.0.2_linux-x64_bin.tar.gz -O /download/openjdk-21.0.2_linux-x64_bin.tar.gz

#3.解压并链接到/usr/local/jdk21
tar -zxvf /download/openjdk-21.0.2_linux-x64_bin.tar.gz -C /usr/local/
ln -s /usr/local/jdk-21.0.2 /usr/local/jdk21

#4.配置jdk环境变量
echo 'export JAVA_HOME=/usr/local/jdk21' >> /etc/profile
echo 'export PATH=${PATH}:$JAVA_HOME/bin' >> /etc/profile
source  /etc/profile

#查看jdk版本
java --version
(2)部署Nexus
#1.创建目录
mkdir -p /app/tools
#2.解压
tar xf /download/nexus-3.87.1-01-linux-x86_64.tar.gz  -C /app/tools/
#3.如有需求可以修改端口号
cat /app/tools/nexus-3.87.1-01/etc/nexus-default.properties
#4.设置nexus软链接到/usr/local/bin
ln -s /app/tools/nexus-3.87.1-01/bin/nexus /usr/local/bin/
#5.启动(注意内存,需要>=2G,跑不起来大概率内存不足)
nexus start
#6.开放对应的端口
#7.浏览器访问(对应的登陆密码)
cat /app/tools/sonatype-work/nexus3/admin.password
账号admin
密码:具体查看的值
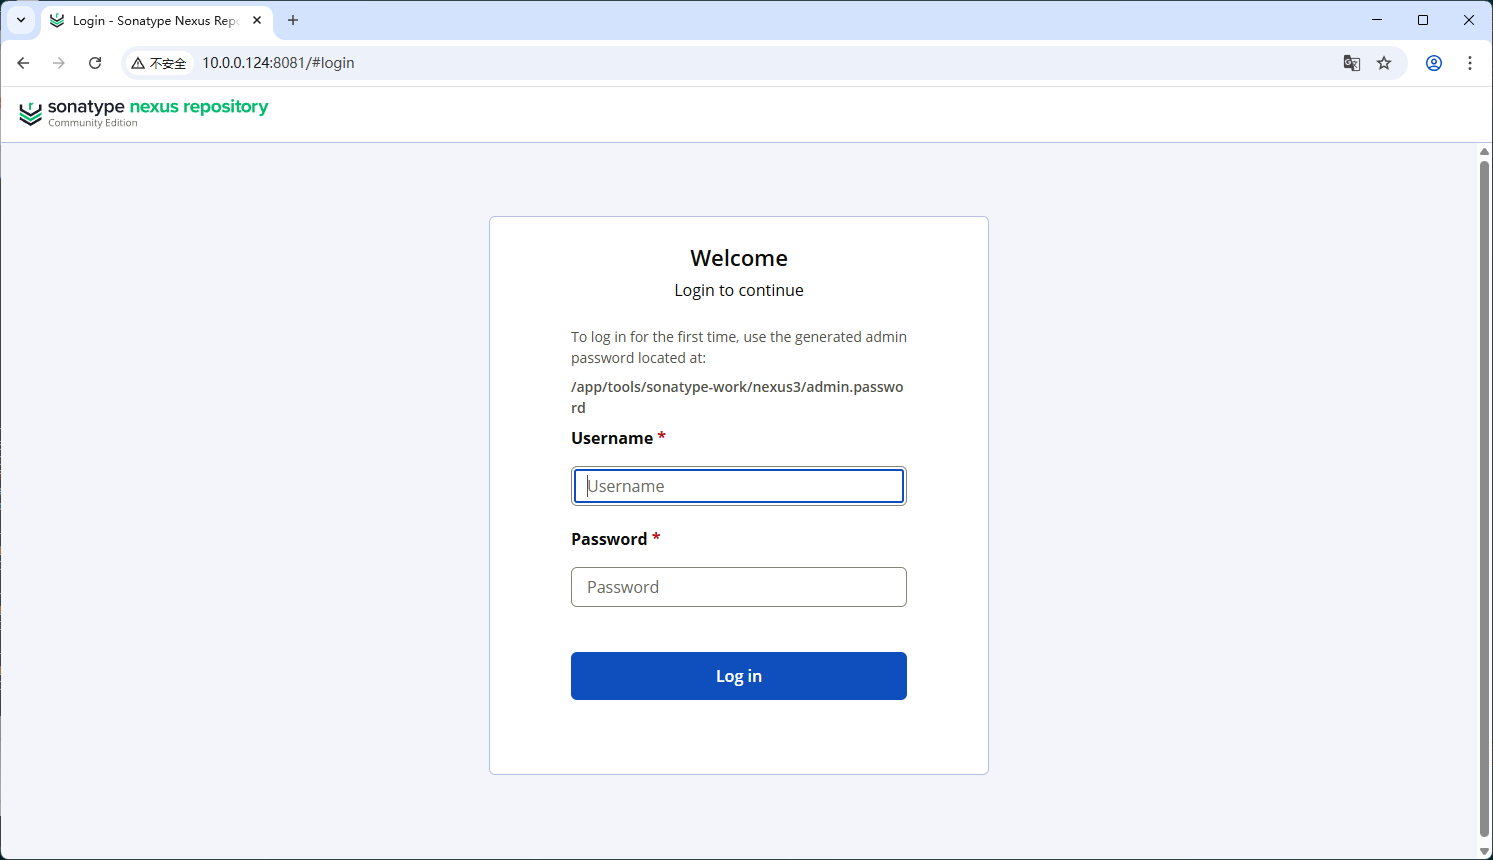
使用Nexus构建本地maven仓库
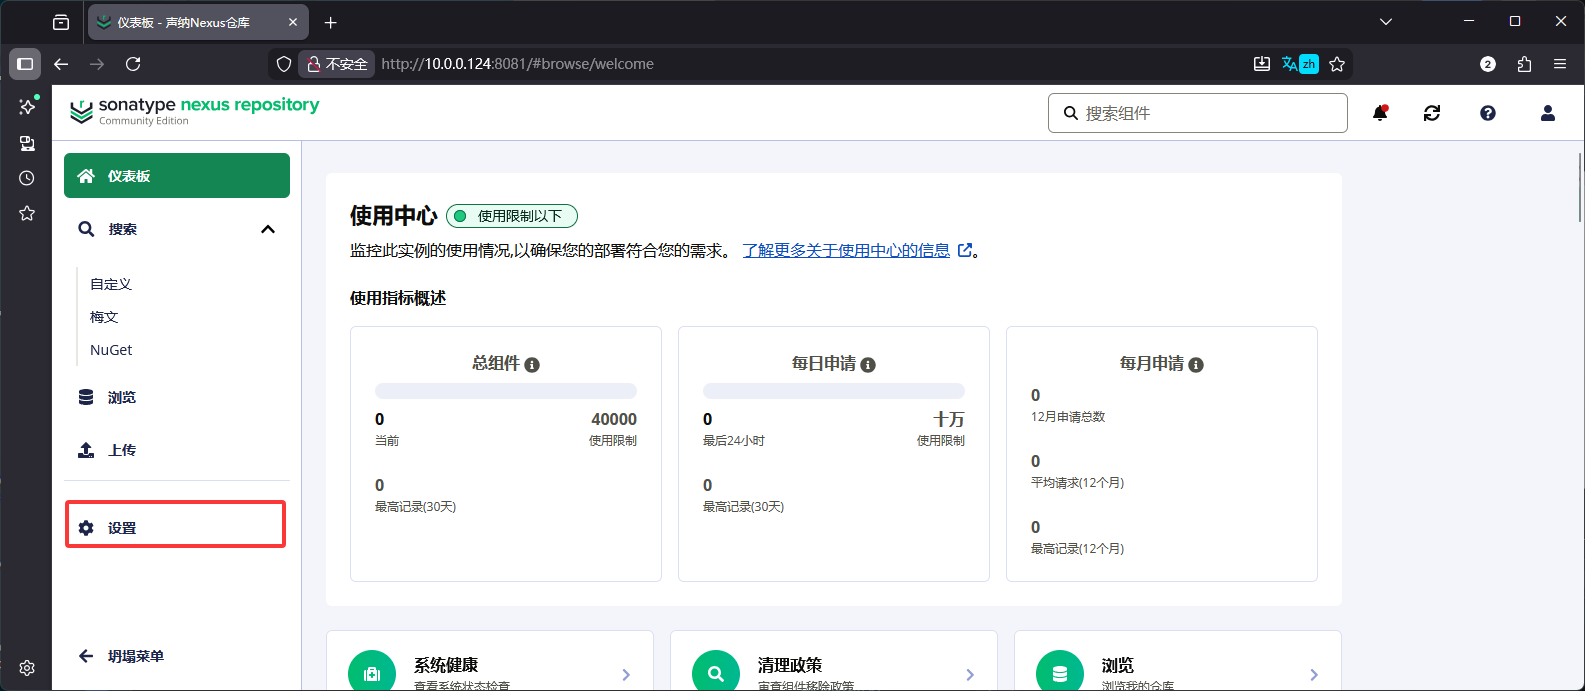
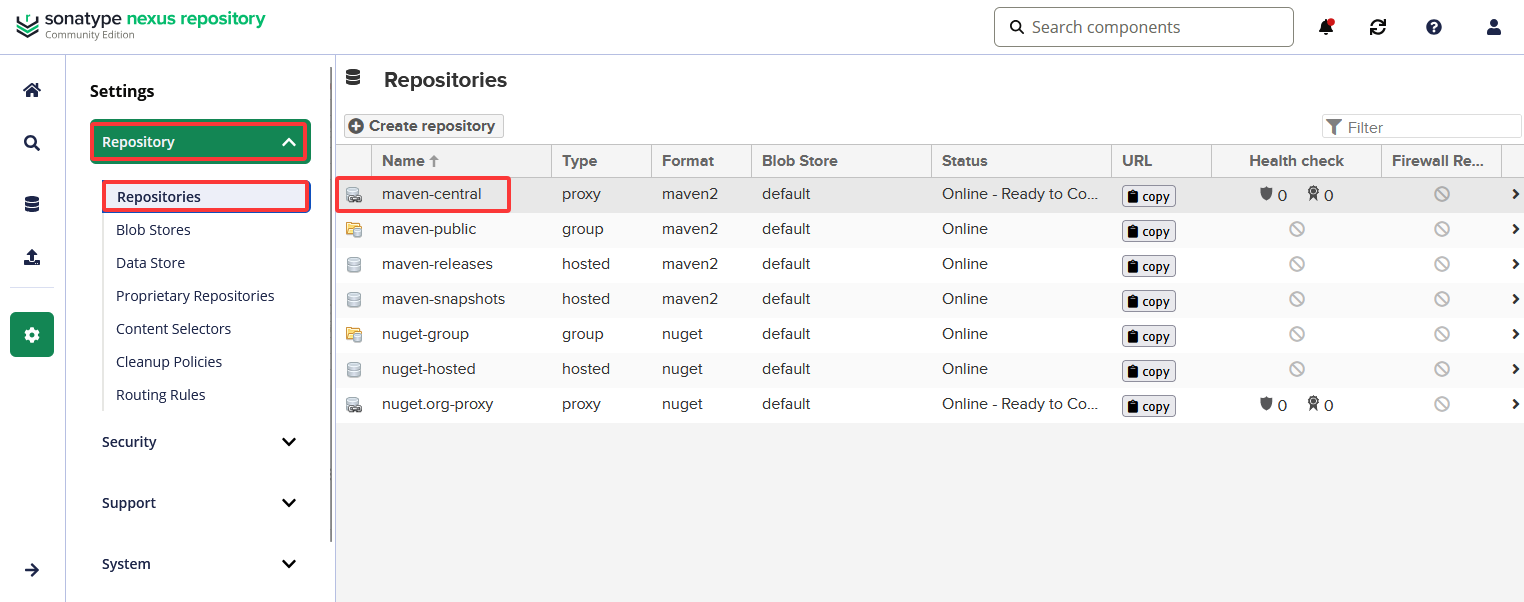
改为阿里云nexus地址(作为代理):http://maven.aliyun.com/nexus/content/groups/public/,最后点击保存
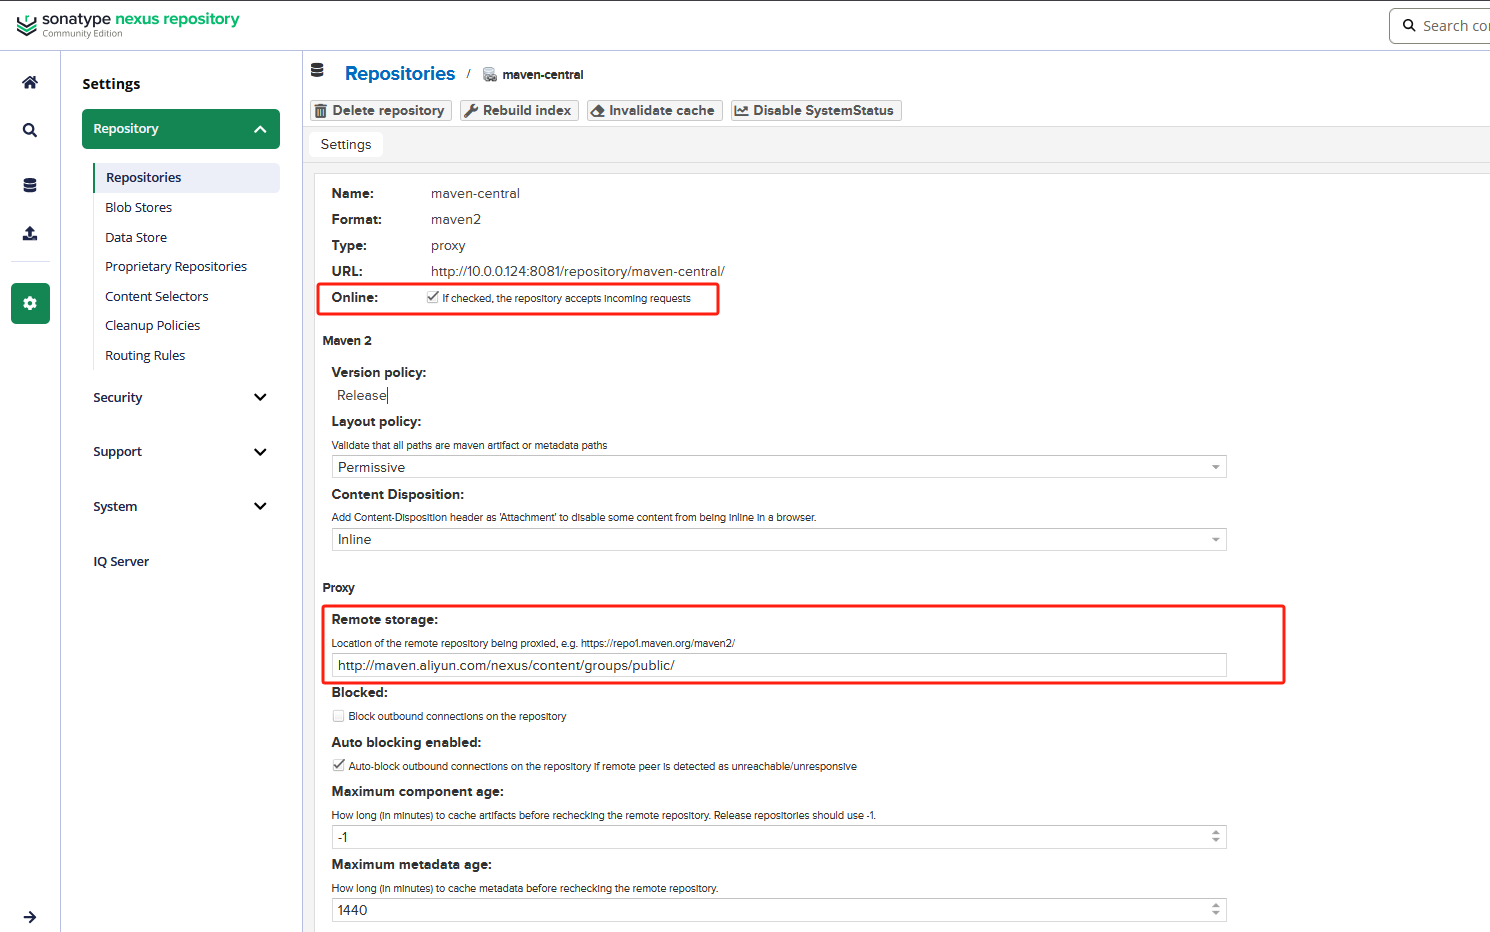
测试,修改默认的setting文件,进行编译测试
#1.对maven默认的setting文件进行备份
cp -rf /usr/local/maven/conf/settings.xml{,bak}
#2.修改setting文件
cat > /usr/local/maven/conf/settings.xml <<EOF
<?xml version="1.0" encoding="UTF-8"?>
<settings xmlns="http://maven.apache.org/SETTINGS/1.0.0"
          xmlns:xsi="http://www.w3.org/2001/XMLSchema-instance"
          xsi:schemaLocation="http://maven.apache.org/SETTINGS/1.0.0 http://maven.apache.org/xsd/settings-1.0.0.xsd">

  <servers>
    <server>
      <id>nexus</id>
      <username>admin</username>
      <password>Abc@1234</password>
    </server>
  </servers>

  <mirrors>
    <mirror>
      <id>nexus</id>
      <mirrorOf>*</mirrorOf>
      <url>http://10.0.0.124:8081/repository/maven-public/</url>
    </mirror>
  </mirrors>

  <profiles>
    <profile>
      <id>nexus</id>
      <repositories>
        <repository>
          <id>central</id>
          <url>http://10.0.0.124:8081/repository/maven-public/</url>
          <releases><enabled>true</enabled></releases>
          <snapshots><enabled>true</enabled></snapshots>
        </repository>
      </repositories>
      <pluginRepositories>
        <pluginRepository>
          <id>central</id>
          <url>http://10.0.0.124:8081/repository/maven-public/</url>
          <releases><enabled>true</enabled></releases>
          <snapshots><enabled>true</enabled></snapshots>
        </pluginRepository>
      </pluginRepositories>
    </profile>
  </profiles>

  <activeProfiles>
    <activeProfile>nexus</activeProfile>
  </activeProfiles>
</settings>
EOF
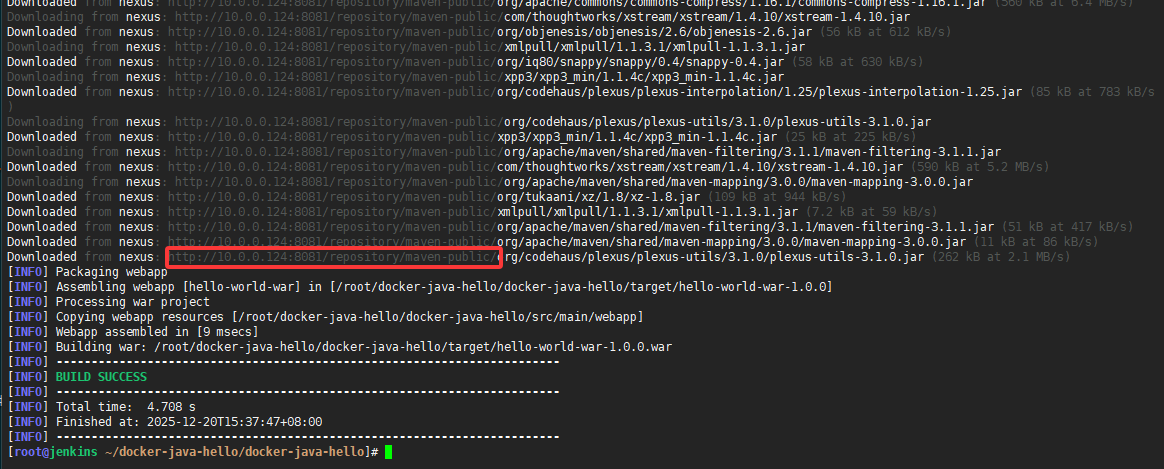
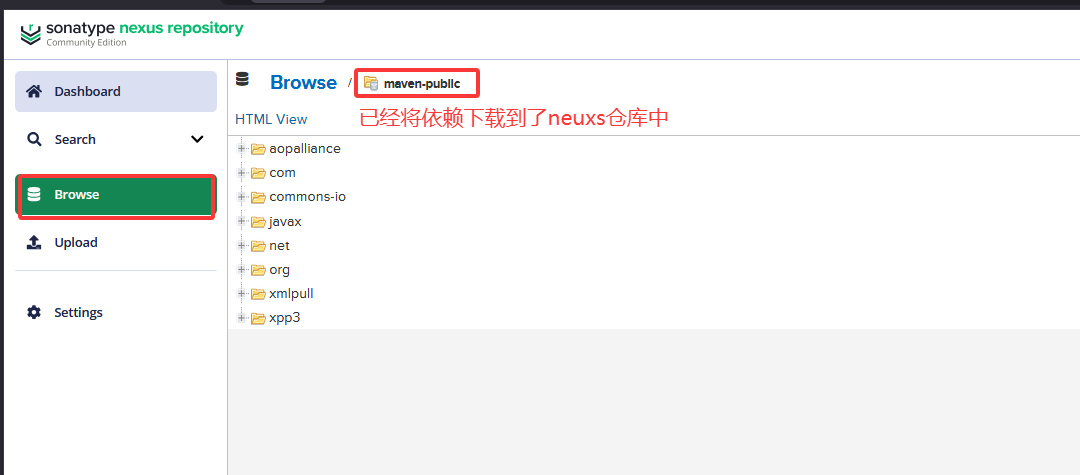
使用Nexus构建私有YUM仓库
(1)创建存放数据的目录
mkdir -p /data/blobs
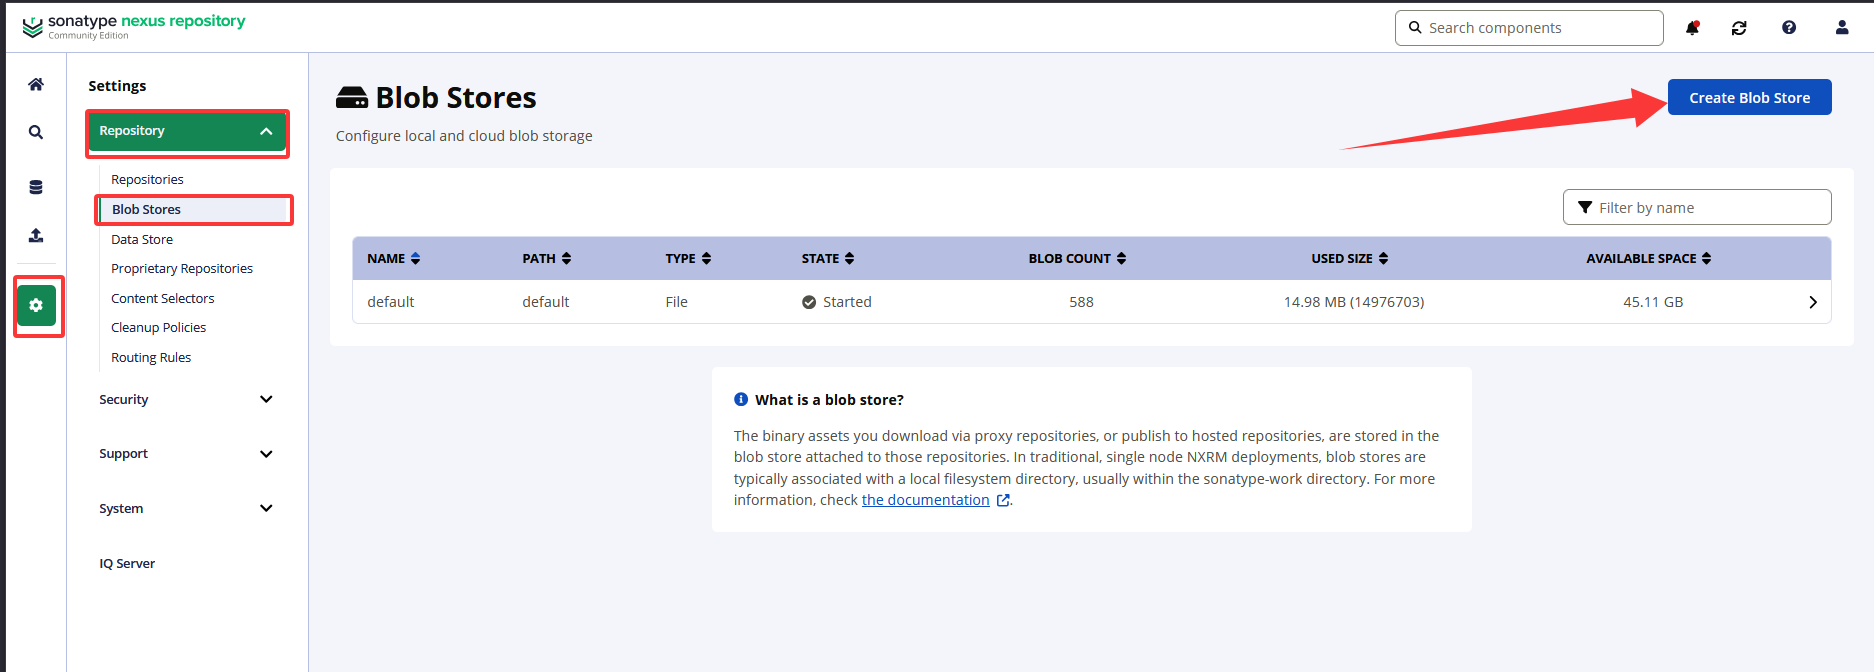
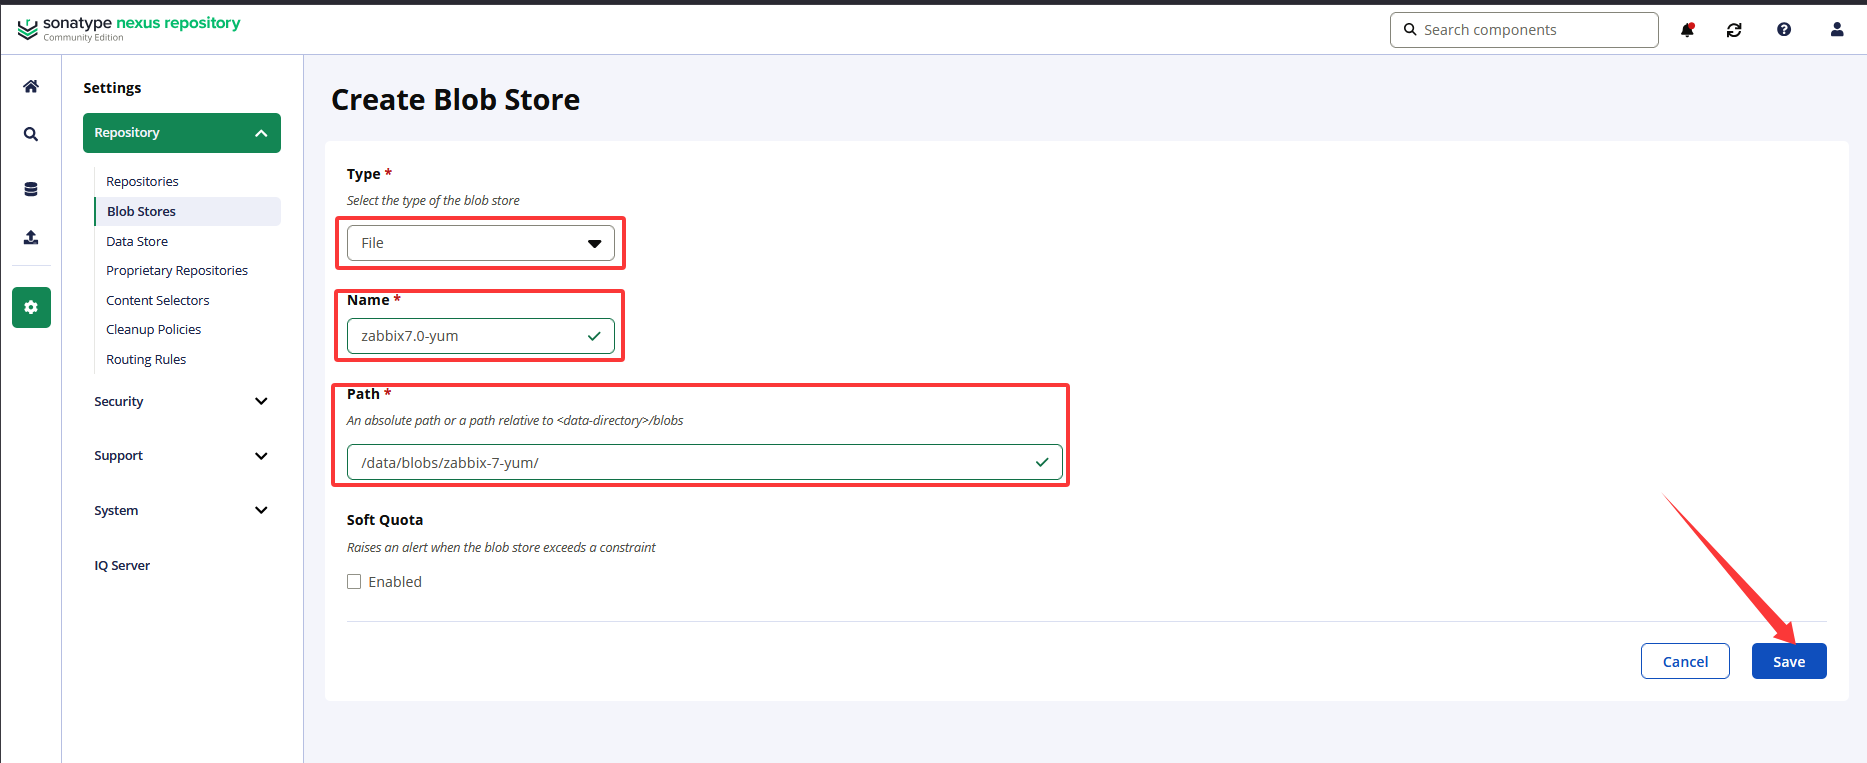
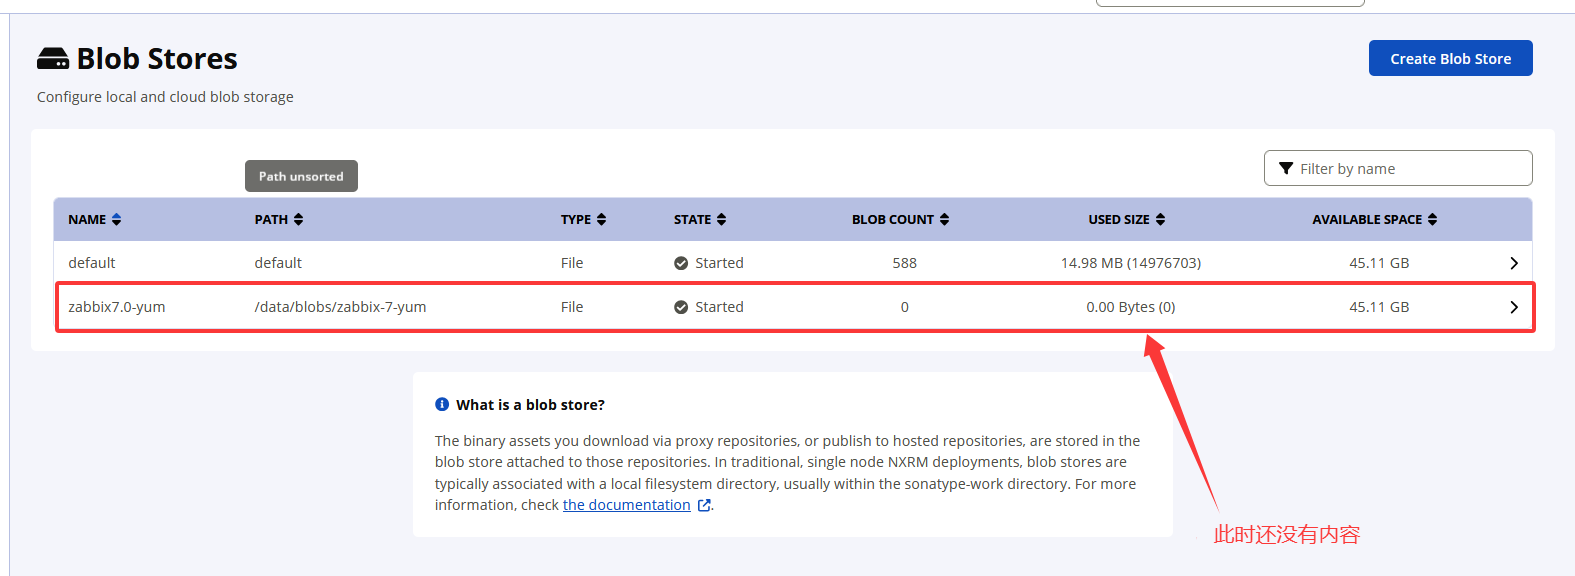
(2)web页面创建仓库
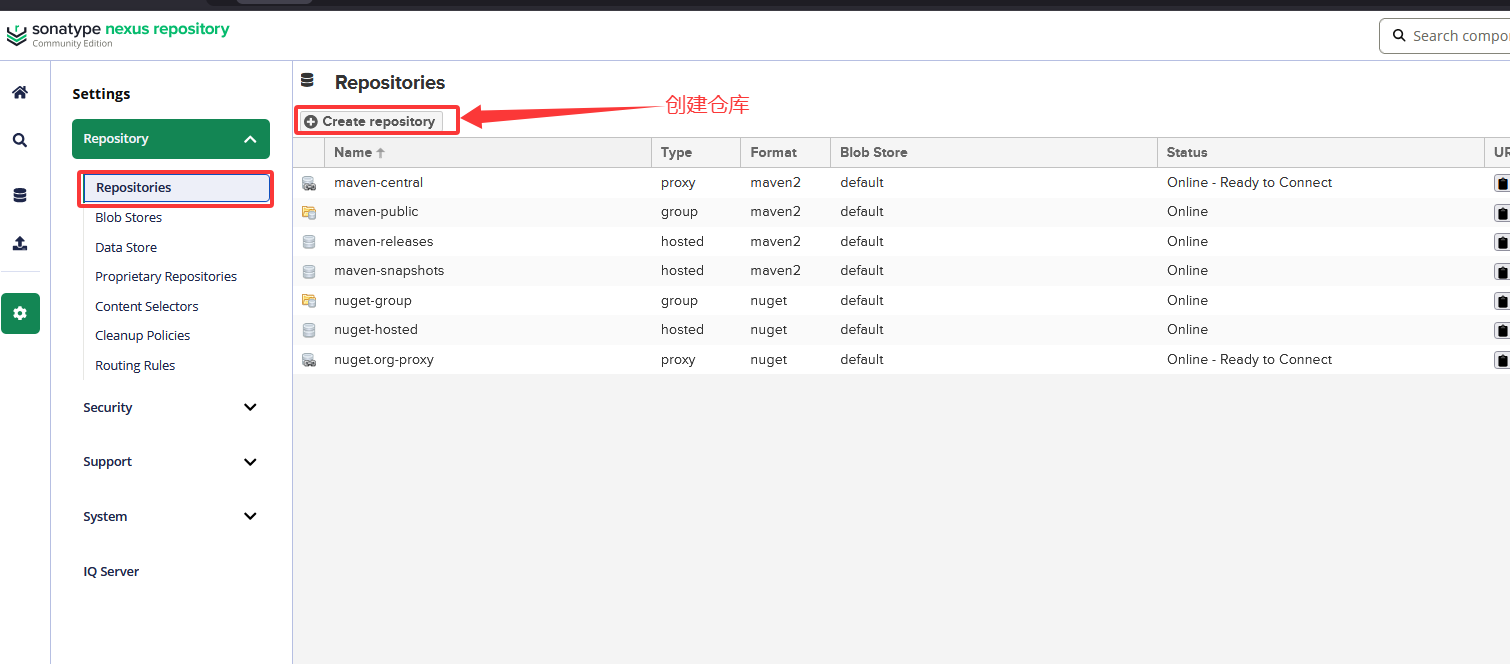
| 类型 | 本质 | 作用场景 |
|---|---|---|
| proxy | 外部仓库中转站 | 缓存外部公共资源(阿里云、官方源) |
| hosted | 私有资源仓库 | 存储自己团队的包(需要自己下载好) |
| group | 仓库集合入口 | 统一对外提供多个仓库的资源 |

配置仓库,比如说要下载zabbix7.0
https://mirrors.tuna.tsinghua.edu.cn/zabbix/zabbix/7.0/rhel/8/x86_64/
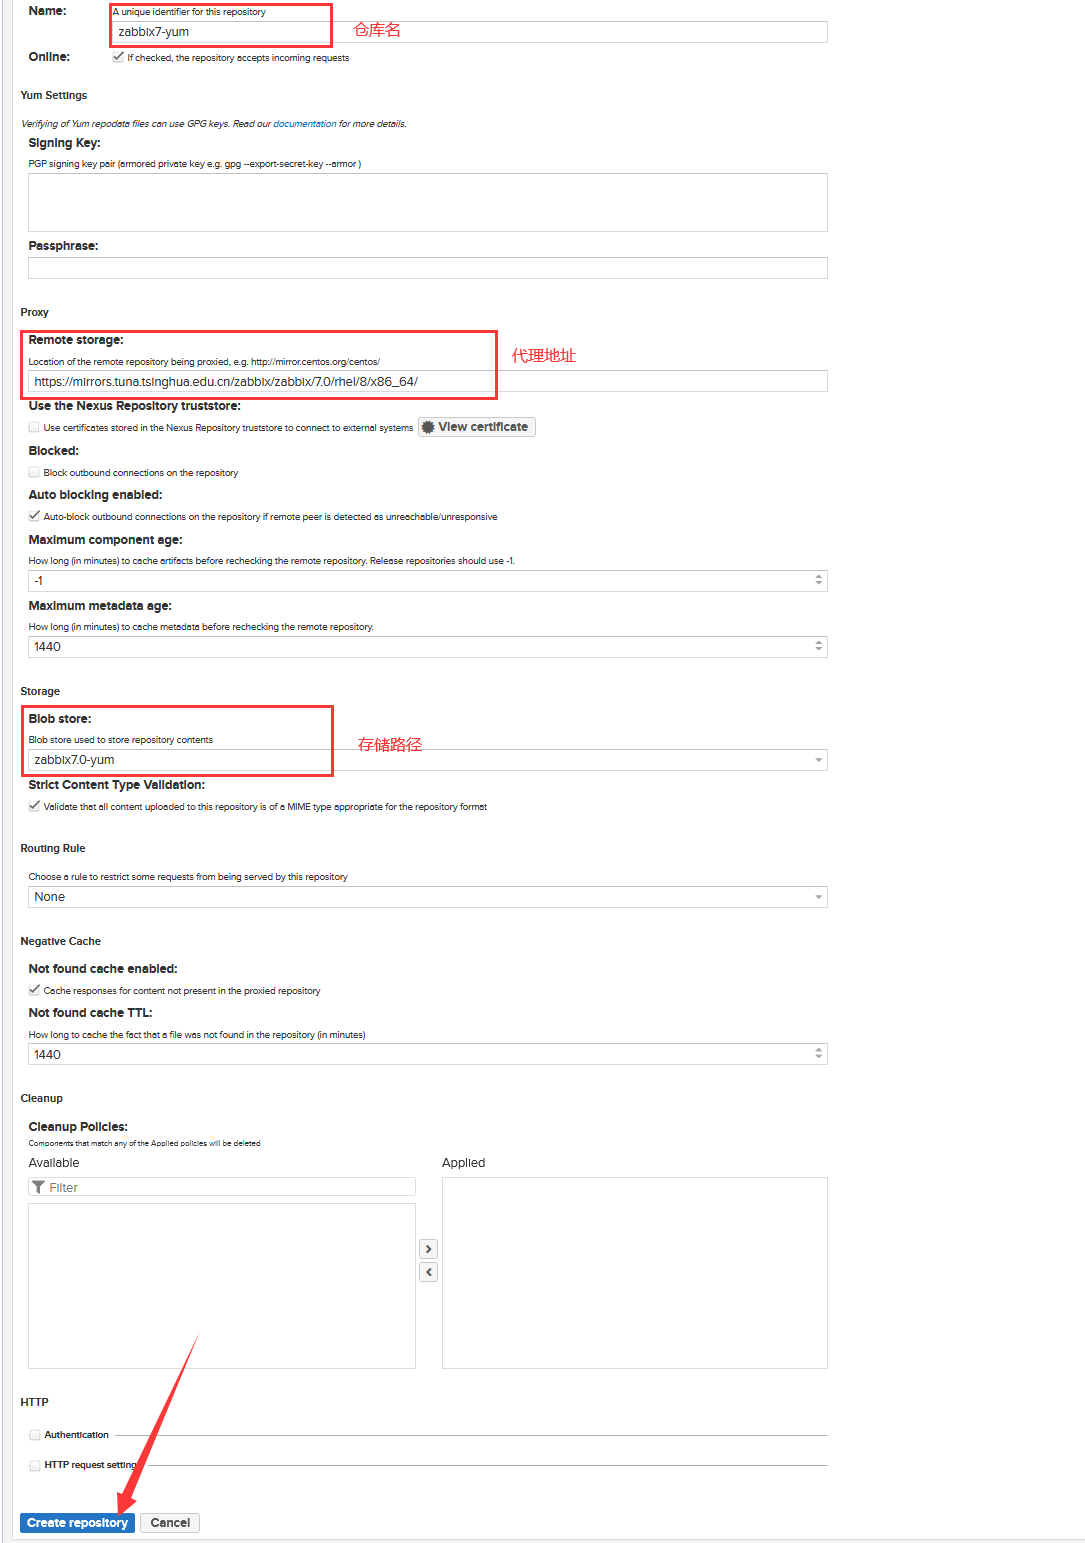
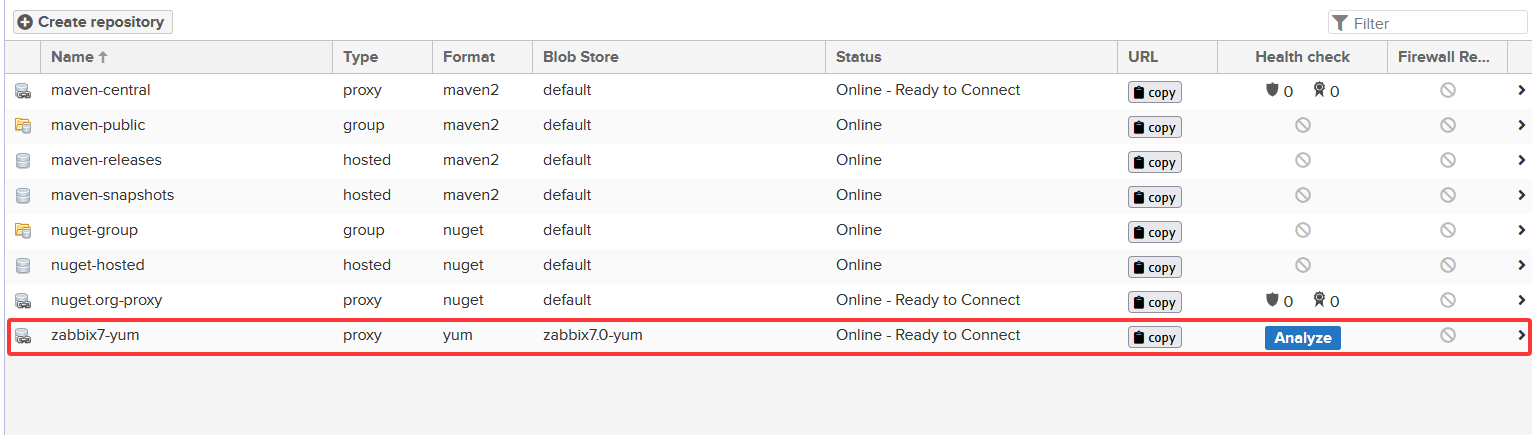
此时仓库中没有数据
#1.设置私有仓库路径
cat > /etc/yum.repos.d/zabbix7.repo <<EOF
[zabbix7]
name=zabbix7
baseurl=http://10.0.0.124:8081/repository/zabbix7-yum/
gpgcheck=0
enabled=1
username=admin
password=Abc@1234
EOF
#2.安装zabbix-agent(确认是仓库zabbix7再点击Y确认安装)
yum install  zabbix-agent
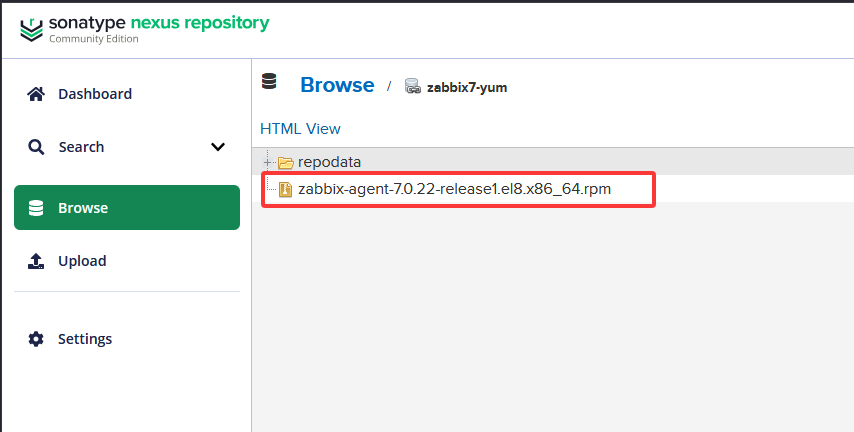
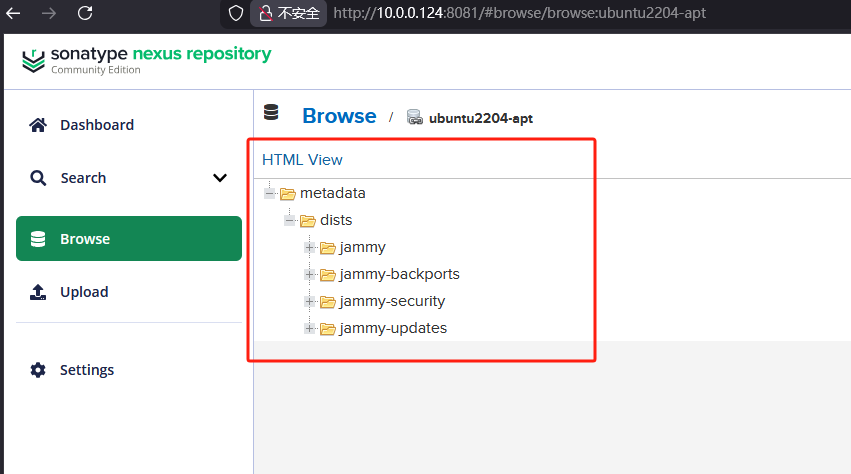
使用Neuxs构建私有APT仓库
(1)创建存放数据的目录
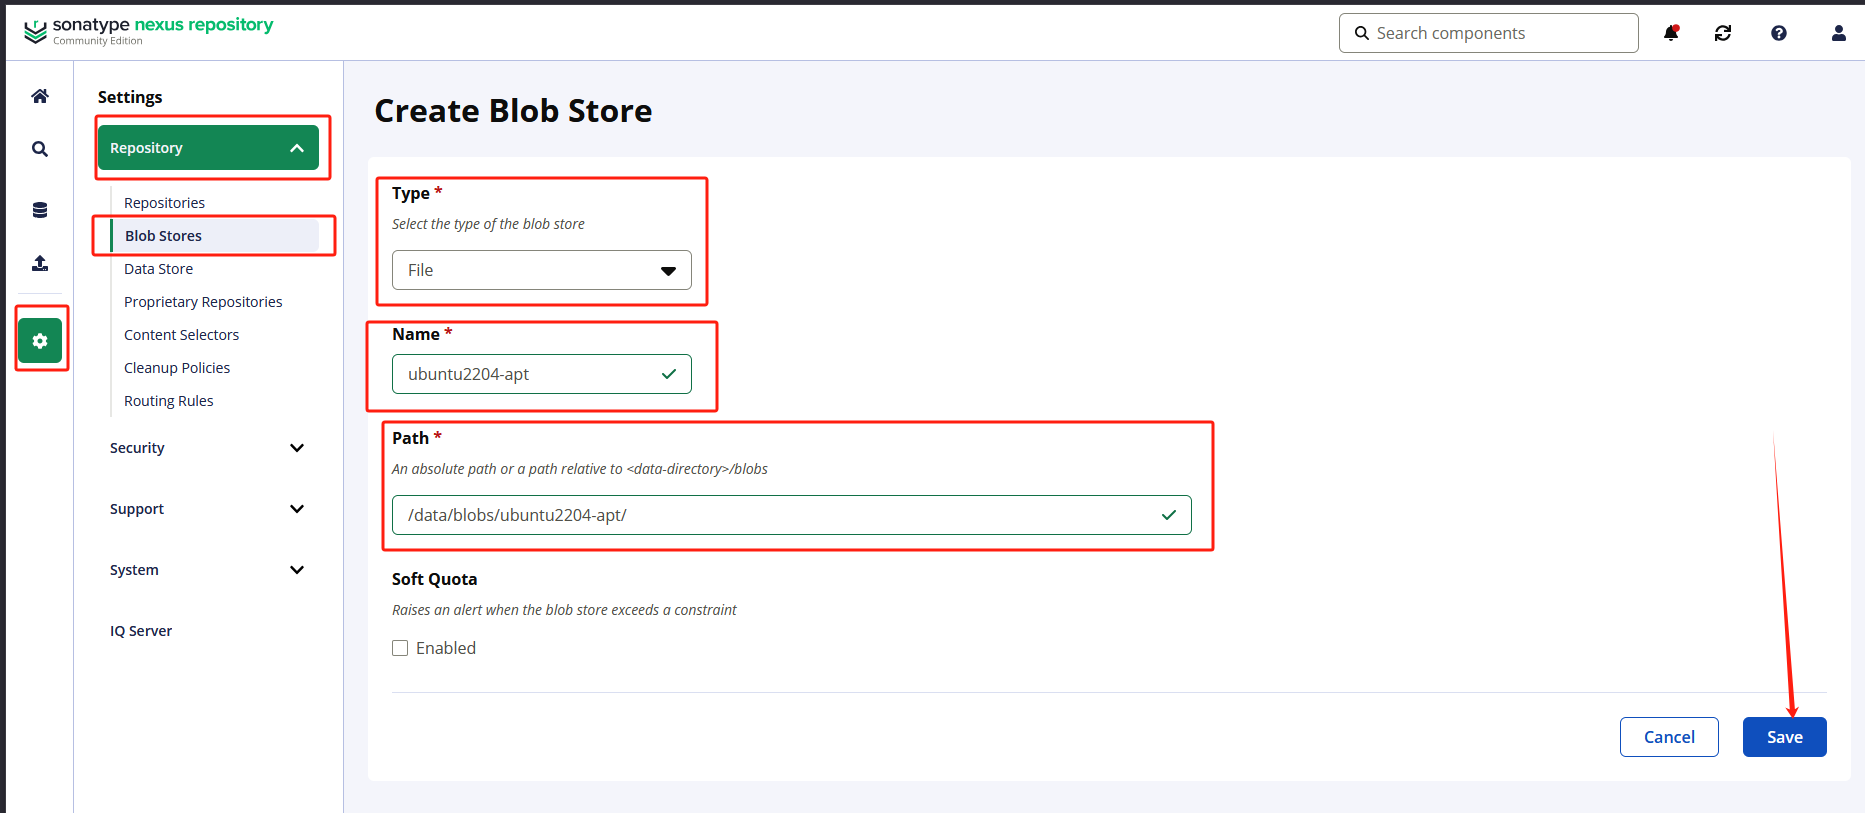
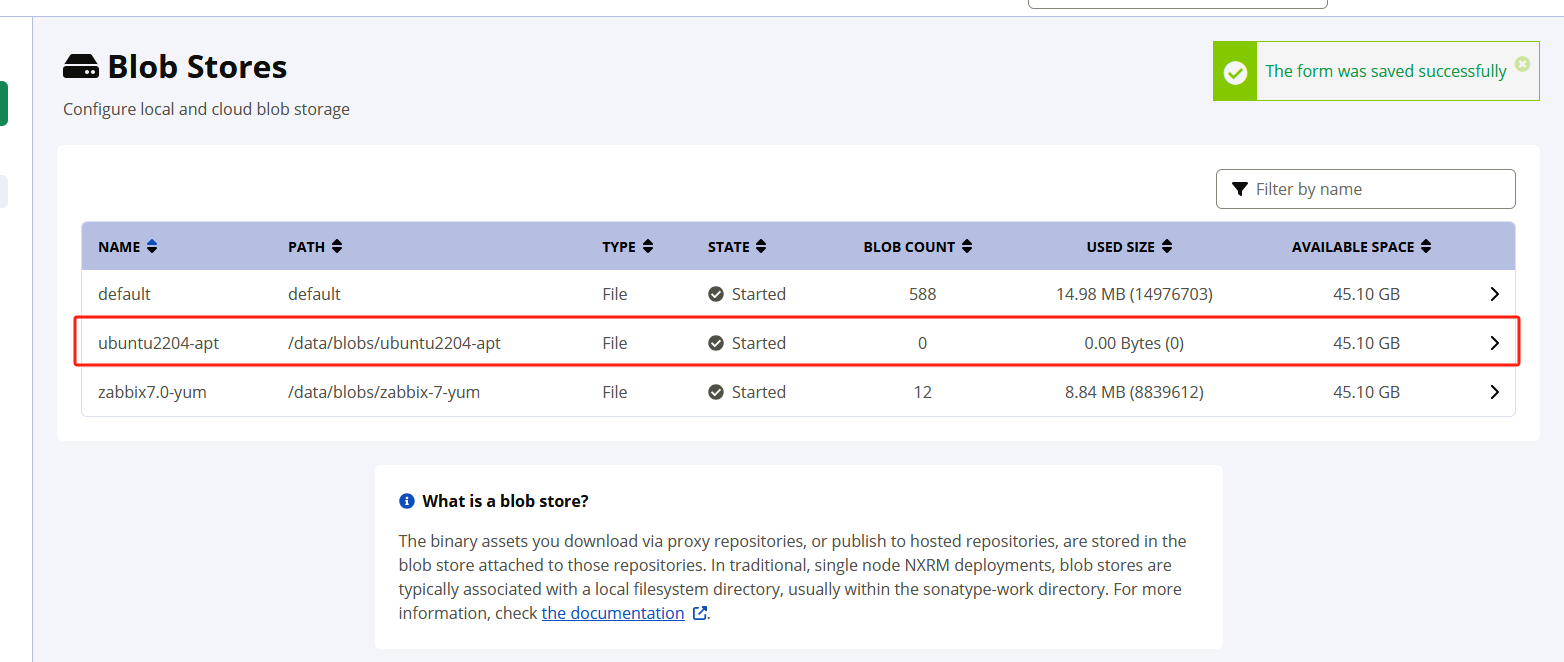
(2)web页面创建仓库
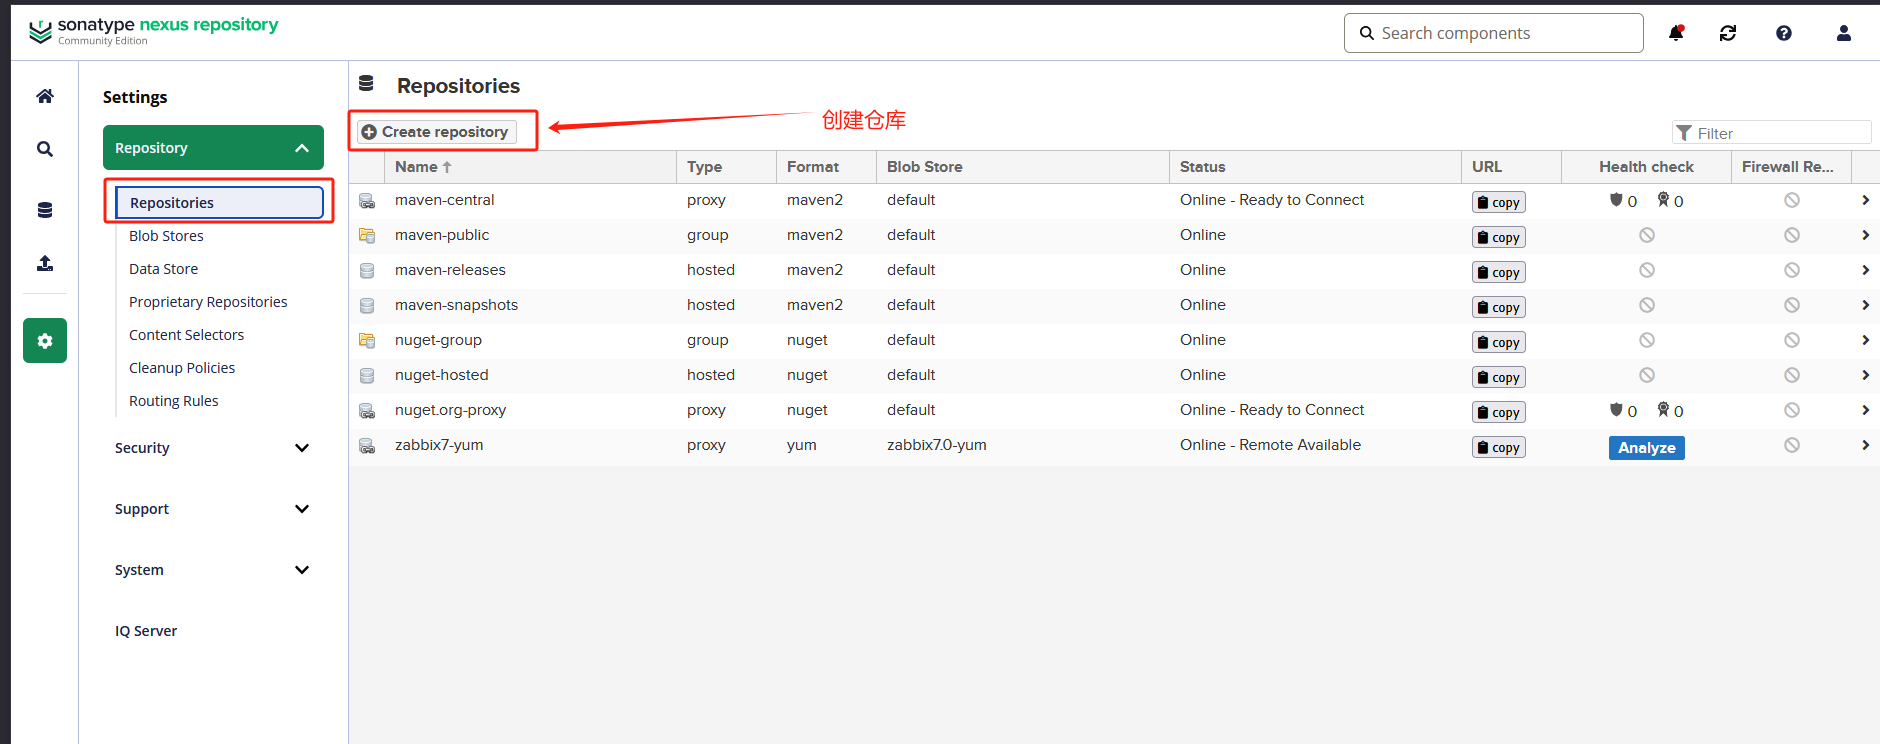
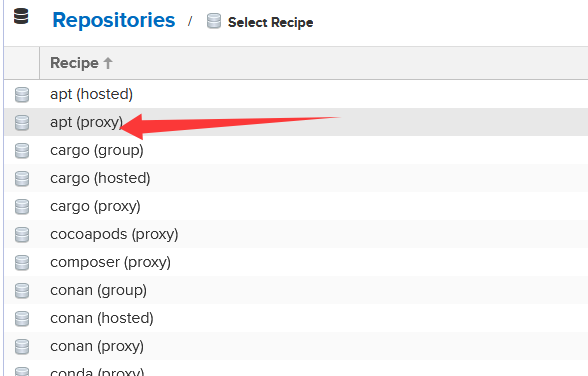
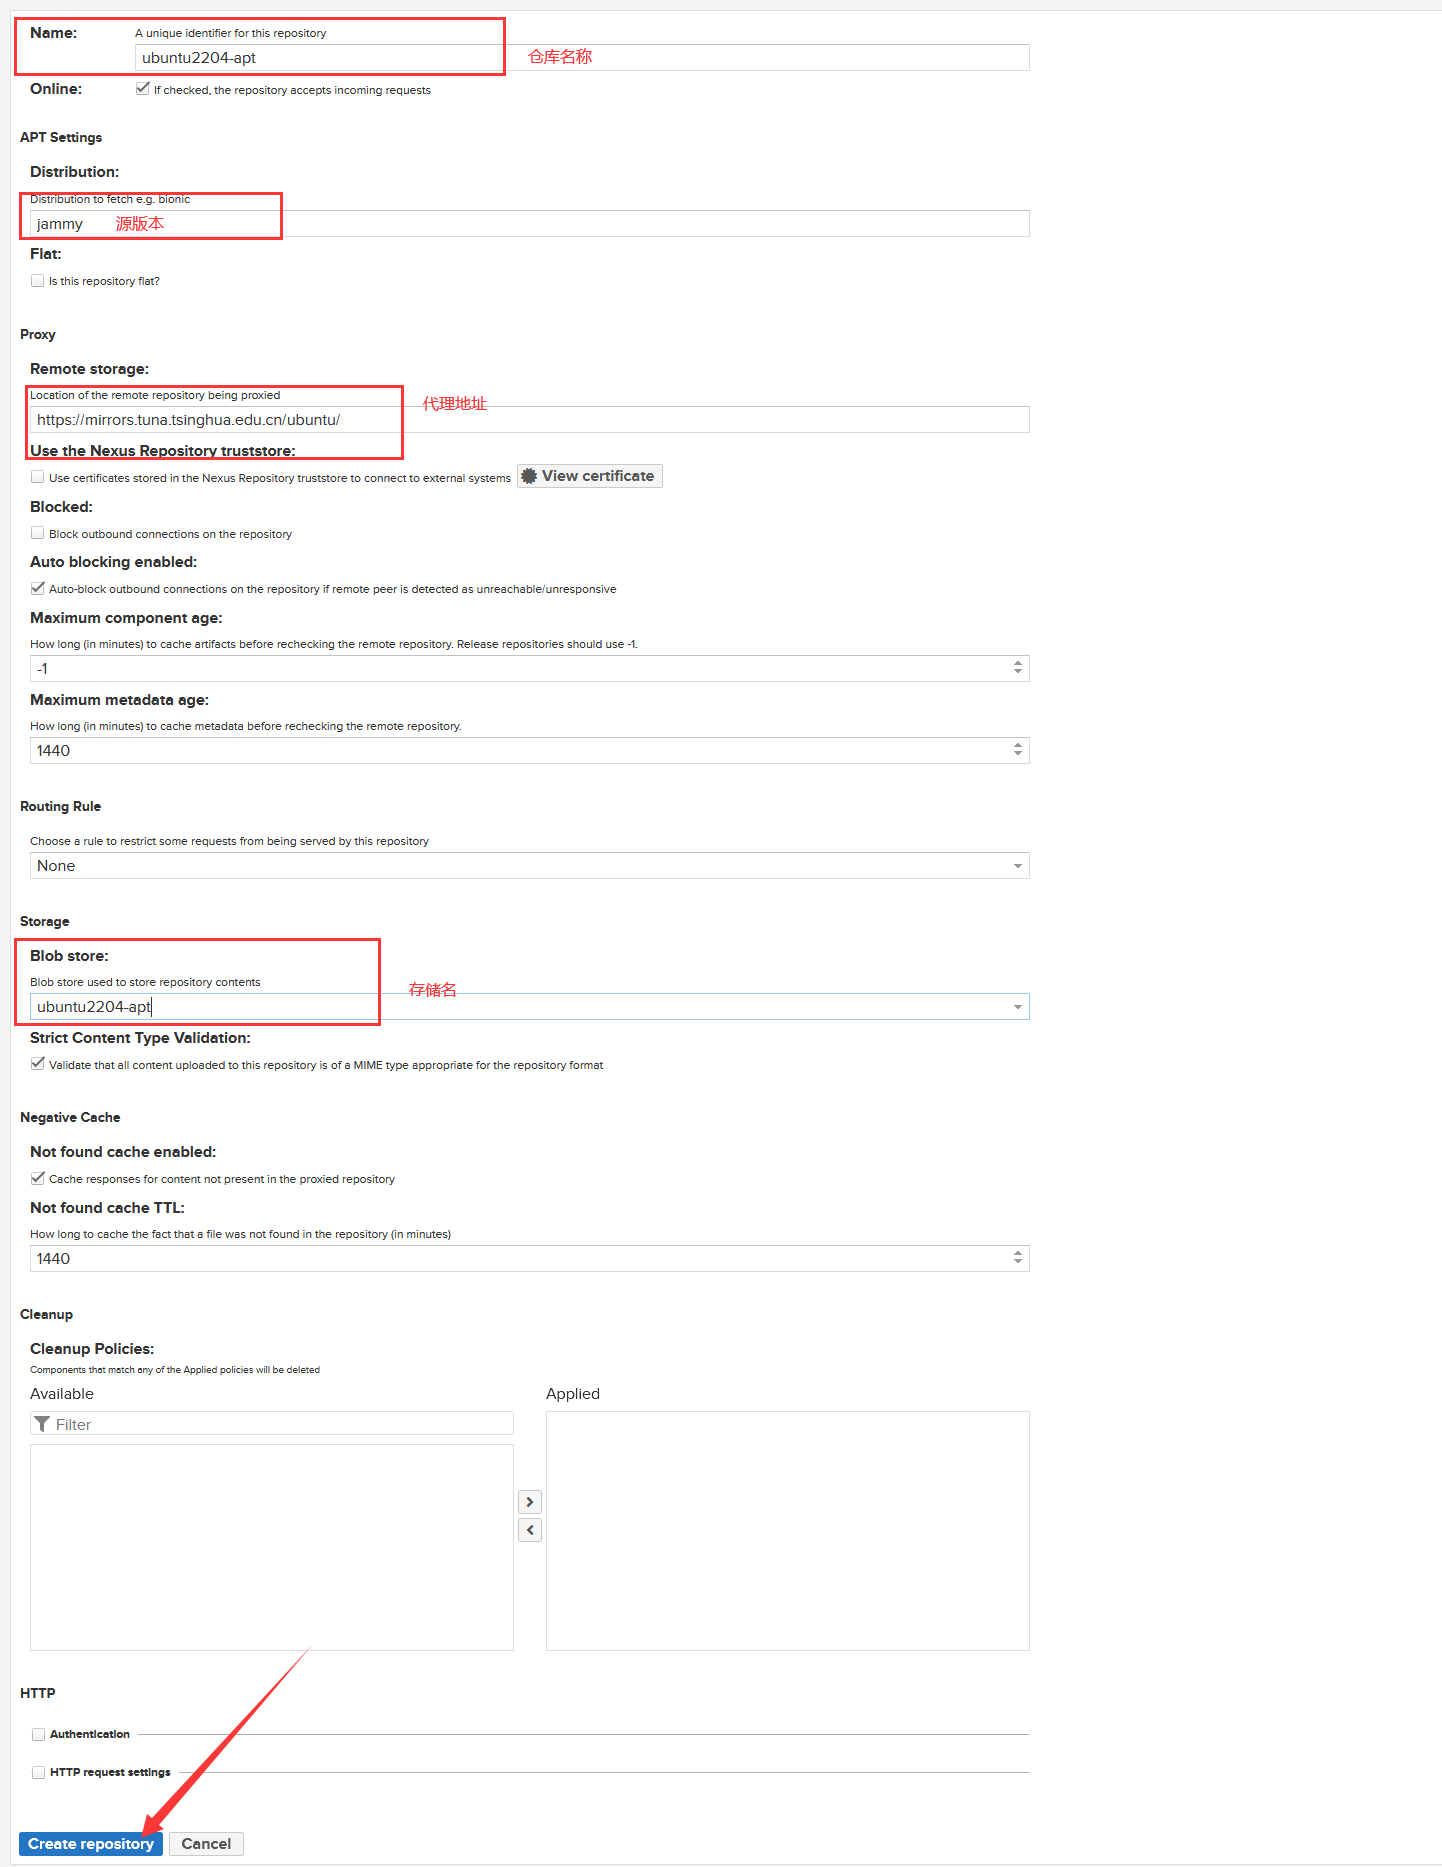
#1.替换源为nexus私有仓库地址
##更换地址
sed -i 's#http://mirrors.aliyun.com/ubuntu/#http://10.0.0.124:8081/repository/ubuntu2204-apt/#g' /etc/apt/sources.list
##设置认证
cat > /etc/apt/auth.conf <<EOF
machine http://10.0.0.124:8081
login admin
password Abc@1234
EOF
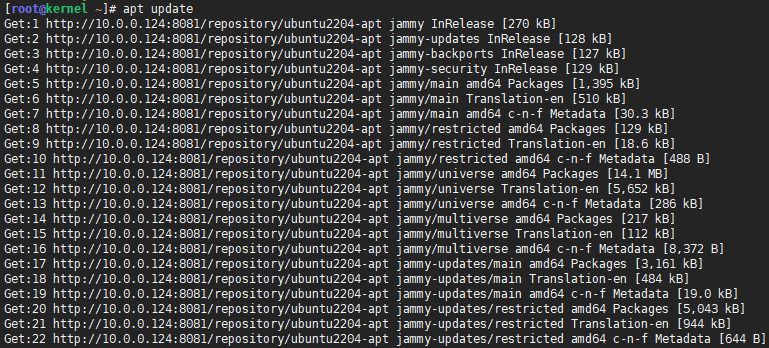
#2.更新源
apt update
更多推荐



 8
8 0
0- 0


 已为社区贡献3条内容

所有评论(0)