
SpringBoot2---单元测试(Junit5)
org.junit.vintage
junit-vintage-engine
test
org.hamcrest
hamcrest-core
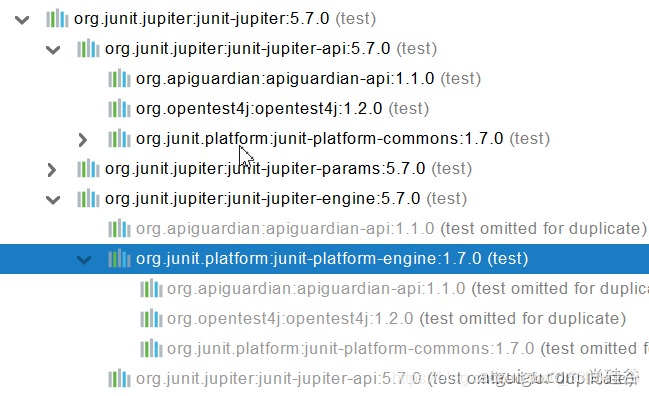
org.springframework.boot
spring-boot-starter-test
test
现在版本:
@SpringBootTest
class Boot05WebAdminApplicationTests {
@Test
void contextLoads() {
}
}
以前:
@SpringBootTest + @RunWith(SpringRunner.class)
SpringBoot整合Junit以后。
编写测试方法:@Test标注(注意需要使用junit5版本的注解)
Junit类具有Spring的功能,@Autowired、比如 @Transactional 标注测试方法,测试完成后自动回滚
=========================================================================
@Test :表示方法是测试方法。但是与JUnit4的@Test不同,他的职责非常单一不能声明任何属性,拓展的测试将会由Jupiter提供额外测试
@ParameterizedTest :表示方法是参数化测试,下方会有详细介绍
@RepeatedTest :表示方法可重复执行,指定测试次数,会重复指定次数
@DisplayName :为测试类或者测试方法设置展示名称
@BeforeEach :表示在每个单元测试之前执行
@AfterEach :表示在每个单元测试之后执行
@BeforeAll :表示在所有单元测试之前执行
@AfterAll :表示在所有单元测试之后执行
标注这上面两个注解的方法必须是static
@Tag :表示单元测试类别,类似于JUnit4中的@Categories
@Disabled :表示测试类或测试方法不执行,类似于JUnit4中的@Ignore
@Timeout :表示测试方法运行如果超过了指定时间将会返回错误
@ExtendWith :为测试类或测试方法提供扩展类引用
=======================================================================
//@RunWith
/*
@BootstrapWith(SpringBootTestContextBootstrapper.class)
@ExtendWith({SpringExtension.class})===>替代runwith
*/
@SpringBootTest //使用spring的测试驱动进行测试,这样就可以使用SpringBoot中的容器功能了
@DisplayName(“自定义测试类”)
public class Test
{
@DisplayName(“自定义测试方法”)
@org.junit.jupiter.api.Test
public void test1()
{
System.out.println(“测试方法1运行”);
}
@Disabled //该测试方法不执行
@org.junit.jupiter.api.Test
public void test2()
{
System.out.println(“测试方法2运行”);
}
@RepeatedTest(5)//当前测试方法一旦运行就执行5次
@org.junit.jupiter.api.Test
public void test3()
{
System.out.println(“测试方法3运行”);
}
//规定方法的超时时间,超出指定时间就会抛出异常
@org.junit.jupiter.api.Test
@Timeout(value = 1,unit = TimeUnit.SECONDS)//指定单位,这里是秒
public void test4() throws InterruptedException {
Thread.sleep(3000);
System.out.println(“测试方法4运行”);
}
@BeforeEach
public void testBeforeEach()
{
System.out.println(“测试方法即将开始”);
}
@AfterEach
public void testAfterEachEach()
{
System.out.println(“测试方法结束”);
}
@BeforeAll
static public void testBeforeAll()
{
System.out.println(“所有测试方法即将开始”);
}
@AfterAll
static public void testAfterEachAll()
{
System.out.println(“所有测试方法结束”);
}
}
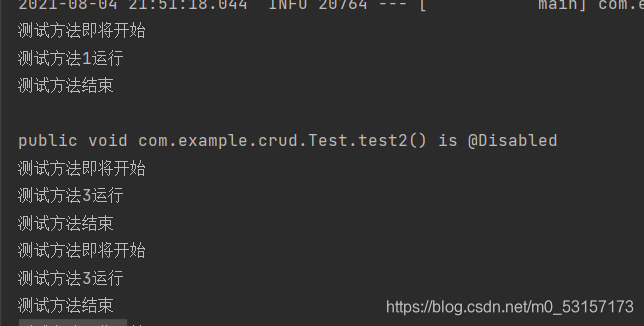
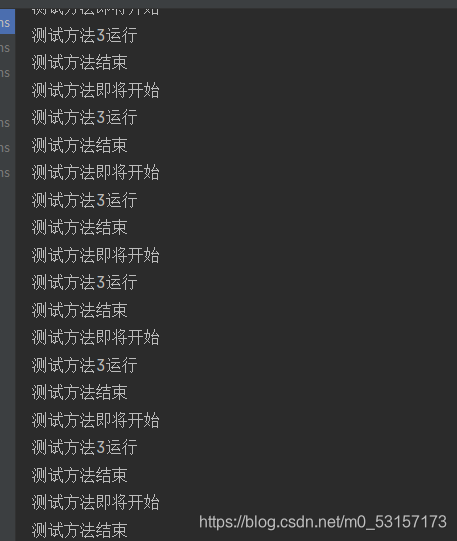
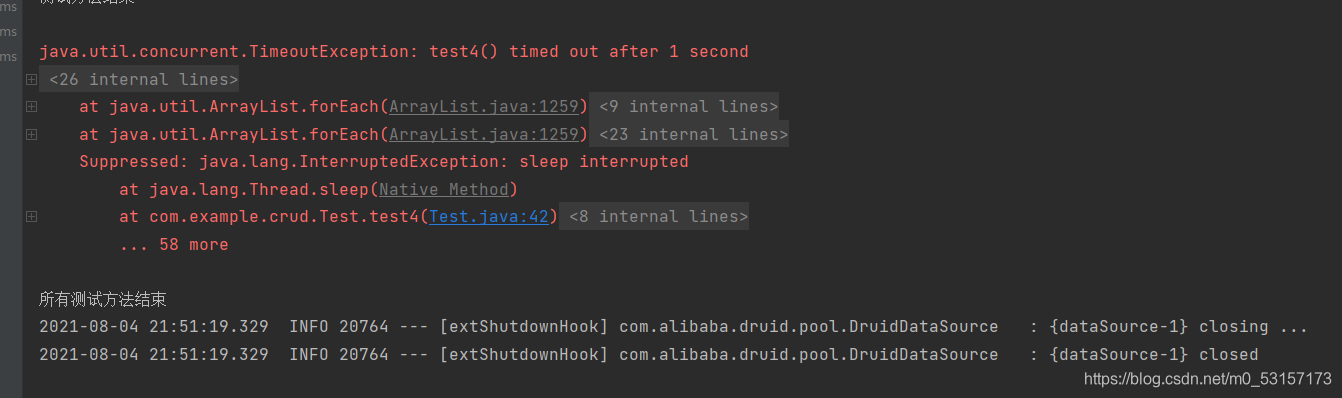
===============================================================================
断言(assertions)是测试方法中的核心部分,用来对测试需要满足的条件进行验证。这些断言方法都是 org.junit.jupiter.api.Assertions 的静态方法。JUnit 5 内置的断言可以分成如下几个类别:
-
检查业务逻辑返回的数据是否合理。
-
所有的测试运行结束以后,会有一个详细的测试报告;
用来对单个值进行简单的验证。如:
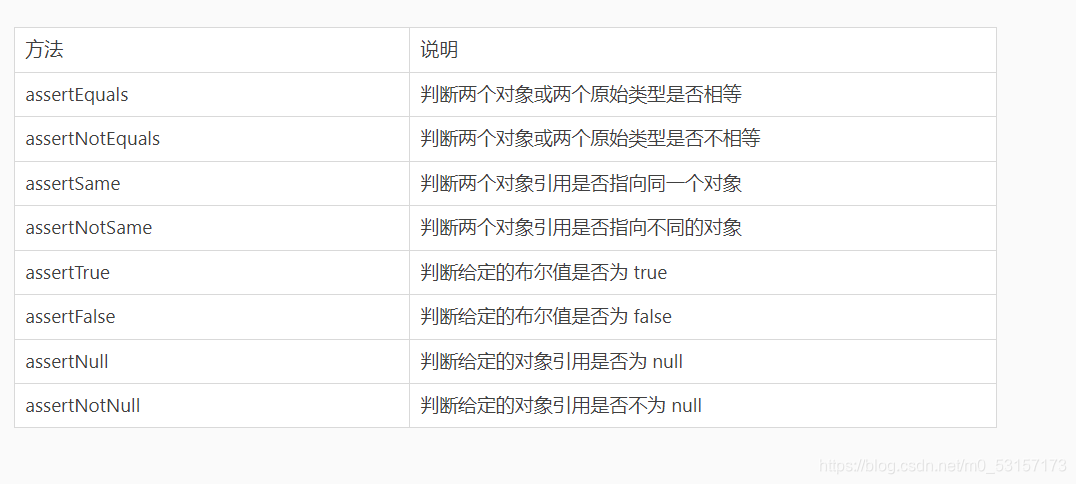
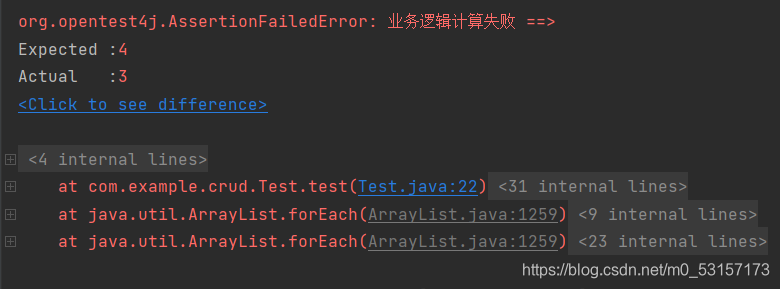
前面的断言失败,后面的断言不会执行
@Test
@DisplayName(“simple assertion”)
public void simple() {
assertEquals(3, 1 + 2, “simple math”);
assertNotEquals(3, 1 + 1);
assertNotSame(new Object(), new Object());
Object obj = new Object();
assertSame(obj, obj);
assertFalse(1 > 2);
assertTrue(1 < 2);
assertNull(null);
assertNotNull(new Object());
}
通过 assertArrayEquals 方法来判断两个对象或原始类型的数组是否相等
是逻辑相等,也就是equals,不是地址相等,即==对于数组就是数组元素一致
@Test
@DisplayName(“array assertion”)
public void array() {
assertArrayEquals(new int[]{1, 2}, new int[] {1, 2},“数组内容不相等”);
}
assertAll 方法接受多个 org.junit.jupiter.api.Executable 函数式接口的实例作为要验证的断言,可以通过 lambda 表达式很容易的提供这些断言
全部断言需要成功,才会执行下面的代码
@Test
@DisplayName(“assert all”)
public void all() {
assertAll(“Math”,
() -> assertEquals(2, 1 + 1),
() -> assertTrue(1 > 0)
);
}
在JUnit4时期,想要测试方法的异常情况时,需要用@Rule注解的ExpectedException变量还是比较麻烦的。而JUnit5提供了一种新的断言方式Assertions.assertThrows() ,配合函数式编程就可以进行使用
第一个参数是预期出现的异常类型,第二个参数是Executable 接口,第三个参数是不符合第一个异常时抛出的信息
断定业务逻辑一定会出现异常,否则会抛出异常
@Test
@DisplayName(“异常测试”)
public void exceptionTest() {
ArithmeticException exception = Assertions.assertThrows(
//扔出断言异常
ArithmeticException.class, () -> System.out.println(1 % 0));
}
Junit5还提供了Assertions.assertTimeout() 为测试方法设置了超时时间
@Test
@DisplayName(“超时测试”)
public void timeoutTest() {
//如果测试方法时间超过1s将会异常
Assertions.assertTimeout(Duration.ofMillis(1000), () -> Thread.sleep(500));
}
通过 fail 方法直接使得测试失败
@Test
@DisplayName(“fail”)
public void shouldFail() {
fail(“This should fail”);
}
JUnit 5 中的前置条件(assumptions【假设】)类似于断言,不同之处在于不满足的断言会使得测试方法失败,而不满足的前置条件只会使得测试方法的执行终止。前置条件可以看成是测试方法执行的前提,当该前提不满足时,就没有继续执行的必要。
和@disabled一样在测试报告中表现为skiped,注意和上面的包区分,这些方法都是assumptions下面的,上面是assertions下面的。
@DisplayName(“前置条件”)
public class Test {
private final String environment = “DEV”;
@org.junit.jupiter.api.Test
@DisplayName(“simple”)
public void simpleAssume() {
assumeTrue(Objects.equals(this.environment, “DEV1”),“两个字符串不相等”);
assumeFalse(() -> Objects.equals(this.environment, “PROD”));
}
@org.junit.jupiter.api.Test
@DisplayName(“assume then do”)
public void assumeThenDo() {
//如果假设成功了,要怎么办
assumingThat(
Objects.equals(this.environment, “DEV”),
() -> System.out.println(“In DEV”)
);
}
}
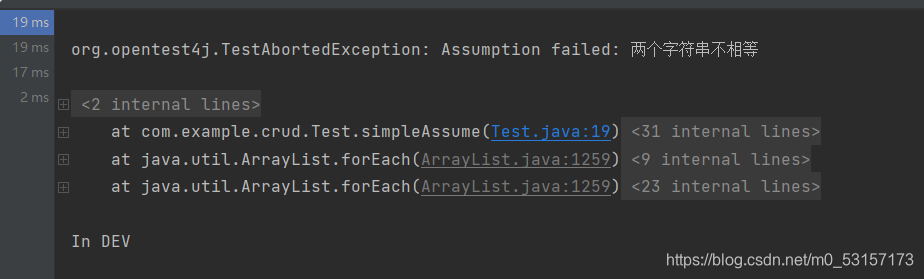
assumeTrue 和 assumFalse 确保给定的条件为 true 或 false,不满足条件会使得测试执行终止。assumingThat 的参数是表示条件的布尔值和对应的 Executable 接口的实现对象。只有条件满足时,Executable 对象才会被执行;当条件不满足时,测试执行并不会终止。
JUnit 5 可以通过 Java 中的内部类和@Nested 注解实现嵌套测试,从而可以更好的把相关的测试方法组织在一起。在内部类中可以使用@BeforeEach 和@AfterEach 注解,而且嵌套的层次没有限制。
内层的test可以驱动外层的Before(After)Each/All之类的方法提前/之后运行,外层的不能驱动内层的Before(After)Each/All之类的方法
@DisplayName(“前置条件”)
public class Test
{
Stack stack;
@org.junit.jupiter.api.Test
@DisplayName(“is instantiated with new Stack()”)
void isInstantiatedWithNew() {
new Stack<>();
}
@Nested
@DisplayName(“when new”)
class WhenNew {
@BeforeEach
void createNewStack() {
stack = new Stack<>();
}
@org.junit.jupiter.api.Test
@DisplayName(“is empty”)
void isEmpty() {
assertTrue(stack.isEmpty());
}
@org.junit.jupiter.api.Test
@DisplayName(“throws EmptyStackException when popped”)
void throwsExceptionWhenPopped() {
assertThrows(EmptyStackException.class, stack::pop);
}
@org.junit.jupiter.api.Test
@DisplayName(“throws EmptyStackException when peeked”)
void throwsExceptionWhenPeeked() {
assertThrows(EmptyStackException.class, stack::peek);
}
@Nested
@DisplayName(“after pushing an element”)
class AfterPushing {
String anElement = “an element”;
@BeforeEach
void pushAnElement() {
stack.push(anElement);
}
@org.junit.jupiter.api.Test
@DisplayName(“it is no longer empty”)
void isNotEmpty() {
assertFalse(stack.isEmpty());
}
@org.junit.jupiter.api.Test
@DisplayName(“returns the element when popped and is empty”)
void returnElementWhenPopped() {
assertEquals(anElement, stack.pop());
assertTrue(stack.isEmpty());
}
@org.junit.jupiter.api.Test
@DisplayName(“returns the element when peeked but remains not empty”)
void returnElementWhenPeeked() {
assertEquals(anElement, stack.peek());
assertFalse(stack.isEmpty());
}
}
}
更多推荐


 29
29 0
0- 0


 已为社区贡献2条内容

所有评论(0)