
小程序云开发之---‘上传图片’到云存储并显示在页面上
·
其实这个知识还是蛮简单的,结合开发文档多看几次慢慢就理解了
效果图

操作顺序图
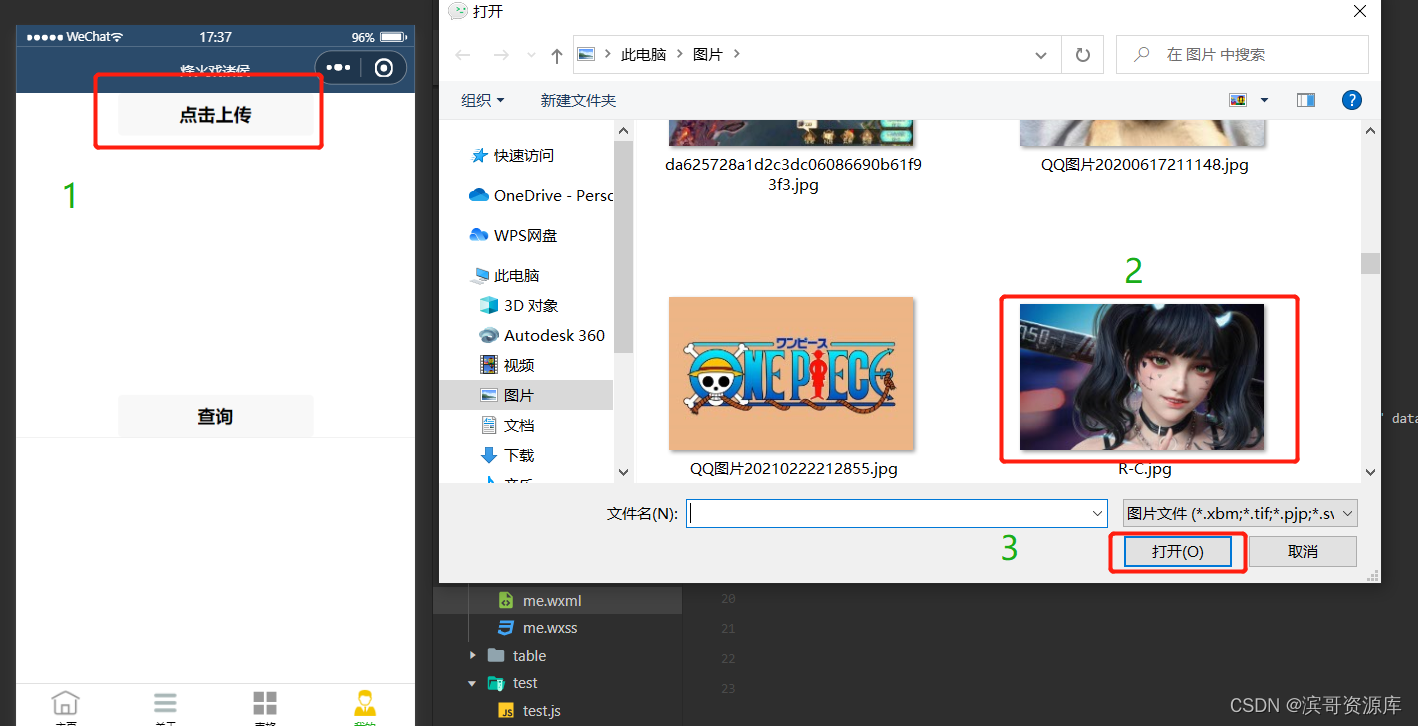
wxml代码
<button bindtap="upload">点击上传</button>
<image src="{{imges}}"></image>
js代码
Page({

  data: {
  imge:[],
  imges:'',
  },


upload:function(e){
  let that=this;
  console.log("点击了上传");
  wx.chooseImage({
    count: 2,//最多上传几个,默认9个
    sizeType:['original','compressed'],//原图,压缩图
    sourceType:['album','camera'],//相机、相册
    success(res){
      console.log("选择成功");
      that.uploadImg(res.tempFilePaths[0]);
    }
  })
},
uploadImg(fileUrl){
   let that =this;
  let rand = (Math.floor(Math.random()*1000 )); //上传图片环节
  wx.cloud.uploadFile({
    cloudPath:rand+'.png',
    filePath:fileUrl,
    success:res=>{
      console.log("上传成功",res);
     toast("上传成功");
      that.setData({
        imges:res.fileID  //把文件的路径ID赋值给imges
      })
    },
    fail:console.error,
    //返回文件ID

  })
},


});
function toast(message) {
    wx.showToast({
      title: message,
      icon: 'none',
      duration: 1000
    });
  };
   function alert(message){
    wx.showModal({
      title:'温馨提示',
      content: message,
      showCancel:false
    });
  };
在此前,我在里面参照了几个博主的文章,对此受益匪浅,结合博主的经验和自身的了解,具体链接我找不到了,实属抱歉。结合自身的学习情况,在此记录一下,同时如果能帮到大家的话,那就更好不过了。
更多推荐


 1
1 0
0- 0


 已为社区贡献1条内容

所有评论(0)