
Android kotlin (仿微博App分享界面)用RecyclerView(androidx+BRVAH3.0.6+AnyLayer)实现从底部弹出菜单栏对话框功能
·
一、实现效果
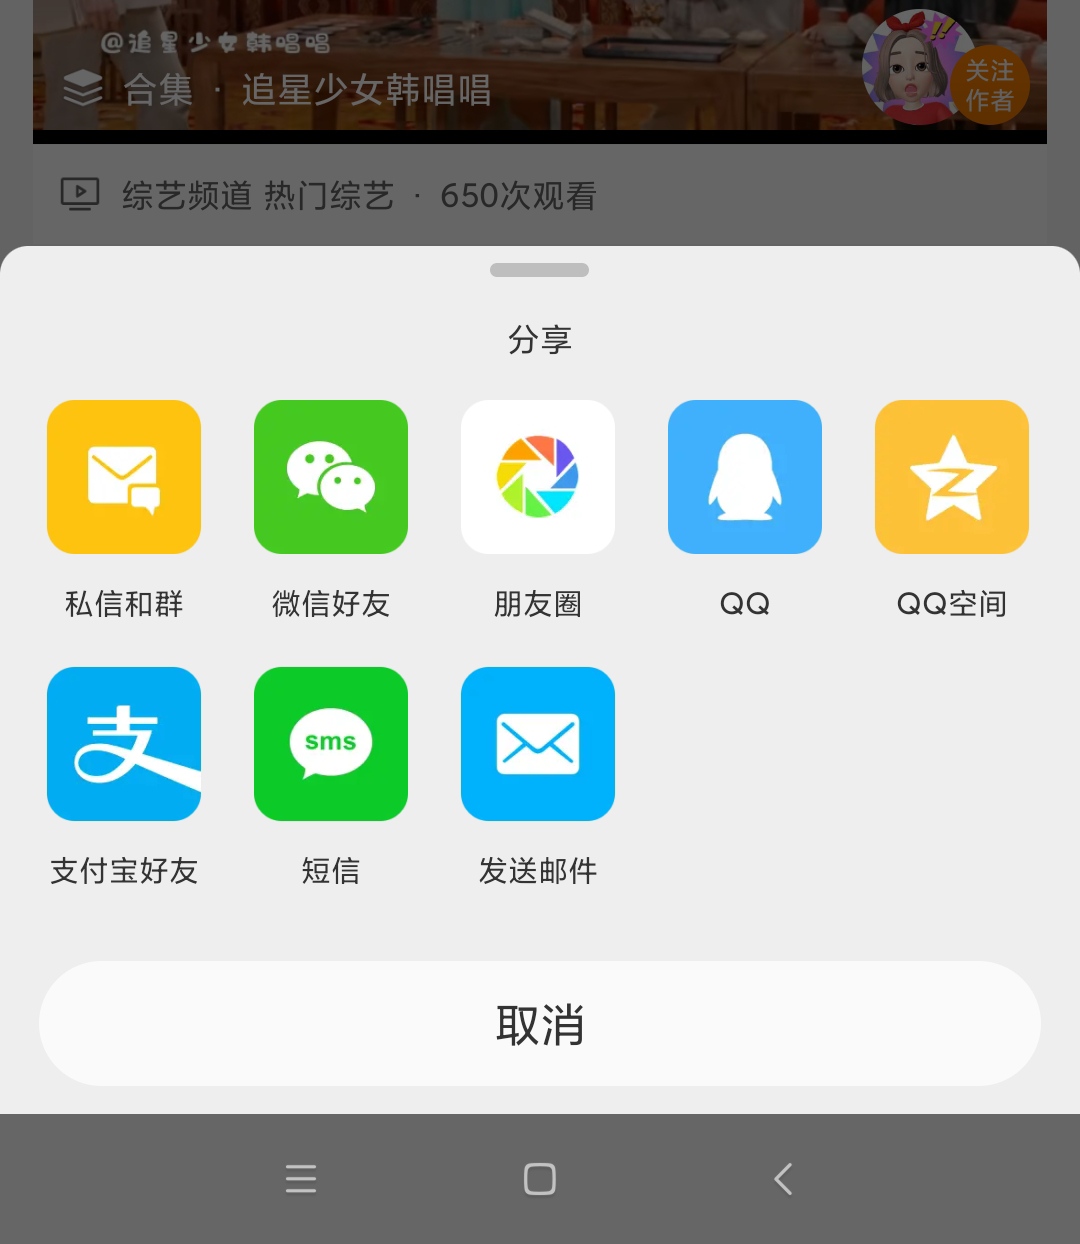
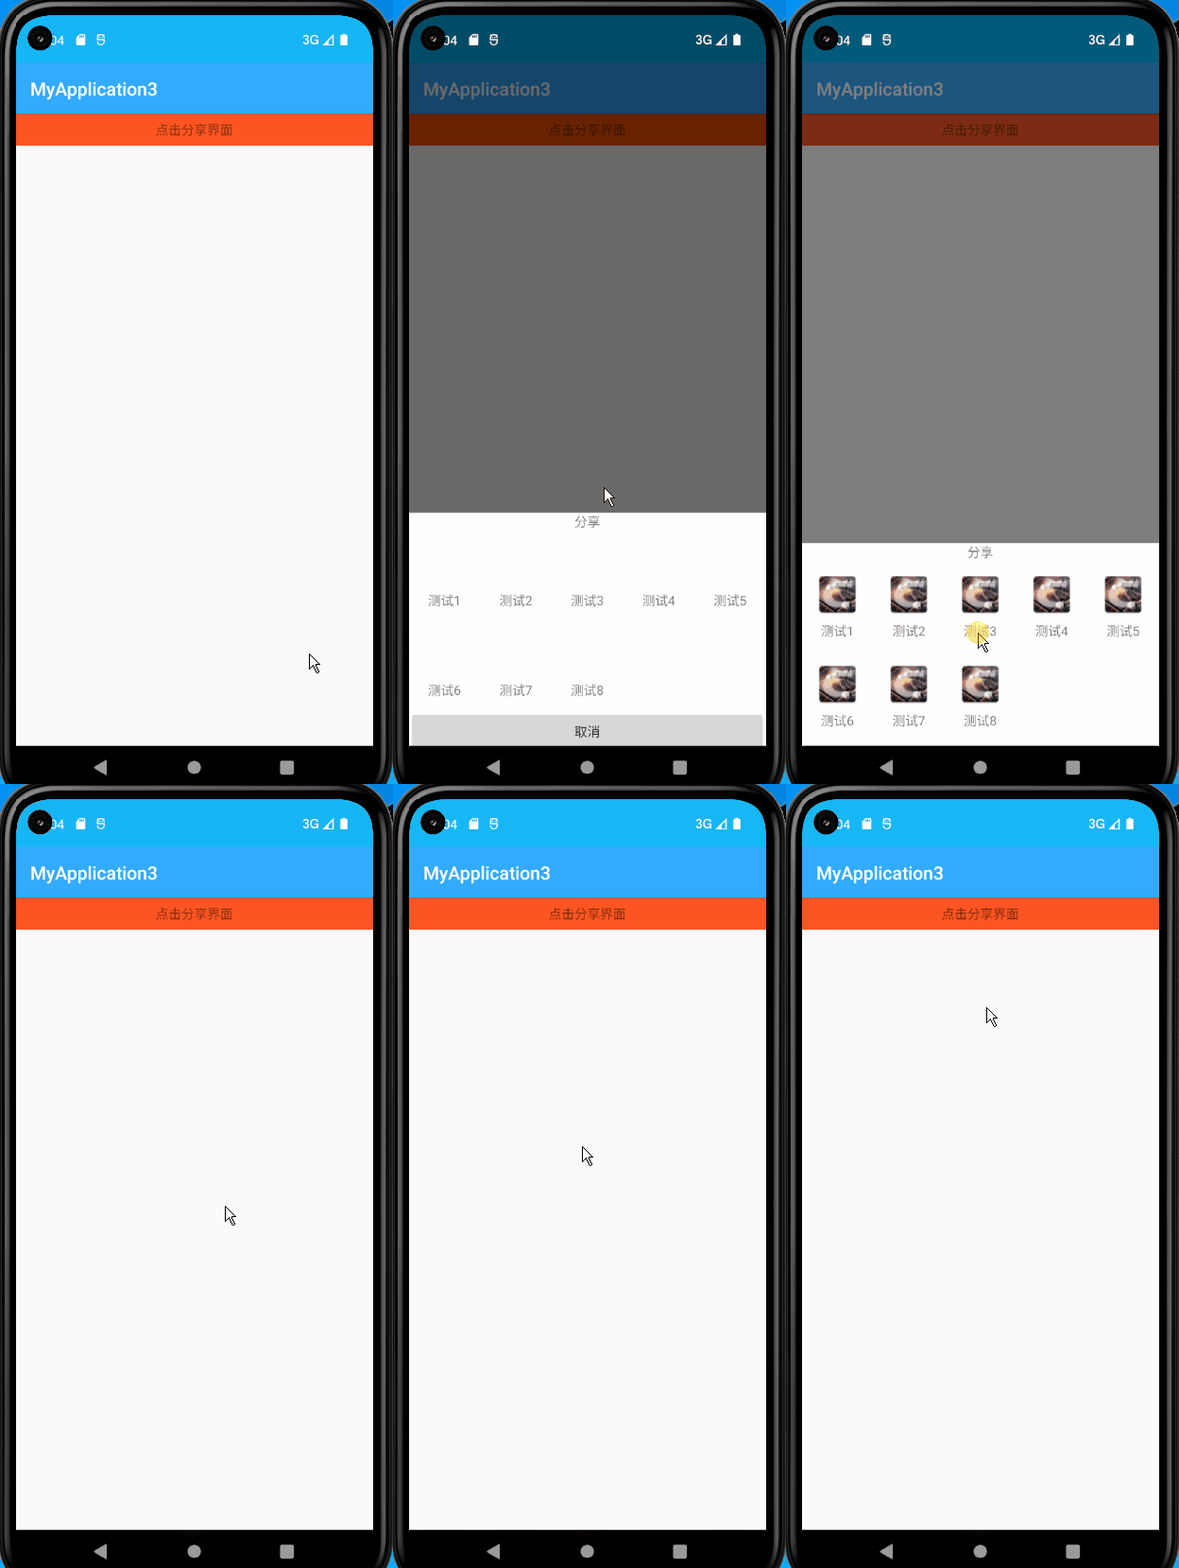
二、引入依赖
在app的build.gradle在添加以下代码
1、图片加载 coil:implementation("io.coil-kt:coil:1.2.1")
2、框架弹窗AnyLayer(github官网):implementation "com.github.goweii:AnyLayer:4.1.4-androidx"
3、implementation 'com.github.CymChad:BaseRecyclerViewAdapterHelper:3.0.6',这个里面带的适配器,直接调用就即可
BaseRecyclerViewAdapterHelper简称BRVAH
Android SDK | 是否支持BaseRecyclerViewAdapterHelper:3.0.6 |
|---|---|
android compileSdkVersion 29 | 是 |
android compileSdkVersion 30 | 是 |
android compileSdkVersion 31 | 是 |
android compileSdkVersion 32 | 是 |
android compileSdkVersion 33 | 是 |
这依赖包还需要得到要添加,在Project的build.gradle在添加以下代码,不添加就不行
allprojects {
    repositories {
        ...
        maven { url "https://jitpack.io" }//加上
    }
}
三、实现源码
1、适配器
RvAdapter.kt
package com.example.myapplication3.adapter

import coil.load
import com.chad.library.adapter.base.BaseQuickAdapter
import com.chad.library.adapter.base.viewholder.BaseViewHolder
import com.example.myapplication3.R
import kotlinx.android.synthetic.main.rv_item.view.*

class RvAdapter(layoutResId: Int = R.layout.rv_item) :
    BaseQuickAdapter<MutableMap<Int, String>, BaseViewHolder>(layoutResId){
    override fun convert(helper: BaseViewHolder, item: MutableMap<Int, String>) {
        helper.itemView.run {
            item.entries.forEach {

                iv_item.load(it.key)
                tv_item.text = it.value
            }
        }
    }
}
布局rv_item.xml
<?xml version="1.0" encoding="utf-8"?>
<RelativeLayout xmlns:android="http://schemas.android.com/apk/res/android"
    android:layout_width="match_parent"
    android:layout_height="wrap_content">

    <RelativeLayout
        android:id="@+id/rl"
        android:layout_width="match_parent"
        android:layout_height="wrap_content"
        android:background="#FFFFFF"
        android:padding="12.0dip">

        <ImageView
            android:id="@+id/iv_item"
            android:layout_width="50dp"
            android:layout_height="50dp"
            android:layout_centerHorizontal="true"
            android:src="@mipmap/ic_c" />

        <TextView
            android:id="@+id/tv_item"
            android:layout_width="wrap_content"
            android:layout_height="wrap_content"
            android:layout_below="@id/iv_item"
            android:layout_centerHorizontal="true"
            android:layout_marginTop="5.0dip"
            android:text="测试"
            android:textSize="@dimen/sp_14" />
    </RelativeLayout>
</RelativeLayout>

这图标样式这是在android studio系统中添加资源图标
3、框架弹窗AnyLayer
DialogUtil.kt
package com.example.myapplication3.util

import android.view.Gravity
import android.widget.TextView
import androidx.recyclerview.widget.RecyclerView
import com.example.myapplication3.R
import com.example.myapplication3.adapter.RvAdapter
import per.goweii.anylayer.AnyLayer
import per.goweii.anylayer.widget.SwipeLayout


/**
 * 底部弹出的菜单栏对话框
 */
fun showRadioListDialog(
    textView: TextView,
    list: MutableList<MutableMap<Int, String>>,
    callback: OnResultCallback<Int>
) {
    val dialog = AnyLayer.dialog()
        .contentView(R.layout.recyclerview)
        .backgroundDimDefault()
        .gravity(Gravity.BOTTOM)
        .swipeDismiss(SwipeLayout.Direction.BOTTOM)
        .onClickToDismiss(R.id.button)

    dialog.show()

    val mAdapter = RvAdapter().apply {

        setOnItemClickListener { adapter, view, position ->
//            val dict = getItem(position)
            callback.onResult(position)
        }
    }
//    dialog.getView<TextView>(R.id.title)?.text = title?:""
    dialog.getView<RecyclerView>(R.id.mRecyclerView)?.apply {
        adapter = mAdapter
        mAdapter.setList(list)
//        val pos = mAdapter.getSelectIndex()
//        scrollToPosition(pos)
    }
}

interface OnResultCallback<T> {
    fun onResult(t: T)
}
recyclerview.xml
<?xml version="1.0" encoding="utf-8"?>
<LinearLayout xmlns:android="http://schemas.android.com/apk/res/android"
    xmlns:app="http://schemas.android.com/apk/res-auto"
    xmlns:tools="http://schemas.android.com/tools"
    android:layout_width="match_parent"
    android:layout_height="wrap_content"
    android:background="#FFFFFF"
    android:orientation="vertical">

    <TextView
        android:layout_width="match_parent"
        android:layout_height="wrap_content"
        android:gravity="center"
        android:text="分享"/>

    <androidx.recyclerview.widget.RecyclerView
        android:id="@+id/mRecyclerView"
        android:layout_width="wrap_content"
        android:layout_height="wrap_content"
        app:layoutManager="androidx.recyclerview.widget.GridLayoutManager"
        app:spanCount="5"
        tools:listitem="@layout/rv_item"/>

    <Button
        android:id="@+id/button"
        android:layout_width="match_parent"
        android:layout_height="wrap_content"
        android:text="取消"/>
</LinearLayout>

注意:recyclerview.xml布局的android:layout_height="wrap_content"不要设置为match_parent,自己试试就知道
5、实现视图
MainActivity.kt
package com.example.myapplication3

import android.os.Bundle
import androidx.appcompat.app.AppCompatActivity
import com.example.myapplication3.util.OnResultCallback
import com.example.myapplication3.util.showRadioListDialog
import kotlinx.android.synthetic.main.activity_main.*

class MainActivity : AppCompatActivity()
{

    var list = mutableListOf<MutableMap<Int, String>>()

    override fun onCreate(savedInstanceState: Bundle?) {
        super.onCreate(savedInstanceState)
        setContentView(R.layout.activity_main)
        initView()
        initData()
    }

    private fun initView() {
        textView.setOnClickListener {

			//从底部弹出菜单栏对话框
            showRadioListDialog(textView,list,object : OnResultCallback<Int> {
                override fun onResult(position: Int) {

                }
            })
        }
    }

    private fun initData() {
        setResources()
    }

    private fun setResources() {
        disableGroup()
    }

    private fun disableGroup() {

    	//图标和它对应的标签
        addItemResources(R.mipmap.ic_c, getString(R.string.test1))//<string name="test1">测试1</string>
        addItemResources(R.mipmap.ic_c, getString(R.string.test2))//<string name="test1">测试2</string>
        addItemResources(R.mipmap.ic_c, getString(R.string.test3))//<string name="test1">测试3</string>
        addItemResources(R.mipmap.ic_c, getString(R.string.test4))//<string name="test1">测试4</string>
        addItemResources(R.mipmap.ic_c, getString(R.string.test5))//<string name="test1">测试5</string>
        addItemResources(R.mipmap.ic_c, getString(R.string.test6))//<string name="test1">测试6</string>
        addItemResources(R.mipmap.ic_c, getString(R.string.test7))//<string name="test1">测试7</string>
        addItemResources(R.mipmap.ic_c, getString(R.string.test8))//<string name="test1">测试8</string>
    }

    private fun addItemResources(key: Int, value: String) {
        list.add(mutableMapOf<Int, String>(key to value))
    }
}
更多推荐



 0
0 0
0- 0


 已为社区贡献11条内容

所有评论(0)