
ESP32-C3 arduino 环境搭建
·
注意,请使用下面第 五步的操作,直接下载新的包即可,注意点:
-
如果芯片是老的,用老一点的RC1库版本
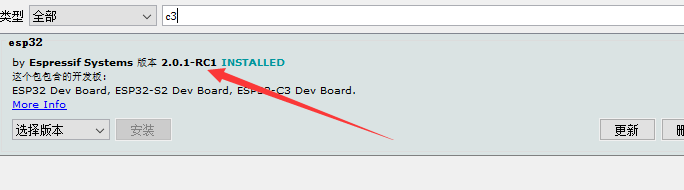
-
如果芯片是2M的Flash,选择下面这个配置
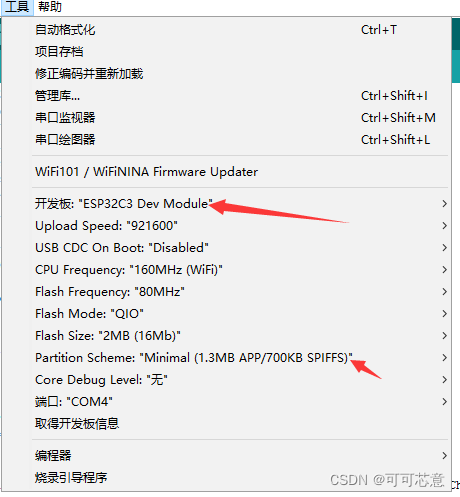
-
CHIP ID的LOG

一、下载最新arduino
https://www.arduino.cc/en/Main/Software?setlang=cn
二、设置包地址
文件–>首选项–>
- esp32使用这个https://dl.espressif.com/dl/package_esp32_index.json
- 8266使用这个http://arduino.esp8266.com/stable/package_esp8266com_index.json
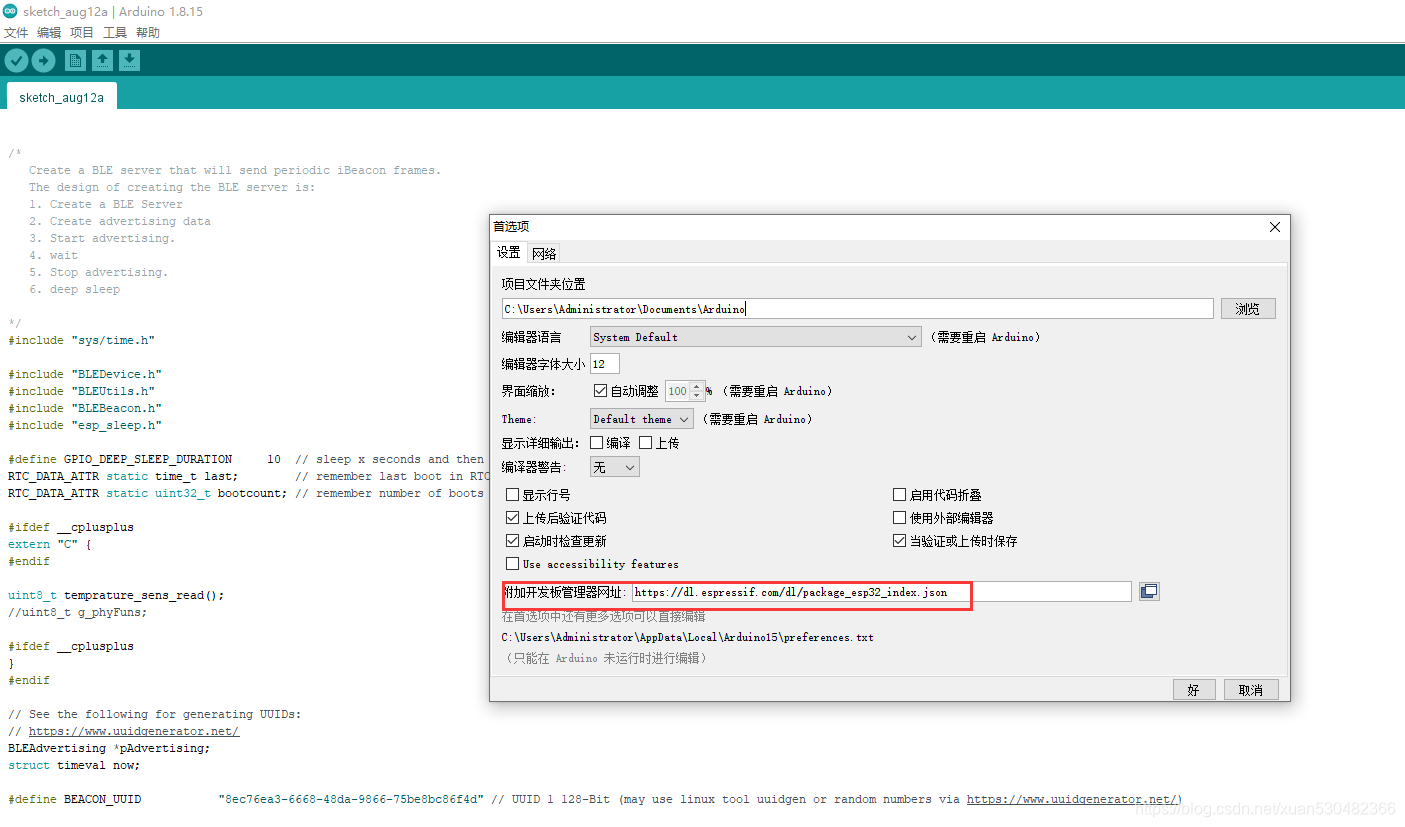
三、选择esp32开发板
工具–>开发板–>开发板管理器–>输入esp32
四、替换新的esp32包
- 从 https://github.com/espressif/arduino-esp32
下载ZIP - 解压到
C:\Users\Administrator\AppData\Local\Arduino15\packages\esp32\hardware\esp32 - 运行
C:\Users\Administrator\AppData\Local\Arduino15\packages\esp32\hardware\esp32\1.0.6\tools 里面的get.exe安装一下环境 - 搞定
五、还发现一种方式
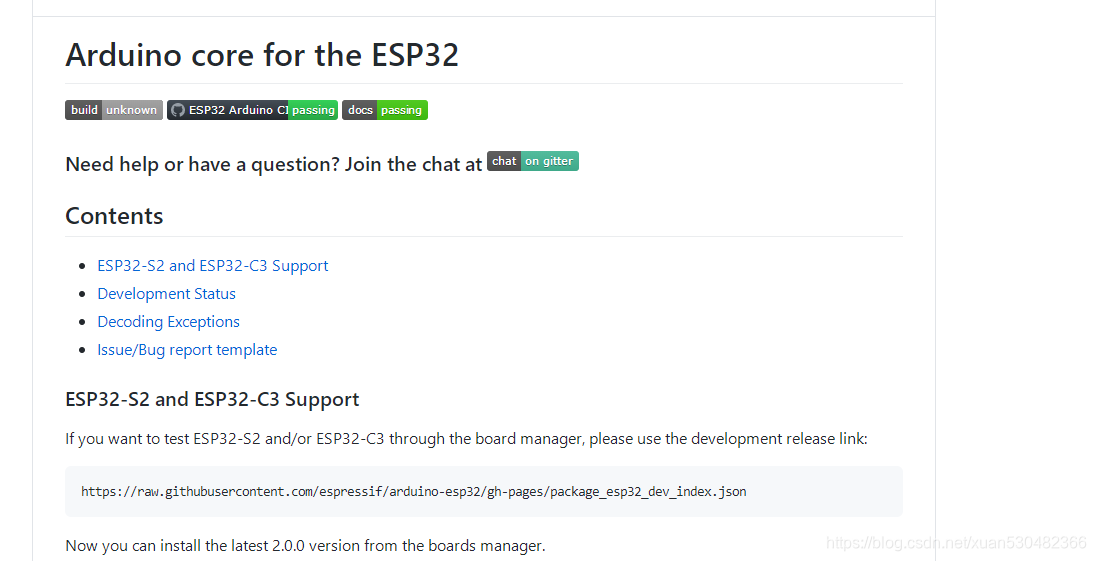
直接输入包地址
ESP32-S2 and ESP32-C3 Support
If you want to test ESP32-S2 and/or ESP32-C3 through the board manager, please use the development release link:
https://raw.githubusercontent.com/espressif/arduino-esp32/gh-pages/package_esp32_dev_index.json
更多推荐


 6
6 0
0- 0


 已为社区贡献1条内容

所有评论(0)