
ansible-playbook部署Nginx高可用集群
·
通过ansible-playbook,部署nginx高可用集群。
准备
- 角色分配:
master:192.168.30.128

backup:192.168.30.129

backup:192.168.30.130

VIP:192.168.30.100
- 将所有部署nginx的主机分为webserver组:
# vim /etc/ansible/hosts

[webserver]
192.168.30.128
192.168.30.129
192.168.30.130
- 创建管理目录:
# mkdir -p nginx+keepalived/roles/{nginx_install,keepalived_install}/{files,handlers,meta,tasks,templates,vars}

# cd nginx+keepalived/
说明:
files:存放需要同步到异地服务器的源码文件及配置文件;
handlers:当资源发生变化时需要进行的操作,若没有此目录可以不建或为空;
meta:存放说明信息、说明角色依赖等信息,可留空;
tasks:nginx+keepalived 安装过程中需要进行执行的任务;
templates:用于执行 nginx+keepalived 安装的模板文件,一般为脚本;
vars:本次安装定义的变量
# tree .
.
├── nginx+keepalived.yml
└── roles
    ├── keepalived_install
    │   ├── files
    │   ├── handlers
    │   ├── meta
    │   ├── tasks
    │   │   ├── install.yml
    │   │   └── main.yml
    │   ├── templates
    │   │   ├── check_nginx.sh
    │   │   ├── keepalived_backup.conf
    │   │   └── keepalived_master.conf
    │   └── vars
    │       └── main.yml
    └── nginx_install
        ├── files
        │   └── nginx-1.15.0.tar.gz             #可提前下载好nginx包放到files下
        ├── tasks
        │   ├── copy.yml
        │   ├── install.yml
        │   ├── main.yml
        │   └── prepare.yml
        ├── templates
        │   ├── fastcgi_params
        │   ├── nginx.conf
        │   ├── nginx.service
        │   └── server.conf
        └── vars
            └── main.yml

13 directories, 17 files
- 创建安装入口文件,用来调用roles:
# vim nginx+keepalived.yml

---
- hosts: webserver
  remote_user: root
  gather_facts: True

  roles:
    - nginx_install
    - keepalived_install
nginx部分
- 创建nginx入口文件,用来调用nginx_install:
# vim nginx.yml

#用于批量安装Nginx
- hosts: webserver
  remote_user: root
  gather_facts: True

  roles:
    - nginx_install
- 创建变量:
# vim roles/nginx_install/vars/main.yml

#定义nginx安装中的变量
NGINX_VER: 1.15.0
DOWNLOAD_URL: http://nginx.org/download/nginx-{{ NGINX_VER }}.tar.gz
NGINX_USER: nginx
NGINX_PORT: 80
SOURCE_DIR: /software
NGINX_DIR: /usr/local/nginx
DATA_DIR: /data/nginx
- 创建模板文件:
nginx主配置文件nginx.conf
# vim roles/nginx_install/templates/nginx.conf

user nobody nobody;
worker_processes  4;
error_log {{ DATA_DIR }}/log/error.log crit;
pid /run/nginx.pid;
worker_rlimit_nofile 65535;

events {
    use epoll;
    worker_connections  1024;
    multi_accept on;
}
http {
    include       mime.types;
    default_type  application/octet-stream;

    log_format  main  '$remote_addr - $remote_user [$time_local] "$request" '
                      '$status $body_bytes_sent "$http_referer" '
                      '"$http_user_agent" "$http_x_forwarded_for"';

    access_log  {{ DATA_DIR }}/log/access.log  main;

    server_tokens       off;
    sendfile        	on;
    send_timeout        3m;
    tcp_nopush          on;
    tcp_nodelay         on;
    keepalive_timeout   65;
    types_hash_max_size 2048;

    client_header_timeout 3m;
    client_body_timeout 3m;
    connection_pool_size 256;
    client_header_buffer_size 4k;
    large_client_header_buffers 8 4k;
    request_pool_size 4k;
    output_buffers 4 32k;
    postpone_output 1460;
    client_max_body_size 10m;
    client_body_buffer_size 256k;
    client_body_temp_path {{ NGINX_DIR }}/client_body_temp;
    proxy_temp_path {{ NGINX_DIR }}/proxy_temp;
    fastcgi_temp_path {{ NGINX_DIR }}/fastcgi_temp;
    fastcgi_intercept_errors on;

    gzip on;
    gzip_min_length 2k;
    gzip_buffers 4 32k;
    gzip_comp_level 6;
    gzip_http_version 1.1;
    gzip_types text/plain application/x-javascript text/css text/htm
    application/xml;

    include  {{ NGINX_DIR }}/conf/vhost/*.conf;
}
nginx vhost配置文件server.conf
# vim roles/nginx_install/templates/server.conf

server {
	listen       80;
	server_name  localhost;
	location / {
		root   {{ NGINX_DIR }}/html;
		index  index.php index.html index.htm;
	}

	error_page   500 502 503 504  /50x.html;
        location = /50x.html {
        	root   html;
        }

	location ~ \.php$ {
	root   {{ NGINX_DIR }}/html;
	fastcgi_pass   127.0.0.1:9000;
	fastcgi_index  index.php;
	fastcgi_param  SCRIPT_FILENAME  $document_root$fastcgi_script_name;
	include        fastcgi_params;
	}
}
nginx额外配置文件fastcgi_params
# vim roles/nginx_install/templates/fastcgi_params

fastcgi_param  GATEWAY_INTERFACE  CGI/1.1;
fastcgi_param  SERVER_SOFTWARE    nginx;
fastcgi_param  QUERY_STRING       $query_string;
fastcgi_param  REQUEST_METHOD     $request_method;
fastcgi_param  CONTENT_TYPE       $content_type;
fastcgi_param  CONTENT_LENGTH     $content_length;
fastcgi_param  SCRIPT_FILENAME    $document_root$fastcgi_script_name;
fastcgi_param  SCRIPT_NAME        $fastcgi_script_name;
fastcgi_param  REQUEST_URI        $request_uri;
fastcgi_param  DOCUMENT_URI       $document_uri;
fastcgi_param  DOCUMENT_ROOT      $document_root;
fastcgi_param  SERVER_PROTOCOL    $server_protocol;
fastcgi_param  REMOTE_ADDR        $remote_addr;
fastcgi_param  REMOTE_PORT        $remote_port;
fastcgi_param  SERVER_ADDR        $server_addr;
fastcgi_param  SERVER_PORT        $server_port;
fastcgi_param  SERVER_NAME        $server_name;
nginx服务文件nginx.service
# vim roles/nginx_install/templates/nginx.service

[Unit]
Description=The nginx HTTP and reverse proxy server
After=network.target remote-fs.target nss-lookup.target

[Service]
Type=forking
PIDFile=/run/nginx.pid
# Nginx will fail to start if /run/nginx.pid already exists but has the wrong
# SELinux context. This might happen when running `nginx -t` from the cmdline.
# https://bugzilla.redhat.com/show_bug.cgi?id=1268621
ExecStartPre=/usr/bin/rm -f /run/nginx.pid
ExecStartPre={{ NGINX_DIR }}/sbin/nginx -t
ExecStart={{ NGINX_DIR }}/sbin/nginx
ExecReload=/bin/kill -s HUP $MAINPID
KillSignal=SIGQUIT
TimeoutStopSec=5
KillMode=process
PrivateTmp=true

[Install]
WantedBy=multi-user.target
- 环境准备prepare.yml:
# vim roles/nginx_install/tasks/prepare.yml
- name: 关闭firewalld
  service: name=firewalld state=stopped enabled=no

- name: 临时关闭 selinux
  shell: "setenforce 0"
  failed_when: false

- name: 永久关闭 selinux
  lineinfile:
    dest: /etc/selinux/config
    regexp: "^SELINUX="
    line: "SELINUX=disabled"

- name: 添加EPEL仓库
  yum: name=epel-release state=latest

- name: 安装常用软件包
  yum:
    name:
      - vim
      - lrzsz
      - net-tools
      - wget
      - curl
      - bash-completion
      - rsync
      - gcc
      - gcc-c++
      - unzip
      - git
      - autoconf
      - cmake
      - openssl
      - openssl-devel
      - pcre
      - pcre-devel
      - zlib
      - zlib-devel
      - gd-devel
      - libxml2-devel
    state: latest

- name: 更新系统
  shell: "yum update -y"
  args:
    warn: False
- 文件拷贝copy.yml:
# vim roles/nginx_install/tasks/copy.yml
- name: 创建nginx用户组
  group: name={{ NGINX_USER }}  state=present

- name: 创建nginx用户
  user: name={{ NGINX_USER }}  group={{ NGINX_USER }}  state=present create_home=False shell=/sbin/nologin

- name: 创建software目录
  file: name={{ SOURCE_DIR }} state=directory mode=0755 recurse=yes

- name: 创建日志目录
  file: name={{ item }} state=directory owner={{ NGINX_USER }} group={{ NGINX_USER }} mode=0755 recurse=yes
  with_items:
  - "{{ DATA_DIR }}"
  - "{{ DATA_DIR }}/log"

- name: 创建日志文件
  file: name={{ item }} state=touch owner={{ NGINX_USER }} group={{ NGINX_USER }} mode=0644
  with_items:
  - "{{ DATA_DIR }}/log/access.log"
  - "{{ DATA_DIR }}/log/error.log"

#当前主机下没有nginx包
- name: 下载nginx包
  get_url: url={{ DOWNLOAD_URL }} dest={{ SOURCE_DIR }} owner={{ NGINX_USER }} group={{ NGINX_USER }}

#当前主机file目录下已有nginx包
#- name: 拷贝现有nginx包到所有主机
#  copy: src=nginx-{{ NGINX_VER }}.tar.gz dest={{ SOURCE_DIR }} owner={{ NGINX_USER }} group={{ NGINX_USER }}

- name: 解压nginx包
  unarchive: src={{ SOURCE_DIR }}/nginx-{{ NGINX_VER }}.tar.gz dest={{ SOURCE_DIR }} owner={{ NGINX_USER }} group={{ NGINX_USER }}

#复制nginx服务文件
- name: 拷贝nginx服务文件
  template: src=nginx.service dest=/usr/lib/systemd/system/nginx.service owner=root group=root
- 编译安装install.yml:
# vim roles/nginx_install/tasks/install.yml
#编译nginx
- name: 编译nginx
  shell: "cd {{ SOURCE_DIR }}/nginx-{{ NGINX_VER }} && ./configure --prefix={{ NGINX_DIR }} --user={{ NGINX_USER }} --group={{ NGINX_USER }} --http-log-path={{ DATA_DIR }}/log/access.log --error-log-path={{ DATA_DIR }}/log/error.log --with-http_ssl_module --with-http_v2_module --with-http_realip_module --with-http_flv_module --with-http_mp4_module --with-http_gunzip_module --with-http_gzip_static_module --with-http_image_filter_module --with-http_stub_status_module"

#安装nginx
- name: 安装nginx
  shell: "cd {{ SOURCE_DIR }}/nginx-{{ NGINX_VER }} && make && make install"

#复制nginx主配置文件
- name: 拷贝nginx主配置文件
  template: src=nginx.conf dest={{ NGINX_DIR }}/conf/nginx.conf owner={{ NGINX_USER }} group={{ NGINX_USER }}

- name: 创建vhost配置文件目录
  file: name={{ NGINX_DIR }}/conf/vhost state=directory owner={{ NGINX_USER }} group={{ NGINX_USER }} mode=0755 recurse=yes

#复制nginx vhost配置文件
- name: 拷贝nginx vhost配置文件
  template: src=server.conf dest={{ NGINX_DIR }}/conf/vhost/server.conf owner={{ NGINX_USER }} group={{ NGINX_USER }} mode=0644

#复制nginx额外配置文件
- name: 拷贝nginx额外配置文件
  template: src=fastcgi_params dest={{ NGINX_DIR }}/conf/fastcgi_params owner={{ NGINX_USER }} group={{ NGINX_USER }} mode=0644

- name: 配置环境变量
  shell: " if [ `grep {{ NGINX_DIR }}/sbin /etc/profile |wc -l` -eq 0 ]; then echo export PATH=$PATH:{{ NGINX_DIR }}/sbin >> /etc/profile && source /etc/profile; else source /etc/profile; fi"

- name: 启动nginx并开机启动
  shell: "systemctl daemon-reload && systemctl enable nginx && systemctl start nginx"
- 引用文件main.yml:
# vim roles/nginx_install/tasks/main.yml
#引用prepare、copy、install模块
- include: prepare.yml
- include: copy.yml
- include: install.yml
keepalived部分
- 创建keepalived入口文件,用来调用keepalived_install:
# vim keepalived.yml

#用于批量安装Keepalived
- hosts: webserver
  remote_user: root
  gather_facts: True

  roles:
    - keepalived_install
- 创建变量:
# vim roles/keepalived_install/vars/main.yml

#定义keepalived安装中的变量
INF: ens33
MASTER_IP: 192.168.30.128
VIP_IP: 192.168.30.100
VRRP_SCRIPT: check_nginx
SCRIPT_DIR: /usr/local/sbin
PASSWORD: 123456
- 创建模板文件:
master配置文件keepalived_master.conf
# vim roles/keepalived_install/templates/keepalived_master.conf

global_defs {
   notification_email {
     lzx@lzxlinux.com               #定义接收告警的人
   }
    notification_email_from root@lzxlinux.com               #定义发邮件的地址
    smtp_server 127.0.0.1                #定义发邮件服务器地址,若为127.0.0.1则使用本机自带邮件服务器发送
    smtp_connect_timeout 30
    router_id LVS_DEVEL
}

vrrp_script {{ VRRP_SCRIPT }} {
    script "{{ SCRIPT_DIR }}/check_nginx.sh"                #自定义脚本,该脚本为监控Nginx服务的脚本
    interval 3                  #每隔3s执行一次该脚本
}

vrrp_instance VI_1 {
    state MASTER                #角色为master
    interface {{ INF }}                 #针对哪个网卡监听VIP
    virtual_router_id 51                #为同一个vip服务的keepalived的virtual_router_id相同
    priority 100                #设置权重为100,master权重必须要比backup大,权重越大优先级越高
    advert_int 1
    authentication {
        auth_type PASS
        auth_pass {{ PASSWORD }}                #自定义密码
    }
    virtual_ipaddress {
        {{ VIP_IP }}                #定义VIP地址
    }

    track_script {
        {{ VRRP_SCRIPT }}               #定义监控脚本,这里和上面vrrp_script后面的字符串保持一致
    }
}
backup配置文件keepalived_backup.conf
# vim roles/keepalived_install/templates/keepalived_backup.conf

global_defs {
   notification_email {
     lzx@lzxlinux.com
   }
    notification_email_from root@lzxlinux.com
    smtp_server 127.0.0.1
    smtp_connect_timeout 30
    router_id LVS_DEVEL
}

vrrp_script {{ VRRP_SCRIPT }} {
    script "{{ SCRIPT_DIR }}/check_nginx.sh"
    interval 3
}

vrrp_instance VI_1 {
    state BACKUP                #角色为backup
    interface {{ INF }}
    virtual_router_id 51
    priority 90                #设置权重为90,比master小即可
    advert_int 1
    authentication {
        auth_type PASS
        auth_pass {{ PASSWORD }}
    }
    virtual_ipaddress {
        {{ VIP_IP }}
    }

    track_script {
        {{ VRRP_SCRIPT }}
    }
}
监控nginx服务脚本check_nginx.sh
# vim roles/keepalived_install/templates/check_nginx.sh

#!/bin/bash
n=`ps -C nginx --no-heading |wc -l`

#如果进程为0,则启动nginx,并且再次检测nginx进程数量,
#如果还为0,说明nginx无法启动,此时需要关闭keepalived

if [ $n -eq "0" ]; then
        systemctl start nginx
        n2=`ps -C nginx --no-heading |wc -l`

        if [ $n2 -eq "0"  ]; then
            systemctl stop keepalived
        fi
fi
- keepalived安装install.yml:
# vim roles/keepalived_install/tasks/install.yml
- name: yum安装keepalived
  yum: name=keepalived state=latest

- name: 拷贝master配置文件
  template: src=keepalived_master.conf dest=/etc/keepalived/keepalived.conf mode=0644 owner=root group=root
  when:
    - hostvars[inventory_hostname]['ansible_default_ipv4']['address'] == "{{ MASTER_IP }}"

- name: 拷贝backup配置文件
  template: src=keepalived_backup.conf dest=/etc/keepalived/keepalived.conf mode=0644 owner=root group=root
  when:
    - hostvars[inventory_hostname]['ansible_default_ipv4']['address'] != "{{ MASTER_IP }}"

- name: 拷贝监控nginx服务脚本
  template: src=check_nginx.sh dest={{  SCRIPT_DIR }} mode=0755 owner=root group=root

- name: 启动keepalived服务
  service: name=keepalived state=started enabled=yes
- 引用文件main.yml:
# vim roles/keepalived_install/tasks/main.yml

#引用install模块
- include: install.yml
安装测试
- 执行安装:
# ansible-playbook nginx+keepalived.yml
# ip addr
1: lo: <LOOPBACK,UP,LOWER_UP> mtu 65536 qdisc noqueue state UNKNOWN group default qlen 1000
    link/loopback 00:00:00:00:00:00 brd 00:00:00:00:00:00
    inet 127.0.0.1/8 scope host lo
       valid_lft forever preferred_lft forever
    inet6 ::1/128 scope host
       valid_lft forever preferred_lft forever
2: ens33: <BROADCAST,MULTICAST,UP,LOWER_UP> mtu 1500 qdisc pfifo_fast state UP group default qlen 1000
    link/ether 00:0c:29:d5:50:5b brd ff:ff:ff:ff:ff:ff
    inet 192.168.30.128/24 brd 192.168.30.255 scope global noprefixroute ens33
       valid_lft forever preferred_lft forever
    inet 192.168.30.100/32 scope global ens33
       valid_lft forever preferred_lft forever
    inet6 fe80::d059:a6aa:2797:1a22/64 scope link noprefixroute
       valid_lft forever preferred_lft forever
VIP在192.168.30.128上,因为它是master,权重最高。
- master上关闭nginx服务:
# netstat -lntp |grep nginx
tcp        0      0 0.0.0.0:80              0.0.0.0:*               LISTEN      36375/nginx: master

# systemctl stop nginx

# netstat -lntp |grep nginx
tcp        0      0 0.0.0.0:80              0.0.0.0:*               LISTEN      38654/nginx: master
nginx服务意外宕掉时,keepalived会自动将nginx服务拉起来。
- 3台nginx机器分别导入测试数据:
192.168.30.128上
# echo 192.168.30.128 > /usr/local/nginx/html/1.html
192.168.30.129上
# echo 192.168.30.129 > /usr/local/nginx/html/1.html
192.168.30.130上
# echo 192.168.30.130 > /usr/local/nginx/html/1.html
查看网页,
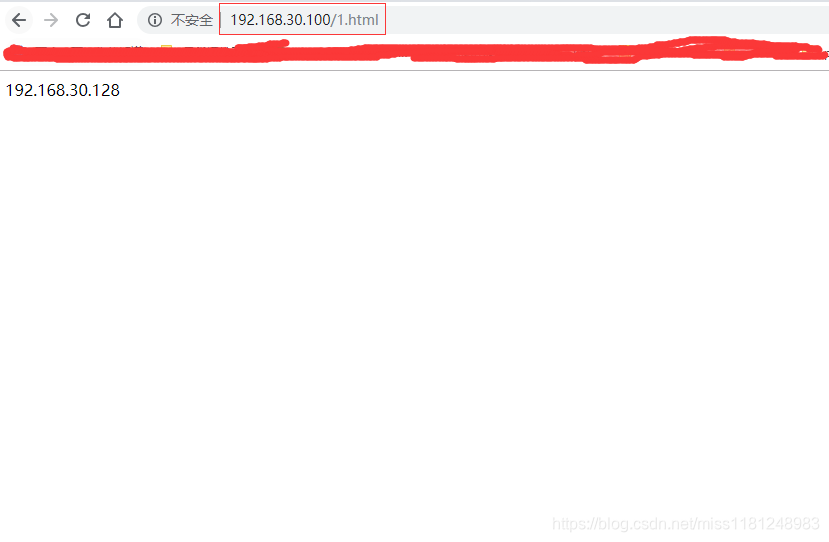
- 关掉192.168.30.128上nginx服务和keepalived服务:
# systemctl stop nginx && systemctl stop keepalived
刷新网页,

- 关掉192.168.30.130上nginx服务和keepalived服务:
# systemctl stop nginx && systemctl stop keepalived
刷新网页,

- 启动192.168.30.128上keepalived服务:
# systemctl start keepalived
刷新网页,
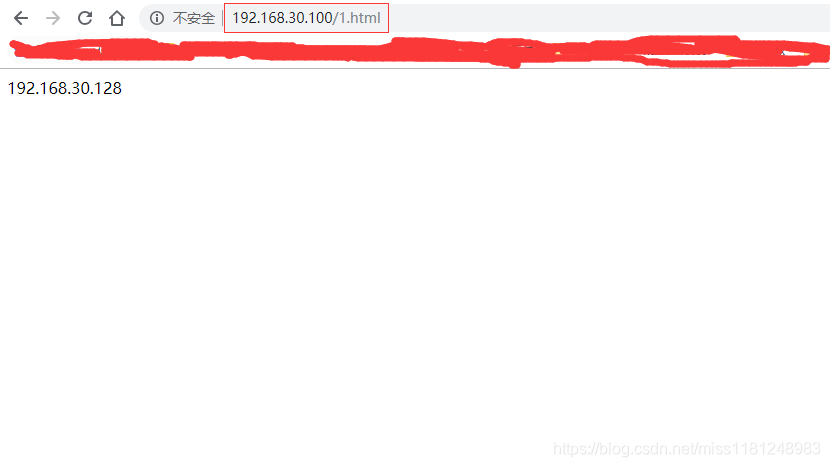
可以看到,当nginx服务宕掉时,keepalived会自动将nginx服务拉起来。如果nginx无法启动,则keepalived会自动关闭,而VIP会转移到集群中其它机器上,继续对用户提供服务,也可以防止出现“脑裂”的情况。
测试安装没有问题,如果本地没有下载好的nginx包,安装会慢一点。已存放至个人gitgub:ansible-playbook
更多推荐



 3
3 0
0- 0


 已为社区贡献4条内容

所有评论(0)