
mipNeRF-pytorch版复现流程(更新中)
https://jonbarron.info/mipnerf/
https://github.com/google-research/google-research/tree/master/jaxnerf
读readme看看安装的具体步骤
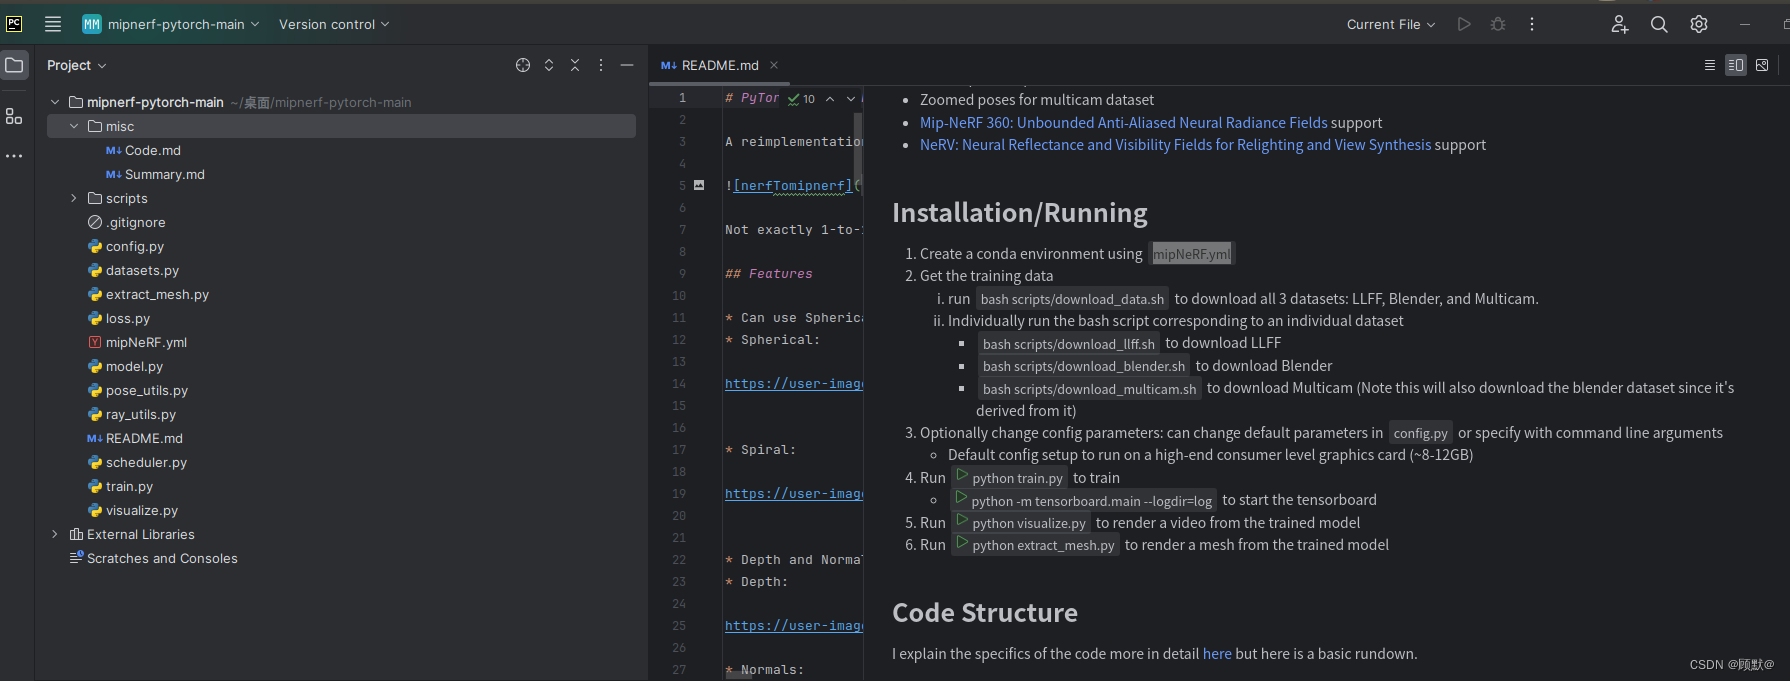
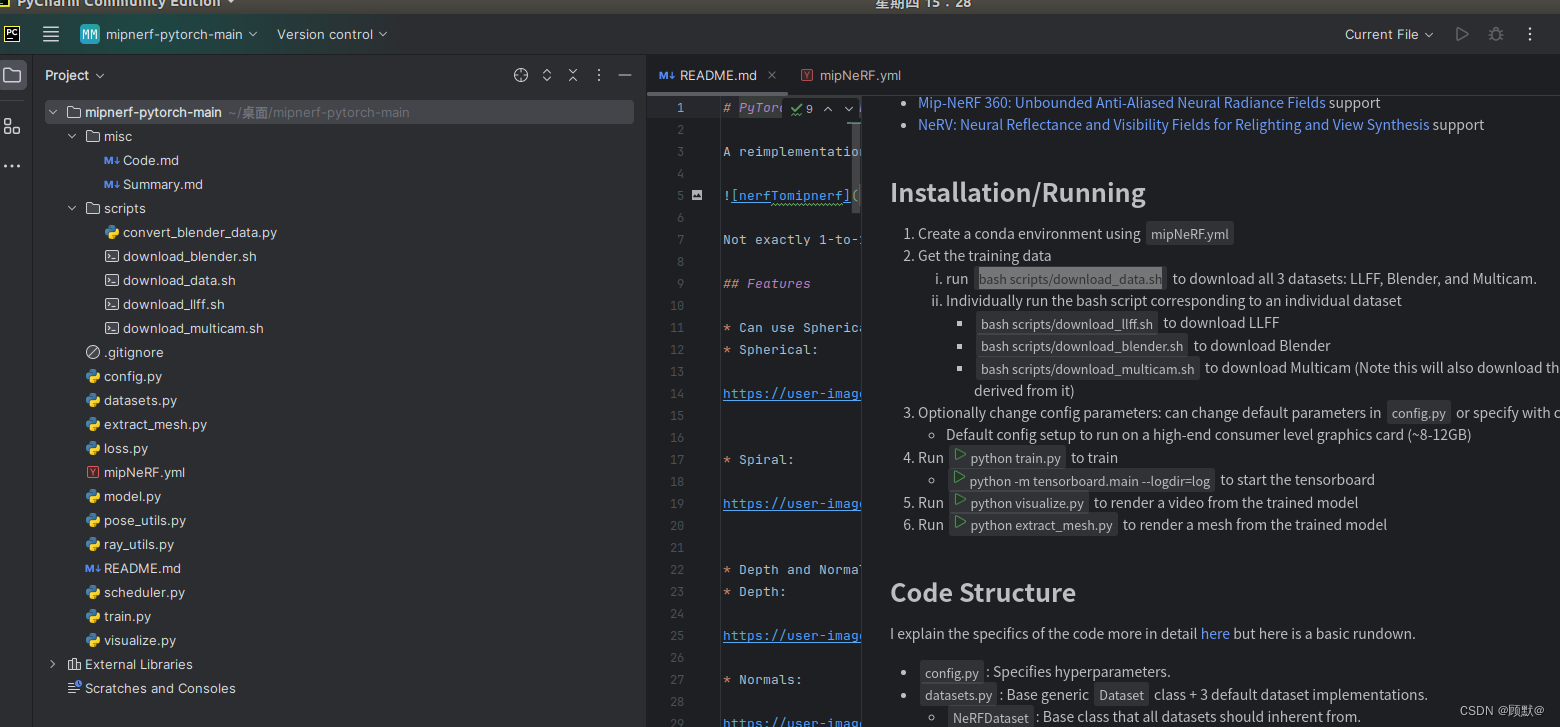
第一步是使用mipNeRF.yml创建一个conda环境
conda env create -f mipNeRF.yml

也就是说这行代码会根据mipNeRF.yml文件中的配置信息自动下载和安装所需的依赖包
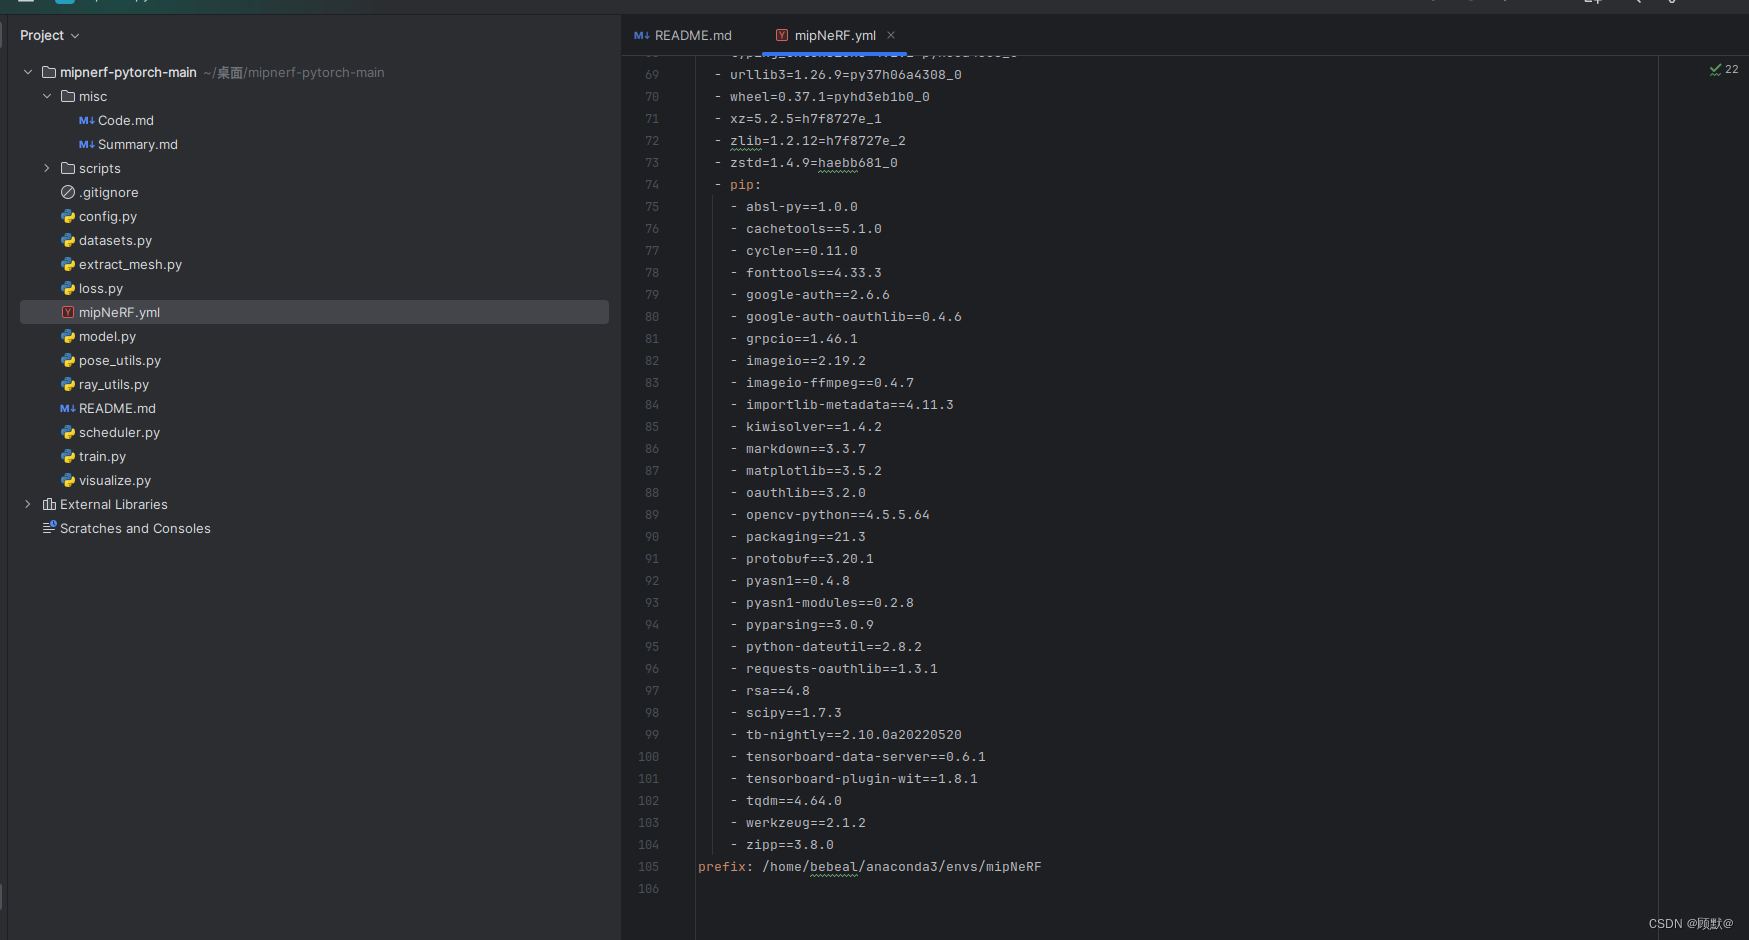
mipNeRF.yml:该文件中所需要的依赖如下
name: mipNeRF
channels:
  - pytorch
  - defaults
dependencies:
  - _libgcc_mutex=0.1=main
  - _openmp_mutex=5.1=1_gnu
  - blas=1.0=mkl
  - brotlipy=0.7.0=py37h27cfd23_1003
  - bzip2=1.0.8=h7b6447c_0
  - ca-certificates=2022.4.26=h06a4308_0
  - certifi=2021.10.8=py37h06a4308_2
  - cffi=1.15.0=py37hd667e15_1
  - charset-normalizer=2.0.4=pyhd3eb1b0_0
  - cryptography=37.0.1=py37h9ce1e76_0
  - cudatoolkit=11.3.1=h2bc3f7f_2
  - ffmpeg=4.3=hf484d3e_0
  - freetype=2.11.0=h70c0345_0
  - giflib=5.2.1=h7b6447c_0
  - gmp=6.2.1=h2531618_2
  - gnutls=3.6.15=he1e5248_0
  - idna=3.3=pyhd3eb1b0_0
  - intel-openmp=2021.4.0=h06a4308_3561
  - jpeg=9e=h7f8727e_0
  - lame=3.100=h7b6447c_0
  - lcms2=2.12=h3be6417_0
  - ld_impl_linux-64=2.38=h1181459_1
  - libffi=3.3=he6710b0_2
  - libgcc-ng=11.2.0=h1234567_0
  - libgomp=11.2.0=h1234567_0
  - libiconv=1.16=h7f8727e_2
  - libidn2=2.3.2=h7f8727e_0
  - libpng=1.6.37=hbc83047_0
  - libstdcxx-ng=11.2.0=h1234567_0
  - libtasn1=4.16.0=h27cfd23_0
  - libtiff=4.2.0=h85742a9_0
  - libunistring=0.9.10=h27cfd23_0
  - libuv=1.40.0=h7b6447c_0
  - libwebp=1.2.2=h55f646e_0
  - libwebp-base=1.2.2=h7f8727e_0
  - lz4-c=1.9.3=h295c915_1
  - mkl=2021.4.0=h06a4308_640
  - mkl-service=2.4.0=py37h7f8727e_0
  - mkl_fft=1.3.1=py37hd3c417c_0
  - mkl_random=1.2.2=py37h51133e4_0
  - ncurses=6.3=h7f8727e_2
  - nettle=3.7.3=hbbd107a_1
  - numpy=1.21.5=py37he7a7128_2
  - numpy-base=1.21.5=py37hf524024_2
  - openh264=2.1.1=h4ff587b_0
  - openssl=1.1.1o=h7f8727e_0
  - pillow=9.0.1=py37h22f2fdc_0
  - pip=21.2.2=py37h06a4308_0
  - pycparser=2.21=pyhd3eb1b0_0
  - pyopenssl=22.0.0=pyhd3eb1b0_0
  - pysocks=1.7.1=py37_1
  - python=3.7.13=h12debd9_0
  - pytorch
  - pytorch-mutex=1.0=cuda
  - readline=8.1.2=h7f8727e_1
  - requests=2.27.1=pyhd3eb1b0_0
  - setuptools=61.2.0=py37h06a4308_0
  - six=1.16.0=pyhd3eb1b0_1
  - sqlite=3.38.3=hc218d9a_0
  - tk=8.6.11=h1ccaba5_1
  - torchaudio=0.11.0=py37_cu113
  - torchvision=0.12.0=py37_cu113
  - typing_extensions=4.1.1=pyh06a4308_0
  - urllib3=1.26.9=py37h06a4308_0
  - wheel=0.37.1=pyhd3eb1b0_0
  - xz=5.2.5=h7f8727e_1
  - zlib=1.2.12=h7f8727e_2
  - zstd=1.4.9=haebb681_0
  - pip:
    - absl-py==1.0.0
    - cachetools==5.1.0
    - cycler==0.11.0
    - fonttools==4.33.3
    - google-auth==2.6.6
    - google-auth-oauthlib==0.4.6
    - grpcio==1.46.1
    - imageio==2.19.2
    - imageio-ffmpeg==0.4.7
    - importlib-metadata==4.11.3
    - kiwisolver==1.4.2
    - markdown==3.3.7
    - matplotlib==3.5.2
    - oauthlib==3.2.0
    - opencv-python==4.5.5.64
    - packaging==21.3
    - protobuf==3.20.1
    - pyasn1==0.4.8
    - pyasn1-modules==0.2.8
    - pyparsing==3.0.9
    - python-dateutil==2.8.2
    - requests-oauthlib==1.3.1
    - rsa==4.8
    - scipy==1.7.3
    - tb-nightly==2.10.0a20220520
    - tensorboard-data-server==0.6.1
    - tensorboard-plugin-wit==1.8.1
    - tqdm==4.64.0
    - werkzeug==2.1.2
    - zipp==3.8.0
prefix: /home/bebeal/anaconda3/envs/mipNeRF
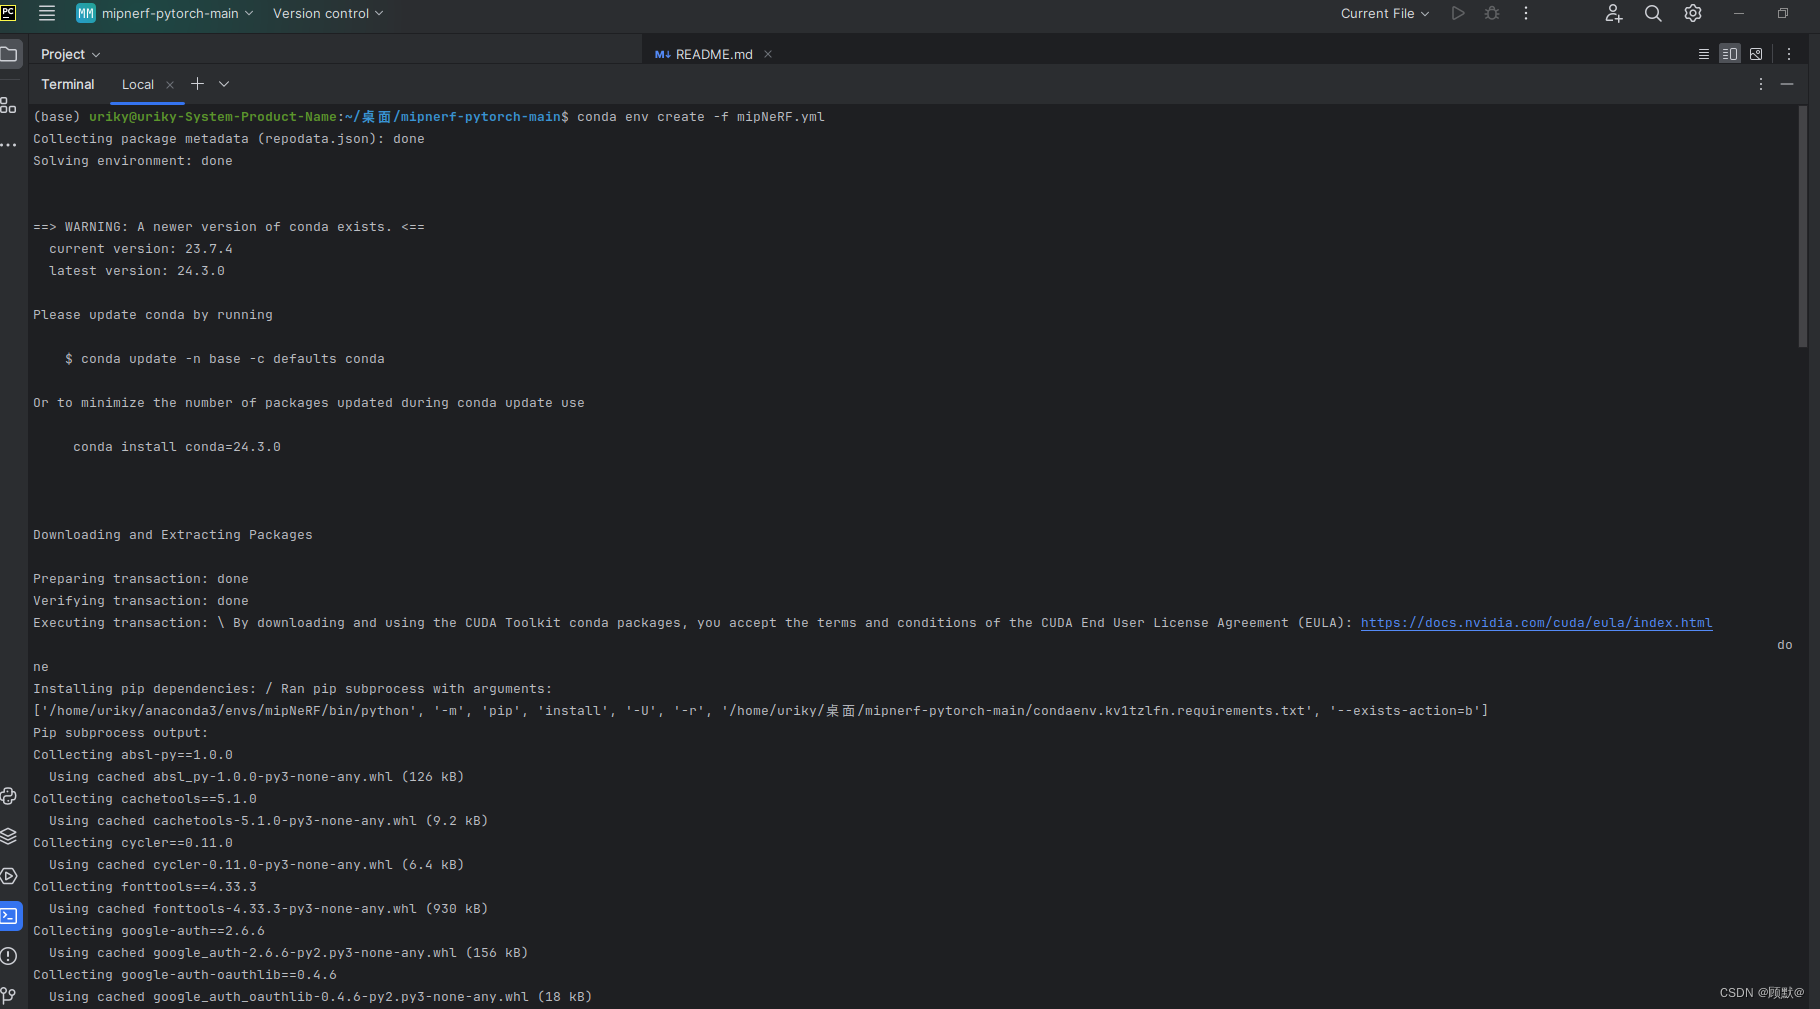
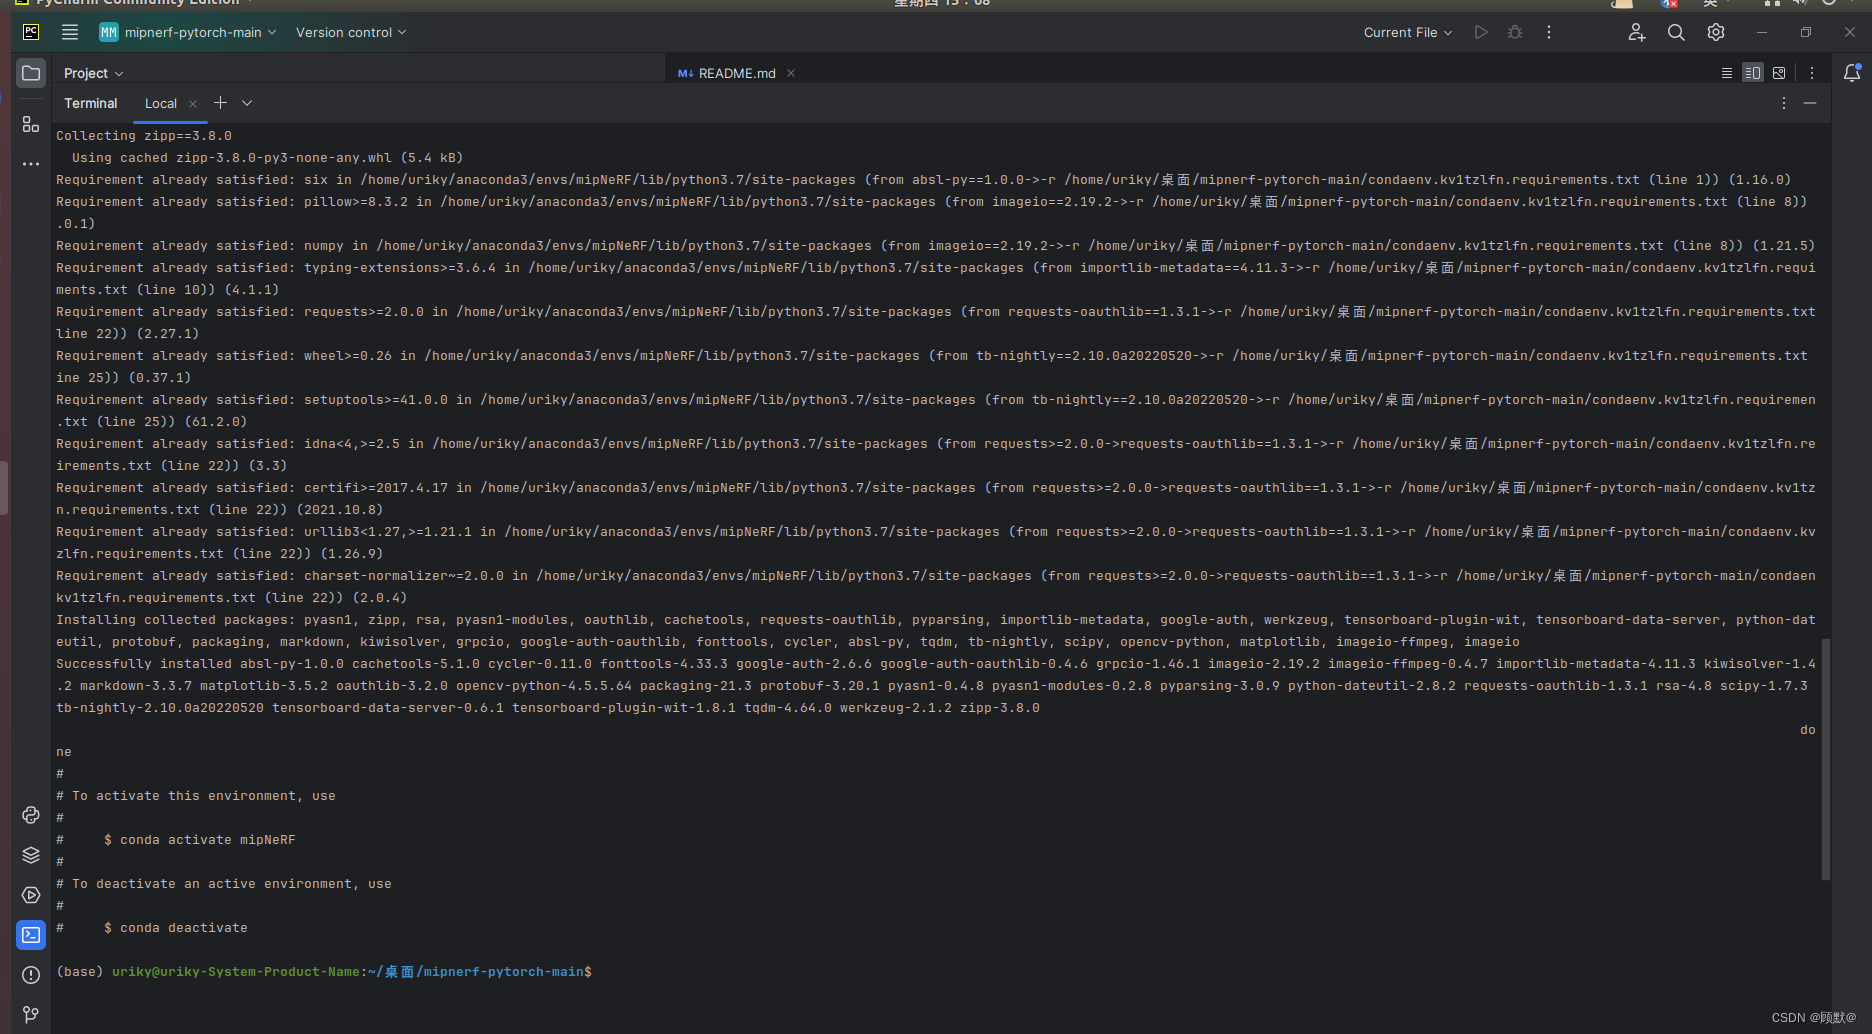
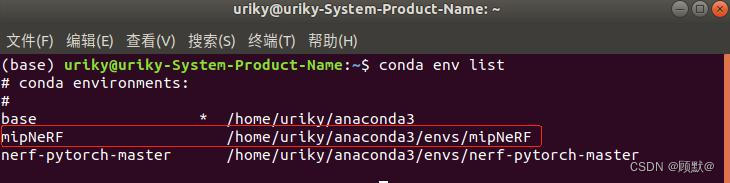
创建成功之后那么mipNeRF的conda环境就创建好了
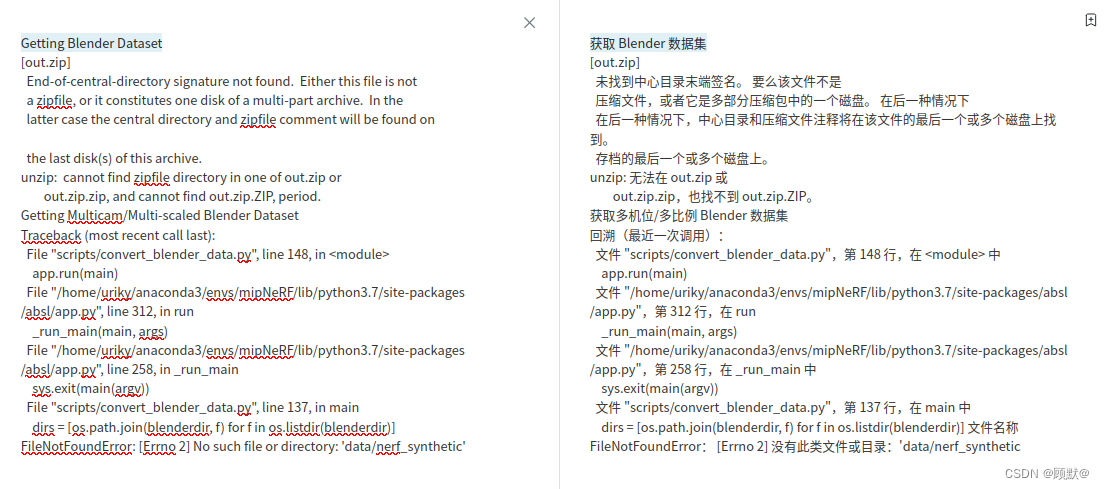
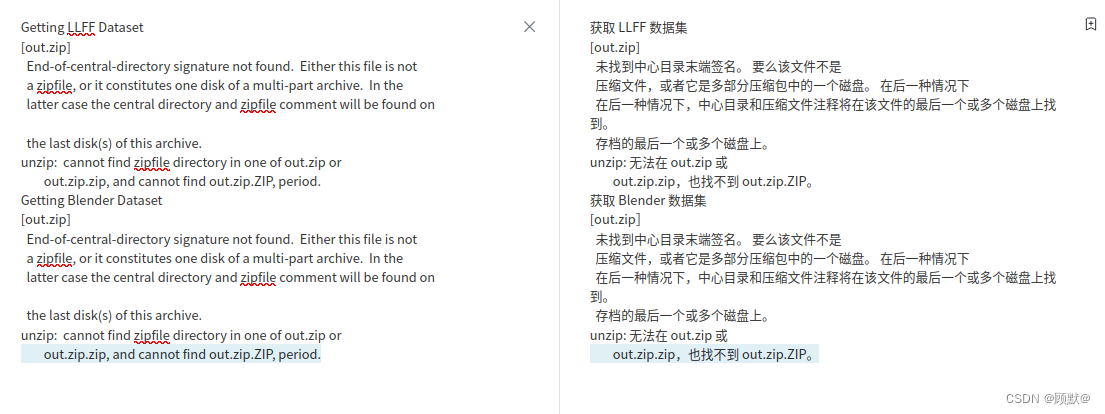
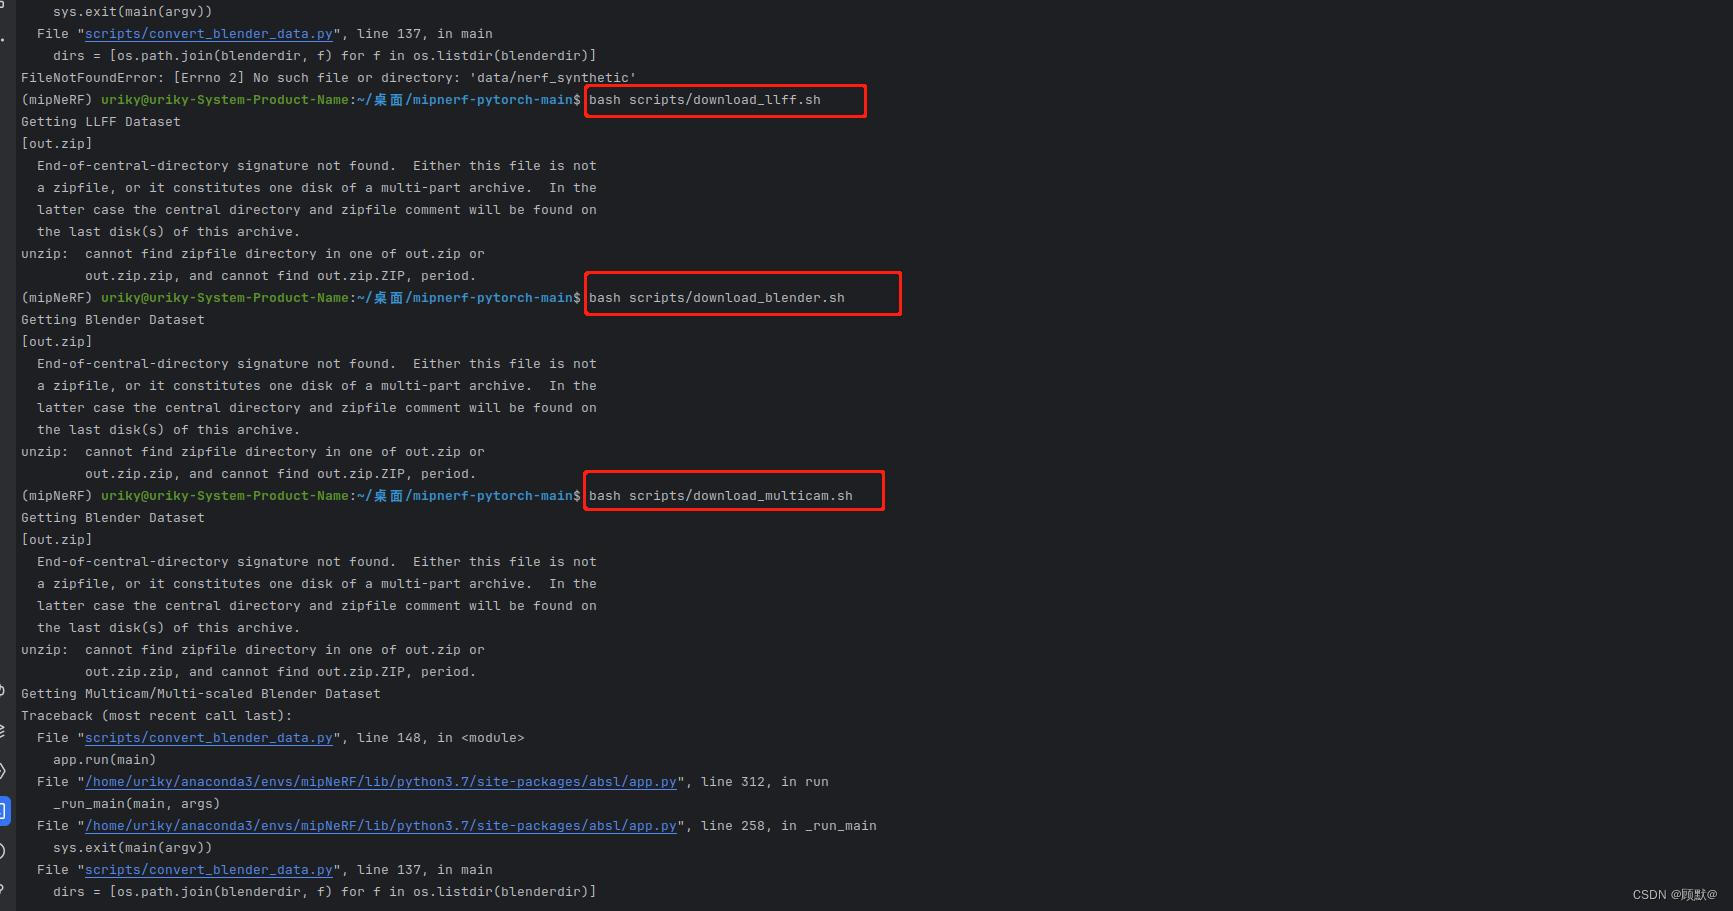
此时下载数据出现问题
Getting LLFF Dataset [out.zip] End-of-central-directory signature
not found. Either this file is not a zipfile, or it constitutes one
disk of a multi-part archive. In the latter case the central
directory and zipfile comment will be found on the last disk(s) of
this archive. unzip: cannot find zipfile directory in one of out.zip
or
out.zip.zip, and cannot find out.zip.ZIP, period. Getting Blender Dataset [out.zip] End-of-central-directory signature not
found. Either this file is not a zipfile, or it constitutes one
disk of a multi-part archive. In the latter case the central
directory and zipfile comment will be found on the last disk(s) of
this archive. unzip: cannot find zipfile directory in one of out.zip
or
out.zip.zip, and cannot find out.zip.ZIP, period. Getting Blender Dataset [out.zip] End-of-central-directory signature not
found. Either this file is not a zipfile, or it constitutes one
disk of a multi-part archive. In the latter case the central
directory and zipfile comment will be found on the last disk(s) of
this archive. unzip: cannot find zipfile directory in one of out.zip
or
out.zip.zip, and cannot find out.zip.ZIP, period. Getting Multicam/Multi-scaled Blender Dataset Traceback (most recent call
last): File “scripts/convert_blender_data.py”, line 148, in
app.run(main) File “/home/uriky/anaconda3/envs/mipNeRF/lib/python3.7/site-packages/absl/app.py”,
line 312, in run
_run_main(main, args) File “/home/uriky/anaconda3/envs/mipNeRF/lib/python3.7/site-packages/absl/app.py”,
line 258, in _run_main
sys.exit(main(argv)) File “scripts/convert_blender_data.py”, line 137, in main
dirs = [os.path.join(blenderdir, f) for f in os.listdir(blenderdir)] FileNotFoundError: [Errno 2] No such file or
directory: ‘data/nerf_synthetic’

一个个下载数据还是不行
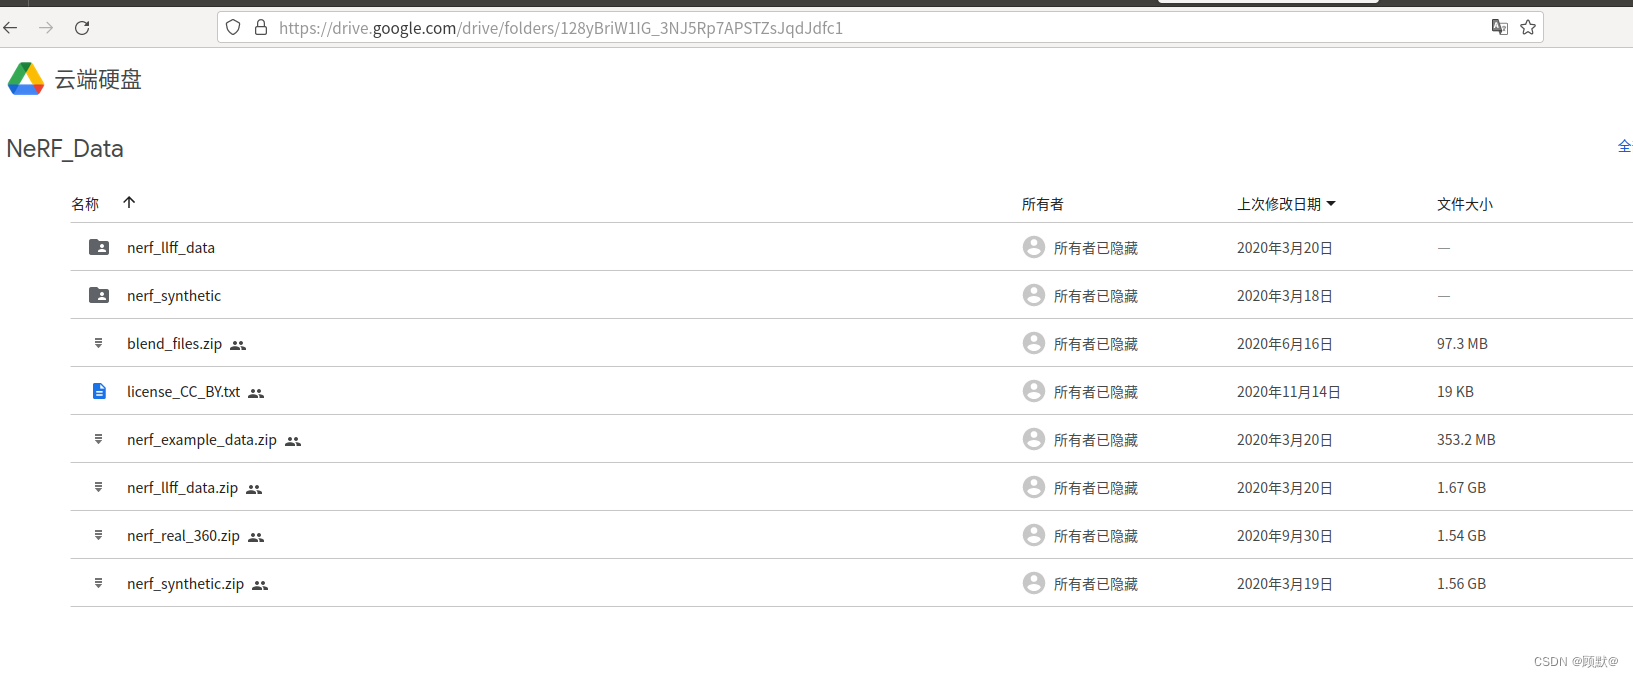
接下来直接去之前NeRF的数据集中找到我们所需要的数据
https://drive.google.com/drive/folders/128yBriW1IG_3NJ5Rp7APSTZsJqdJdfc1
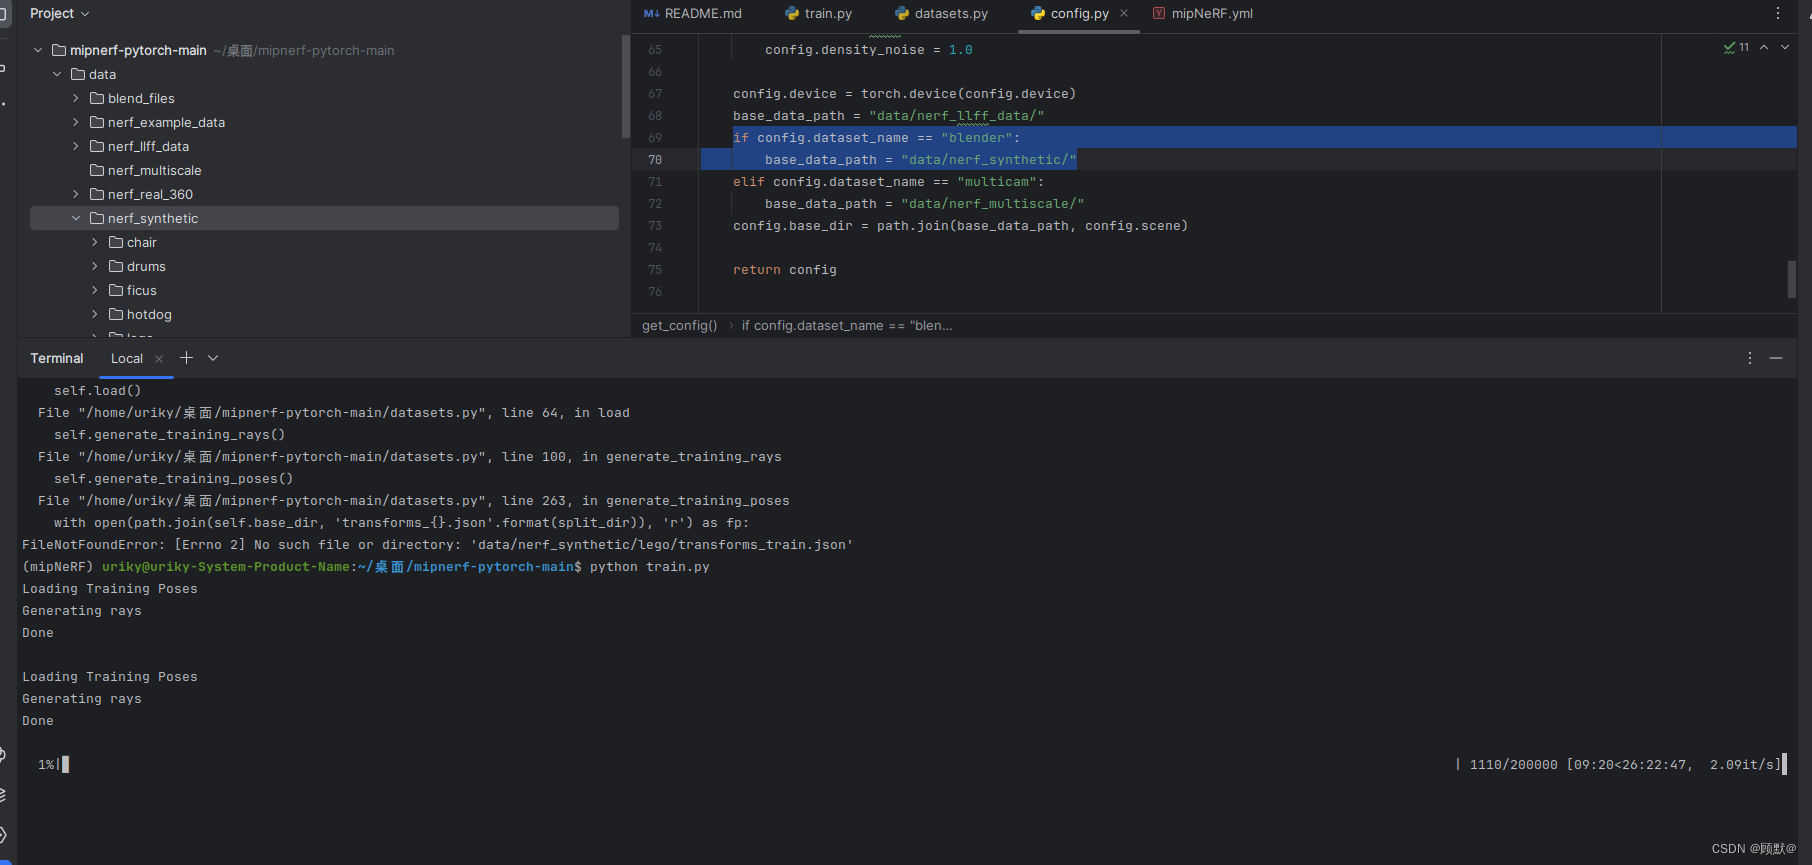
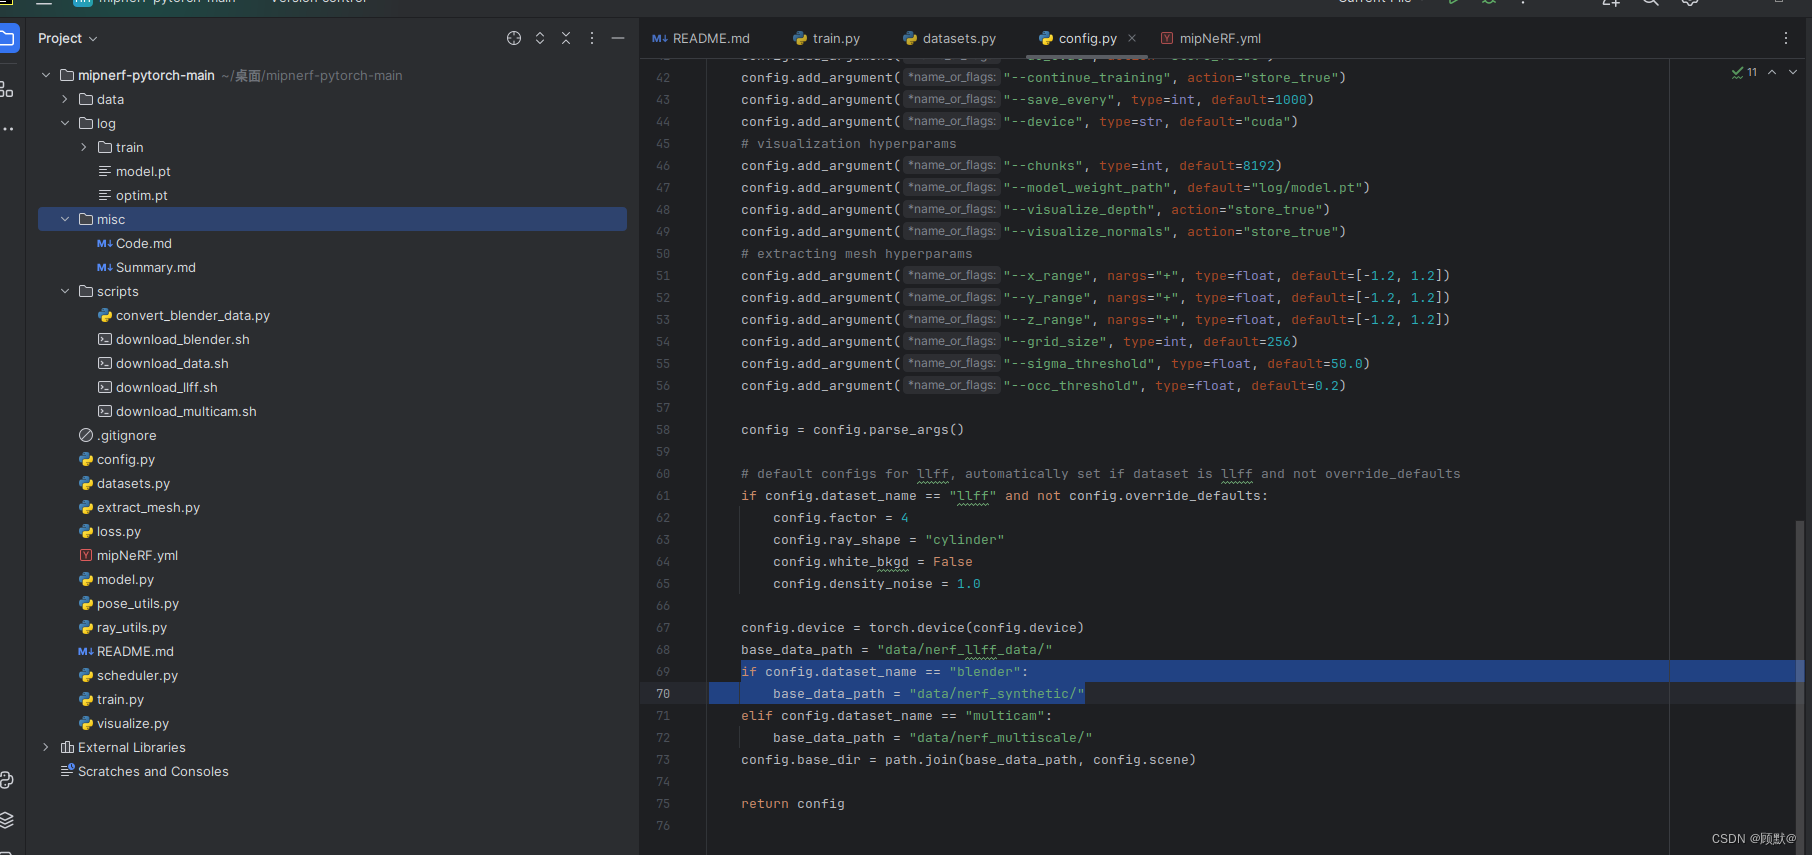
数据下好开始训练
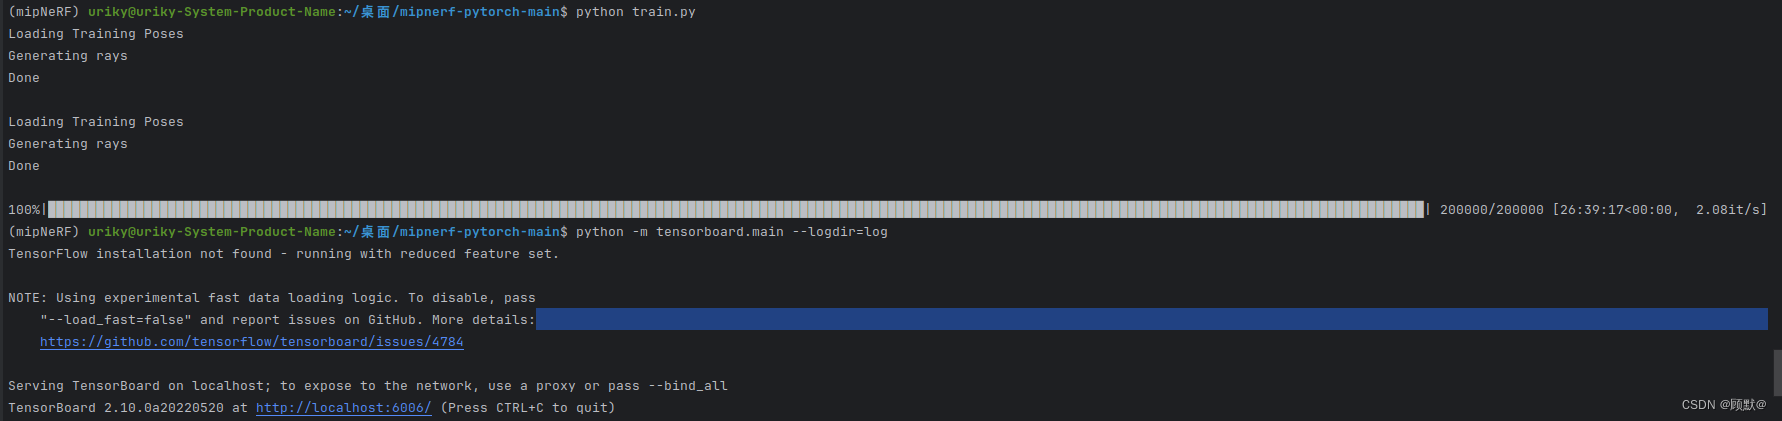
训练完成,打开tensorboard查看数据
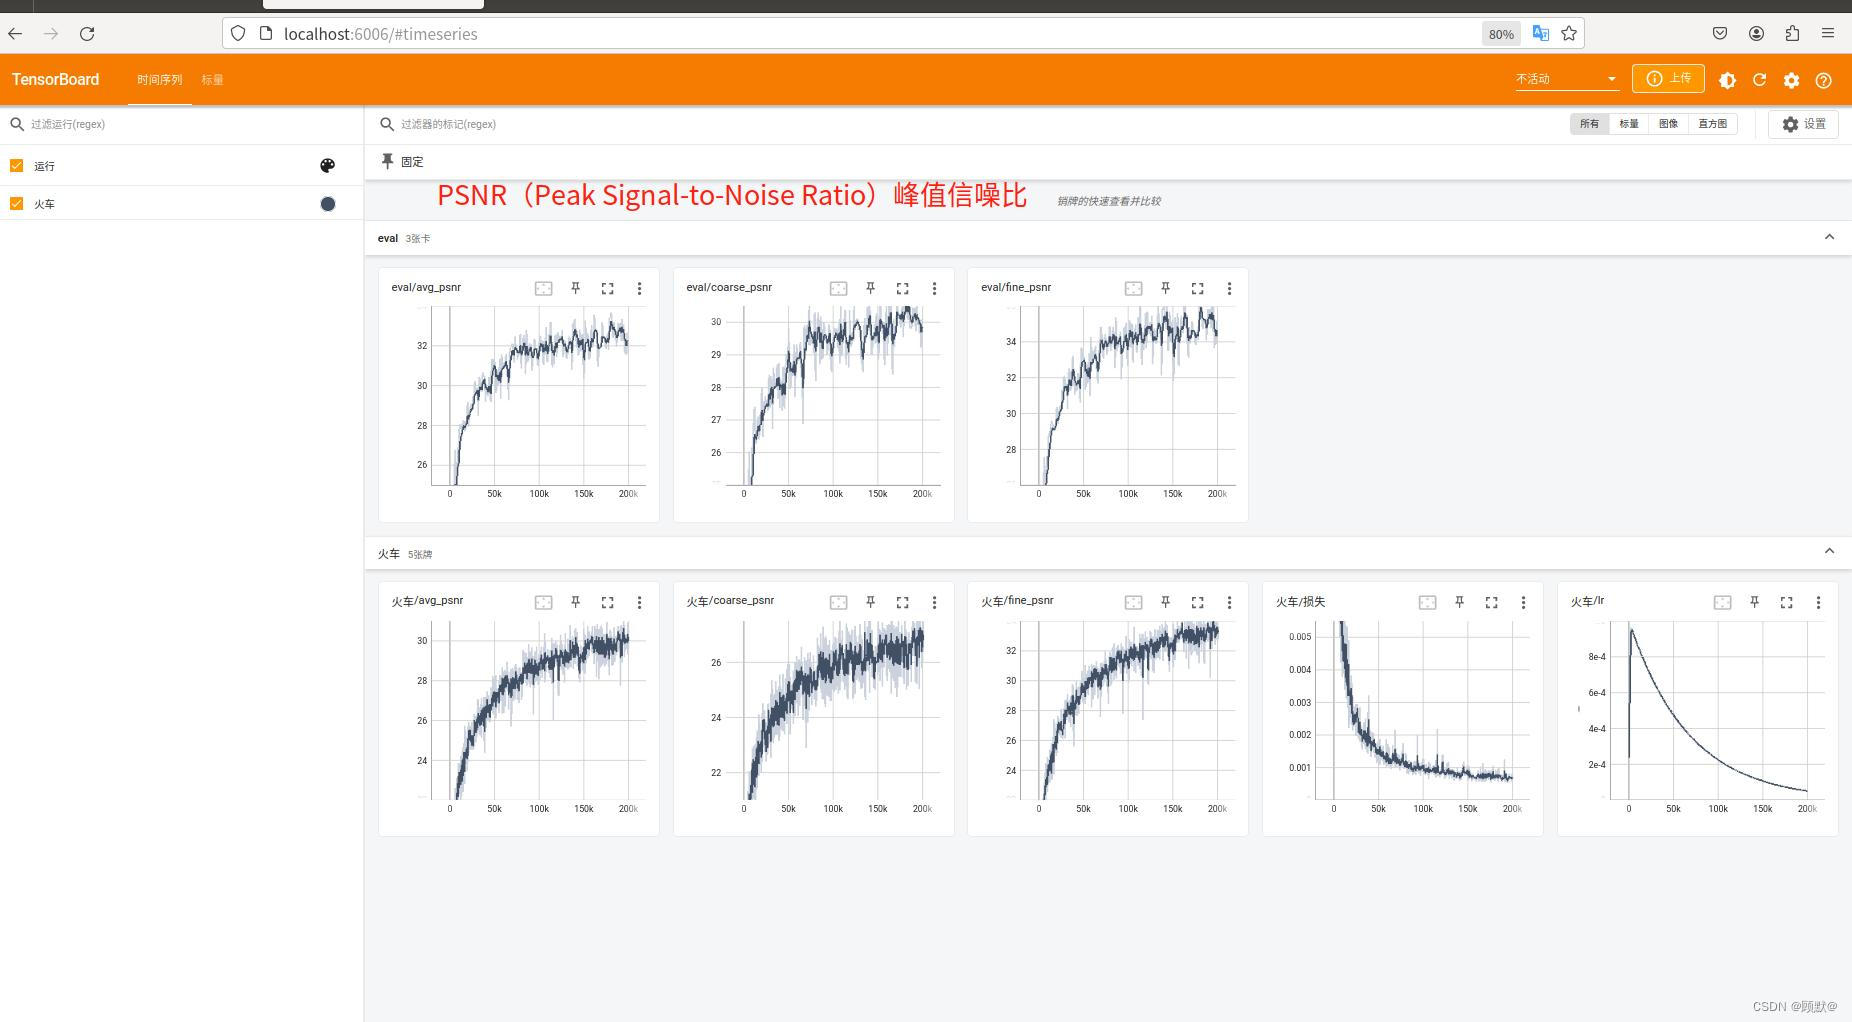
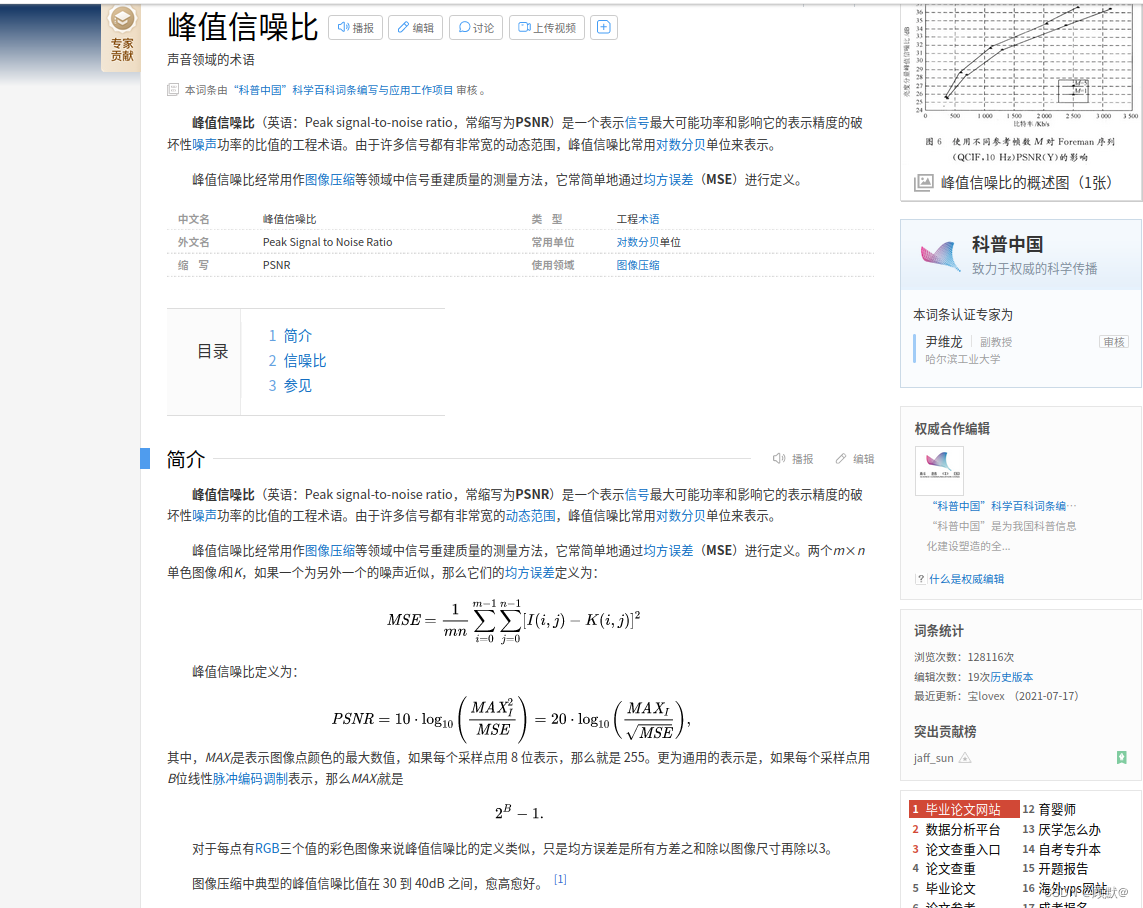
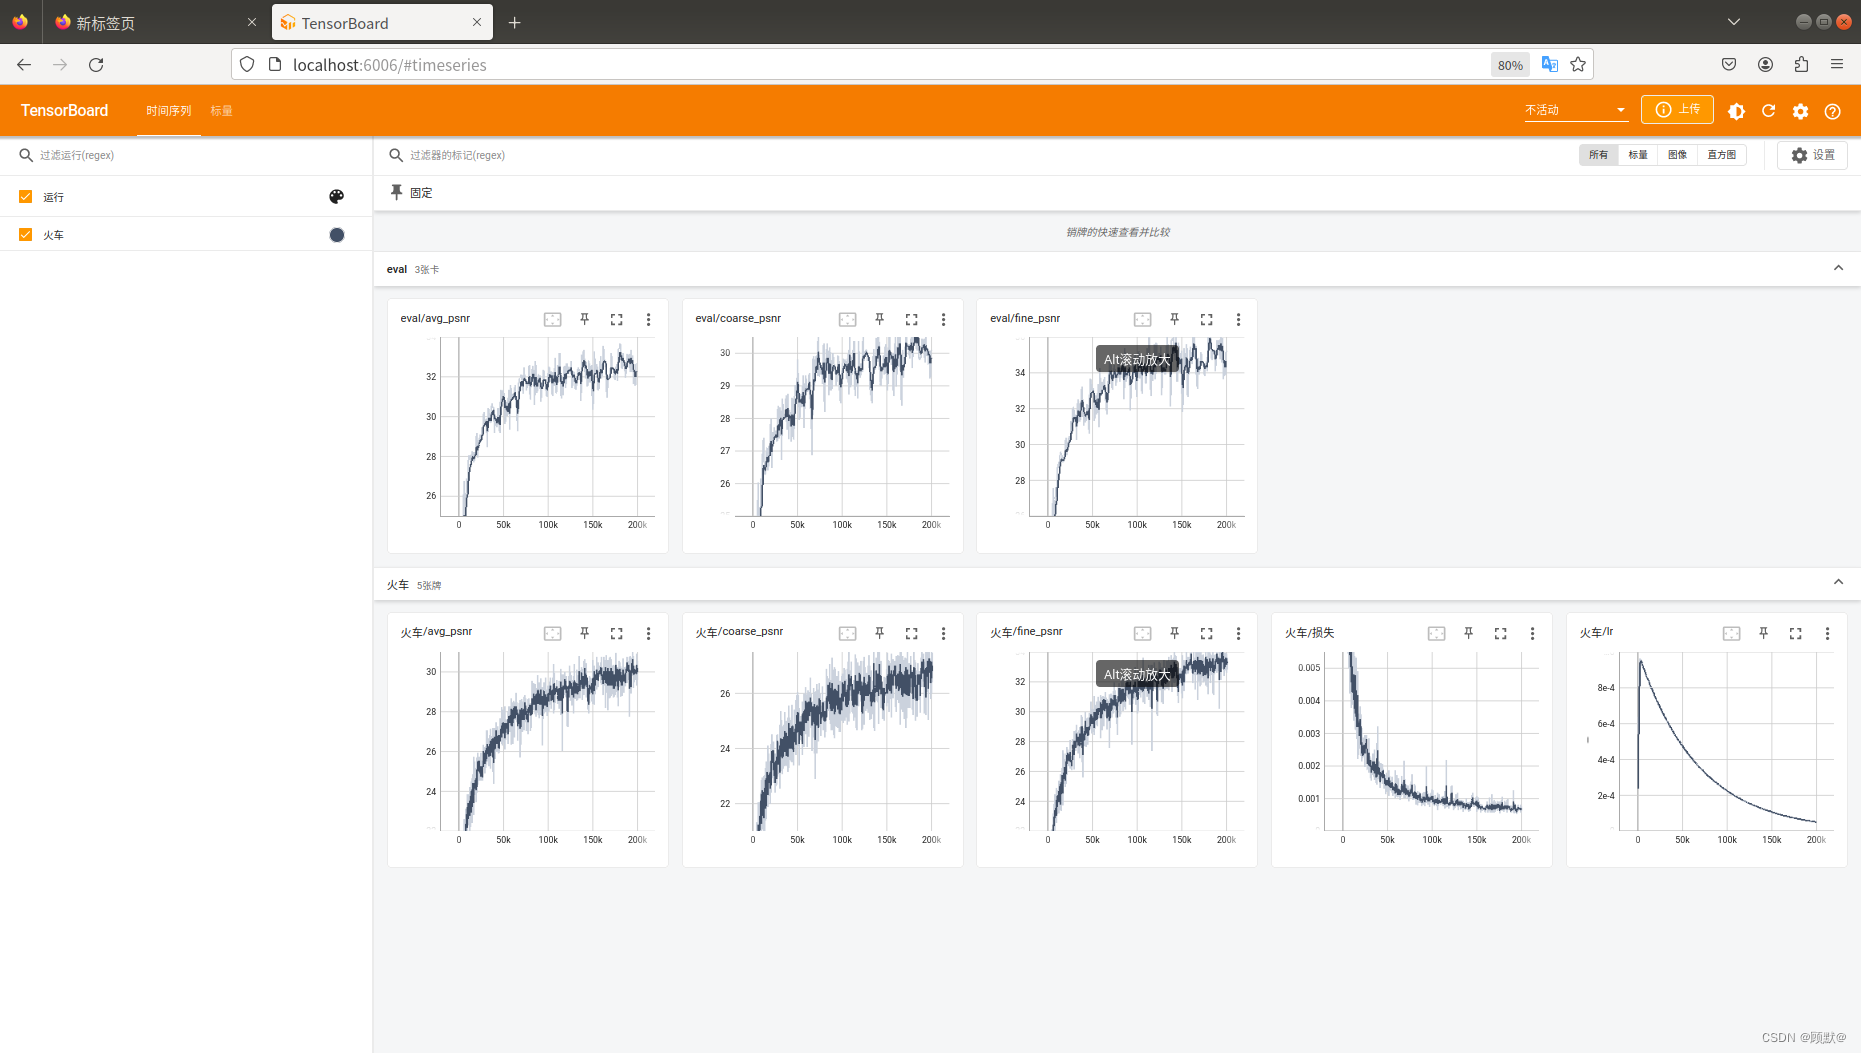
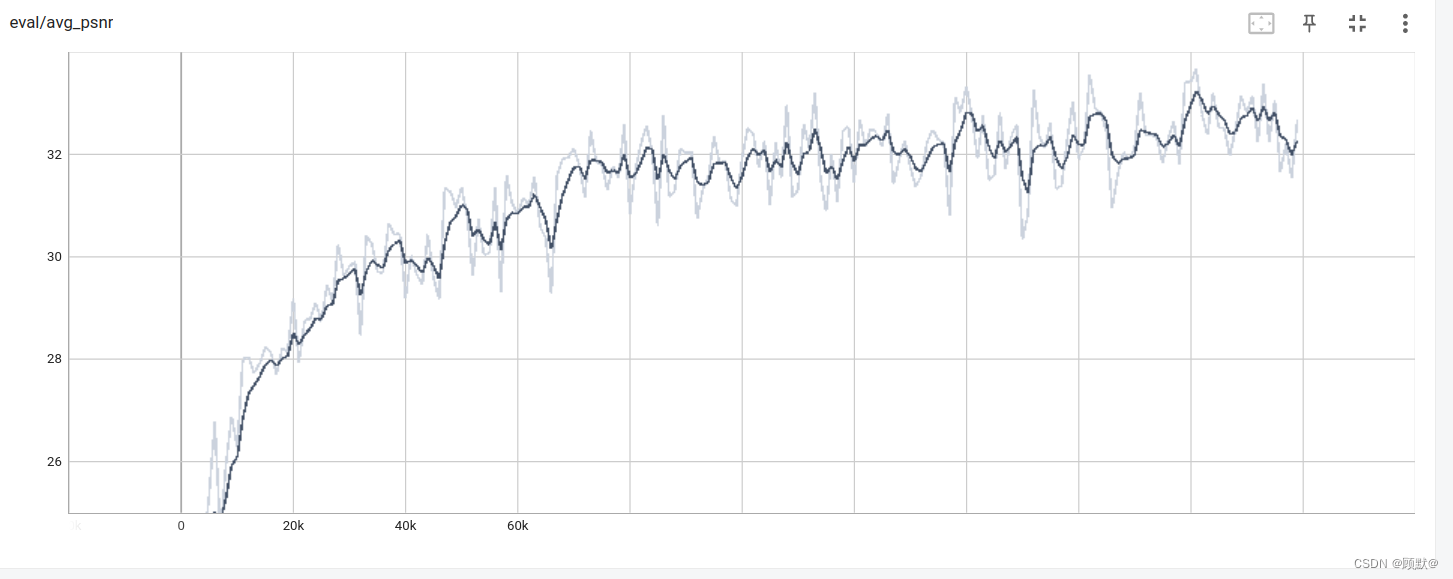
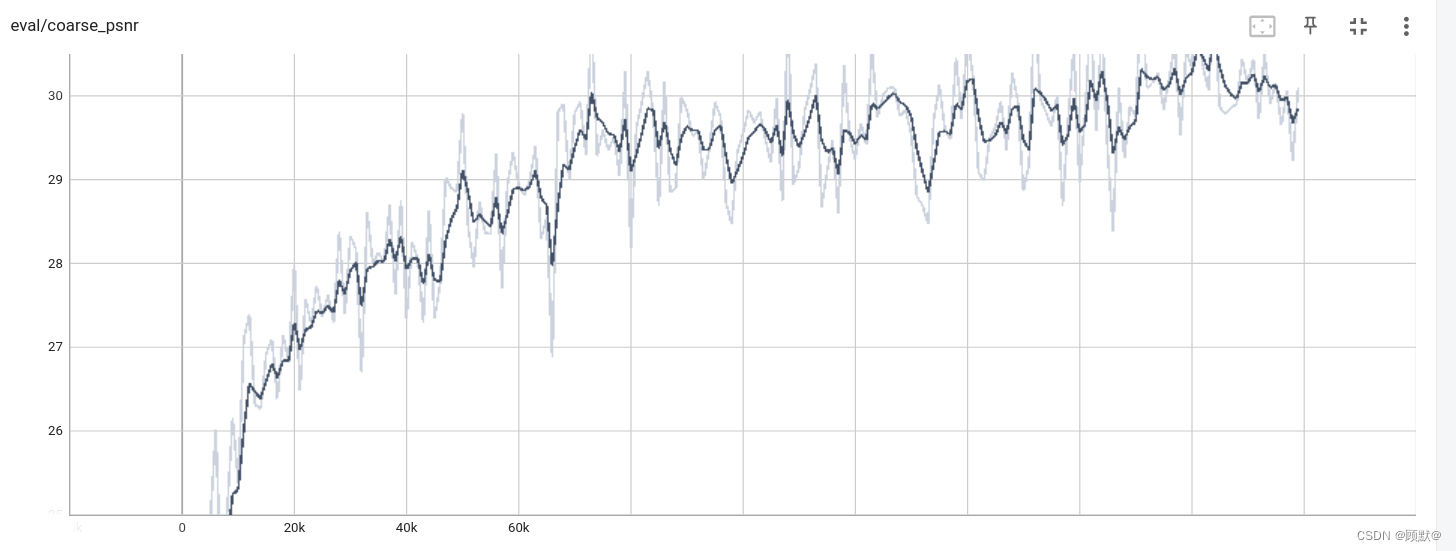
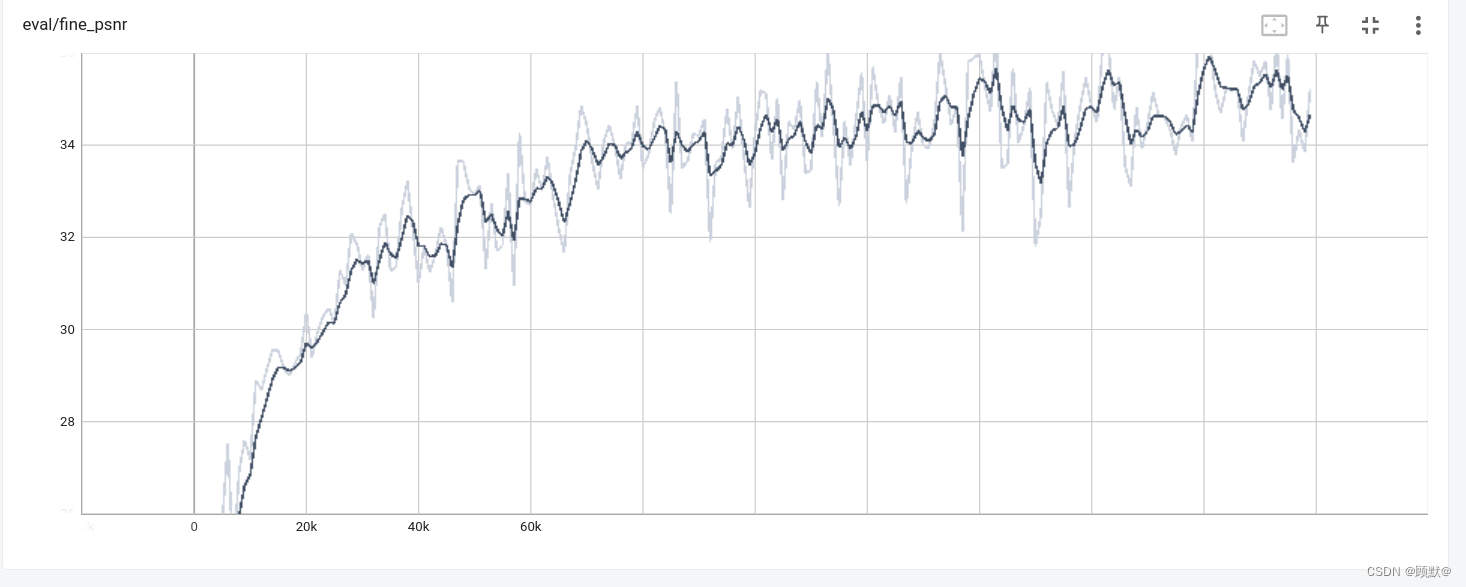
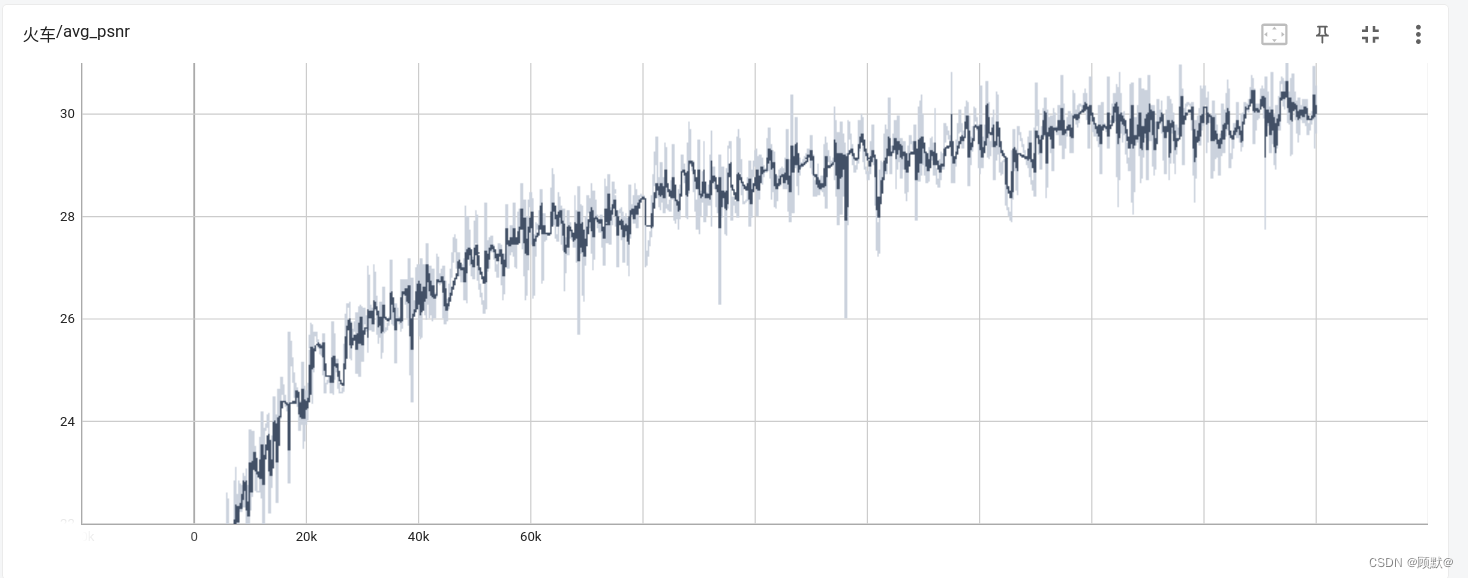
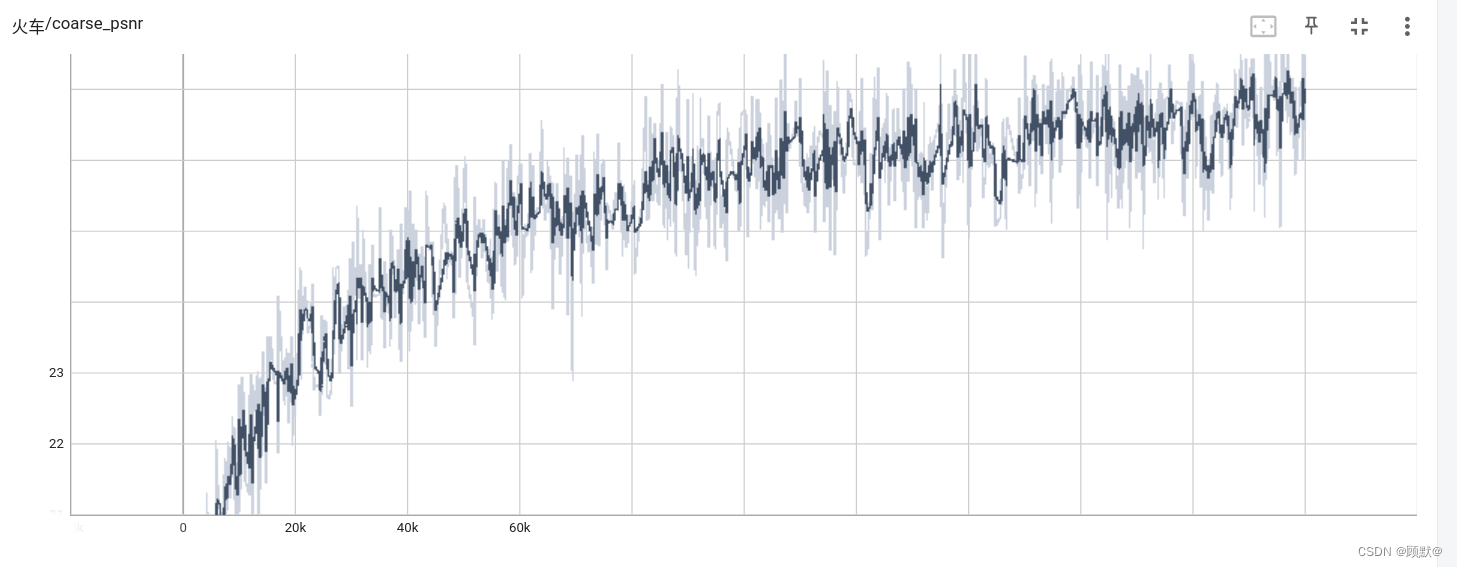
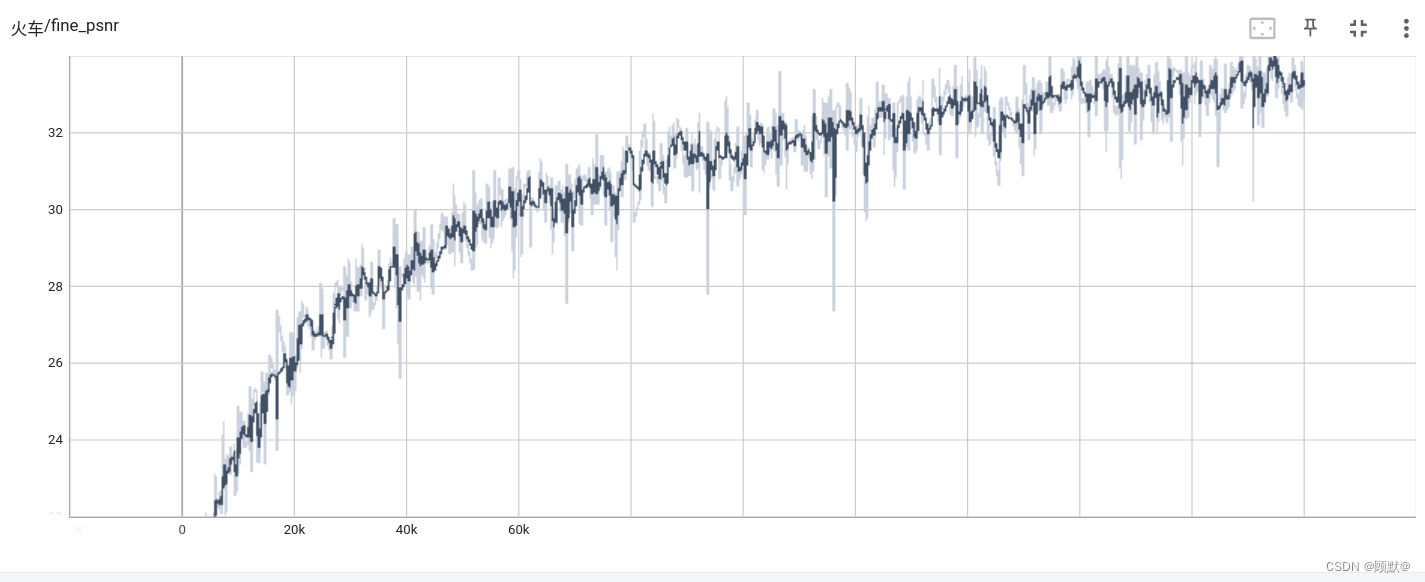
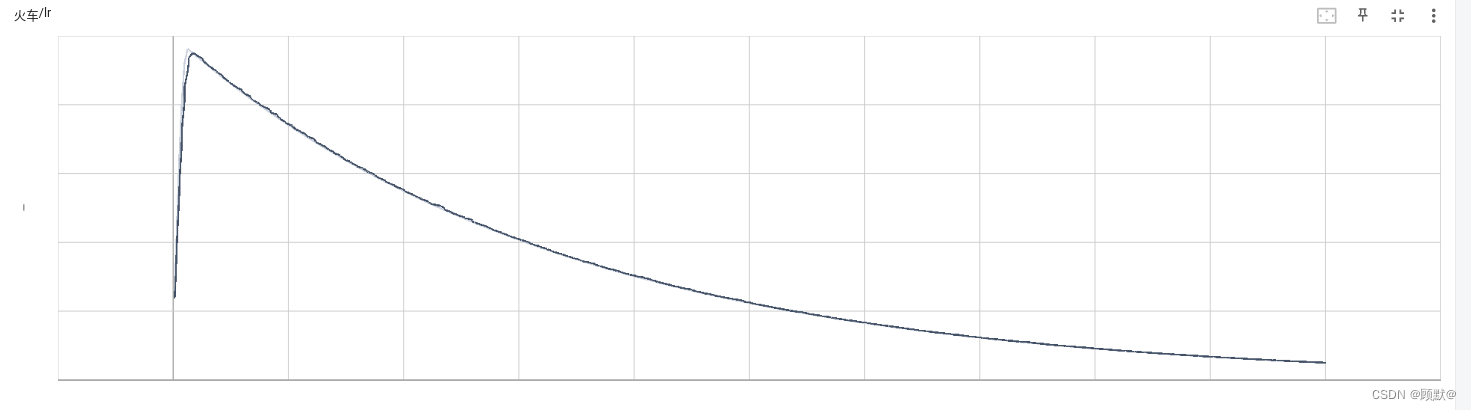 在Mipnerf代码中,运行产生的TensorBoard中的"lr"代表学习率(learning rate)。学习率是深度学习中一个重要的超参数,用于控制模型参数在每次迭代中的更新幅度。在训练过程中,学习率的大小会直接影响模型的收敛速度和性能。
通过在TensorBoard中查看"lr"可以了解模型在每个训练步骤中使用的学习率的变化情况。通常,学习率会在训练的早期较大,以便快速收敛,然后逐渐减小,以便更精细地调整模型参数。这种变化通常可以通过使用学习率调度器(learning rate scheduler)来实现,例如指数衰减、余弦退火等。
可以看到在训练过程中,psnr都是差不多呈现上升的趋势,损失也在训练过程中逐步地减少
从训练模型中渲染一个视频
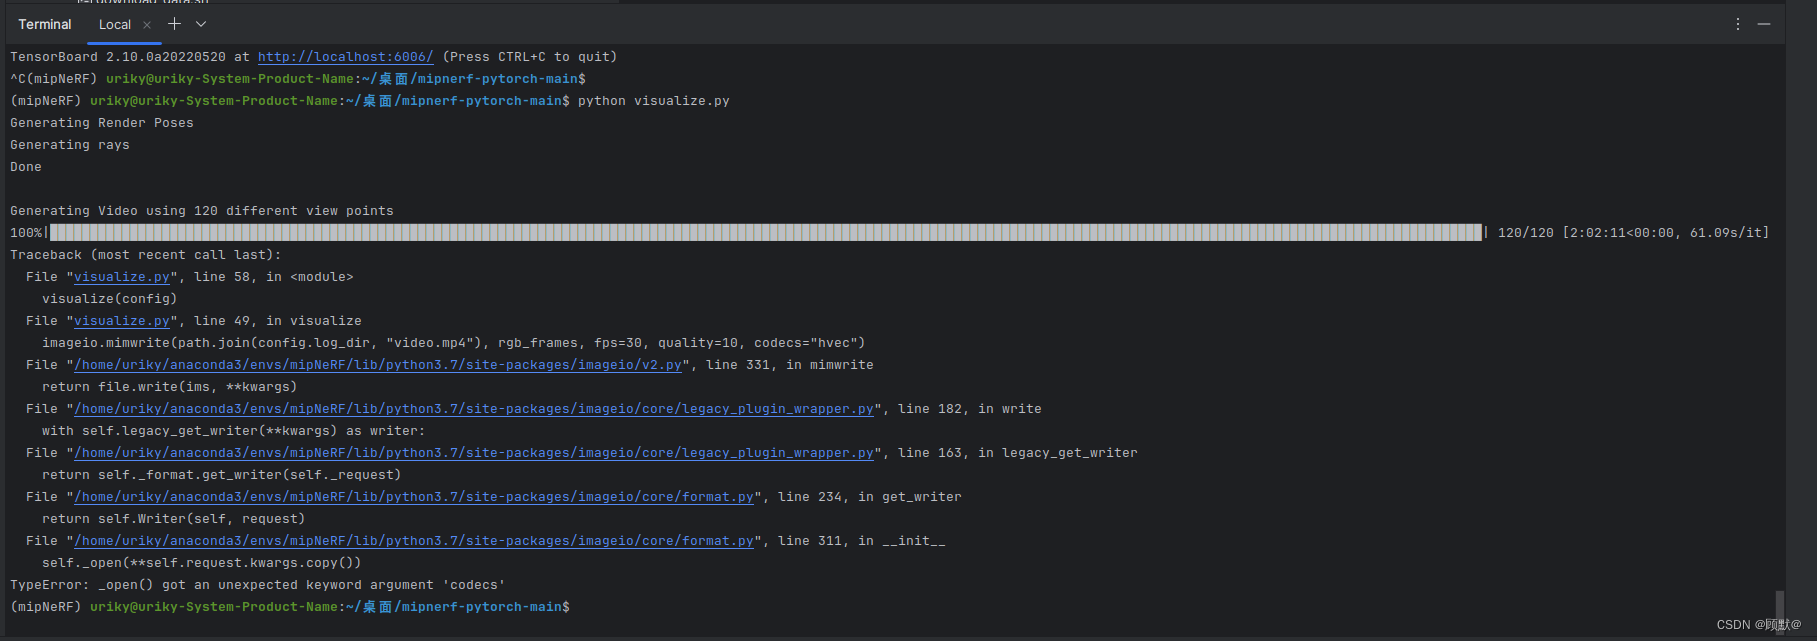 Traceback (most recent call last):
File “visualize.py”, line 58, in
visualize(config)
File “visualize.py”, line 49, in visualize
imageio.mimwrite(path.join(config.log_dir, “video.mp4”), rgb_frames, fps=30, quality=10, codecs=“hvec”)
File “/home/uriky/anaconda3/envs/mipNeRF/lib/python3.7/site-packages/imageio/v2.py”, line 331, in mimwrite
return file.write(ims, **kwargs)
File “/home/uriky/anaconda3/envs/mipNeRF/lib/python3.7/site-packages/imageio/core/legacy_plugin_wrapper.py”, line 182, in write
with self.legacy_get_writer(**kwargs) as writer:
File “/home/uriky/anaconda3/envs/mipNeRF/lib/python3.7/site-packages/imageio/core/legacy_plugin_wrapper.py”, line 163, in legacy_get_writer
return self._format.get_writer(self._request)
File “/home/uriky/anaconda3/envs/mipNeRF/lib/python3.7/site-packages/imageio/core/format.py”, line 234, in get_writer
return self.Writer(self, request)
File “/home/uriky/anaconda3/envs/mipNeRF/lib/python3.7/site-packages/imageio/core/format.py”, line 311, in init
self._open(**self.request.kwargs.copy())
TypeError: _open() got an unexpected keyword argument ‘codecs’

参数出错把codecs改为codec重新渲染视频(看网上说是更新问题,目前还没找到相关文档)
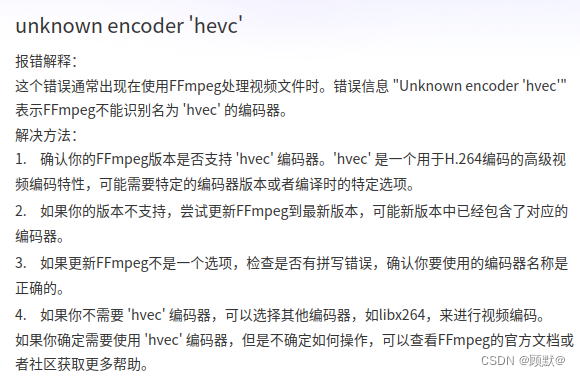
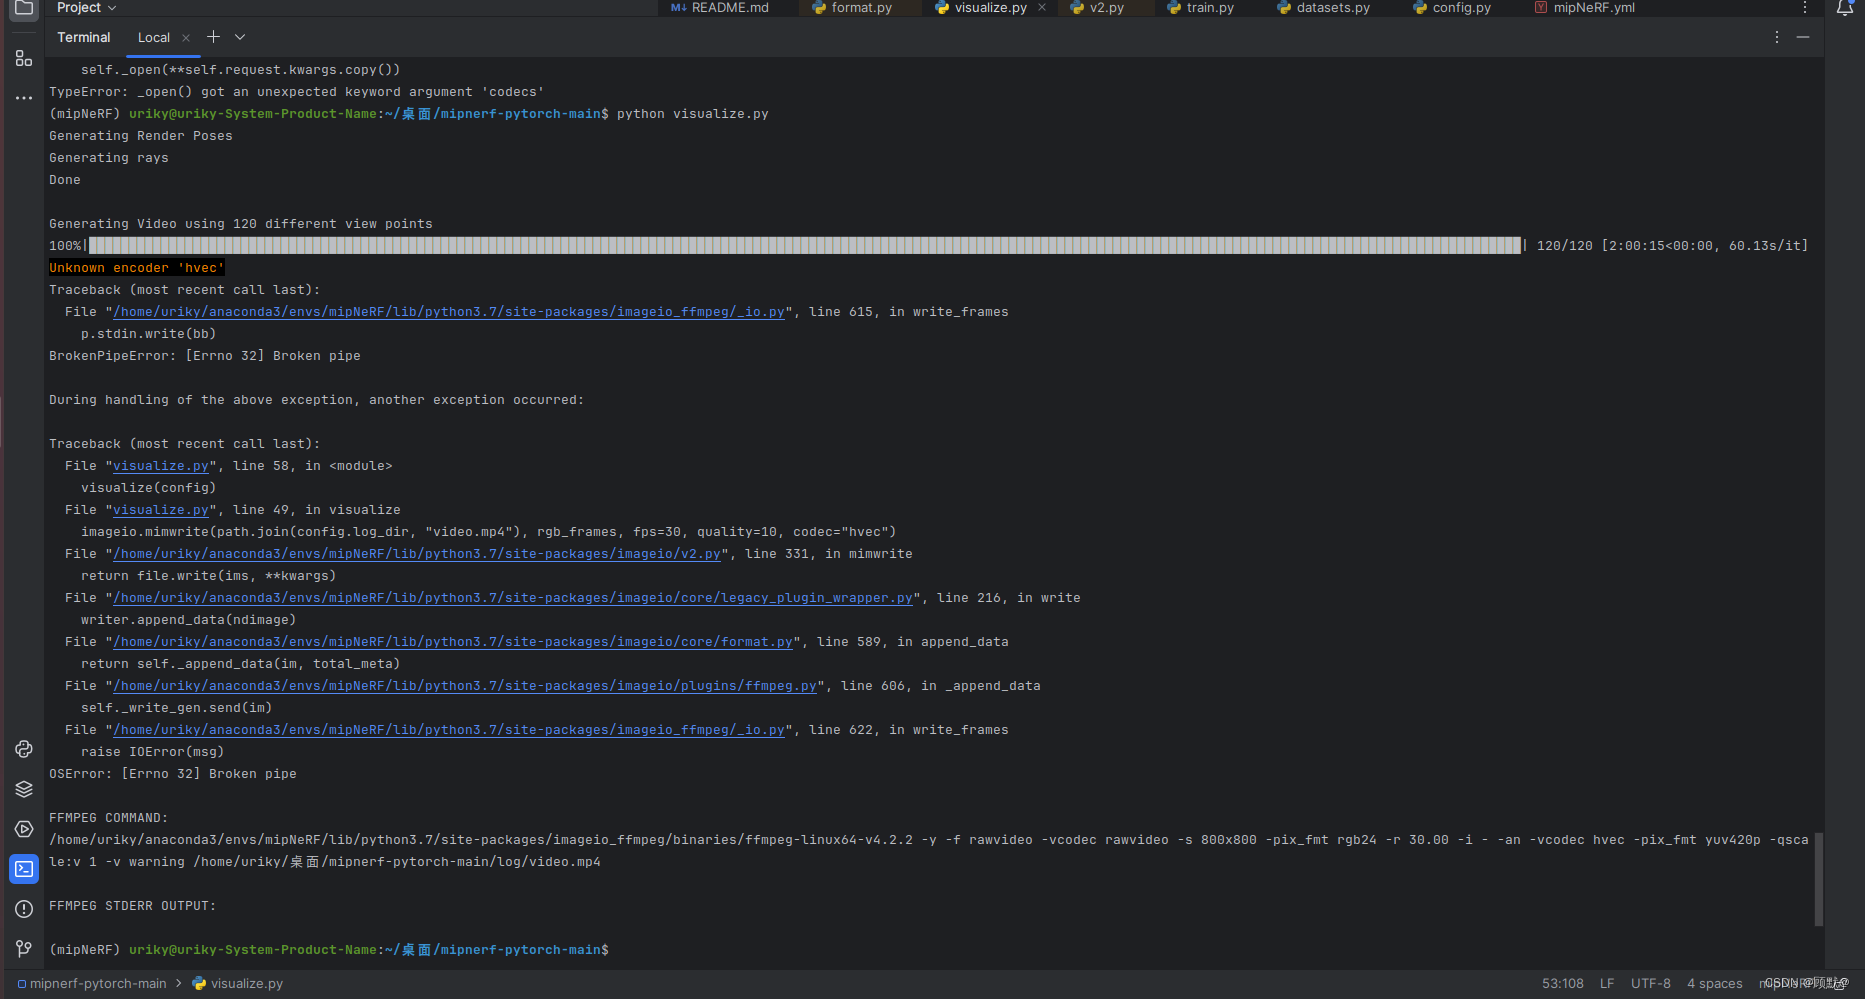
更改为codec之后开始渲染,但是又报别的错误Unknown encoder ‘hvec’
Unknown encoder ‘hvec’ Traceback (most recent call last): File
“/home/uriky/anaconda3/envs/mipNeRF/lib/python3.7/site-packages/imageio_ffmpeg/_io.py”,
line 615, in write_frames
p.stdin.write(bb) BrokenPipeError: [Errno 32] Broken pipeDuring handling of the above exception, another exception occurred:
Traceback (most recent call last): File
“/home/uriky/anaconda3/envs/mipNeRF/lib/python3.7/site-packages/imageio_ffmpeg/_io.py”,
line 615, in write_frames
p.stdin.write(bb) BrokenPipeError: [Errno 32] Broken pipeDuring handling of the above exception, another exception occurred:
Traceback (most recent call last): File “visualize.py”, line 58, in
visualize(config) File “visualize.py”, line 49, in visualize
imageio.mimwrite(path.join(config.log_dir, “video.mp4”), rgb_frames, fps=30, quality=10, codec=“hvec”) File
“/home/uriky/anaconda3/envs/mipNeRF/lib/python3.7/site-packages/imageio/v2.py”,
line 331, in mimwrite
return file.write(ims, **kwargs) File “/home/uriky/anaconda3/envs/mipNeRF/lib/python3.7/site-packages/imageio/core/legacy_plugin_wrapper.py”,
line 216, in write
writer.append_data(ndimage) File “/home/uriky/anaconda3/envs/mipNeRF/lib/python3.7/site-packages/imageio/core/format.py”,
line 589, in append_data
return self._append_data(im, total_meta) File “/home/uriky/anaconda3/envs/mipNeRF/lib/python3.7/site-packages/imageio/plugins/ffmpeg.py”,
line 606, in _append_data
self._write_gen.send(im) File “/home/uriky/anaconda3/envs/mipNeRF/lib/python3.7/site-packages/imageio_ffmpeg/_io.py”,
line 622, in write_frames
raise IOError(msg) OSError: [Errno 32] Broken pipeFFMPEG COMMAND:
/home/uriky/anaconda3/envs/mipNeRF/lib/python3.7/site-packages/imageio_ffmpeg/binaries/ffmpeg-linux64-v4.2.2
-y -f rawvideo -vcodec rawvideo -s 800x800 -pix_fmt rgb24 -r 30.00 -i - -an -vcodec hvec -pix_fmt yuv420p -qscale:v 1 -v warning /home/uriky/桌面/mipnerf-pytorch-main/log/video.mp4FFMPEG STDERR OUTPUT:
查看FFmpeg版本

ffmpeg -version    查看ffmpeg版本
 sudo apt-get update     更新软件包
sudo apt-get upgrade ffmpeg     更新ffmpeg版本
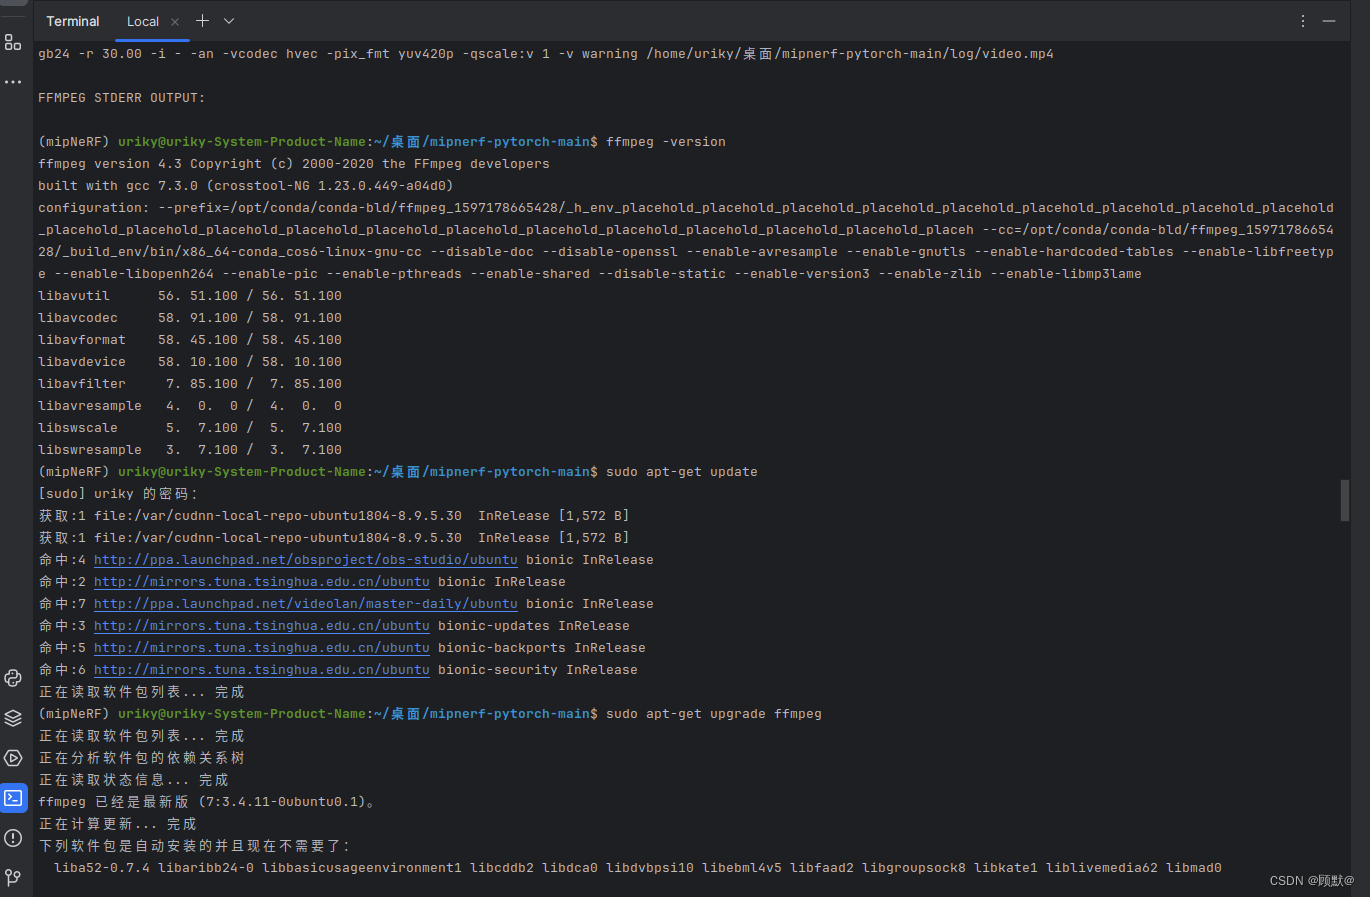
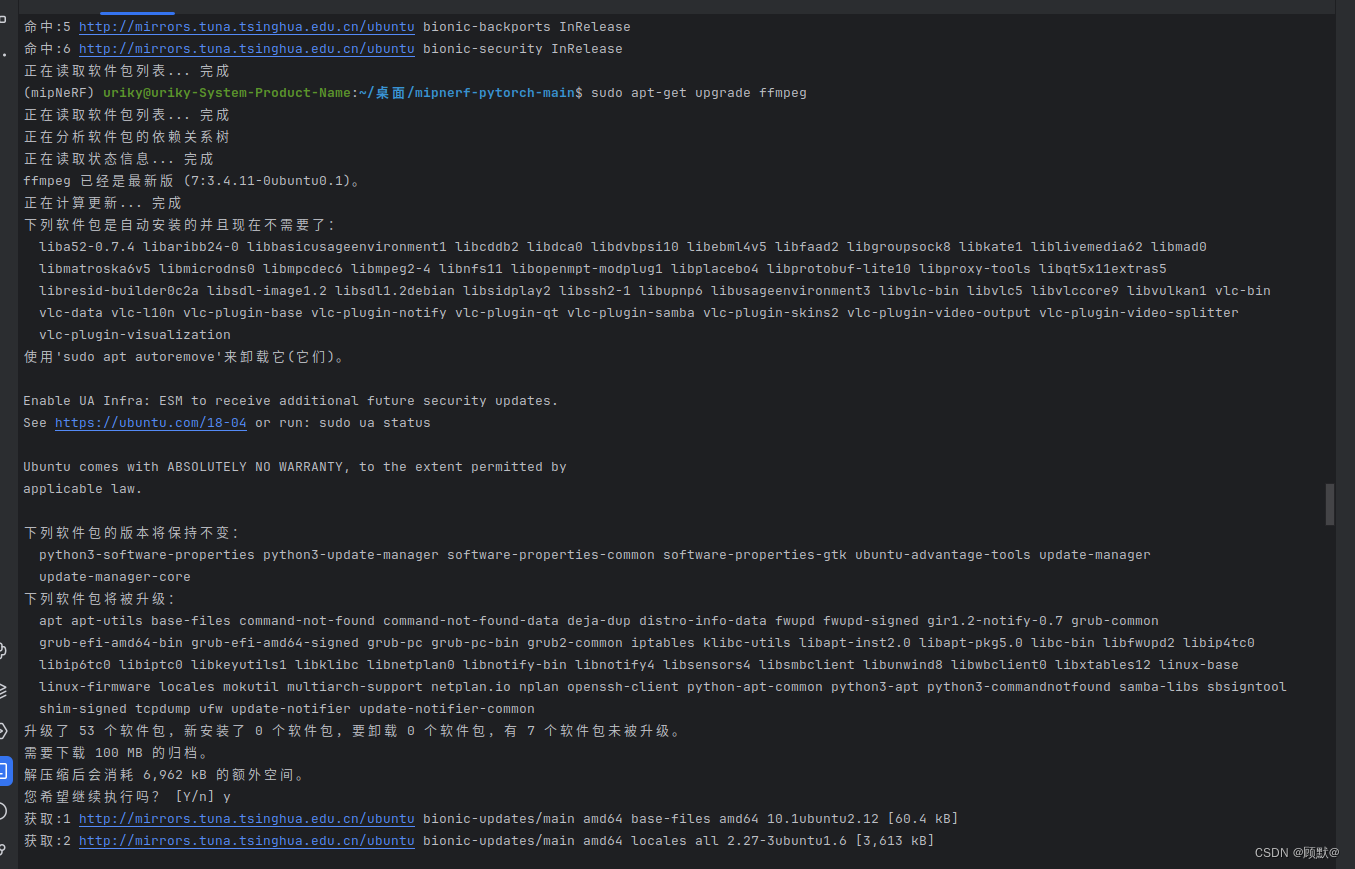 实际上版本已经是最新的,只更新了一些软件包,重新检查版本,版本未升级。再渲染一下视频看看会不会出现同样的错误(猜测应该还是会报错)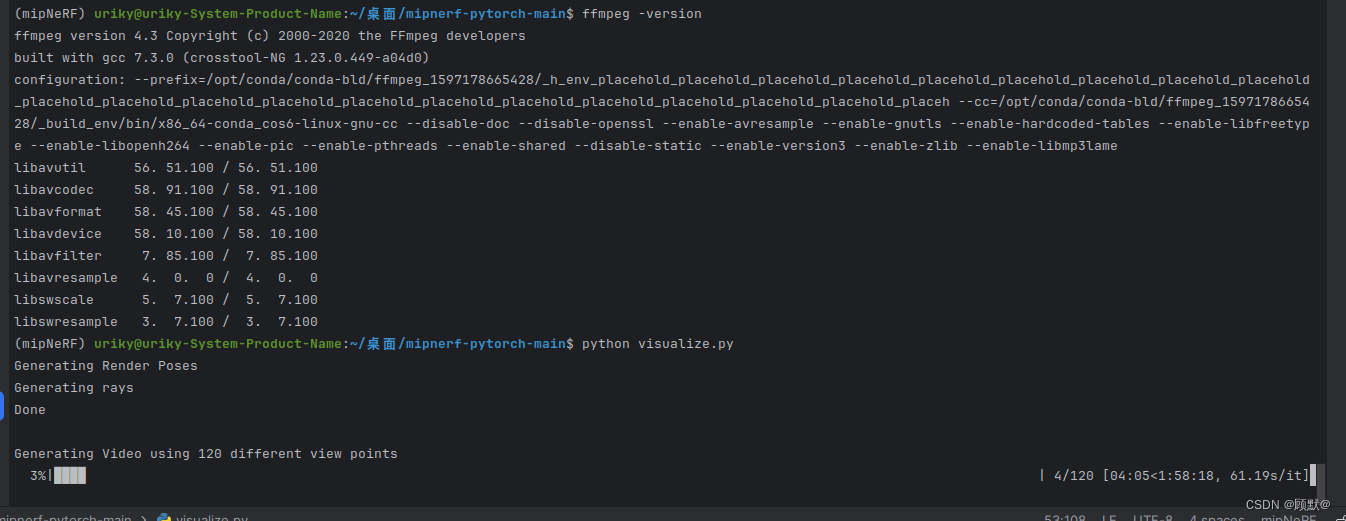
运行过程中还是报错
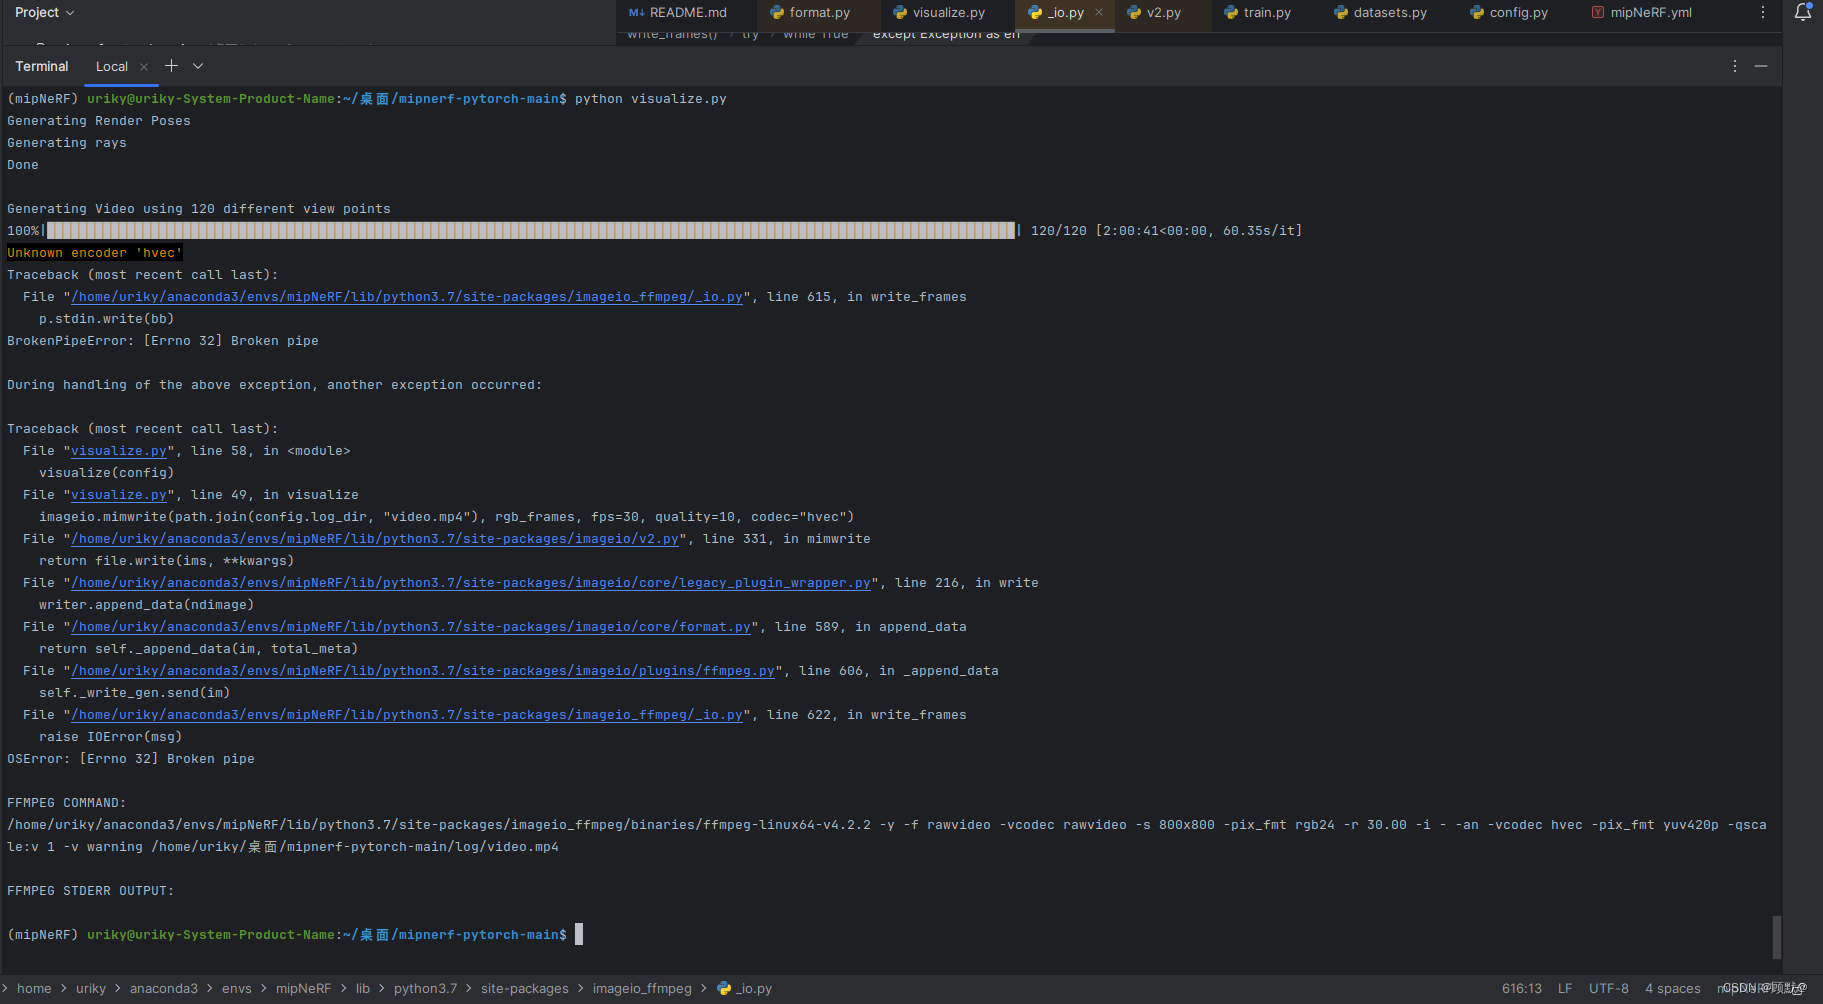
应该三编码视频的hvec没有安装
安装好了ffmpeg后,如果使用ffmpeg命令去把某个视频文件转成h264视频编码、mp3音频编码或者其他ffmpeg自身不带的xxx编码类型,就会看到报错信息,unknown encoder ‘xxx’
解决方法流程
HEVC(此方法未成功)
(High Efficiency Video Coding)是一种高效的视频编码标准,可以提供更好的视频压缩性能和更高的视频质量。要安装HEVC,可以按照以下步骤进行操作:
首先,访问HEVC官方网站(https://www.openhevc.net/)或其他可信的下载网站,下载HEVC软件包。

解压下载的HEVC软件包到你选择的目录中。

打开终端或命令提示符,并导航到解压后的HEVC软件包目录。

根据操作系统,执行相应的安装命令。例如,在Linux上,可以运行以下命令进行编译和安装:
 ./configure
    make
    sudo make install
等待编译和安装过程完成。

安装完成后,可以使用HEVC编码器和解码器来处理HEVC视频文件。
将解码器换成 libavcodec(此方法进行中)
终端输入:
ffmpeg -encoders | grep libx264       #查看已有的解码器
显示输出:
ffmpeg version 4.3 Copyright (c) 2000-2020 the FFmpeg developers
  built with gcc 7.3.0 (crosstool-NG 1.23.0.449-a04d0)
  configuration: --prefix=/opt/conda/conda-bld/ffmpeg_1597178665428/_h_env_placehold_placehold_placehold_placehold_placehold_placehold_placehold_placehold_placehold_placehold_placehold_placehold_placehold_placehold_placehold_placehold_placehold_placehold_placehold_placehold_placeh --cc=/opt/conda/conda-bld/ffmpeg_1597178665428/_build_env/bin/x86_64-conda_cos6-linux-gnu-cc --disable-doc --disable-openssl --enable-avresample --enable-gnutls --enable-hardcoded-tables --enable-libfreetype --enable-libopenh264 --enable-pic --enable-pthreads --enable-shared --disable-static --enable-version3 --enable-zlib --enable-libmp3lame
  libavutil      56. 51.100 / 56. 51.100
  libavcodec     58. 91.100 / 58. 91.100
  libavformat    58. 45.100 / 58. 45.100
  libavdevice    58. 10.100 / 58. 10.100
  libavfilter     7. 85.100 /  7. 85.100
  libavresample   4.  0.  0 /  4.  0.  0
  libswscale      5.  7.100 /  5.  7.100
  libswresample   3.  7.100 /  3.  7.100
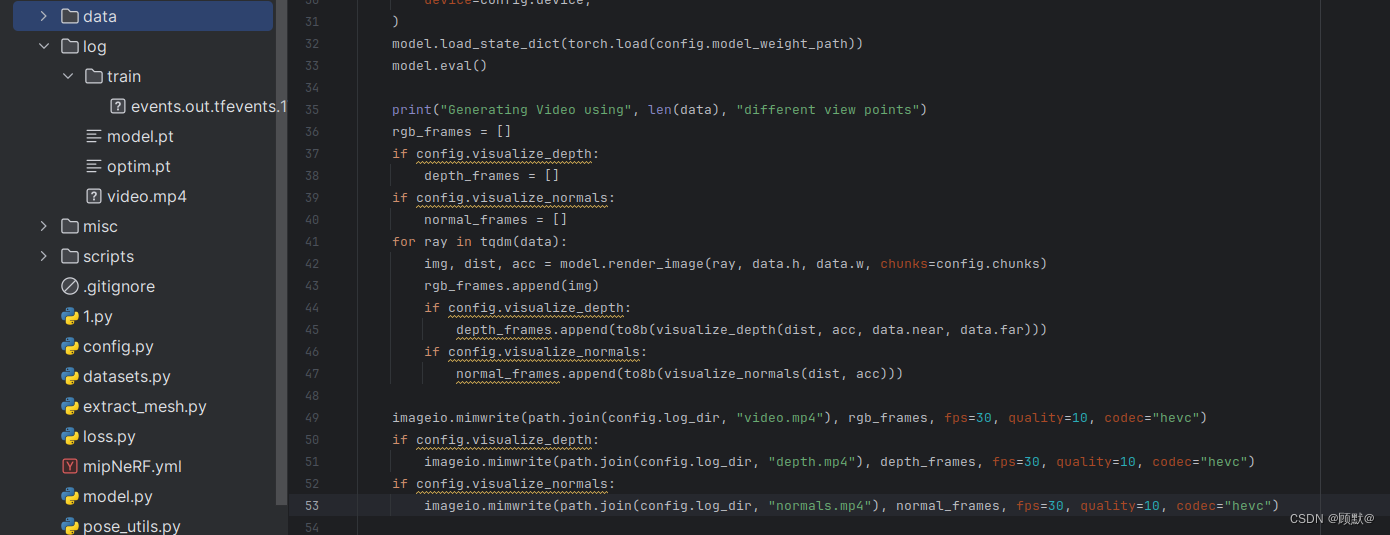
刚开始以为是编码器的问题,最终发现是codec的属性值写错了,改称hevc即可

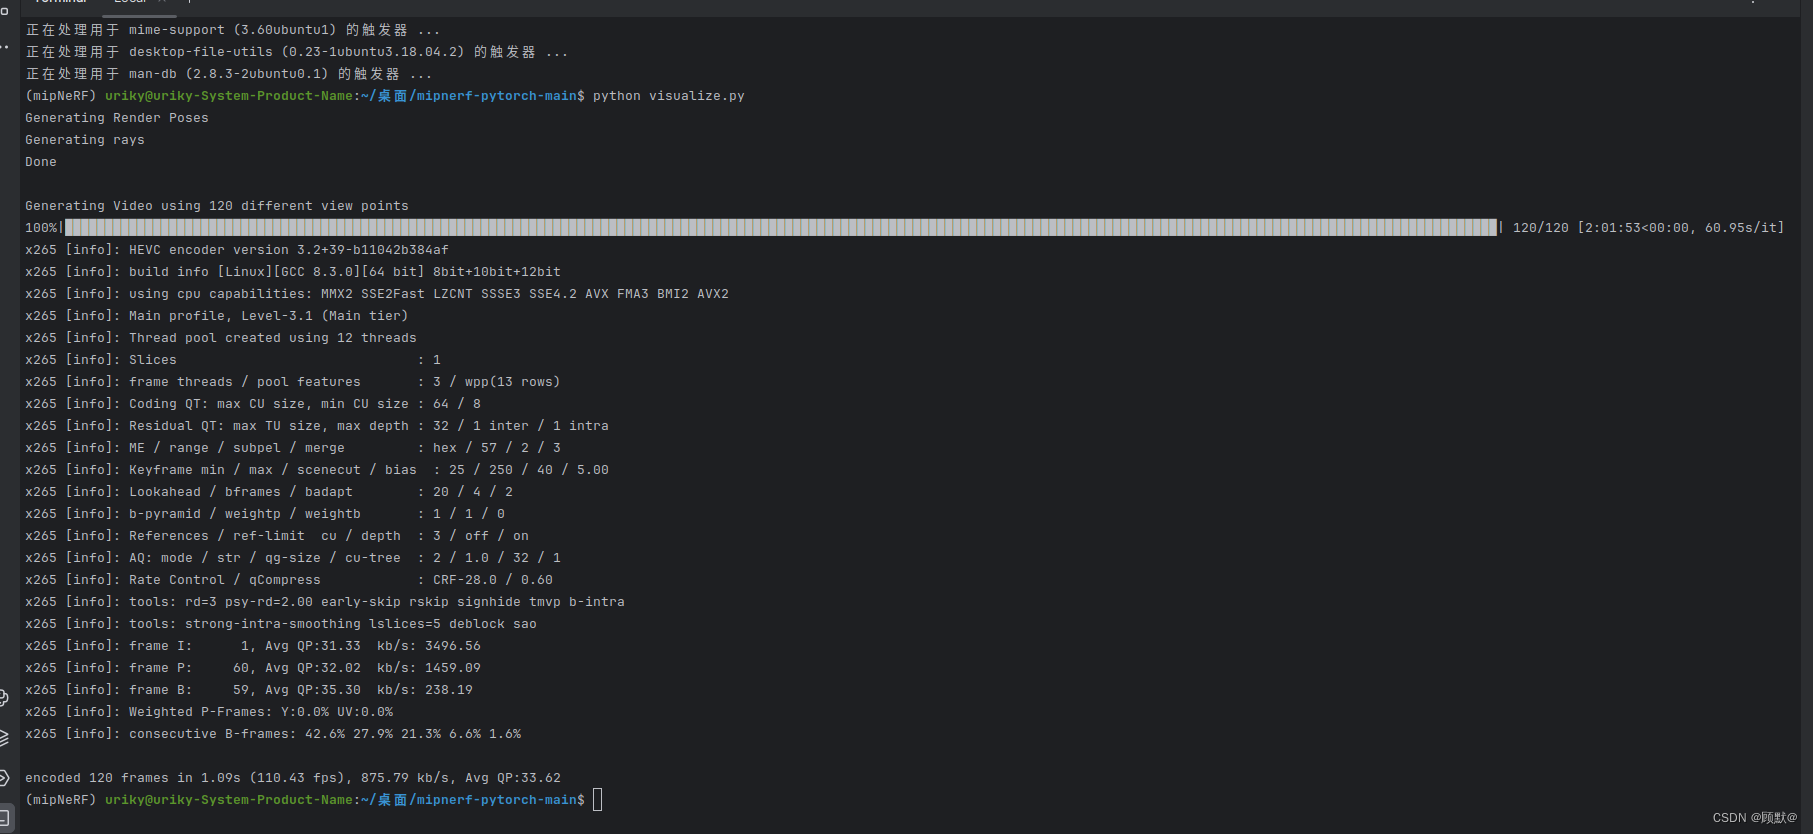
最终在log的训练目录下就生成了mp4类型的video
最后一步训练模型
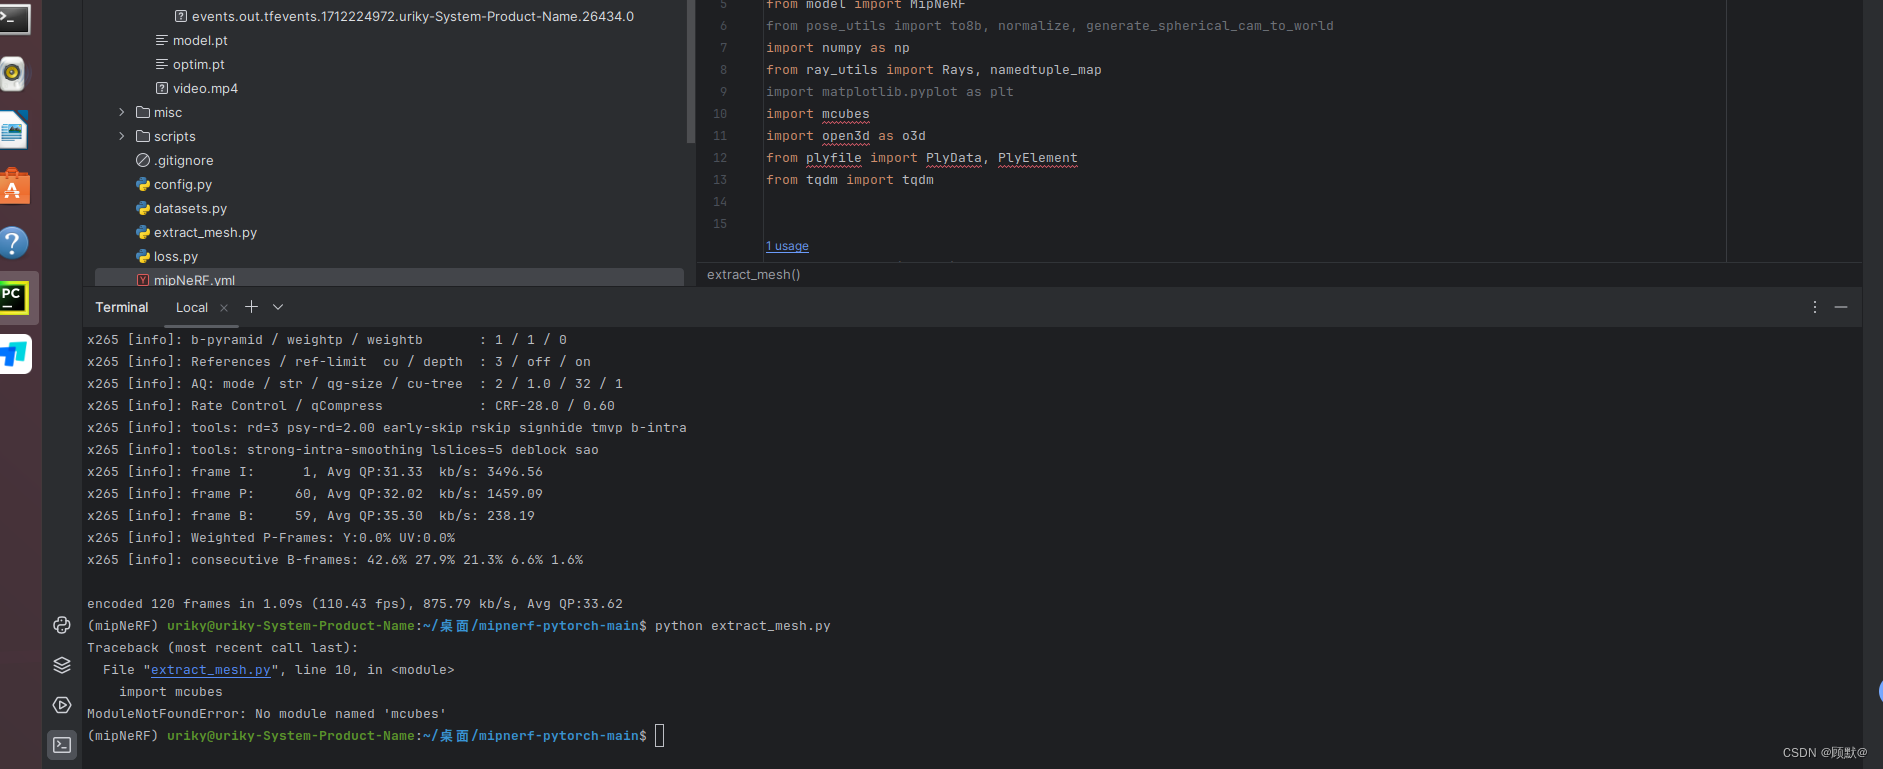
出错了,显示没有mcubes模块
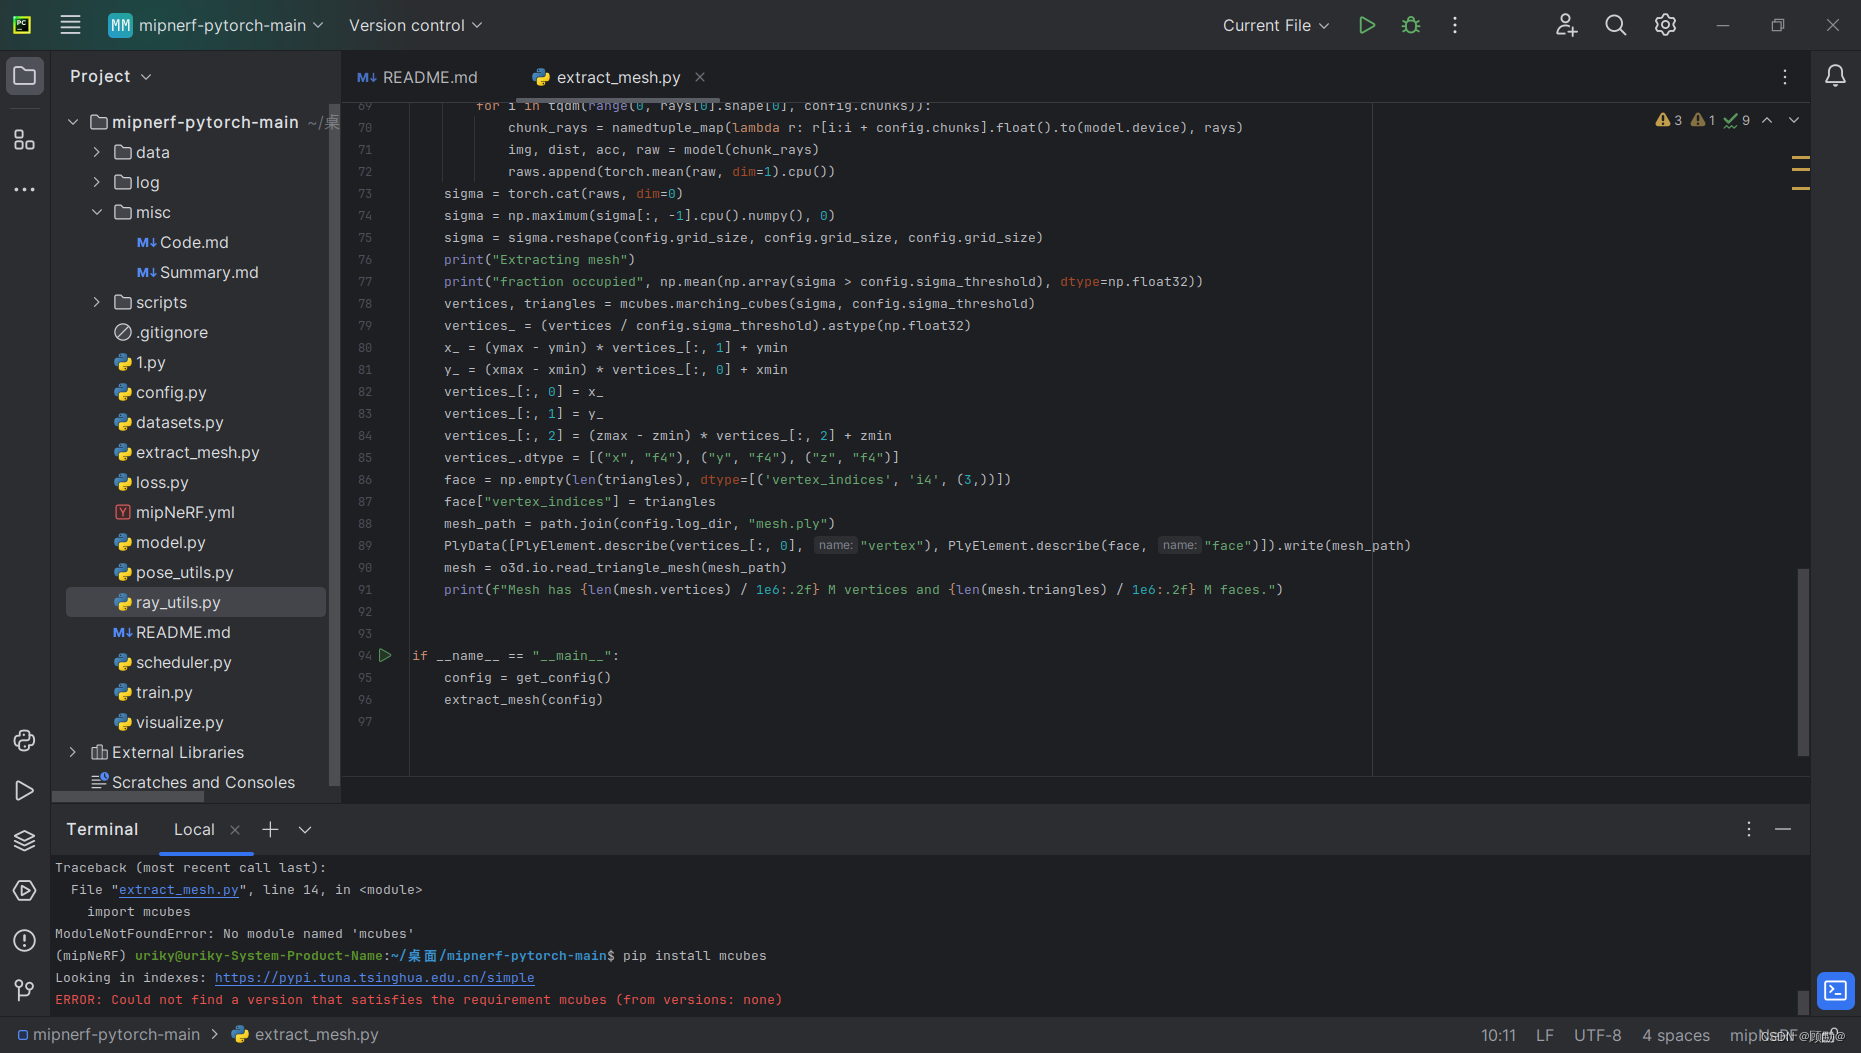
 安装完其他缺失模块之后,安装mcubes模块失败
 安装pymcubes模块失败(因为看网上说可以先安装这个之后就能正常使用mcubes模块)
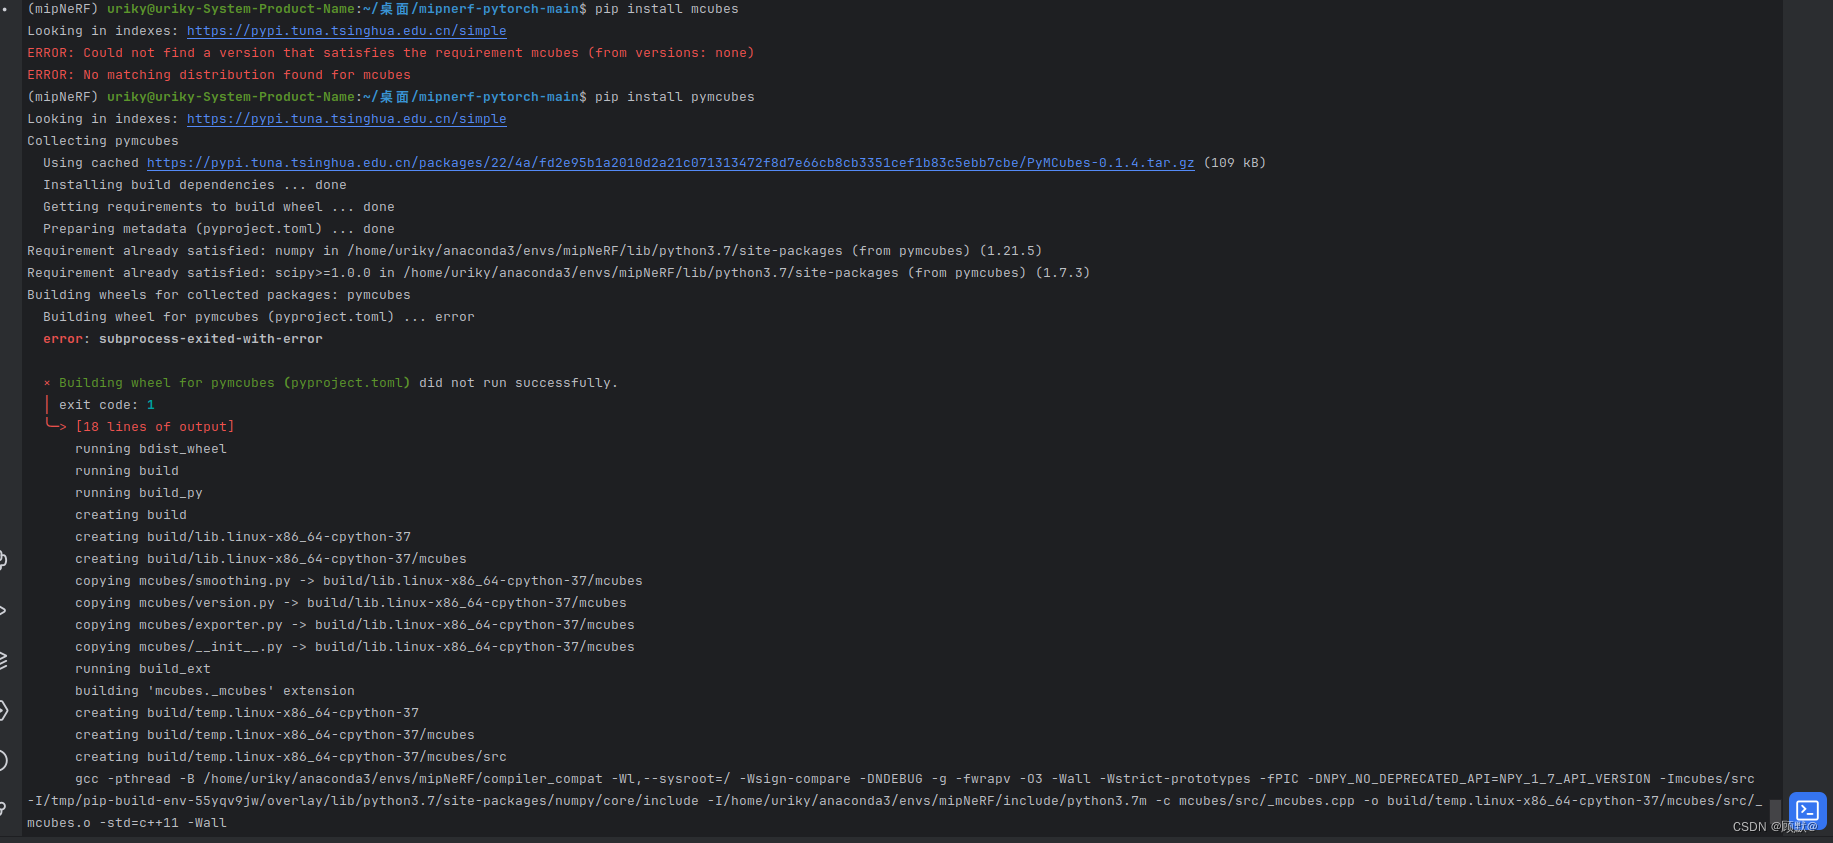
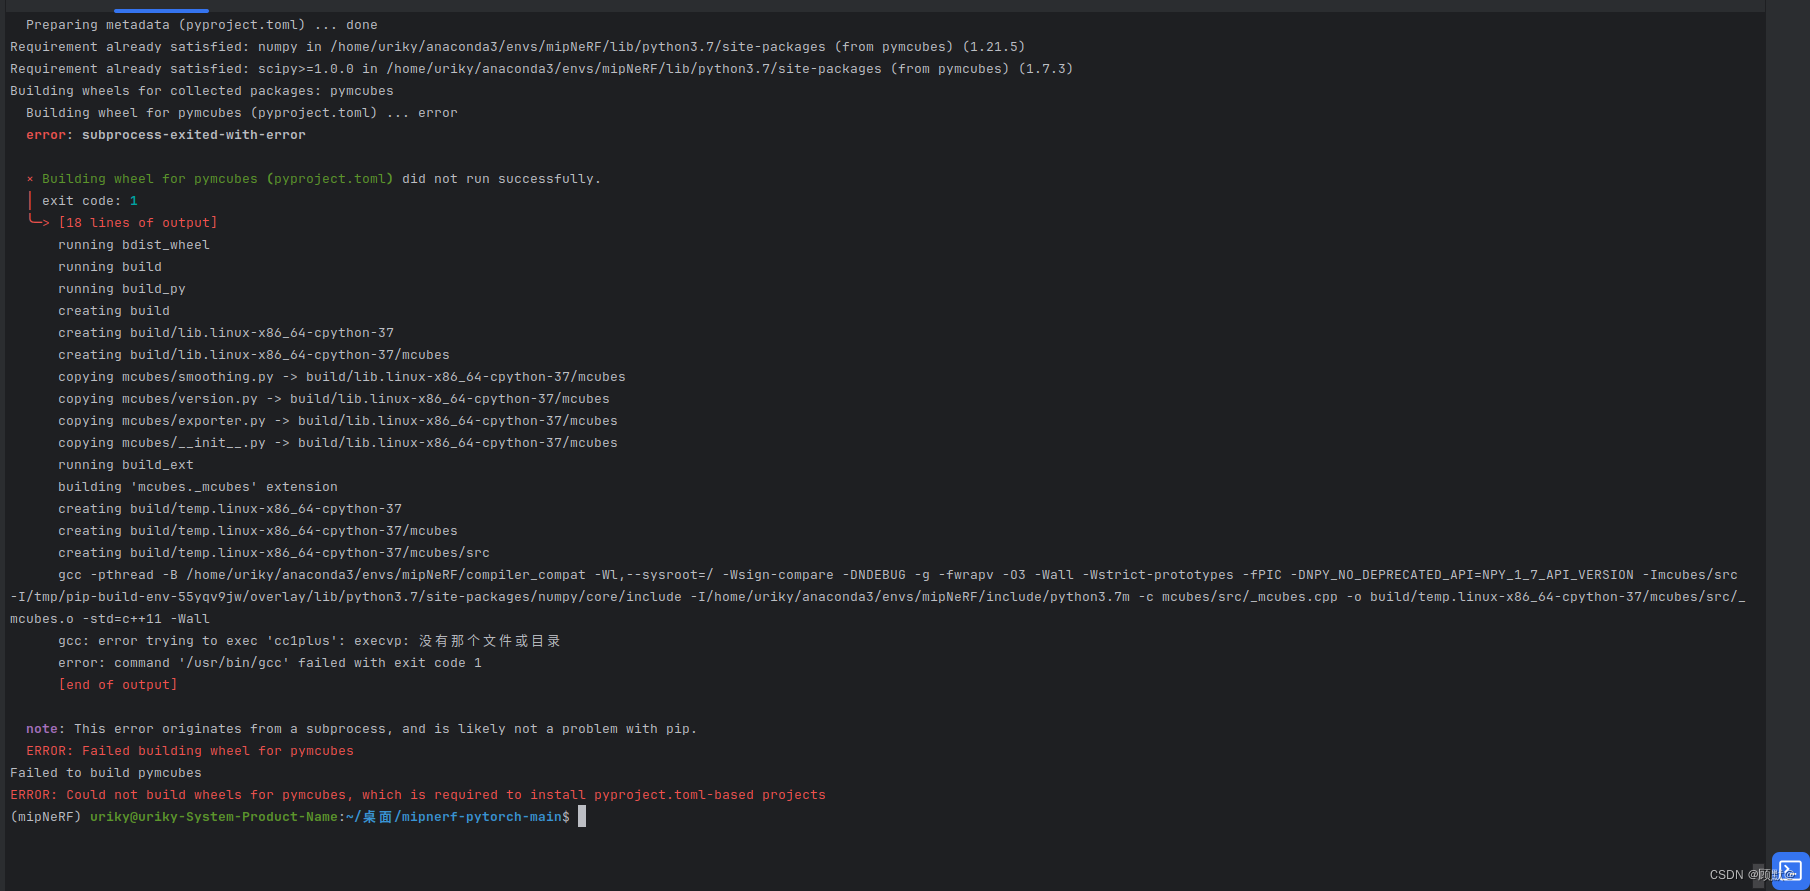
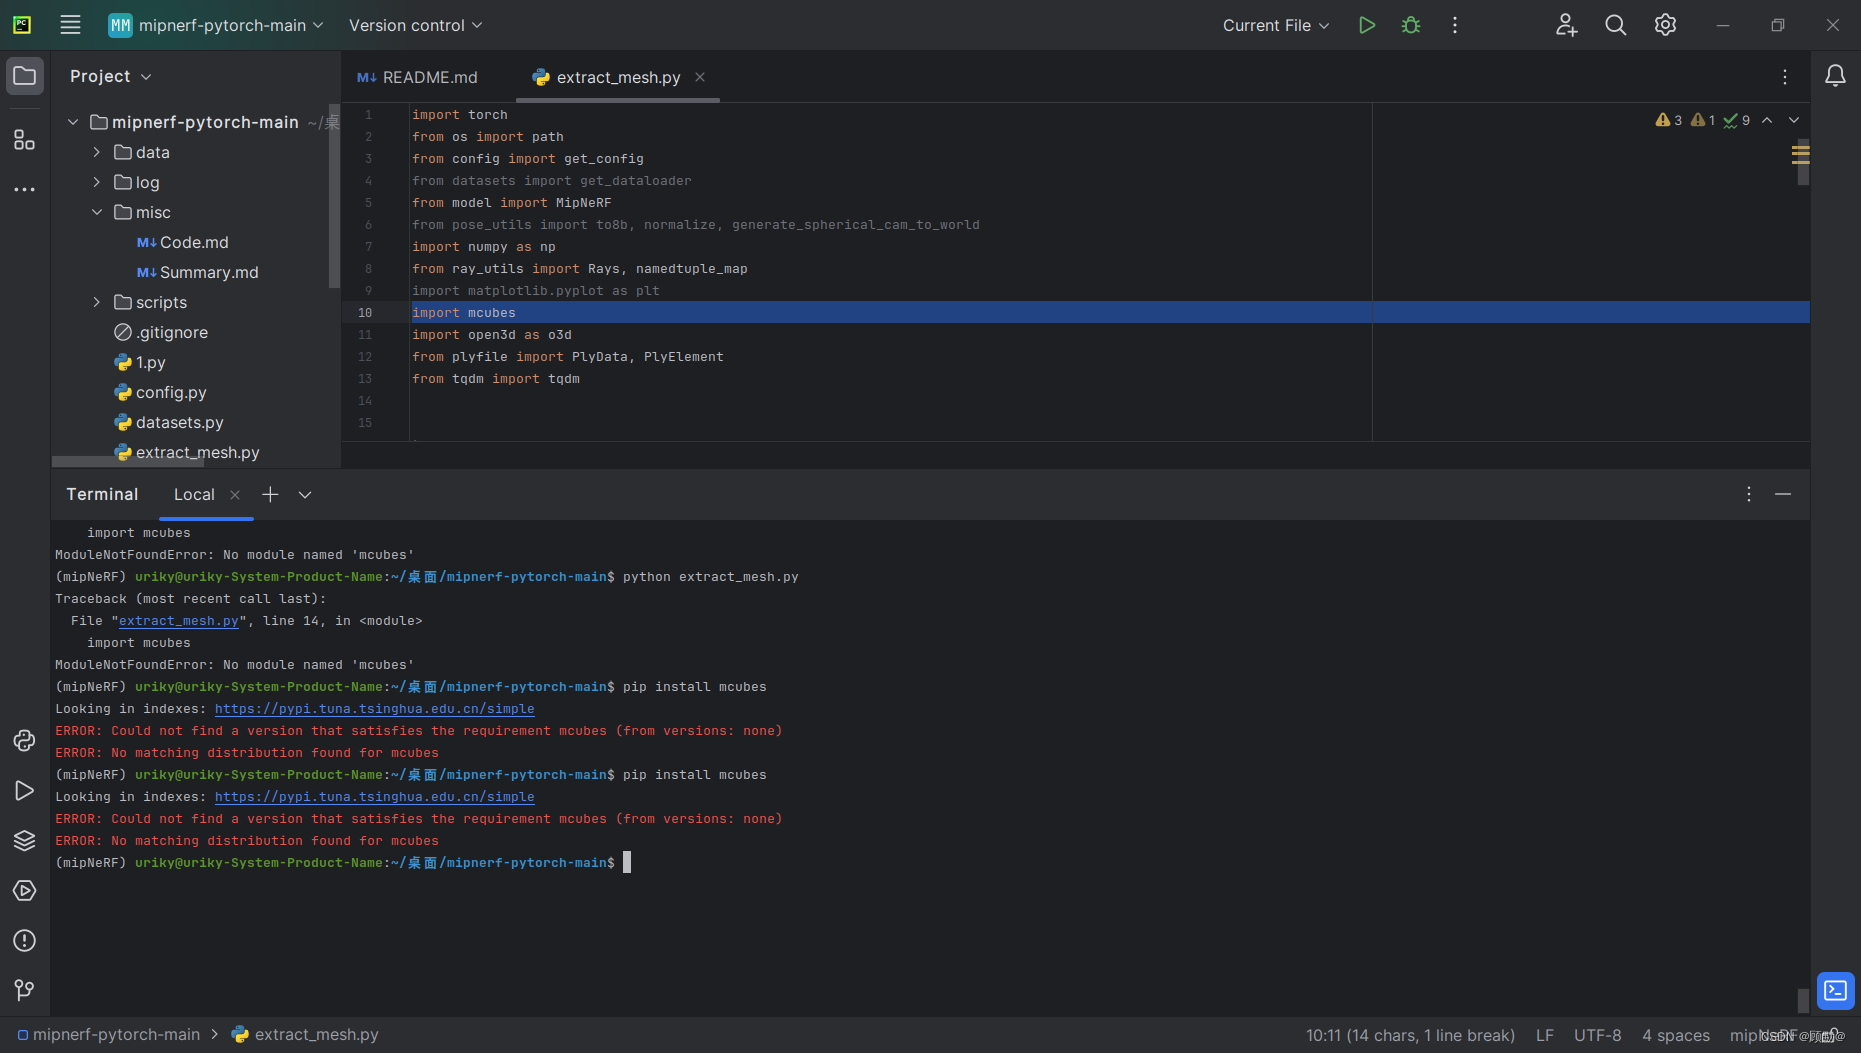
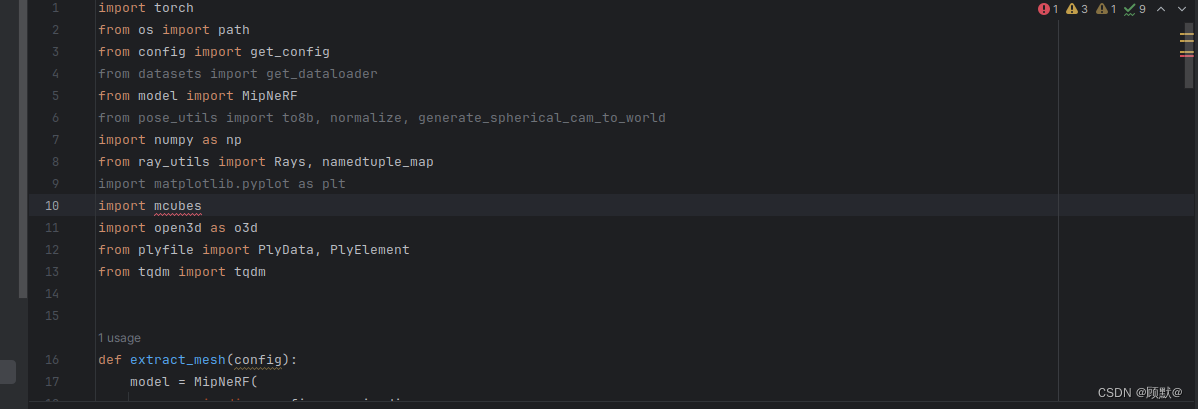
总结:所有步骤已完成,最终模型生成步骤失败,原因是mcubes模块安装失败
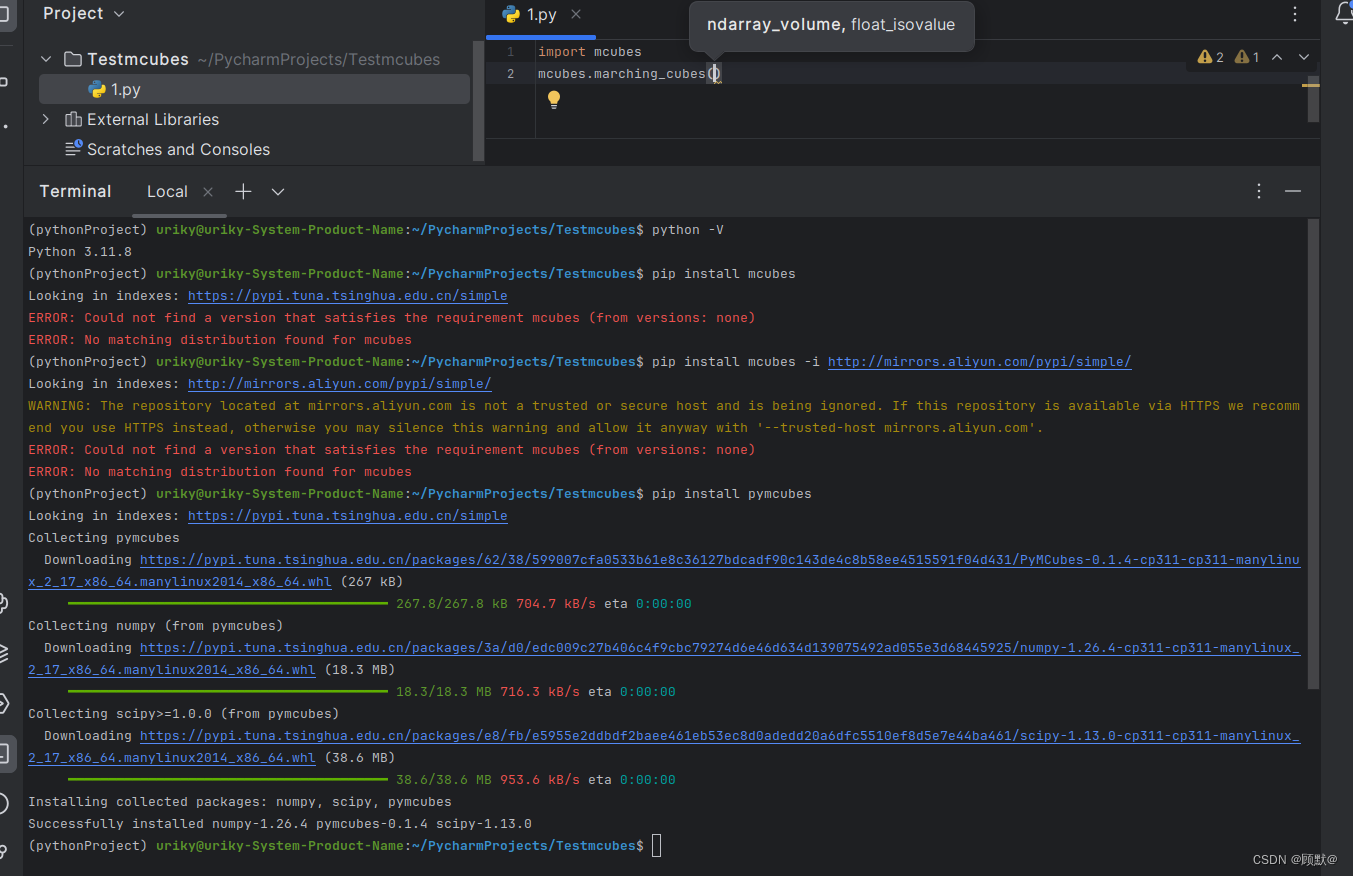
重新创建了一个包,发现在python3.11版本中可以下载pymcubes库成功使用mcubes,初步怀疑mipnerf中安装不成功mcubes库的原因在于版本的问题
更多推荐


 3
3 0
0- 0


 已为社区贡献4条内容

所有评论(0)