
Keepalived+Nginx 主备高可用负载均衡架构(基于wordpress)
文章目录
Keepalived+Nginx 主备高可用负载均衡架构
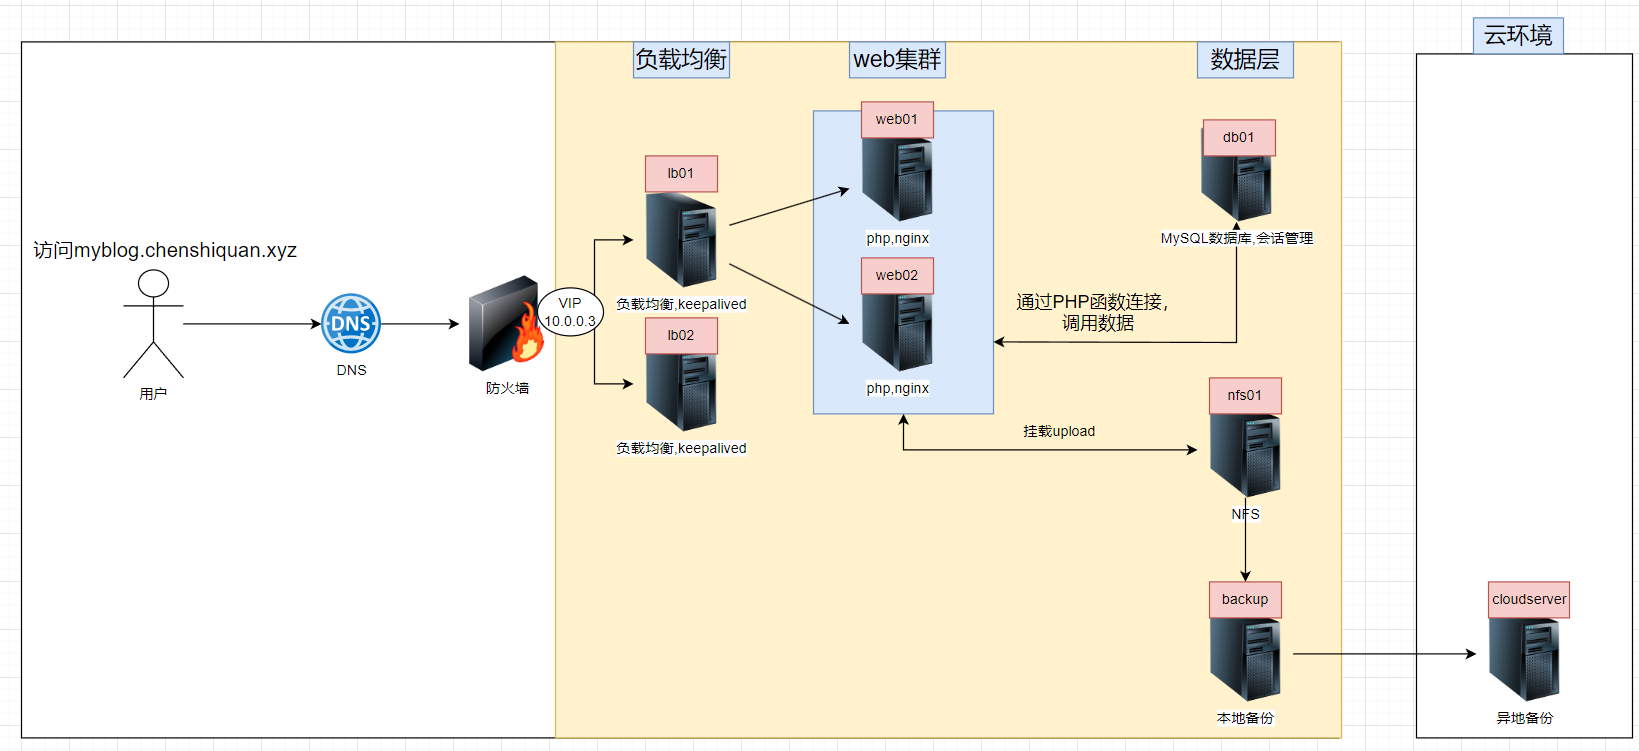
环境准备
| 角色 | 主机名 | IP | 操作系统 |
|---|---|---|---|
| nginx+keepalived | lb02 | 10.0.0.107/172.16.1.105 | kylinv10sp3 |
| nginx+keepalived | lb01 | 10.0.0.106/172.16.1.105 | kylinv10sp3 |
| mysql,redis(会话管理) | db01 | 10.0.0.105/172.16.1.105 | kylinv10sp3 |
| nginx+php | web02 | 10.0.0.104/172.16.1.104 | kylinv10sp3 |
| nginx+php | web01 | 10.0.0.103/172.16.1.103 | kylinv10sp3 |
| nfs+lsync | nfs01 | 10.0.0.102/172.16.1.102 | kylinv10sp3 |
| backup+rsync | backup | 10.0.0.101/172.16.1.101 | kylinv10sp3 |
| 云环境+rysnc | cloudserver | - | - |
(1)检查网络环境
#1.检查网段情况
检查10网段是否能够上网
检查内网172网段 #是否能互通
(2)修改主机名
hostnamectl set-hostname web01
hostnamectl set-hostname web02
hostnamectl set-hostname lb01
hostnamectl set-hostname lb02
hostnamectl set-hostname db01
hostnamectl set-hostname nfs01
hostnamectl set-hostname backup
(3)配置时间同步
yum install -y ntpdate
echo "*/3 * * * * root bash ntpdate ntp.aliyun.com >/dev/null 2>&1" >> /etc/crontab
(4)host解析
SSH 服务默认会对 客户端 IP 做反向 DNS 解析(验证 IP 对应的域名是否合法),若服务器 DNS 配置错误、解析超时,或客户端 IP 无反向解析记录,会导致登录卡在 “等待解析” 环节,延迟通常 5-30 秒
#1.注释掉已有的配置
sed -i '/^GSSAPIAuthentication/s@^@#@g' /etc/ssh/sshd_config
#2.关闭对应功能
#关闭dns反向解析  ip-->域名
cat >>/etc/ssh/sshd_config<<EOF
UseDNS no
GSSAPIAuthentication no
EOF
#2.重启sshd(在本地连接重启)
systemctl restart sshd
egrep '^(GSSAPIAuthentication|UseDNS)' /etc/ssh/sshd_config
#2.写入域名解析
cat >> /etc/hosts <<'EOF'
172.16.1.101 backup
172.16.1.102 nfs01
172.16.1.103 web01
172.16.1.104 web02
172.16.1.105 db01
172.16.1.106 lb01
172.16.1.107 lb02
你的公网IP cloudserver
EOF
一、利用LNMP实现wordpres站点搭建+NFS迁移+异地备份
(1)backup和nfs实时同步(rsync+lsyncd)
(1)backup安装rsync,nfs安装lsyncd
#在nfs01上安装lsyncd(依赖rsync)
[root@nfs01 ~]# yum install -y lsyncd
[root@nfs01 ~]# rpm -qa |grep -E "lsyncd|rsync"
#backup节点安装rsync,后续需要设置定时备份到异地服务器
[root@backup ~]# yum install -y rsync
[root@backup ~]# rpm -qa |grep rsync
(2)backup设置配置文件并启动
#1.修改backup节点的rsync的配置文件
cat > /etc/rsyncd.conf <<EOF
fake super =yes
uid = rsync
gid = rsync
use chroot = no
max connections = 2000
timeout = 600
pid file = /var/run/rsyncd.pid
lock file = /var/run/rsync.lock
log file = /var/log/rsyncd.log
ignore errors
read only = false
list = false
hosts allow = 172.16.1.0/24
#hosts deny = 0.0.0.0/32
auth users = rsync_backup
secrets file = /etc/rsync.password
#####################################
[nfsbackup]
comment = backup nfs
path = /nfsbackup
EOF

#2.配置相应的环境
#添加rsync系统用户
useradd -r -M -s /sbin/nologin rsync
#创建/etc/rsync.password文件并写入
echo rsync_backup:Abc@1234 > /etc/rsync.password
#指定认证用户(配置文件中auth user):密码

#修改/etc/rsync.password为600
chmod 600 /etc/rsync.password

#创建模块需要的目录 /nfsbackup
mkdir /nfsbackup

#修改/backup所有者、用户组为rsync
chown -R rsync:rsync /nfsbackup

#3.启动rsync
systemctl enable --now rsyncd
#注意ubuntu的rsync启动服务配置文件没有d
#查看是否开启873端口
ss -tulnp |grep 873
#4.防火墙记得放行该端口
firewall-cmd --add-port=873/tcp --permanent
firewall-cmd --reload
(3)nfs01设置lsyncd并启动
#1.设置lsyncd配置文件
cat > /etc/lsyncd.conf <<EOF
settings {
   logfile    = "/var/log/lsyncd.log",
   pidfile    = "/var/run/lsyncd.pid",
   statusFile = "/var/log/lsyncd.status",
   nodaemon   = true,
   maxProcesses = 2
}

sync {
    default.rsync,
    source    = "/data",
    target    = "rsync_backup@backup::nfsbackup",
    delay     = 5,
    delete    = true,
    rsync     = {
        binary   = "/usr/bin/rsync",
        archive  = true,
        compress = true,
        password_file = "/etc/rsync.password"


    }
}
EOF

#2.配置相应的环境
#lsyncd监控的目录,源目录
mkdir -p /data
#密码文件
echo "Abc@1234" > /etc/rsync.password
#设置密码文件权限
chmod 600 /etc/rsync.password

#启动lsyncd
systemctl enable --now lsyncd
systemctl status lsyncd
(2)backup和云服务器配置定时备份(rsync+cron)
(1)阿里云节点安装并配置rsync
#rsync谁接收数据谁就是服务端
[root@ubuntu2404-csq ~]# apt install -y rsync
[root@ubuntu2404-csq ~]# dpkg -l |grep rsync
#配置rsyncd.conf文件
cat > /etc/rsyncd.conf <<'EOF'
fake super =yes
uid = rsync
gid = rsync
use chroot = no
max connections = 2000
timeout = 600
pid file = /var/run/rsyncd.pid
lock file = /var/run/rsync.lock
log file = /var/log/rsyncd.log
ignore errors
read only = false
list = false
hosts allow = 123.113.31.55  #backup的公网IP
#hosts deny = 0.0.0.0/32
auth users = rsync_backup
secrets file = /etc/rsync.password
#####################################
[backup]
comment = backup
path = /backup
EOF

#配置对应的环境
#1.添加rsync系统用户
useradd -r -M -s /sbin/nologin rsync

#2.创建/etc/rsync.password文件并写入
echo rsync_backup:Abc@1234 > /etc/rsync.password
#指定认证用户(配置文件中auth user):密码

#3.修改/etc/rsync.password为600
chmod 600 /etc/rsync.password

#4.创建模块需要的目录 /backup
mkdir /backup

#5.修改/backup所有者、用户组为rsync
chown -R  rsync:rsync /backup

#6.启动rsync(ubuntu的rsync服务没有d)
systemctl enable --now rsync

#7.安全组放行断开,端口只开放给backup节点的本地访问的公网IP
#查找backup节点的公网IP
curl ifconfig.io
(2)backup服务端编写备份脚本,定时备份
mkdir -p /server/scripts/
cat > /server/scripts/cron-rsync.sh <<'EOF'
#!/bin/bash
##############################################################
# File Name: /server/scripts/cron-rsync.sh
# Version: V1.0
# Author: csq
# Description: 将备份脚本传输到异地灾备服务器上
##############################################################
#变量
#######################################################
#备份的目录
backupdir="/nfsbackup/"
#远程主机的模块
backupmodule=backup
#要传输的主机
host=cloudserver
#######################################################
function judge_backupdir(){
#判断backup是否存在
if [ ! -d  $backupdir  ];then
	mkdir -p $backupdir
fi
}

function remote_backup(){
#备份同步到远程主机
if RSYNC_PASSWORD=Abc@1234 rsync -avz ${backupdir}  rsync_backup@${host}::${backupmodule}  >/dev/null 2>&1;then
	echo "已经将备份传输到了远程主机${host}的${backupmodule}目录下"
else

	echo "远程备份失败"
	exit 1
fi
}
function remove_mtime_7(){
#删除本地backupdir下面大于7天的文件
if find $backupdir -type f -mtime +30 |xargs -n1 rm -rf;then
	echo "已经删除大于30天的文件"
else
	echo "删除文件错误!"
	exit 1
fi
}

function main(){
		judge_backupdir
		remote_backup
		remove_mtime_7
}
main
EOF
#脚本测试
[root@backup ~]# bash /server/scripts/cron-rsync.sh
#写入到定时任务中(每1个小时备份1次)
echo "0 */1 * * * root bash /server/scripts/cron-rsync.sh >/dev/null 2>&1" >> /etc/crontab
(3)阿里云定时邮件发送备份内容
#安装s-nail 和postfix
apt install -y s-nail postfix tree
#配置s-nail
cat >> /etc/s-nail.rc <<EOF
set v15-compat
set smtp-auth=login
set from="csq<chenshiren2025@163.com>"
set mta=smtps://chenshiren2025:TVdDbQRYfCyL3tUH@smtp.163.com:465
EOF
#创建脚本目录
mkdir -p /server/scripts/
#编写备份内容脚本
cat > /server/scripts/check_backup.sh <<'EOF'
#!/bin/bash
##############################################################
# File Name:/server/scripts/check_bash.sh
# Version:V1.0
# Author:csq
# Organization: www.chenshiquan.xyz
# Desc:
##############################################################
num=$(find /backup/ -type f | wc -l)
info=$(tree --du -h -L 3 /backup/)
# 合并内容
content="文件数量: ${num}\n${info}"
# 发送邮件
echo -e "${content}" | s-nail -s "$(curl -s ifconfig.io)-每日备份内容" 2033717617@qq.com
EOF
#测试脚本
bash /server/scripts/check_backup.sh
#将脚本写入定时任务(每天晚上21点发送备份内容)
echo "00 21 * * * root bash /server/scripts/check_backup.sh >/dev/null 2>&1" >> /etc/crontab
(3)nfs01安装NFS配置共享目录
(1)安装NFS并配置
#1.安装nfs和rpcbind
yum install -y nfs-utils
#2.设置nfs和rpcbind开机自启并启动(注意启动顺序)
systemctl enable --now rpcbind && systemctl enable --now nfs
#3.查看端口状态(包含NFS和rpcbind)
rpcinfo -p
#4.设置nfs共享目录exports
cat > /etc/exports <<EOF
/data 172.16.1.0/24(rw,all_squash,anonuid=1999,anongid=1999)
EOF
#5.创建用户
groupadd -g 1999 www
useradd -u 1999 -g www -M -s /sbin/nologin www
#6.之前创建过data目录所以不用再次创建了
#7.给data目录属主和属组设置为www
chown -R www:www /data/
#8.生效共享目录配置
exportfs -arv
#9.查看共享目录
showmount -e localhost
#10.设置nfs固定端口,并防火墙放行端口
cat >> /etc/sysconfig/nfs <<EOF
RQUOTAD_PORT=875
LOCKD_TCPPORT=32803
LOCKD_UDPPORT=32769
MOUNTD_PORT=892
STATD_PORT=662
EOF
#给lockd、statd设置端口
vim /etc/nfs.conf
[lockd]
 port=32803
 udp-port=32769

[statd]
# debug=0
 port=662
#重启相关服务
systemctl restart rpcbind && systemctl restart nfs && systemctl restart nfs-lock
#放行端口
cat > open_port.sh <<'EOF'
#!/bin/bash
##############################################################
# File Name:open_port.sh
# Version:V1.0
# Author:csq
# Organization: www.chenshiquan.xyz
# Desc:
##############################################################

no_open_port=`rpcinfo -p |awk 'NR>1{print $(NF-1)}' | sort | uniq`
for i in ${no_open_port}
do
	open_port=`firewall-cmd --list-all | grep $i | wc -l`
	if [ ${open_port} -eq 0 ];then
	   if firewall-cmd --add-port=$i/tcp --permanent >/dev/null 2>&1;then
		   echo "端口$i放行成功"
	   else
		   echo "端口放行失败"
	   fi
	else
		echo "端口$i已经放行"
	fi
done
firewall-cmd --reload >/dev/null 2>&1
firewall-cmd --list-all
EOF
[root@nfs01 ~]# bash open_port.sh
端口111放行成功
端口20048放行成功
端口2049放行成功
端口34801放行成功
端口44395放行成功
端口662放行成功
public (active)
  target: default
  icmp-block-inversion: no
  interfaces: ens33 ens34
  sources:
  services: cockpit dhcpv6-client mdns ssh
  ports: 111/tcp 20048/tcp 2049/tcp 34801/tcp 44395/tcp 662/tcp
  protocols:
  masquerade: no
  forward-ports:
  source-ports:
  icmp-blocks:
  rich rules:
(2)web01/02安装nfs-utils
#安装nfs-utils
yum install -y nfs-utils
#查看共享的目录
showmount -e nfs01
#先不进行挂载,等LNMP+wordpress搭建完成再挂载
(4)web01/02 LNMP搭建并配置web01挂载nfs共享目录
(1)web01/02安装Nginx1.28
部署Nginx1.28(Kylinv10sp3、Ubuntu2204、Rocky9.3)_yum 安装nginx1.28-CSDN博客
#nginx服务启动完成,并放行nginx 80端口
#1.创建www用户
groupadd -g 1999 www
useradd -u 1999 -g www -M -s /sbin/nologin www
#2.查看是否创建成功
id www
#3.修改nginx的系统用户为www,方便后续管理
grep www /etc/nginx/nginx.conf
user  www;
#4.重新加载nginx配置文件
systemctl reload nginx
#5.查看nginx的系统用户是否为www
ps -ef |grep nginx
(2)db01安装MySQL8.4.6
部署MySql8.4.6(Kylinv10sp3、Ubuntu2204、Rocky9.3)_银河麒麟服务器版yum装mysql8.4.6-CSDN博客
#1.安装完毕并设置完root密码后,并放行数据库的3306端口
#登陆mysql
mysql -uroot -pAbc@1234
#2.创建wordpress数据库
create database wordpress;
#3.创建wordpress用户并授权它只能从本地和内网登陆
CREATE USER 'wordpress'@'172.16.1.%' IDENTIFIED BY 'Abc@1234';
CREATE USER IF NOT EXISTS 'wordpress'@'localhost' IDENTIFIED BY 'Abc@1234';
#查看用户是否创建成功
SELECT user, host FROM mysql.user;
#4.将wordpress用户授权wordpress库
GRANT ALL  ON wordpress.* TO 'wordpress'@'localhost';
GRANT ALL  ON wordpress.* TO 'wordpress'@'172.16.1.%';
#查看是否授权成功
SELECT user, host FROM mysql.user WHERE user = 'wordpress';
#登陆测试
mysql -uwordpress -pAbc@1234
(3)web01/02安装PHP8.4
部署PHP8.4(KylinV10SP3、Ubuntu2204、Rocky9.3)-CSDN博客
#php服务先不要开启
#1.修改配置文件进程用户为nginx
#php-fpm.conf 主配置文件
#php-fpm.d/www.conf 子配置文件 <==修改目标
grep -E '^(user|group|listen =)' /usr/local/php/etc/php-fpm.d/www.conf
#修改如下内容
user = www
group = www
listen = 127.0.0.1:9000
#2.检查语法(看看是否有successful),重启服务
php-fpm -t
systemctl restart php-fpm
(4)web01配置WodPress
#1.下载wordpress并解压
wget https://cn.wordpress.org/latest-zh_CN.zip -P /download/
unzip /download/latest-zh_CN.zip -d /download/
#2.创建/app/code/blog/并将wordpress文件移动到该目录下
mkdir -p /app/code/blog/
mv /download/wordpress/* /app/code/blog/
#3.配置nginx站点文件
cat > /etc/nginx/conf.d/myblog.chenshiquan.xyz.conf <<'EOF'
server {
	listen 80;
	server_name myblog.chenshiquan.xyz;
	client_max_body_size 10M;
	access_log /var/log/nginx/access-myblog.chenshiquan.xyz main;
	error_log /var/log/nginx/error-myblog.chenshiquan.xyz notice;
	root /app/code/blog/;
	location / {
		index index.php;
	}
	location ~ \.php$ {
		fastcgi_pass 127.0.0.1:9000;
		fastcgi_index index.php;
		fastcgi_param SCRIPT_FILENAME $document_root$fastcgi_script_name;
		include fastcgi_params;
	}
}
EOF
#4.检查nginx语法,并重新加载配置文件
nginx -t
systemctl restart nginx
#5.因为wordpress属于动态站点了,www用户要有写的权限才行,修改站点目录属主和属组为www即可
chown -R  www:www  /app/code/blog/

#6.修改默认站点,当用户不正当访问返回418状态(就是用户访问的不是myblog.csq.xyz就返回418状态)
#先备份默认站点
cp /etc/nginx/conf.d/{default.conf,.bak}
#修改默认站点
cat > /etc/nginx/conf.d/default.conf <<EOF
server {
        listen 80 default_server;
        server_name _;
        return 418;
}
EOF
#5.检查nginx语法,并重新加载配置文件
nginx -t
systemctl restart nginx
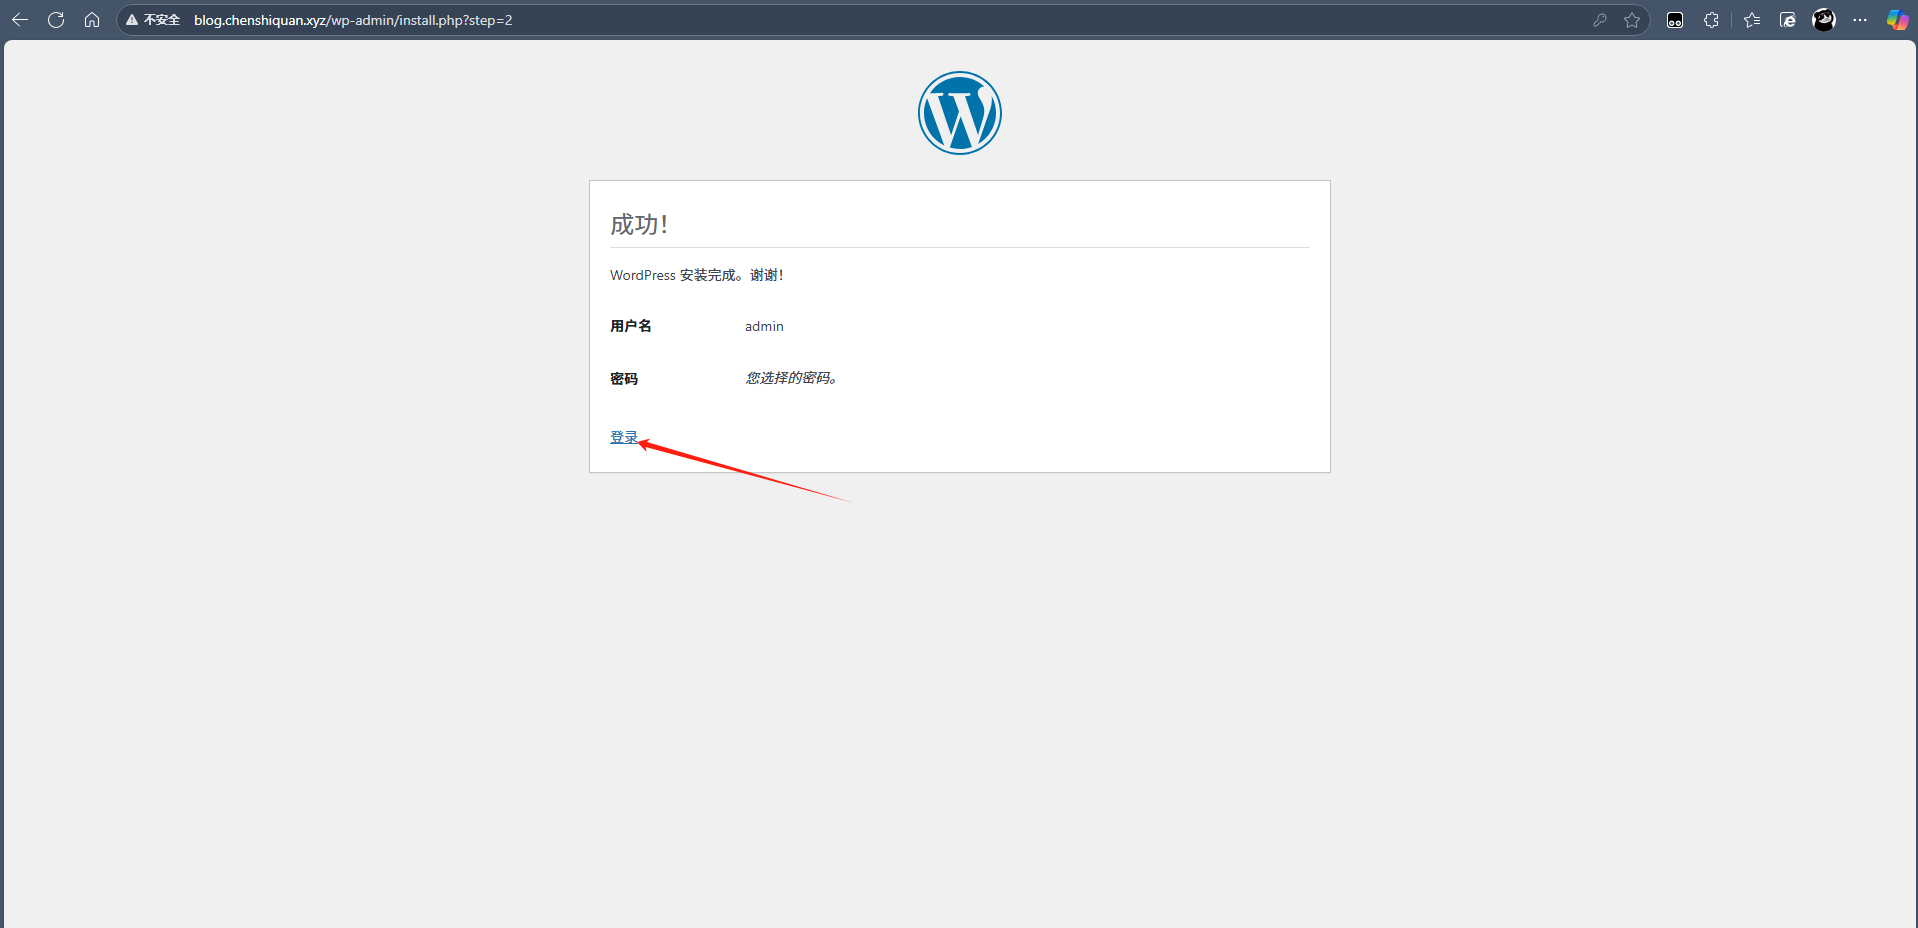
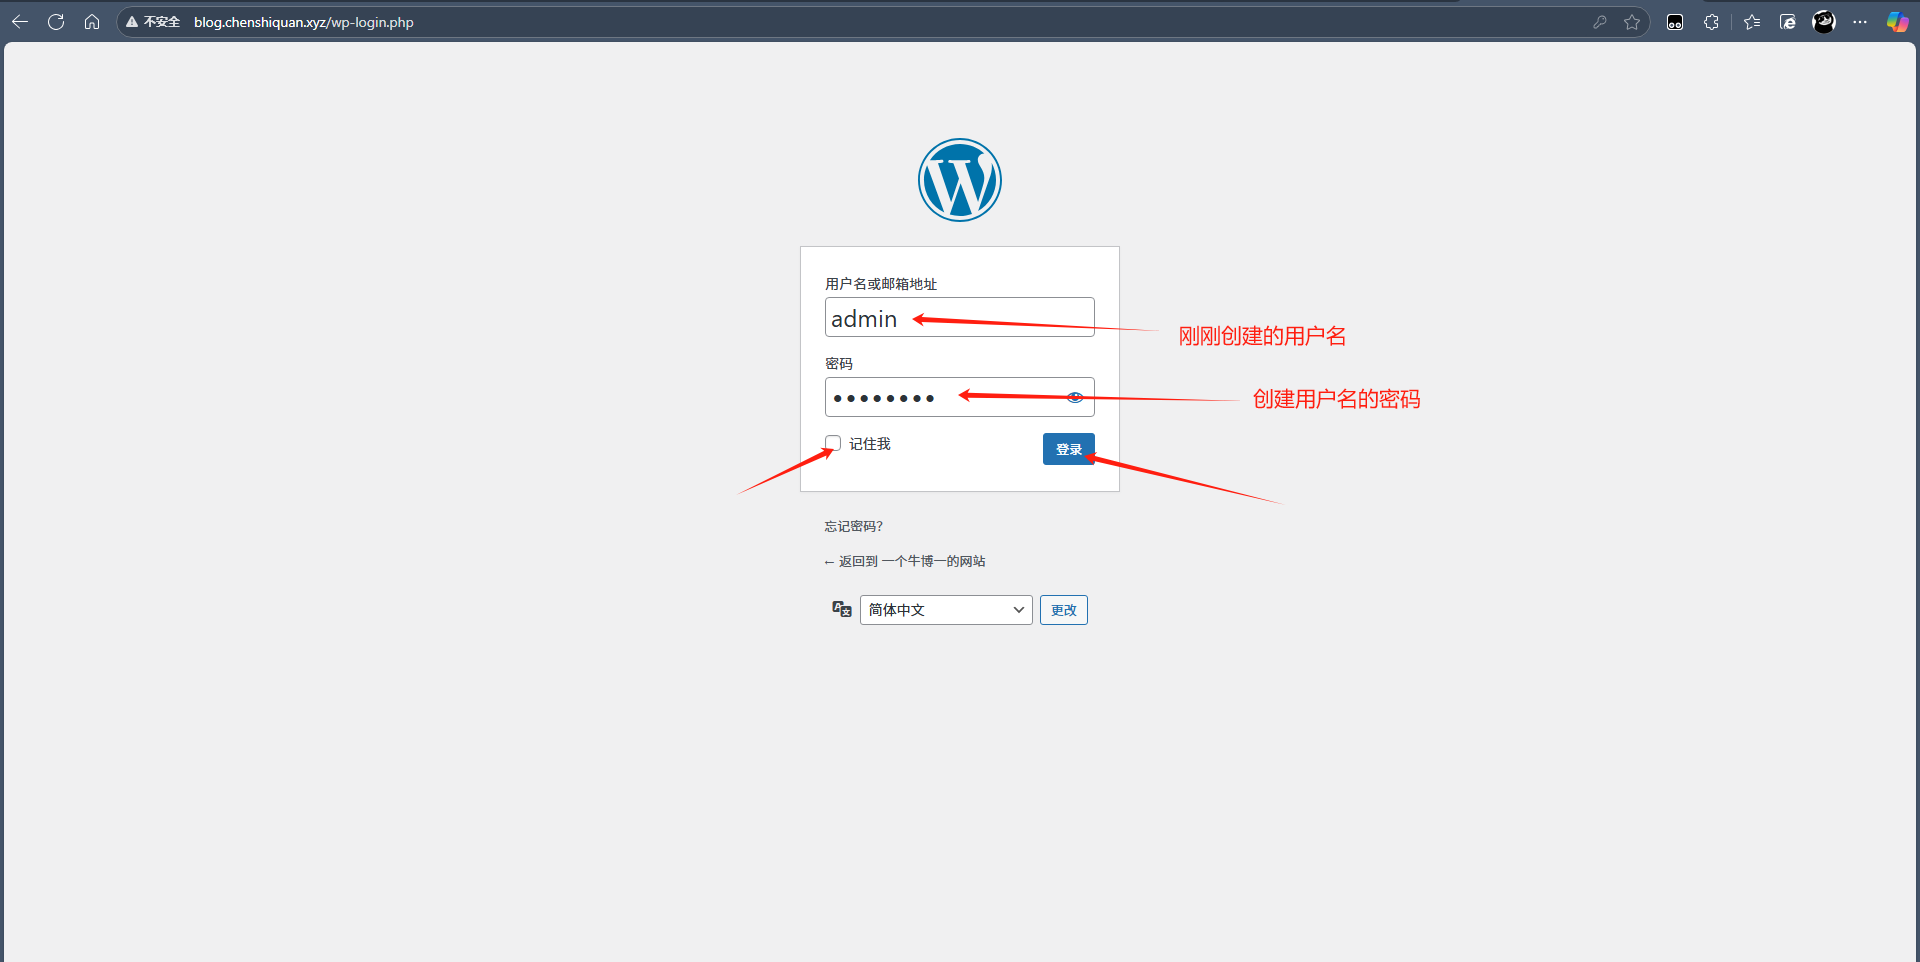
windows配置hosts解析,访问http://myblog.chenshiquan.xyz(注意是http)
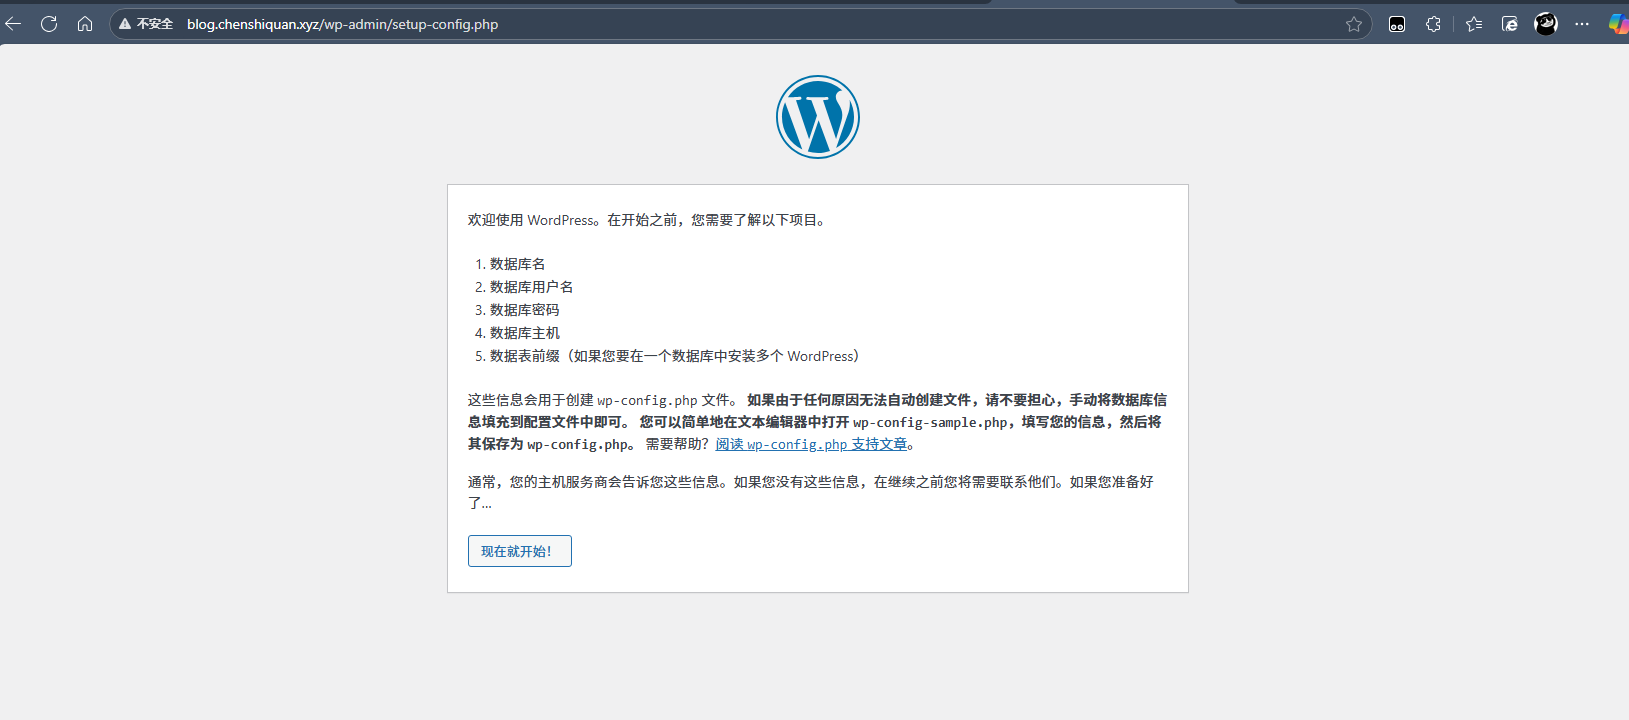
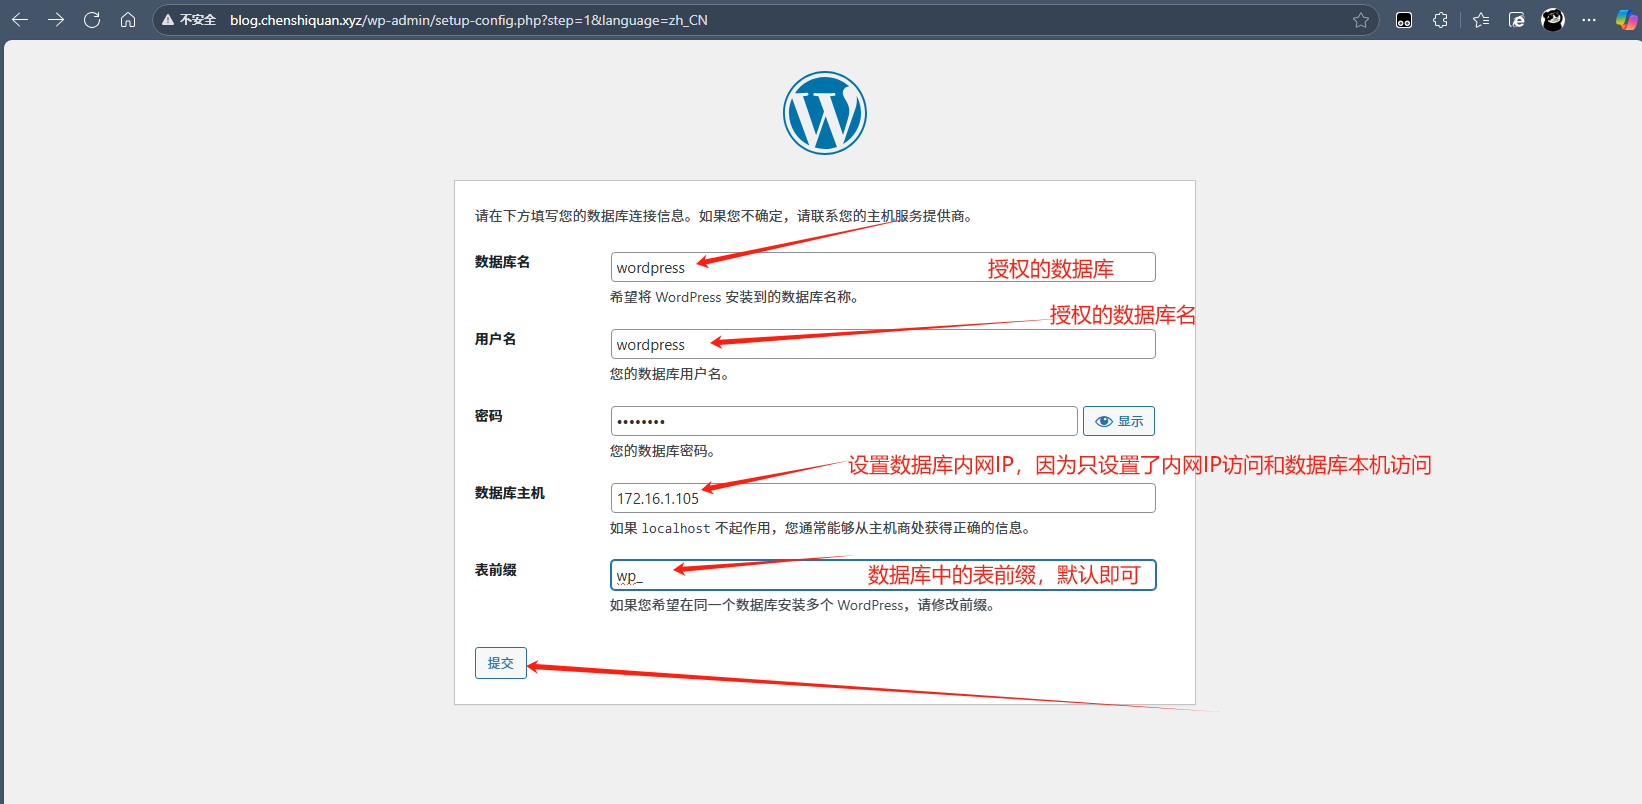
配置没问题应该能到下一步
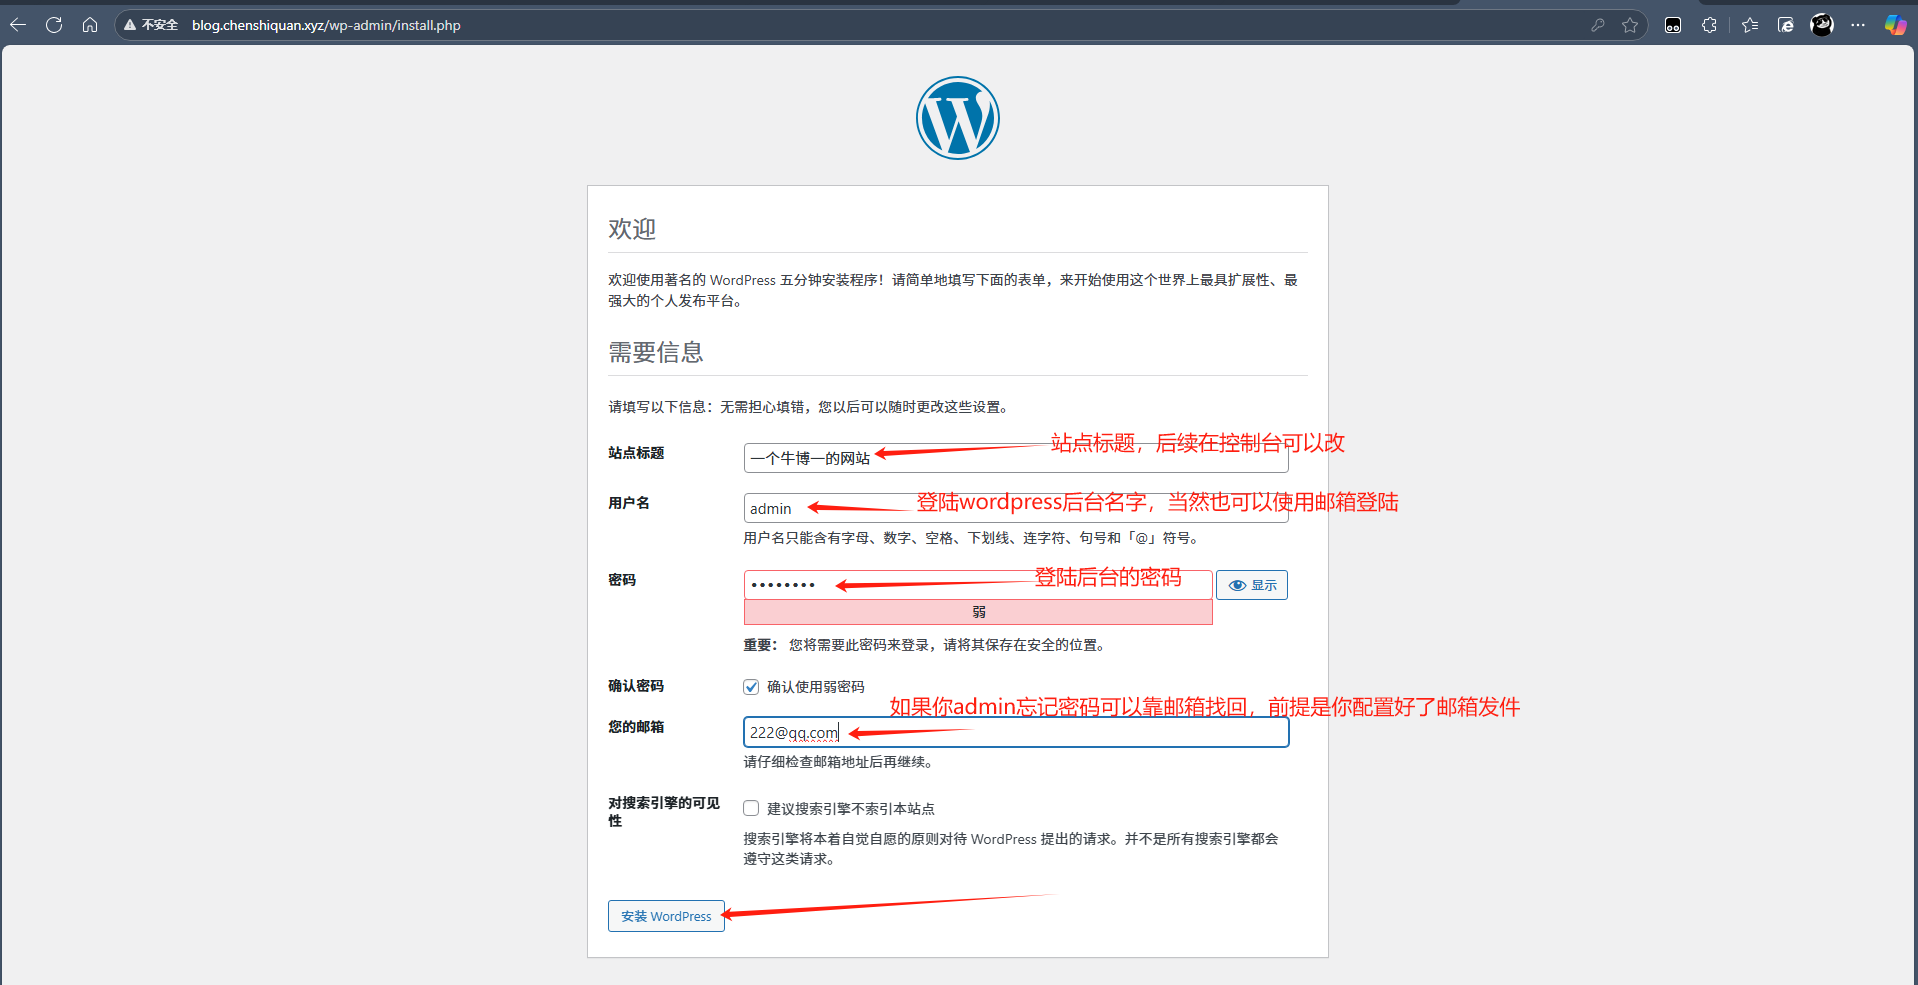
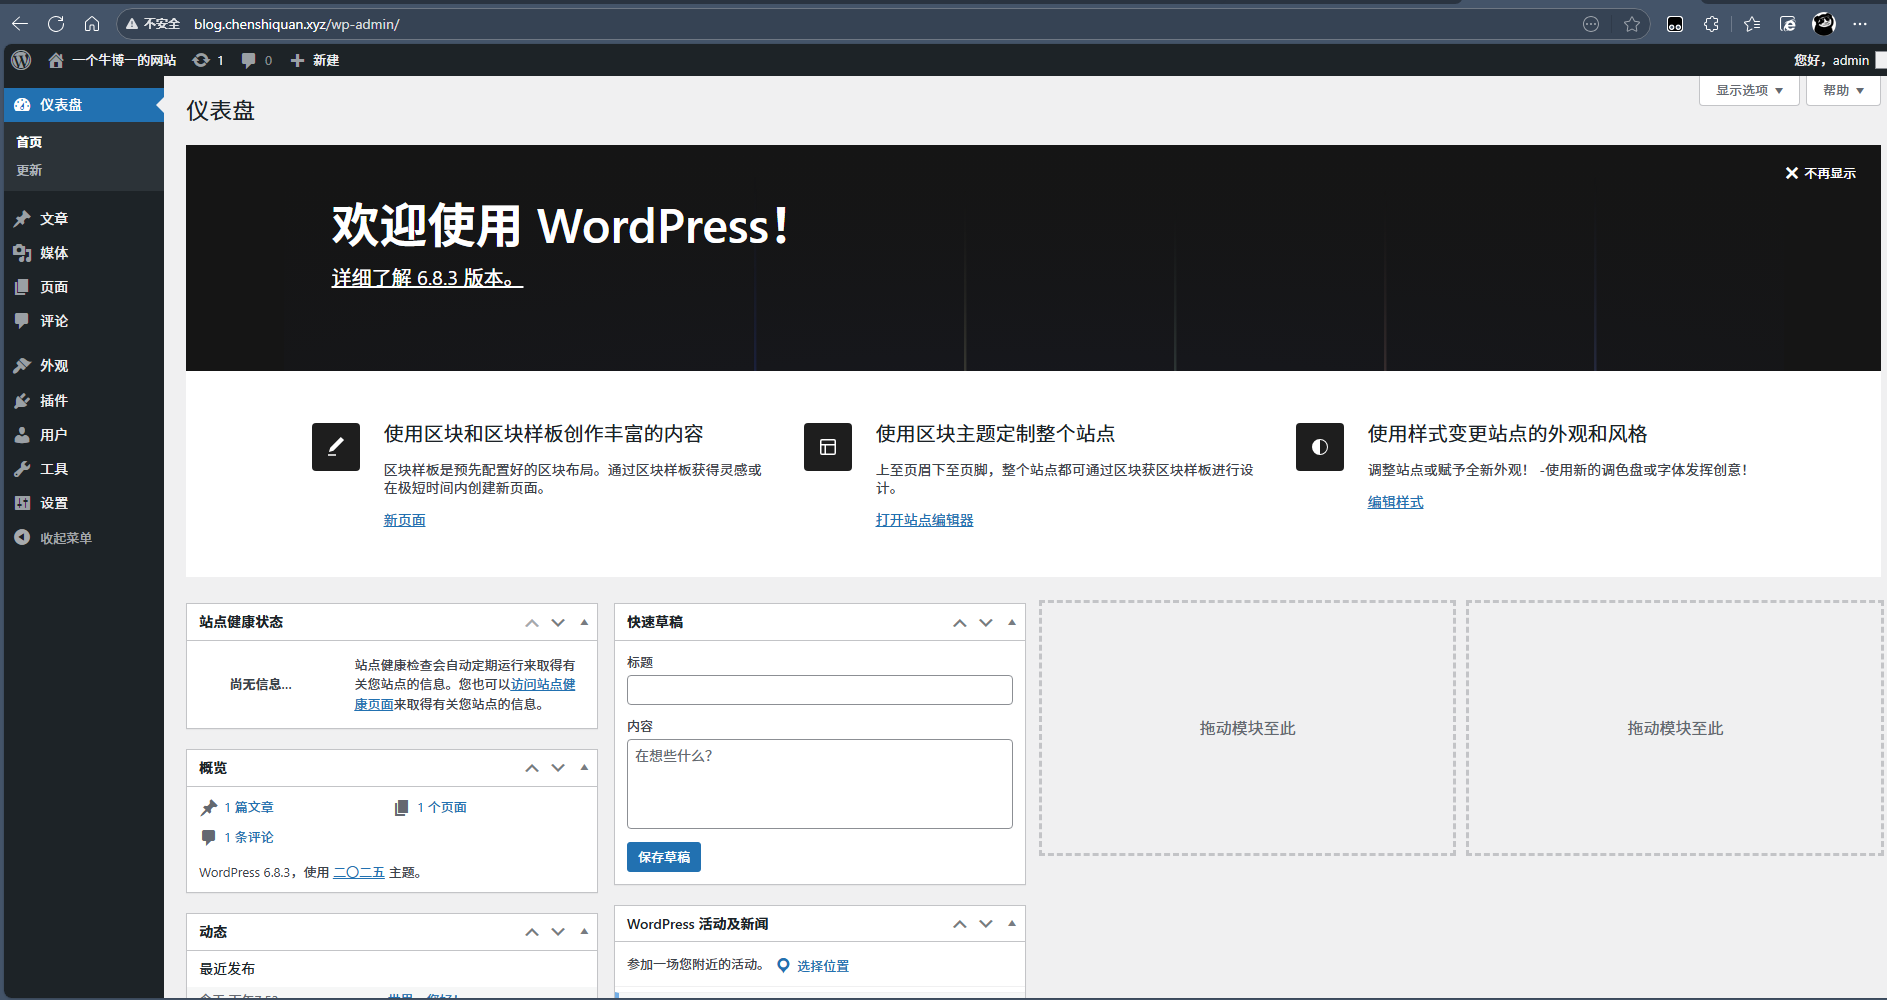
网站后台
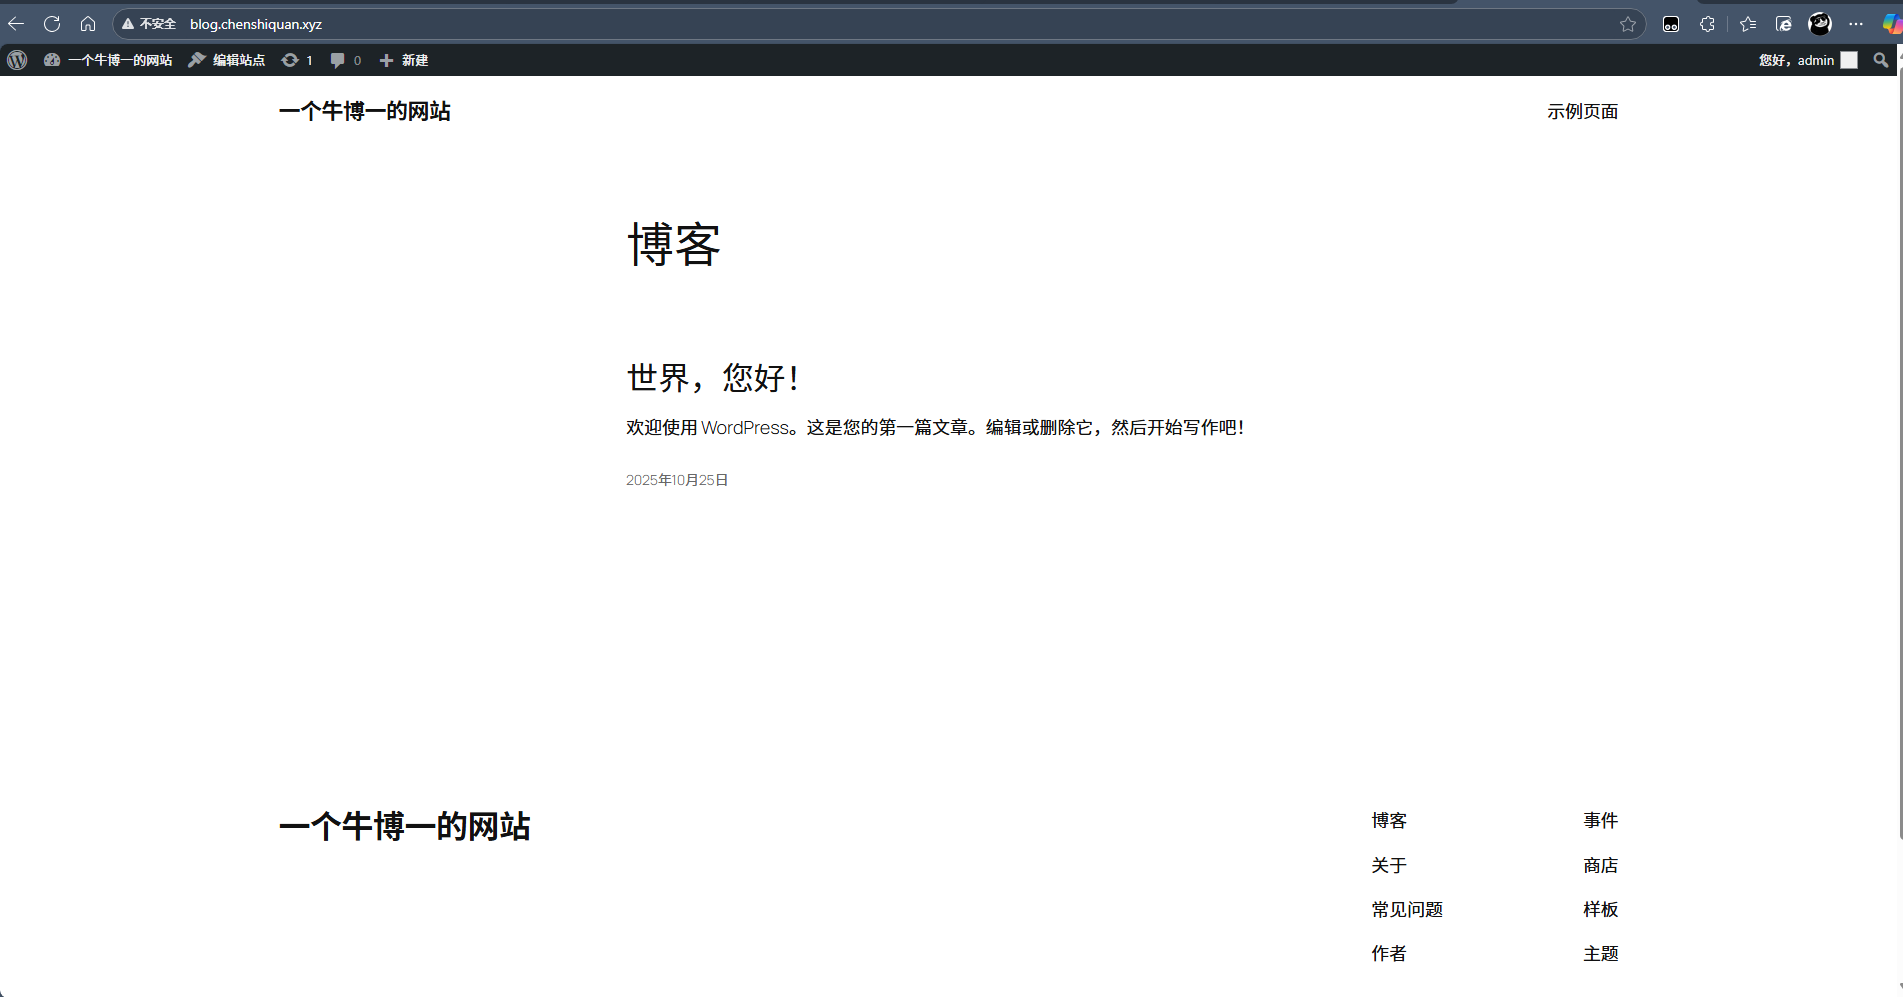
如果别人可以访问你,那这个页面就是他所看到的
(5)web01挂载共享目录
#1.先创建一个目录存放用户上传的内容
mkdir /app/code/blog/wp-content/uploads
#4.挂载nfs共享目录,并永久挂载
echo "nfs01:/data /app/code/blog/wp-content/uploads/ nfs defaults 0 0" >> /etc/fstab
mount -a
#5.查看
df  -h /app/code/blog/wp-content/uploads/
(5)上传图片测试
在wordpress控制台媒体库中上传图片
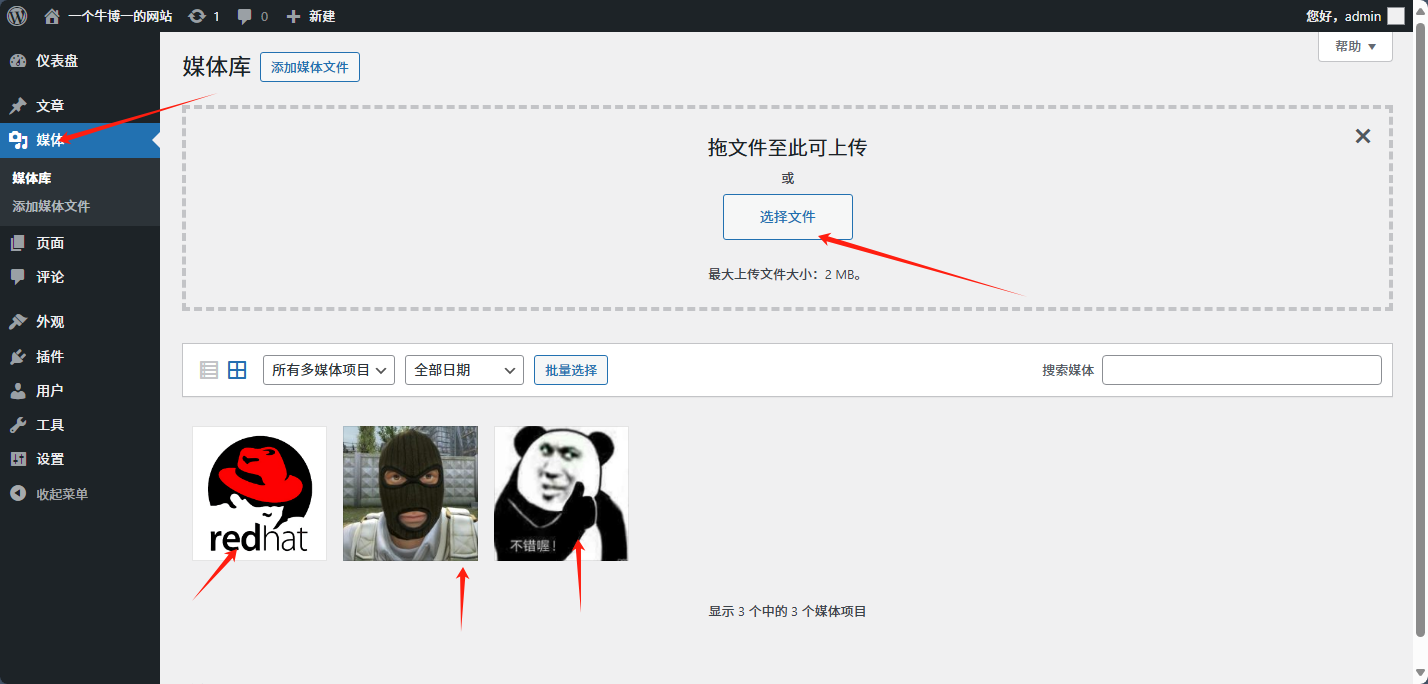
查看同步情况,web01 -> nfs01 -> backup
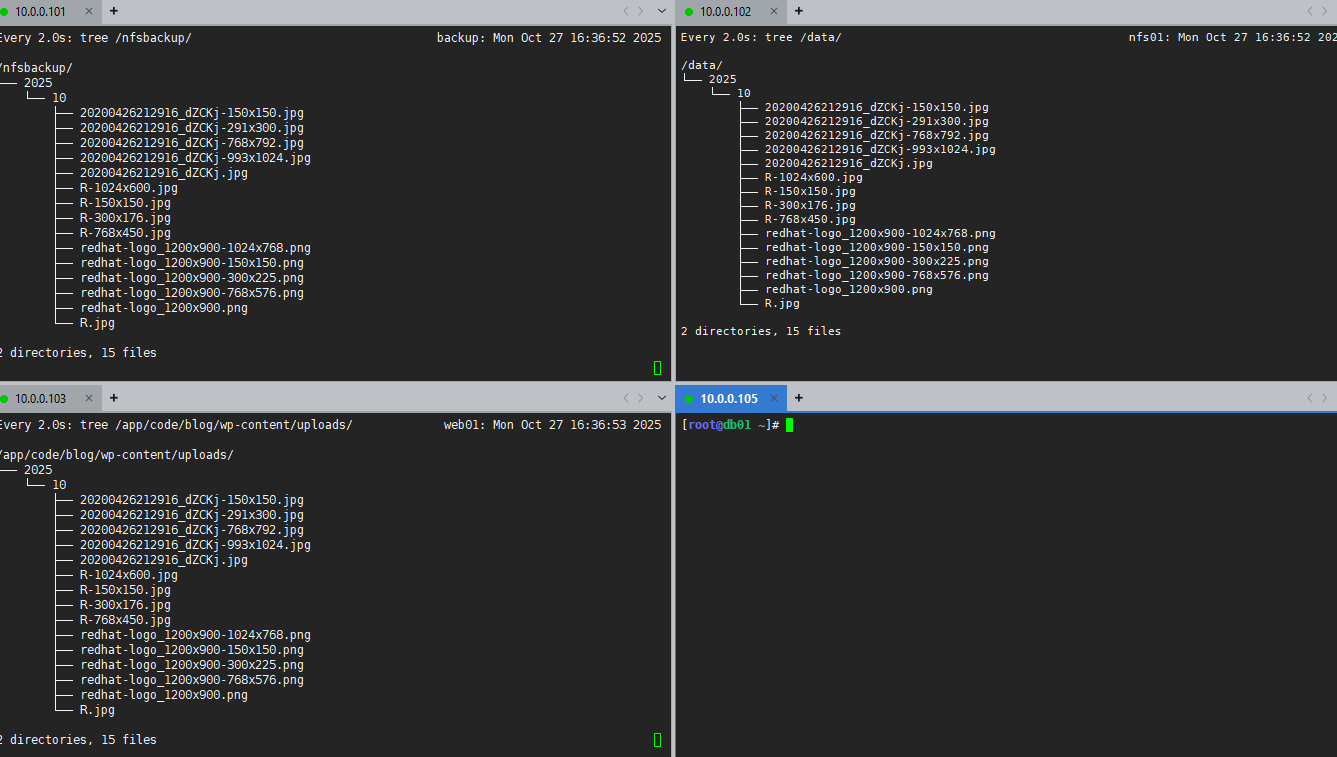
出现的顺序 web01 -> nfs01 -> backup每隔1小时同步到异地备份服务器中,异地备份服务器21:00邮件发送备份内容
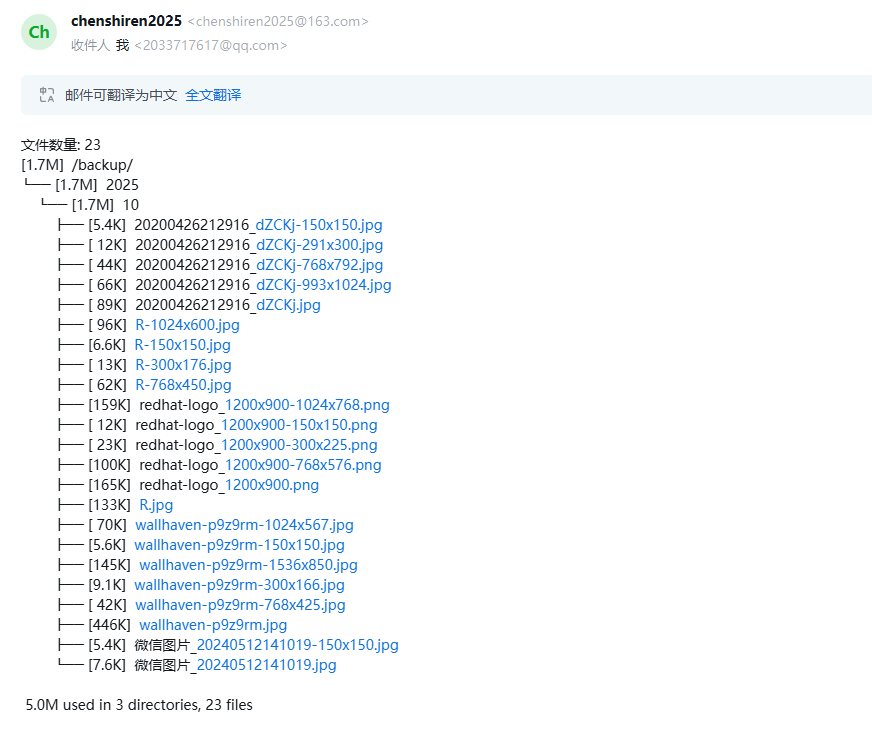
(6)配置web02站点目录和挂载nfs共享目录
#1.web01节点打包/app/code/blog目录发送给web02,排除/app/..../wp-content/uploads目录
[root@web01 ~]# tar -zcf blog.tar.gz --exclude=/app/code/blog/wp-content/uploads/* /app/code/blog/
[root@web01 ~]# scp blog.tar.gz root@web02:`pwd`
#2.web01发送nginx站点文件发送给web02
[root@web01 ~]# cd /etc/nginx/conf.d/
[root@web01 /etc/nginx/conf.d]# scp myblog.chenshiquan.xyz.conf root@web02:`pwd`
#3.web02解压站点目录
[root@web02 ~]# tar -zxvf blog.tar.gz -C /
#4.挂载nfs共享目录,并永久挂载
echo "nfs01:/data /app/code/blog/wp-content/uploads/ nfs defaults 0 0" >> /etc/fstab
mount -a
#4.检查语法
nginx -t
#5.重新加载nginx服务
systemctl reload nginx
(7)抓包查看web01,web02
windows添加hosts解析:10.0.0.103 myblog.chenshiquan.xyz
访问myblog.chenshiquan.xyz,使用wireshark抓包,过滤http

注释10.0.0.103 myblog.chenshiquan.xyz,添加10.0.0.104 myblog.chenshiquan.xyz
访问myblog.chenshiquan.xyz(记得用无痕浏览器)使用wireshark抓包,过滤http

二、给web集群接入负载均衡
(1)lb01,lb02安装nginx
#1.使用web01给lb01,lb02 传nginx源
[root@web01 ~]# cd /etc/yum.repos.d/
[root@web01 /etc/yum.repos.d]# scp nginx.repo root@lb01:`pwd`
[root@web01 /etc/yum.repos.d]# scp nginx.repo root@lb02:`pwd`
#2.lb01,lb02节点安装nginx1.28
yum install -y nginx-1:1.28.0-1.el8.ngx.x86_64
#3.lb01,lb02编写负载均衡到web01,web02
cat > /etc/nginx/conf.d/myblog.chenshiquan.xyz.conf  <<'EOF'
upstream web01_web02_lb{
	server 10.0.0.103:80;
	server 10.0.0.104:80;
}
server {
	listen 80;
	error_log /var/log/nginx/error-lb-myblog.log notice;
	access_log /var/log/nginx/access-lb-myblog.log main;
	server_name myblog.chenshiquan.xyz;
	location / {
		proxy_pass http://web01_web02_lb;
		proxy_set_header Host $host;
		proxy_set_header X-Forwarded-For $proxy_add_x_forwarded_for;
		proxy_set_header X-Real-Ip $remote_addr;
	}
}
EOF
#4.检查nginx语法
nginx -t
#5.启动nginx并开机自启
systemctl enable --now nginx
#6.放行负载均衡的80端口
firewall-cmd --add-port=80/tcp --permanent
firewall-cmd --reload
(2)测试lb01,lb02是否能够将请求负载到web01,web02
删除之前添加的myblog.csq.xyz的解析,再windows添加hosts解析:10.0.0.106 myblog.chenshiquan.xyz
访问myblog.chenshiquan.xyz

使用wireshark抓包,过滤http,多刷新几次,看看是否访问能负载到web01和web02
注释10.0.0.106 myblog.chenshiquan.xyz,添加10.0.0.107 myblog.chenshiquan.xyz
访问myblog.chenshiquan.xyz(记得用无痕浏览器)

三、KeepAlived实现nginx高可用
(1)lb01/lb02安装keepalived并配置
#1.安装keepalived
yum install -y keepalived
#2.配置邮件
#安装s-nail和postfix,记得开启服务
yum install s-nail postfix
systemctl enable --now postfix.service
vim /etc/s-nail.rc
###################SMPT设置####################
set v15-compat                     #版本所必须,v15版本的配置格式
set smtp-auth=login                #验证方式为登陆
##############################################
#设置发件人,昵称<邮箱完整格式>
set from="csq<chenshiren2025@163.com>"
#配置发送邮件服务器,SSL加密,端口465或587
#设置smtp服务器端口465
#用户名为邮箱地址,密码为授权码
#端口465配置 163使用
set mta=smtps://chenshiren2025:授权码@smtp.163.com:465
###############################################

#3.修改keepalived配置文件
#keepalived配置实现nginx故障,自动切换到lb02
#MASTER
! Configuration File for keepalived
global_defs {
   router_id lb01
}
vrrp_script check_nginx {
	script /server/scripts/check_nginx.sh
	interval 2
	weight  -60
	user root
}
vrrp_instance vip_3 {
    state MASTER
    interface ens33
    virtual_router_id 51
    priority 100
    advert_int 1
    authentication {
        auth_type PASS
        auth_pass 1111
    }
    virtual_ipaddress {
        10.0.0.5/24 dev ens33 label ens33:0
    }
    notify_master "/server/scripts/notify.sh master"
    notify_backup "/server/scripts/notify.sh backup"
    notify_fault "/server/scripts/notify.sh fault"
track_script {
	check_nginx
	}
}


#BACKUP
! Configuration File for keepalived
global_defs {
   router_id lb02
}
vrrp_script check_nginx {
	script /server/scripts/check_nginx.sh
	interval 2
	weight  -30
	user root
}
vrrp_instance vip_3 {
    state BACKUP
    interface ens33
    virtual_router_id 51
    priority 50
    advert_int 1
    authentication {
        auth_type PASS
        auth_pass 1111
    }
    virtual_ipaddress {
        10.0.0.5/24 dev ens33 label ens33:0
    }
    notify_master "/server/scripts/notify.sh master"
    notify_backup "/server/scripts/notify.sh backup"
    notify_fault "/server/scripts/notify.sh fault"
track_script {
	check_nginx
	}
}

#lb01/lb02设置通知脚本(记得安装psmisc软件包,脚本中使用了killall命令)
#发送邮件的前提是你配置好了发送邮件的功能
cat > /server/scripts/check_nginx.sh <<EOF
#!/bin/bash
killall -0 nginx || systemctl restart nginx
EOF

#设置执行权限
chmod +x /server/scripts/check_nginx.sh


#创建通知脚本(不要把脚本放在链接目录里面,脚本会不执行)
cat > /server/scripts/notify.sh <<'EOF'
#!/bin/bash
#
contact='2033717617@qq.com'
notify() {
 mailsubject="$(hostname) 成为${1},vip漂移"
 mailbody="$(date +'%F %T'): vrrp 切换, $(hostname) 切换为 $1"
 echo "$mailbody" | s-nail -s "$mailsubject" $contact
}
case $1 in
master)
 notify master
 ;;
backup)
 notify backup
 ;;
fault)
 notify fault
 ;;
*)
 echo "Usage: $(basename $0) {master|backup|fault}"
 exit 1
 ;;
esac
EOF
#赋予通知脚本执行权限
chmod +x /server/scripts/notify.sh

#重启生效
systemctl restart keepalived

#允许VRRP协议
firewall-cmd --add-protocol=vrrp --permanent
firewall-cmd --reload
#设置keepalived开机自启并开启
systemctl enable --now keepalived
(2)测试:抓包查看keepalived主备节点的高可用心跳检测
主节点每秒会给备节点BACKUP发送我还存活的报文

报文内容
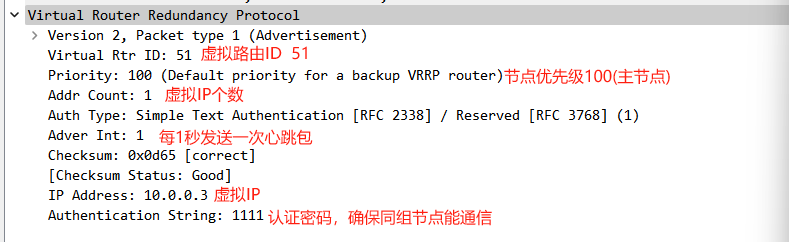
备节点会持续监听这些报文,若超过1秒以上未收到就会判定主节点故障,进而触发主备切换,接管虚拟 IP(VIP)以保障服务连续性
模拟master节点故障
#修改nginx配置文件,随便修改错一下
#然后进行重新加载nginx
systemctl restart nginx
Job for nginx.service failed because the control process exited with error code.
See "systemctl status nginx.service" and "journalctl -xe" for details
查看邮件

nginx重新启动成功后

(3)测试网站高可用
windows注释掉所有myblog.chenshiquan.xyz的hosts解析,添加一条10.0.0.3 myblog.chenshiquan.xyz解析
使用wireshark抓包,过滤http,刷新两次,能负载到每个节点

#结束lb01的负载均衡
[root@lb01 ~]# pkill nginx
#网站依然可用,切换到负载均衡备节点

四、实现web集群之间的phpMyAdmin会话共享
直接使用 phpMyAdmin(默认方式)
- 核心原理:PHP 会话(Session)默认存储在 当前 Web 节点的本地文件(如
/tmp/sess_xxx)。 - 运行逻辑:无负载均衡时,单节点独立提供服务,Session 本地有效;若有 Web 集群 + 负载均衡,用户请求可能被分发到不同节点,新节点无本地 Session,导致登录失效、频繁重新登录。
方法 1:一致性哈希(会话绑定)共享 phpMyAdmin
- 核心原理:负载均衡层(如 Nginx)通过一致性哈希算法,将同一用户的所有请求固定分发到同一 Web 节点。
- 运行逻辑:无需共享 Session 数据,因为用户请求始终指向同一个节点,该节点的本地 Session 一直有效;哈希算法确保用户与节点的绑定关系稳定(除非节点故障)。
方法 2:Redis 会话保持(数据共享)共享 phpMyAdmin
- 核心原理:所有 Web 节点共享同一个 Redis 服务,Session 数据统一存储在 Redis 中(而非本地文件)。
- 运行逻辑:负载均衡可随机 / 轮询分发请求到任意 Web 节点,节点接收请求后,从 Redis 读取 / 写入 Session 数据,实现跨节点会话同步
(1)方法1:使用一致性hash会话共享phpmyadmin
这种方法是将session存在本地
在web01配置phpmyadmin
#1.上传phpmyadmin
#2.设置phpmyadmin站点配置文件
cat > /etc/nginx/conf.d/db.chenshiquan.xyz.conf <<'EOF'
server {
	listen 80;
	server_name db.chenshiquan.xyz;
	client_max_body_size 10M;
	access_log /var/log/nginx/access-db.chenshiquan.xyz main;
	error_log /var/log/nginx/error-db.chenshiquan.xyz notice;
	root /app/code/db/;
	location / {
		index index.php;
	}
	location ~ \.php$ {
		fastcgi_pass 127.0.0.1:9000;
		fastcgi_index index.php;
		fastcgi_param SCRIPT_FILENAME $document_root$fastcgi_script_name;
		include fastcgi_params;
	}
}
EOF
#创建目录存放站点文件
mkdir -p /app/code/db/

#解压phpMyAdmin并把文件移动到站点目录下
unzip phpMyAdmin-5.2.3-all-languages.zip
mv phpMyAdmin-5.2.3-all-languages/* /app/code/db/

#修改config.sample.inc.php为config.inc.php
mv /app/code/db/{config.sample.inc.php,config.inc.php}

#修改config.inc.php的host,修改为数据库IP
grep "host" /app/code/db/config.inc.php
$cfg['Servers'][$i]['host'] = '172.16.1.105';

#检查nginx语法
nginx -t

#重新加载nginx
systemctl reload nginx
在web02配置phpmyadmin
#1.传输web01的phpmyadmin站点目录
[root@web01 ~]# tar -zcf db.tar.gz  /app/code/db/
[root@web01 ~]# scp -r db.tar.gz root@web02:/root/
#2.web02解压到根
[root@web02 ~]# tar -zxvf db.tar.gz -C /

#3.传输nginx站点配置文件
[root@web01 ~]# cd /etc/nginx/conf.d/
[root@web01 /etc/nginx/conf.d]# scp  db.csq.xyz.conf root@web02:`pwd`

#4.检查语法重新加载nginx
[root@web01 ~]# nginx -t
nginx: the configuration file /etc/nginx/nginx.conf syntax is ok
nginx: configuration file /etc/nginx/nginx.conf test is successful
[root@web01 ~]# systemctl reload nginx
在负载均衡节点(lb01,lb02)配置一致性hash
cat > /etc/nginx/conf.d/db.chenshiquan.xyz.conf <<'EOF'
upstream web01_web02_db{
	hash $remote_addr consistent;
	server 10.0.0.103:80;
	server 10.0.0.104:80;
}
server {
	listen 80;
	error_log /var/log/nginx/error-db-lb.log notice;
	access_log /var/log/nginx/access-db-lb.log main;
	server_name db.chenshiquan.xyz;
	location / {
		proxy_pass http://web01_web02_db;
		proxy_set_header Host $host;
		proxy_set_header X-Forwarded-For $proxy_add_x_forwarded_for;
		proxy_set_header X-Real-Ip $remote_addr;
	}
}
EOF
#检查nginx语法
nginx -t
#重新加载nginx
systemctl reload nginx
在数据库中添加一个特权用户csq,用于访问phpmyadmin
#登陆数据库
mysql -uroot -pAbc@1234
#数据库添加访问phpmyadmin的用户csq
CREATE USER 'csq'@'172.16.1.%' IDENTIFIED BY 'Abc@1234';
GRANT ALL  ON *.* TO 'csq'@'172.16.1.%';
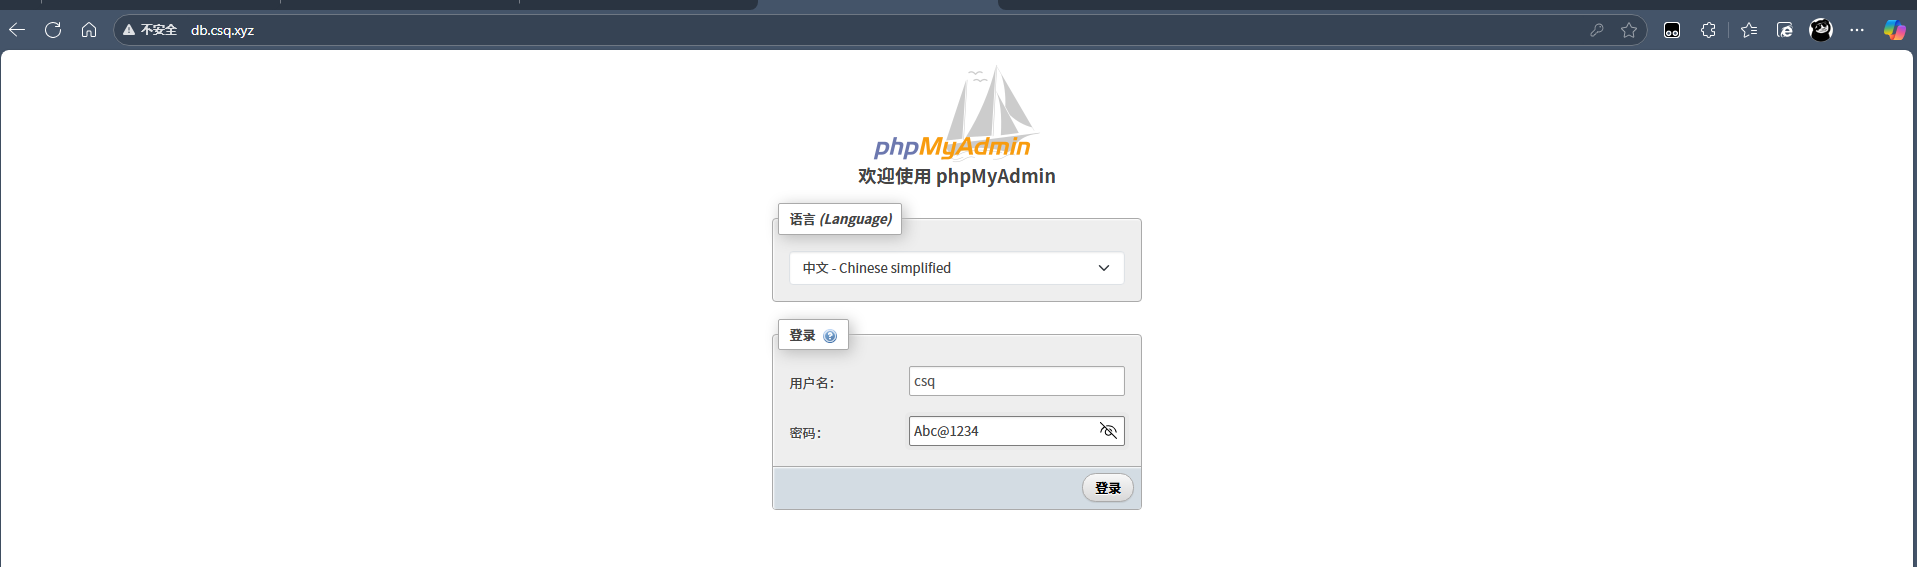
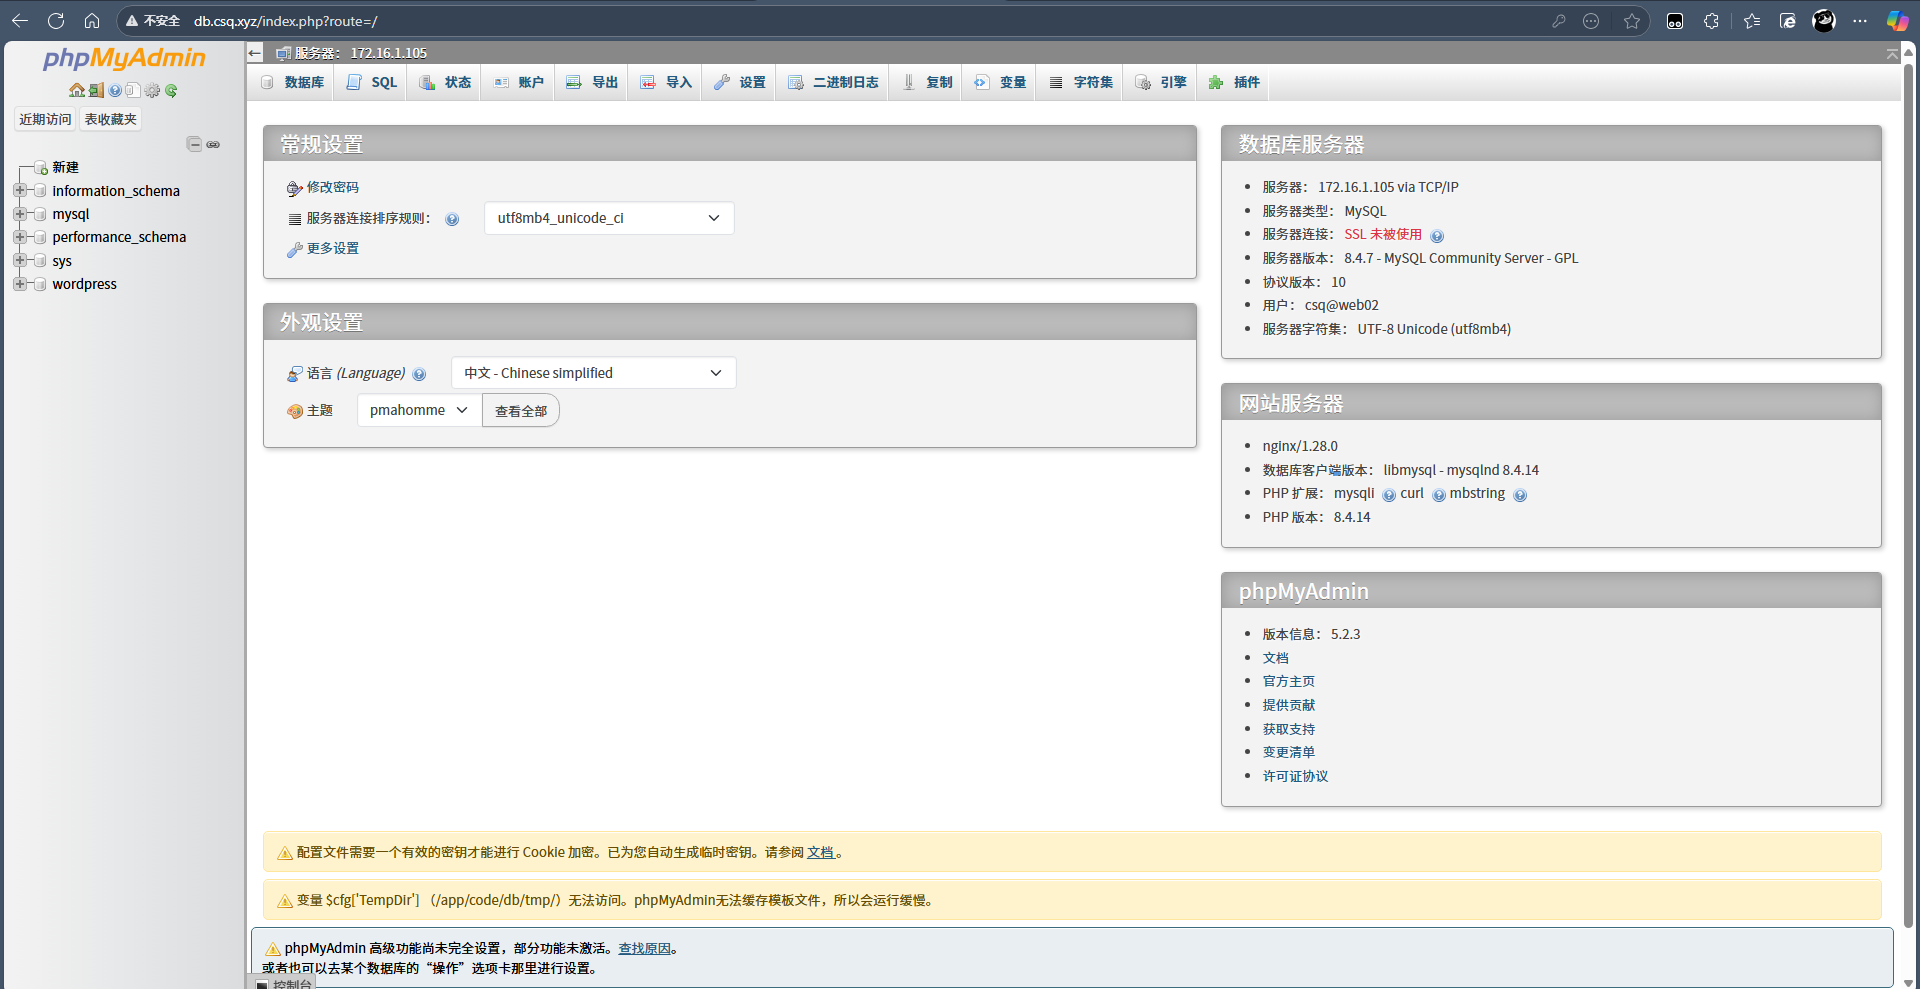
windows做hosts解析:10.0.0.3 db.csq.xyz,浏览器访问db.csq.xyz
(2)方法2:使用会话保持服务(redis)共享phpmyadmin
(1)编译安装redis扩展模块(web01/web02)
由于我是通过编译安装方式安装的php,需要添加redis扩展模块,需要通过PHP扩展的源码编译安装
核心思路
下载扩展源码 → 用phpize生成编译配置 → 编译安装 → 配置php.ini加载扩展 → 重启PHP服务
#1.确认phpize路径(编译扩展的必备工具)
#编译安装的 PHP,phpize通常在 PHP 安装目录的bin文件夹下
find /usr/local/ -name phpize

#2.下载redis扩展源码
## 下载源码包(以6.2.0版本为例,可到https://pecl.php.net/package/redis查看最新版)
wget https://pecl.php.net/get/redis-6.2.0.tgz

#3.解压
tar -zxvf redis-6.2.0.tgz

#4.进入编译目录使用phpize生成编译配置
cd redis-6.2.0/
phpize
#5.执行后会生成configure文件,此时配置编译参数(指定PHP的配置文件路径)
./configure --with-php-config=/usr/local/php/bin/php-config

#6.编译
make -j2

#7.安装
make install

#8.配置php.ini加载 Redis 扩展
# 在文件末尾添加以下内容(扩展路径替换为make install输出的路径)
echo  "extension=/usr/local/php-8.4.14/lib/php/extensions/no-debug-non-zts-20240924/redis.so" >> /usr/local/php/etc/php.ini

#9.复制www.conf为db.conf,修改db.conf listen
cd /usr/local/php/etc/php-fpm.d/
cp www.conf db.conf
vim db.conf
#修改如下内容,[www]修改为如下db
[db]
listen = 127.0.0.1:9001
php_value[session.save_handler] = redis
php_value[session.save_path] = tcp://172.16.1.105:6379

#10.修改nginx的站点配置文件db.csq.xyz
grep fastcgi_pass /etc/nginx/conf.d/db.chenshiquan.xyz.conf
fastcgi_pass 127.0.0.1:9001;


#10.检查php语法和nginx语法
php-fpm -t && nginx -t

#11.重新加载php、nginx
systemctl restart php-fpm.service nginx

#12.检查php模块是否有redis
php -m |grep redis
(2)db01安装redis并进行配置数据库IP
#安装redis
yum install -y redis
#配置数据库IP
grep -En '^(bind|protect)' /etc/redis.conf
87:bind 127.0.0.1 -::1 172.16.1.105
111:protected-mode no
#设置redis开启并开机自启
systemctl enable --now redis
#放行6379端口
firewall-cmd --add-port=6379/tcp --permanent
firewall-cmd --reload
(3)如果有设置负载均衡节点一致性hash,进行注释
cat > /etc/nginx/conf.d/db.chenshiquan.xyz.conf <<'EOF'
upstream web01_web02_db{
	#hash $remote_addr consistent;
	server 10.0.0.103:80;
	server 10.0.0.104:80;
}
server {
	listen 80;
	error_log /var/log/nginx/error-db-lb.log notice;
	access_log /var/log/nginx/access-db-lb.log main;
	server_name db.chenshiquan.xyz;
	location / {
		proxy_pass http://web01_web02_db;
		proxy_set_header Host $host;
		proxy_set_header X-Forwarded-For $proxy_add_x_forwarded_for;
		proxy_set_header X-Real-Ip $remote_addr;
	}
}
EOF
#检查nginx 语法并重载nginx服务
systemctl reload nginx
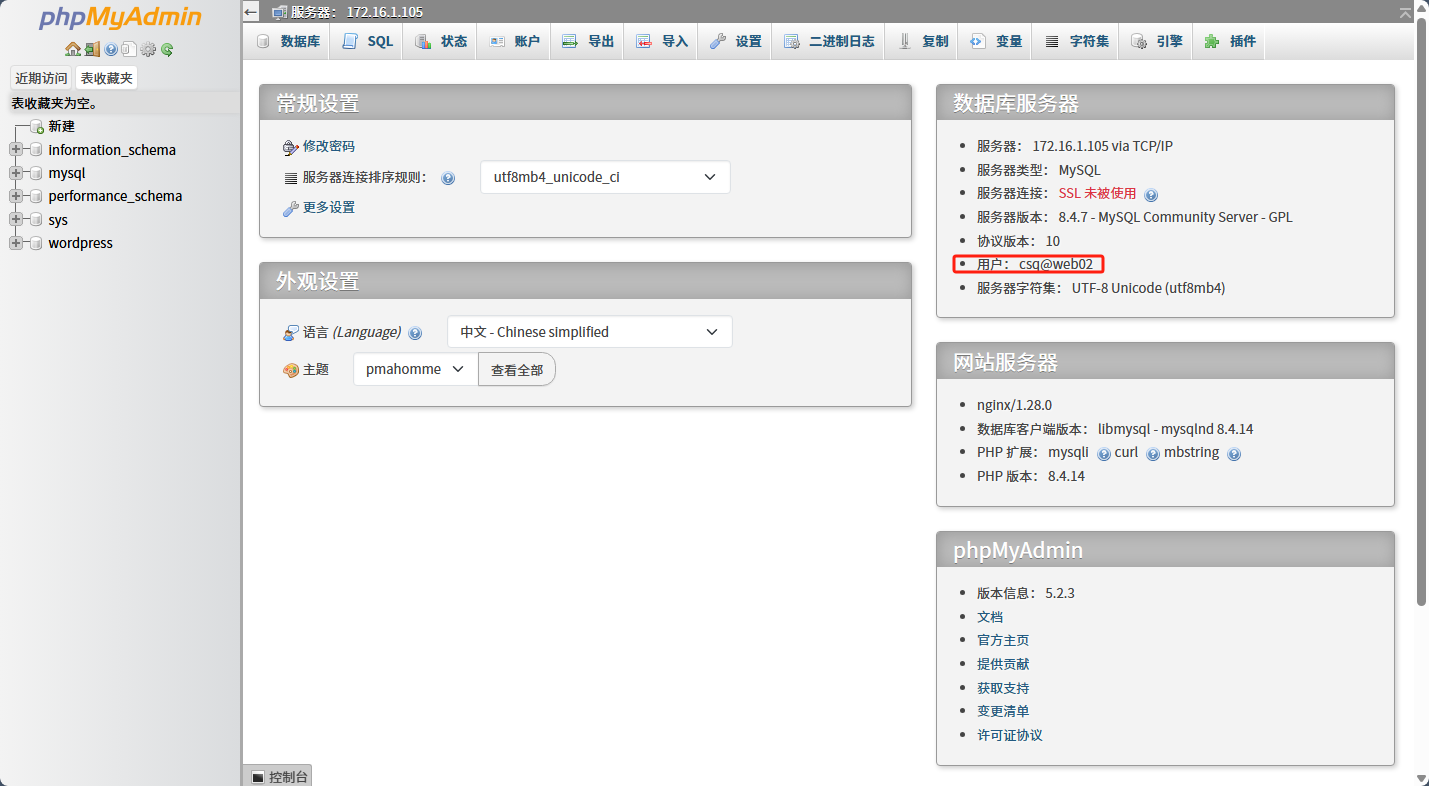
windows添加hosts解析:10.0.0.3 db.chenshiquan.xyz,访问http://db.chenshiquan.xyz/
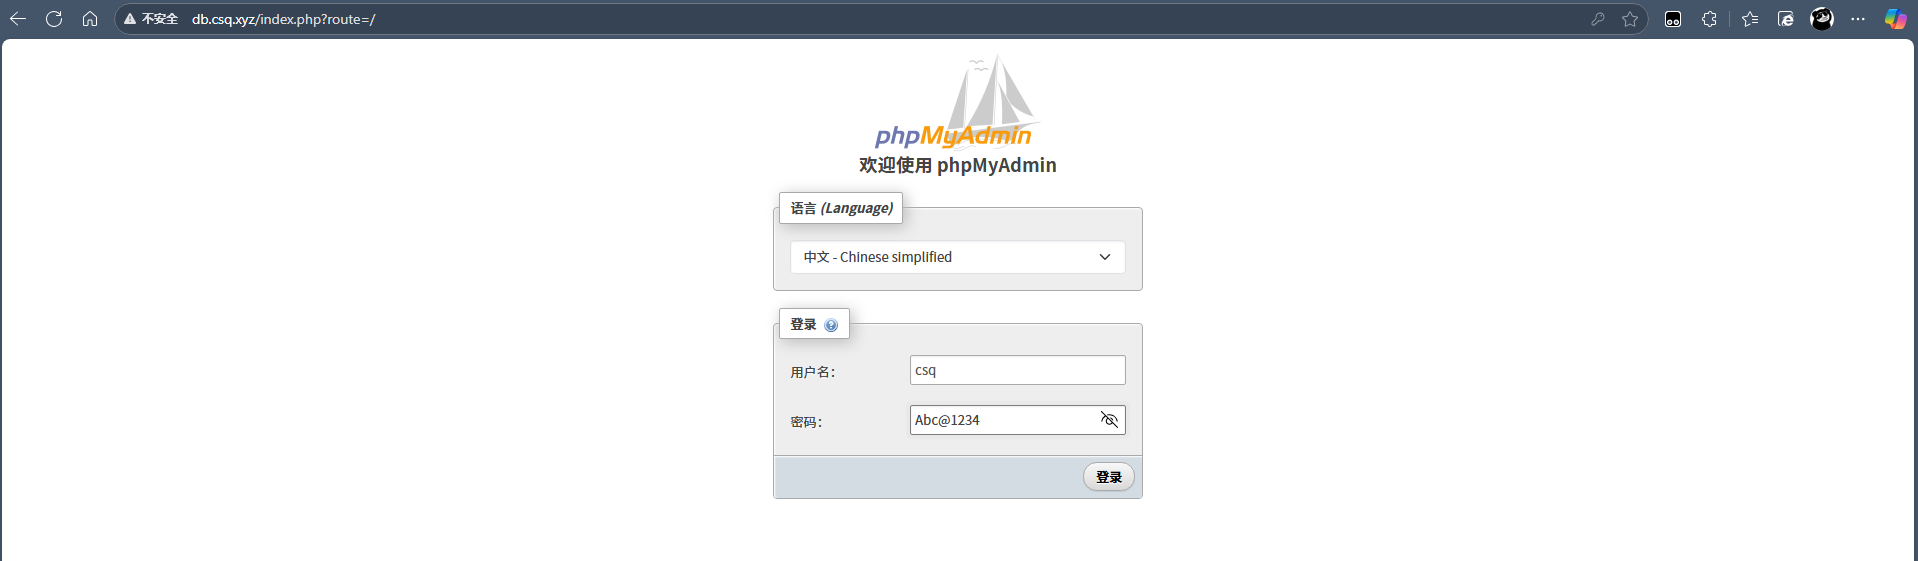
多次刷新可以发现,用户可以在不同节点中来回切换,这是因为redis存储了用户的session
五、集群添加https
(1)证书申请
- 阿里云:免费20个
- 腾讯云:免费50个
(2)下载证书
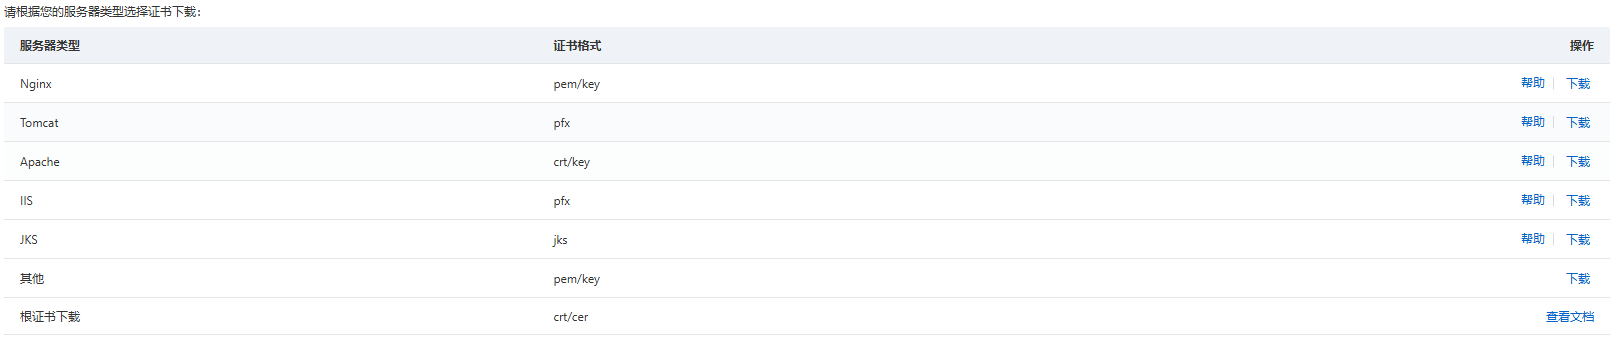
- 根据服务器类型下载证书文件
(3)配置证书
负载均衡(lb01/lb02)节点配置证书
#负载均衡配置证书
cat > /etc/nginx/conf.d/myblog.chenshiquan.xyz.conf <<'EOF'
upstream web01_web02_lb{
	server 10.0.0.103:443;
	server 10.0.0.104:443;
}
server {
	listen 80;
	server_name myblog.chenshiquan.xyz;
	return 302 https://myblog.chenshiquan.xyz$request_uri;

}
server {
	listen 443 ssl;
	server_name myblog.chenshiquan.xyz;
	ssl_certificate     /etc/nginx/keys/myblog.chenshiquan.xyz.pem;
        ssl_certificate_key /etc/nginx/keys/myblog.chenshiquan.xyz.key;
	ssl_ciphers AES128-SHA:AES256-SHA:RC4-SHA:DES-CBC3-SHA:RC4-MD5:!aNULL:!eNULL:!EXPORT:!IDES:!RC4:!MD5;
	ssl_protocols TLSv1.2 TLSv1.3;
	ssl_session_cache shared:SSL:10m;
	ssl_session_timeout 10m;
	error_log /var/log/nginx/error-lb-myblog.log notice;
	access_log /var/log/nginx/access-lb-myblog.log main;
	location / {
		proxy_pass https://web01_web02_lb;
		proxy_set_header Host $host;
		proxy_set_header X-Forwarded-For $proxy_add_x_forwarded_for;
		proxy_set_header X-Real-Ip $remote_addr;
	}
}
EOF
#配置证书到指定目录
unzip 21267849_myblog.chenshiquan.xyz_nginx.zip -d /etc/nginx/keys/
#放行443端口
firewall-cmd --add-port=443/tcp --permanent
firewall-cmd --reload
#检查nginx语法
nginx -t
#重启nginx
systemctl restart nginx
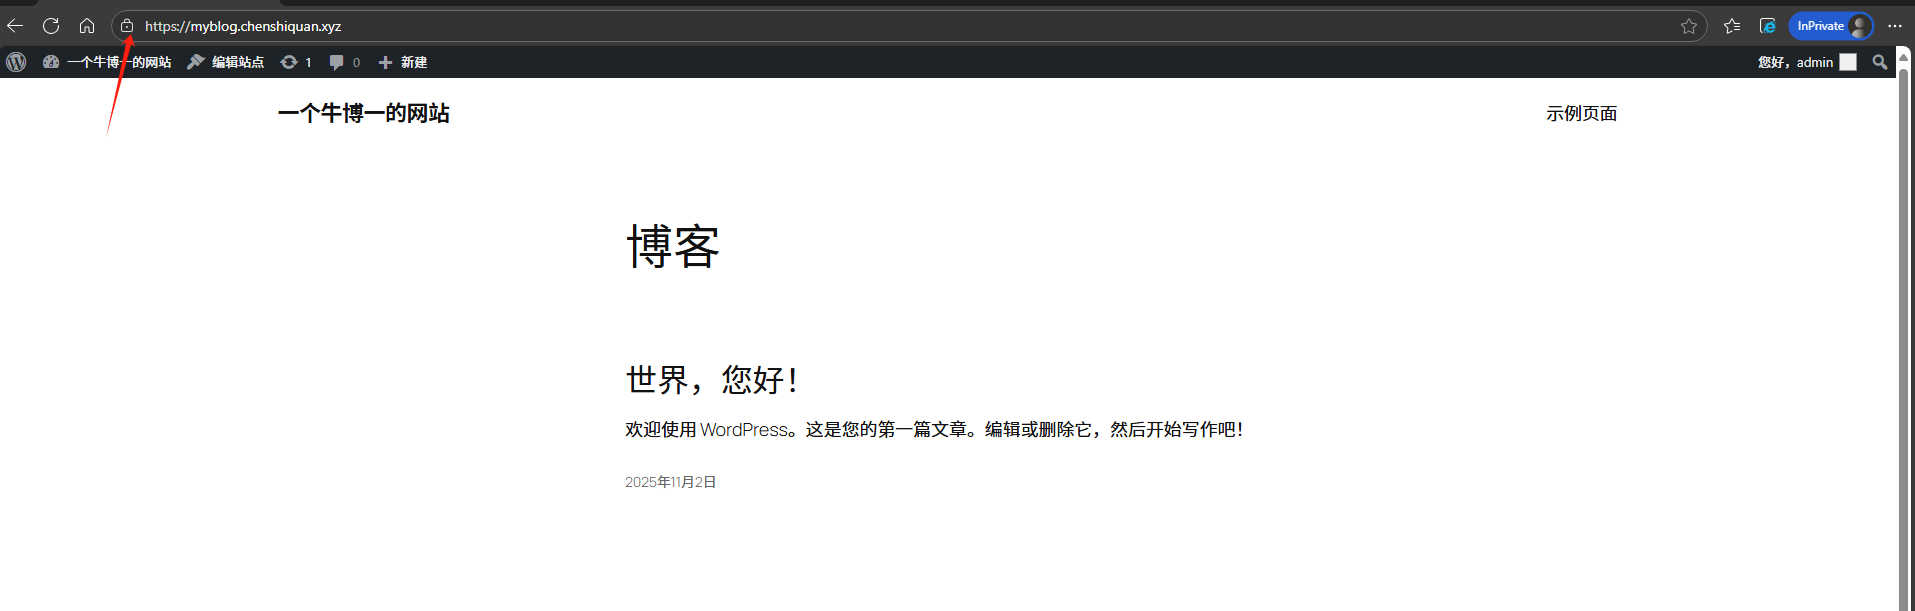
web集群(web01/web02)配置证书
cat > /etc/nginx/conf.d/myblog.chenshiquan.xyz.conf <<'EOF'
server {
	listen 443 ssl;
	server_name myblog.chenshiquan.xyz;
	ssl_certificate     /etc/nginx/keys/myblog.chenshiquan.xyz.pem;
        ssl_certificate_key /etc/nginx/keys/myblog.chenshiquan.xyz.key;
	ssl_ciphers AES128-SHA:AES256-SHA:RC4-SHA:DES-CBC3-SHA:RC4-MD5:!aNULL:!eNULL:!EXPORT:!IDES:!RC4:!MD5;
        ssl_protocols TLSv1.1 TLSv1.2 TLSv1.3;
        ssl_session_cache shared:SSL:10m;
        ssl_session_timeout 10m;
	client_max_body_size 10M;
	access_log /var/log/nginx/access-myblog.chenshiquan.xyz main;
	error_log /var/log/nginx/error-myblog.chenshiquan.xyz notice;
	root /app/code/blog/;
	location / {
		index index.php;
	}
	location ~ \.php$ {
		fastcgi_pass 127.0.0.1:9000;
		fastcgi_index index.php;
		fastcgi_param SCRIPT_FILENAME $document_root$fastcgi_script_name;
		include fastcgi_params;
	}
}


EOF
#配置证书到指定目录
unzip 21267849_myblog.chenshiquan.xyz_nginx.zip -d /etc/nginx/keys/
#放行443端口
firewall-cmd --add-port=443/tcp --permanent
firewall-cmd --reload
#检查nginx语法
nginx -t
#重启nginx
systemctl restart nginx
(4)监控证书是否过期,域名过期时间
#!/bin/bash
##############################################################
# File Name:/server/scripts/check_yuming_and_zhengshu.sh
# Version:V1.0
# Author:csq
# Organization: www.chenshiquan.xyz
# Desc:
##############################################################
#vars
yuming=chenshiquan.xyz
zhengshu=myblog.chenshiquan.xyz
virt_ip=10.0.0.5

nowtime=`date +%s`
yuming_time_end=`whois ${yuming} | grep -i expir | awk -F': ' '{print $2}'`
yuming_time_end_seconds=`date +%s -d "${yuming_time_end}"`

zhengshu_time_end=`curl -s -v -o /dev/null -H Host:${zhengshu} https://${virt_ip}  |&  grep expire | awk -F': '  '{print $2}'`
zhengshu_time_end_seconds=`date +%s -d "${zhengshu_time_end}"`

yuming_time=`echo "($yuming_time_end_seconds - $nowtime)/86400" |bc`
zhengshu_time=`echo "($zhengshu_time_end_seconds - $nowtime)/86400" |bc`

echo "域名还剩: ${yuming_time} 天过期"
echo "证书还剩: ${zhengshu_time} 天过期"
[root@lb01 ~]# bash /server/scripts/check_yuming_and_zhengshu.sh
域名还剩: 308 天过期
证书还剩: 89 天过期
解决架构搭建中的问题
(1)不知道用户上传的图片在哪
随便发布一篇文章,上传一个图片,查看这个图片上传在本地哪个目录下

(2)上传主题(413)上传内容过大
解决413 request Entity too Large
#在站点目录server中添加(配置客户端请求体最大值)
client_max_body_size 20m;
#在php.ini中修改
grep -E '^(upload_max|post_max)' /usr/local/php/etc/php.ini
post_max_size = 20M
upload_max_filesize = 20M
(3)设置完固定链接无法打开文章404问题
#在站点配置文件,server中添加如下内容
		if (-f $request_filename/index.html){
            rewrite (.*) $1/index.html break;
        }
        if (-f $request_filename/index.php){
            rewrite (.*) $1/index.php;
        }
        if (!-f $request_filename){
            rewrite (.*) /index.php;
        }
更多推荐



 1
1 0
0- 0


 已为社区贡献3条内容

所有评论(0)