
win10下安装cuda10.0+pytorch1.2+torchvision0.4.0
·
1.先安装 cuda 和 cudnn
到nvidia官网下载cuda 10.0
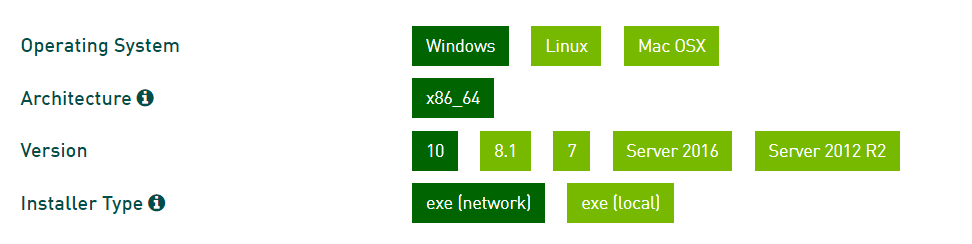
cuda 10.0
cuda 安装完以后 安装cudnn 到nvidia官网下载 cudnn https://developer.nvidia.com/rdp/cudnn-archive
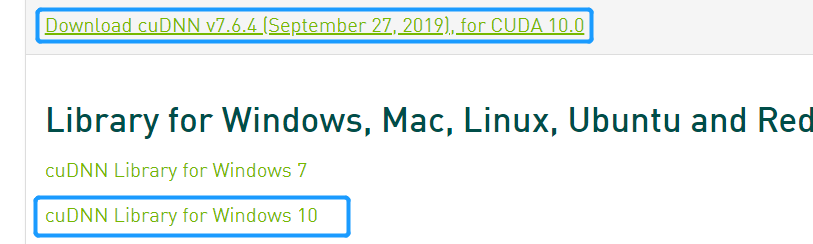
下载cudnn以后解压缩

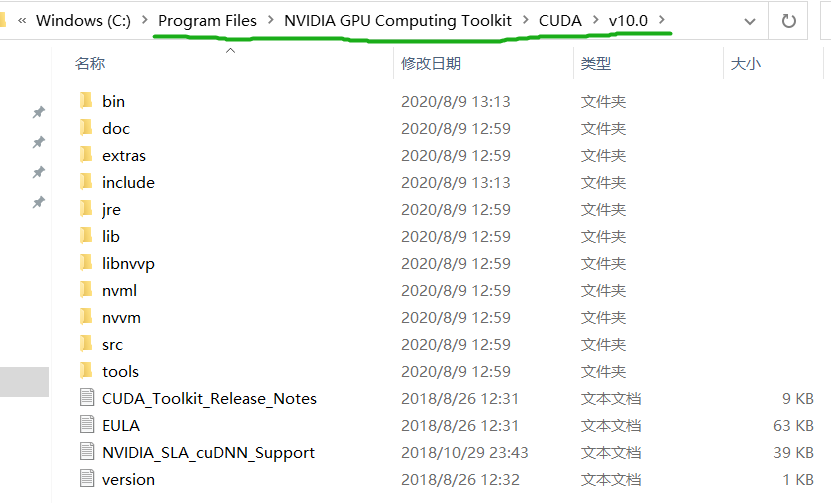
cudnn解压缩
放到cuda的安装目录下面
2.安装anaconda
anaconda 官网下载 anaconda https://www.anaconda.com/products/individual
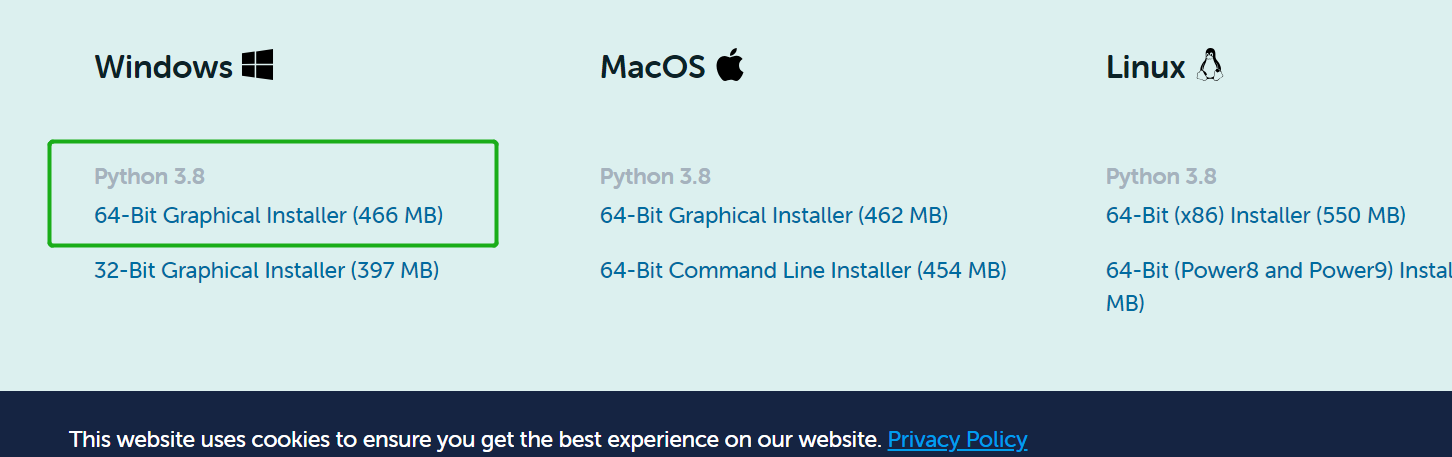
anaconda下载
3.更换国内镜像
conda 替换清华源 如果conda 不替换清华源走国外路线 会很慢
conda config --add channels https://mirrors.tuna.tsinghua.edu.cn/anaconda/cloud/conda-forge/

conda config --add channels https://mirrors.tuna.tsinghua.edu.cn/anaconda/pkgs/free/

conda config --add channels https://mirrors.tuna.tsinghua.edu.cn/anaconda/pkgs/main/

conda config --append channels https://mirrors.tuna.tsinghua.edu.cn/anaconda/cloud/fastai/

conda config --append channels https://mirrors.tuna.tsinghua.edu.cn/anaconda/cloud/pytorch/

conda config --append channels https://mirrors.tuna.tsinghua.edu.cn/anaconda/cloud/bioconda/

conda config --set show_channel_urls yes
4.创建conda虚拟环境
由于python3.6+cuda10.0+pytorch1.2,容易安装,不容易出错。推荐
conda create -n AI_study python=3.6
其中,AI_study是虚拟环境名称
激活虚拟环境
conda activate AI_study
5.安装pytorch
conda install pytorch torchvision cudatoolkit=10.0
完成安装!!!
6.测试pytorch环境
(AI_study) C:\Users\67231>python
Python 3.6.12 |Anaconda, Inc.| (default, Sep  9 2020, 00:29:25) [MSC v.1916 64 bit (AMD64)] on win32
Type "help", "copyright", "credits" or "license" for more information.
>>> import torch
>>> torch.__version__
'1.2.0'
>>> torch.cuda.is_available()
True
>>> import torchvision
>>> torchvision.__version__
'0.4.0'
参考网址:
下载和安装cuda 10.0主要参考这篇文章
https://www.jianshu.com/p/097003ae75ab
更多推荐


 0
0 0
0- 0


 已为社区贡献5条内容

所有评论(0)