
ubuntu-jupyter环境搭建
文章目录
使用pip安装jupter-notebook
pip3 install --upgrade pip更新你的pip
pip3 install notebook -i https://pypi.tuna.tsinghua.edu.cn/simple
运行jupter-notebook
jupyter notebook
生成配置文件
jupyter notebook --generate-config

会在家目录.jupyter中生成配置文件
指定端口
jupyter notebook --port 9999
打开特定的notebook
jupyter notebook notebook.ipynb
配置文件相关
配置远程访问
修改jupyter_notebook_config.py文件
将c.NotebookApp.ip='localhost改为c.NotebookApp.ip='0.0.0.0'在防火墙允许8888端口的情况下,你可以通过局域网去访问
配置启动关闭浏览器
c.NotebookApp.open_browser = False
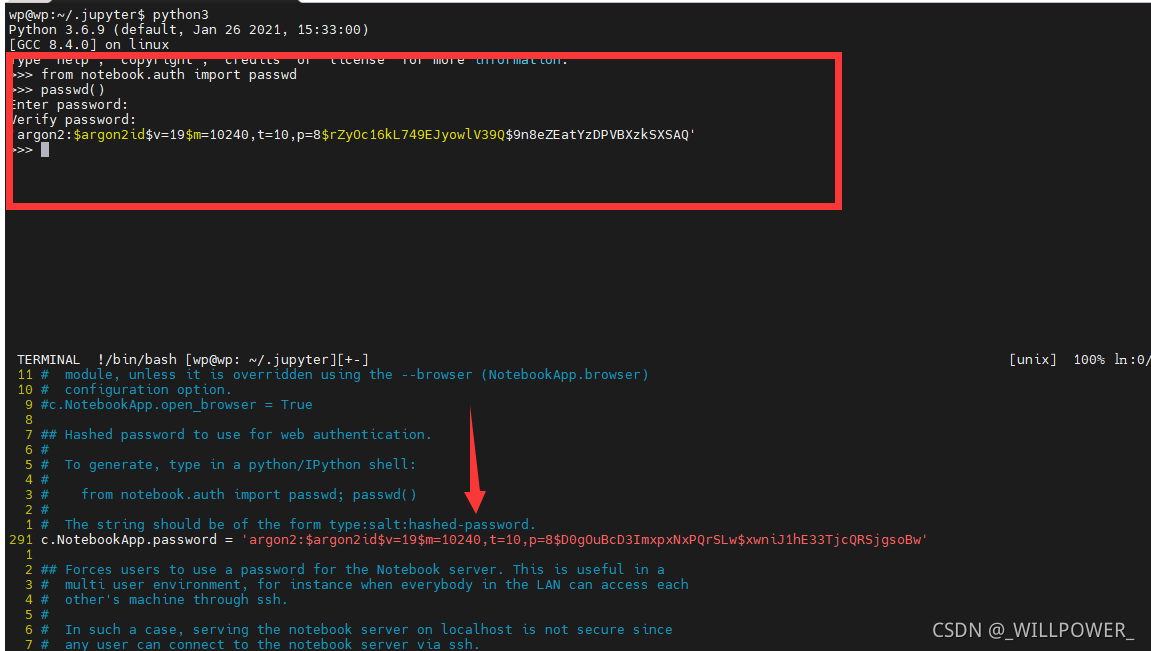
配置密码

根据说明,我们需要执行以上代码获取其加密的值,然后将其填入即可
一直开启服务器
使用screen即可
如果没有安装命令
sudo apt install screen
打开一个交互screen
screen -S notebook
然后开启notebook
jupyter notebook然后关闭窗口就行了
notebook补全
pip3 install jupyter_contrib_nbextensions
关闭notebook后
jupyter contrib nbextension install --user --skip-running-check
启动 Jupyter Notebook,勾选设置
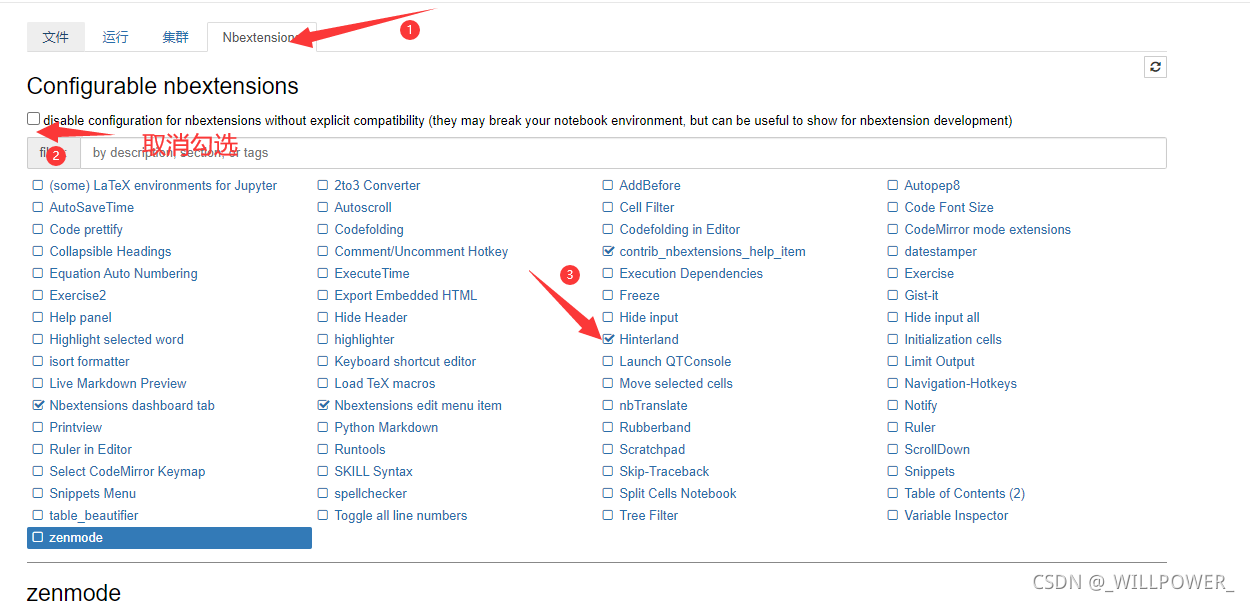
这个时候会报错
TypeError: __init__() got an unexpected keyword argument 'column'
参考Jupyter按tab键无法补全,而且报错TypeError: init() got an unexpected keyword argument ‘column‘的解决办法

pip3 install jedi==0.17 -i https://mirror.edu.cn/pypi/simple
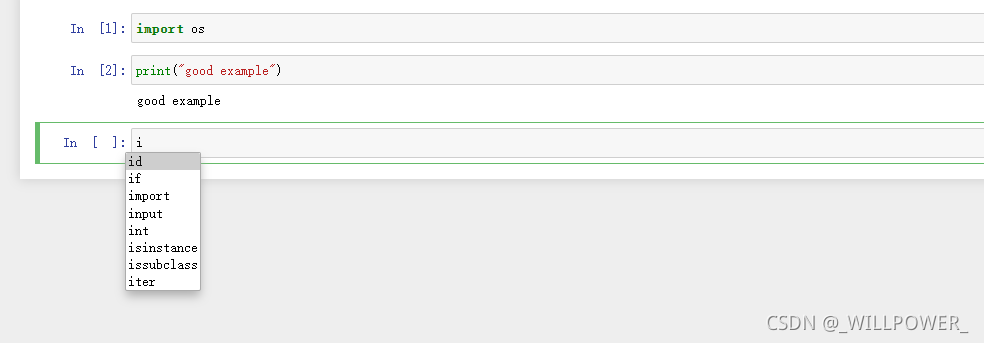
然后就可以愉快补全了
vscode中使用
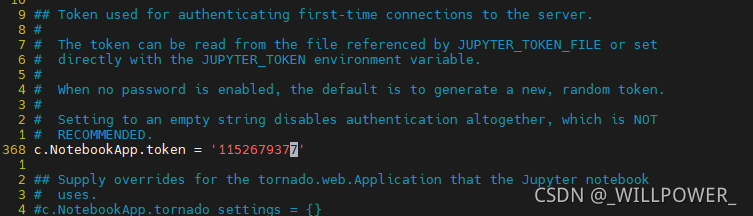
首先要在jupyter服务器的机子上修改token让vscode能够连接上内核
vim ~/.jupyter/jupyter_notebook_config.py
其中密码填入你想填入的值
然后在vscode中下载python插件
然后按下ctrl+shift+p进入命令查找,输入服务器
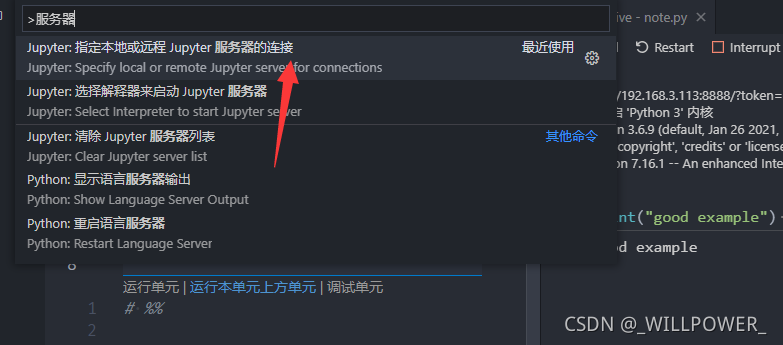
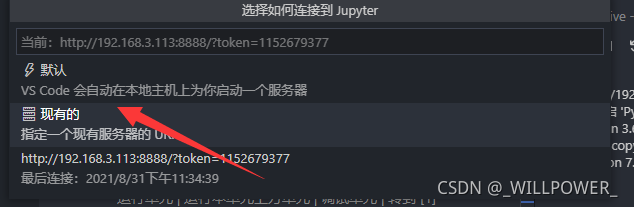
填入http://ip:port/?token=你填入的值即可
在python文件中使用符号#%%即可开启一个框格
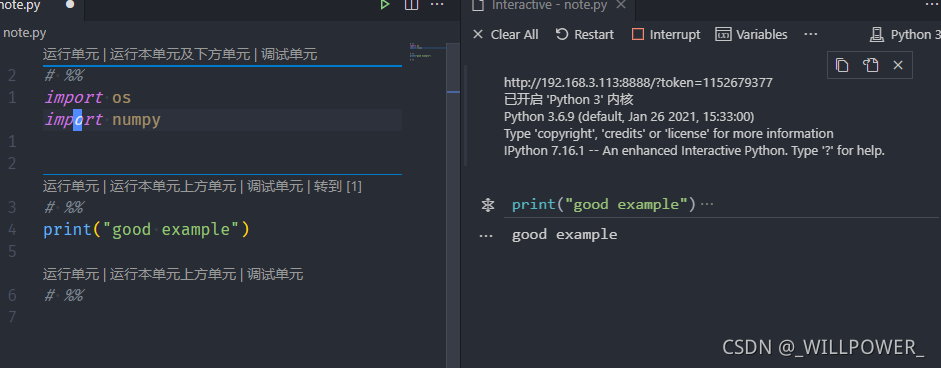
转换为pdf
pip3 install nbconvert
然后在命令行中使用
python3 -c "import nbconvert看一下是否可以导入- 安装pandoc
下载链接
安装完后,如果还提醒没有找到pandoc,记得加入环境变量D:\pandoc - 安装MiKTeX
下载链接
安装后,记得添加环境变量
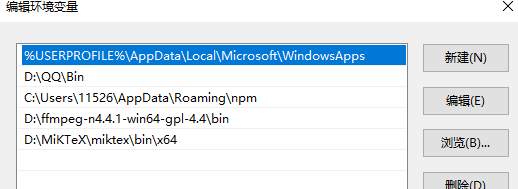
- 完成后,在命令行中使用
jupyter nbconvert a.ipynb --to pdf --output a.pdf
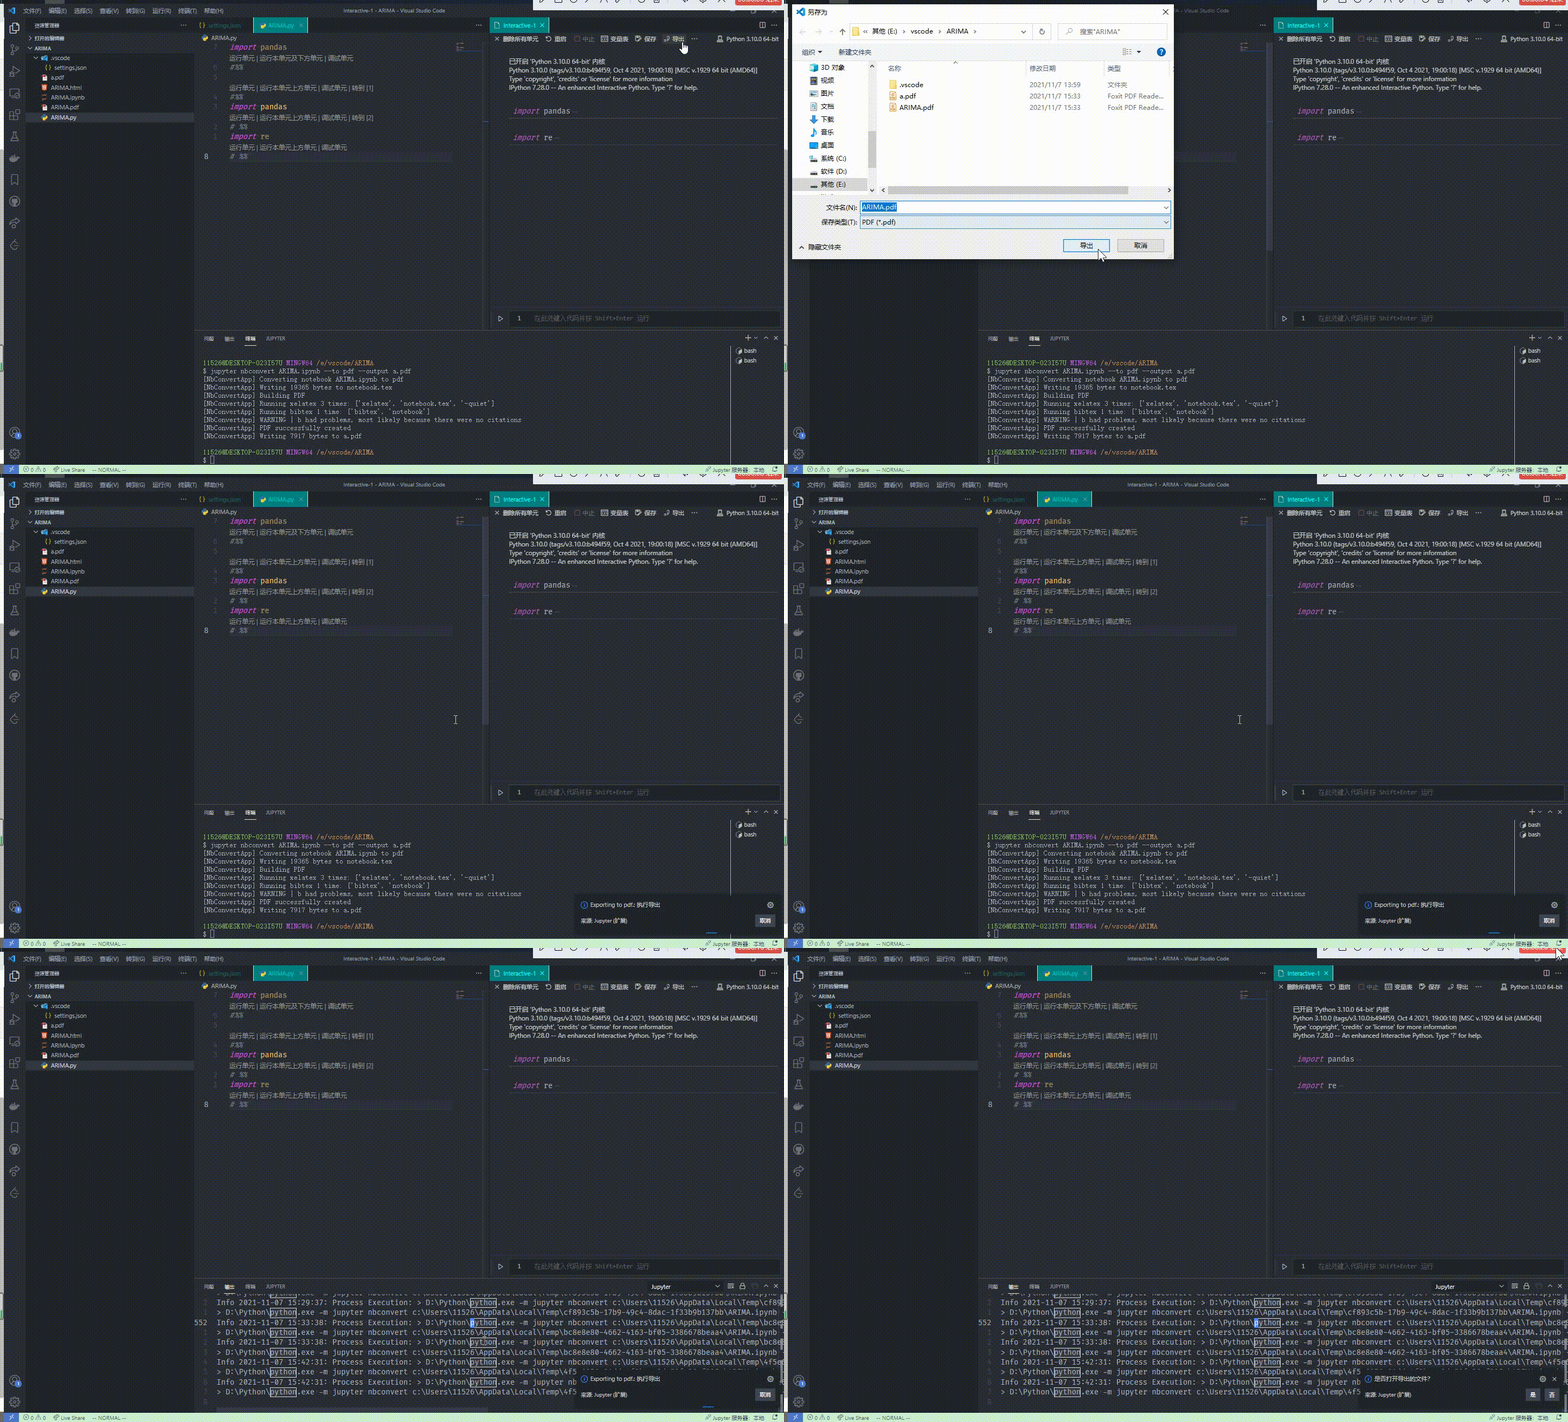
随便使用一个jupyter来进行转换,这个时候会弹出安装选项装一些依赖包,直接点击install即可,最好将左下角的取消框选,免得一直弹窗,最后等待一会,再次进行转换,转换成功后就可以在vscode里面进行转换了。
权限问题
sudo jupyter notebook --allow-root
转换相关问题
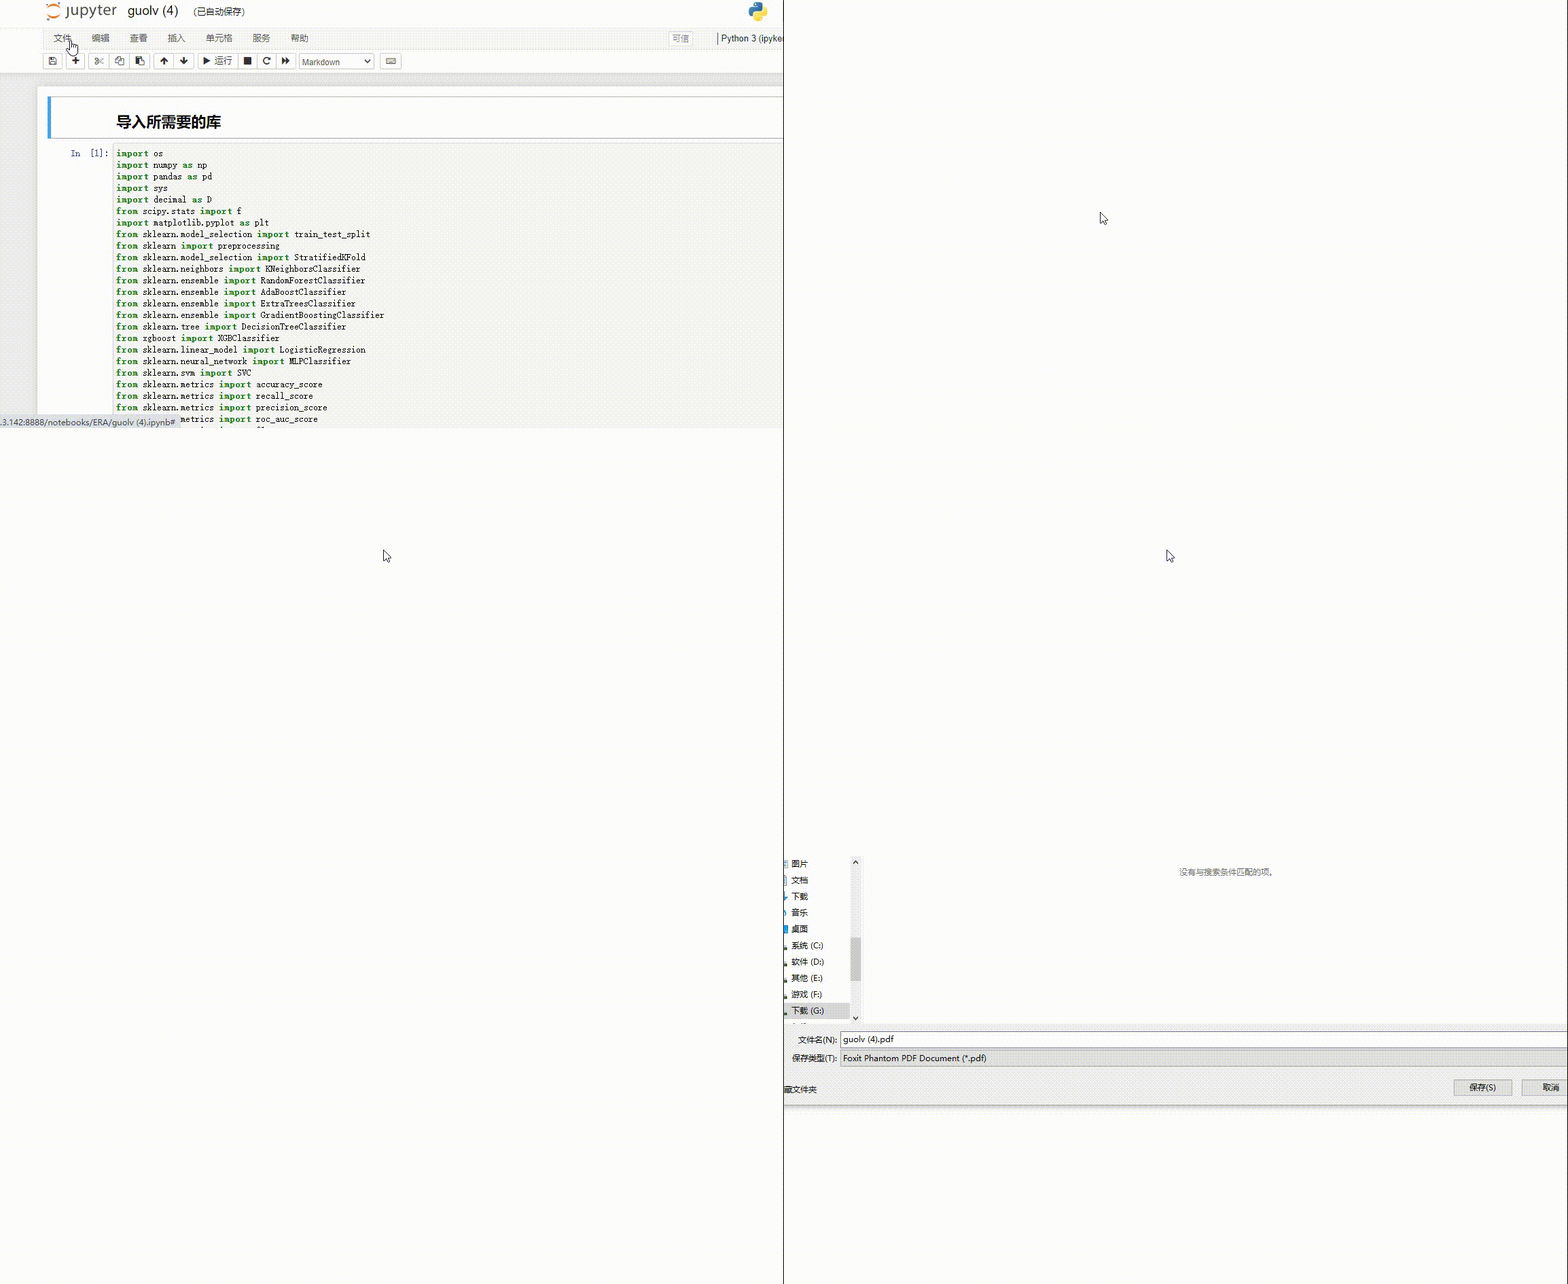
使用html转换为pdf
sudo apt install Pyppeteer
然后在随便一个含有notebook的文件下执行
jupyter nbconvert --to webpdf --allow-chromium-download test.ipynb
这样你后面的notebook就都可以在网页上面进行转换了
更换主题
jupyter更换主题(win)
pip3 install --upgrade jupyterthemes
jt -t oceans16 -T
在vscode中用动图
pip install ipympl
嵌入
%matplotlib ipympl
或者
%matplotlib notebook
更多推荐


 2
2 0
0- 0


 已为社区贡献4条内容

所有评论(0)