
Selenium+dddocr轻松解决Web自动化验证码识别
今天给大家推荐一款验证码识别神器:dddocr。
1、介绍
dddocr是一个基于深度学习的OCR(Optical Character Recognition,光学字符识别)库,用于识别图片中的文字。它可以识别各种类型的文字,包括印刷体、手写体、表格、条形码等。dddocr库使用了深度卷积神经网络(CNN)和循环神经网络(RNN)等先进的模型,具有较高的准确性和稳定性。
使用dddocr库可以方便地进行文字识别的开发和应用。它提供了简单易用的API接口,可以接收图片作为输入,返回识别结果。用户只需要将待识别的图片传入dddocr库的API接口,即可获取识别出的文字信息。同时,dddocr库还支持批量处理多张图片,提供了多线程和分布式处理的功能,可以提高识别速度和效率。
dddocr库可以广泛应用于各种场景,例如文档数字化、图像检索、自动化办公等。它可以帮助用户快速准确地提取图片中的文字信息,方便进行后续的处理和分析。在实际应用中,dddocr库已经被广泛应用于金融、医疗、物流等领域,取得了良好的效果。
2、基本使用
安装:pip install dddocr
利用dddocr库可以支持识别不同类型的验证码。
示例1:英文字母验证码识别
-
import dddocr -
def recognize_letter_captcha(image_path): -
ocr = dddocr.DddOcr() -
result = ocr.classification(image_path, model_type='letter') -
return result -
image_path = 'letter_captcha.png' -
result = recognize_letter_captcha(image_path) -
print(result)
示例2:数字验证码识别
-
import dddocr -
def recognize_number_captcha(image_path): -
ocr = dddocr.DddOcr() -
result = ocr.classification(image_path, model_type='number') -
return result -
image_path = 'number_captcha.png' -
result = recognize_number_captcha(image_path) -
print(result)
示例3:混合验证码识别
-
import dddocr -
def recognize_mixed_captcha(image_path): -
ocr = dddocr.DddOcr() -
result = ocr.classification(image_path, model_type='mixed') -
return result -
image_path = 'mixed_captcha.png' -
result = recognize_mixed_captcha(image_path) -
print(result)
示例4:滑动验证码识别
-
import dddocr -
def recognize_slide_captcha(image_path): -
ocr = dddocr.DddOcr() -
result = ocr.slide_captcha(image_path) -
return result -
image_path = 'slide_captcha.png' -
result = recognize_slide_captcha(image_path) -
print(result)
示例5:中文验证码识别
-
import dddocr -
def recognize_chinese_captcha(image_path): -
ocr = dddocr.DddOcr() -
result = ocr.classification(image_path, model_type='chinese') -
return result -
image_path = 'chinese_captcha.png' -
result = recognize_chinese_captcha(image_path) -
print(result)
以上示例中,image_path为待识别的验证码图片路径,通过调用不同的识别函数来识别不同类型的验证码。每个示例都创建了一个dddocr的实例,然后调用相应的方法进行识别。识别结果会以字符串形式返回。实际应用中,可能需要根据具体情况进行参数调整和模型训练,以提高识别准确性。
3、selenium+dddorc自动化登录识别验证码
使用selenium和dddocr进行自动登录时,可以通过以下步骤识别验证码:
-
安装selenium和dddocr库:
-
pip install selenium -
pip install dddocr
-
导入必要的库和模块:
-
from selenium import webdriver -
from selenium.webdriver.common.by import By -
from selenium.webdriver.support.ui import WebDriverWait -
from selenium.webdriver.support import expected_conditions as EC -
import dddocr
-
创建一个dddocr的实例:
ocr = dddocr.DddOcr()
-
使用selenium打开登录页面,并找到验证码图片元素:
-
driver = webdriver.Chrome() -
driver.get('https://example.com/login') -
captcha_image = driver.find_element(By.ID, 'captcha-image')
-
获取验证码图片的src属性,并下载保存到本地:
-
captcha_image_src = captcha_image.get_attribute('src') -
driver.get_screenshot_as_file('screenshot.png')
-
使用dddocr识别验证码:
-
result = ocr.classification('screenshot.png', model_type='mixed') -
captcha_code = result[0]['text']
-
在登录页面找到验证码输入框,并输入识别出的验证码:
-
captcha_input = driver.find_element(By.ID, 'captcha-input') -
captcha_input.send_keys(captcha_code)
-
输入其他登录信息,并提交表单:
-
username_input = driver.find_element(By.ID, 'username-input') -
password_input = driver.find_element(By.ID, 'password-input') -
username_input.send_keys('your_username') -
password_input.send_keys('your_password') -
submit_button = driver.find_element(By.ID, 'submit-button') -
submit_button.click()
完整的代码示例:
-
from selenium import webdriver -
from selenium.webdriver.common.by import By -
from selenium.webdriver.support.ui import WebDriverWait -
from selenium.webdriver.support import expected_conditions as EC -
import dddocr -
ocr = dddocr.DddOcr() -
driver = webdriver.Chrome() -
driver.get('https://example.com/login') -
captcha_image = driver.find_element(By.ID, 'captcha-image') -
captcha_image_src = captcha_image.get_attribute('src') -
driver.get_screenshot_as_file('screenshot.png') -
result = ocr.classification('screenshot.png', model_type='mixed') -
captcha_code = result[0]['text'] -
captcha_input = driver.find_element(By.ID, 'captcha-input') -
captcha_input.send_keys(captcha_code) -
username_input = driver.find_element(By.ID, 'username-input') -
password_input = driver.find_element(By.ID, 'password-input') -
username_input.send_keys('your_username') -
password_input.send_keys('your_password') -
submit_button = driver.find_element(By.ID, 'submit-button') -
submit_button.click()
以上代码示例中,假设登录页面的验证码图片元素的id为'captcha-image',验证码输入框的id为'captcha-input',用户名输入框的id为'username-input',密码输入框的id为'password-input',登录按钮的id为'submit-button'。根据实际情况,需要替换这些id值为实际的页面元素id。
注意:上述示例仅适用于验证码图片直接以img标签的形式嵌入在页面中的情况。
4、验证码通过Ajax请求加载如何识别
如果验证码是通过Ajax请求加载的,可以通过以下步骤识别验证码:
-
使用selenium打开登录页面,并等待验证码图片加载完成:
-
driver = webdriver.Chrome() -
driver.get('https://example.com/login') -
wait = WebDriverWait(driver, 10) -
captcha_image = wait.until(EC.presence_of_element_located((By.ID, 'captcha-image')))
-
执行JavaScript代码,获取验证码图片的base64编码:
captcha_image_base64 = driver.execute_script("return arguments[0].toDataURL('image/png').substring(21);", captcha_image)
-
将base64编码解码为图片,并保存到本地:
-
with open('captcha.png', 'wb') as f: -
f.write(base64.b64decode(captcha_image_base64))
-
使用dddocr识别验证码:
-
result = ocr.classification('captcha.png', model_type='mixed') -
captcha_code = result[0]['text']
-
在登录页面找到验证码输入框,并输入识别出的验证码:
-
captcha_input = driver.find_element(By.ID, 'captcha-input') -
captcha_input.send_keys(captcha_code)
-
输入其他登录信息,并提交表单:
-
username_input = driver.find_element(By.ID, 'username-input') -
password_input = driver.find_element(By.ID, 'password-input') -
username_input.send_keys('your_username') -
password_input.send_keys('your_password') -
submit_button = driver.find_element(By.ID, 'submit-button') -
submit_button.click()
完整的代码示例:
-
from selenium import webdriver -
from selenium.webdriver.common.by import By -
from selenium.webdriver.support.ui import WebDriverWait -
from selenium.webdriver.support import expected_conditions as EC -
import dddocr -
import base64 -
ocr = dddocr.DddOcr() -
driver = webdriver.Chrome() -
driver.get('https://example.com/login') -
wait = WebDriverWait(driver, 10) -
captcha_image = wait.until(EC.presence_of_element_located((By.ID, 'captcha-image'))) -
captcha_image_base64 = driver.execute_script("return arguments[0].toDataURL('image/png').substring(21);", captcha_image) -
with open('captcha.png', 'wb') as f: -
f.write(base64.b64decode(captcha_image_base64)) -
result = ocr.classification('captcha.png', model_type='mixed') -
captcha_code = result[0]['text'] -
captcha_input = driver.find_element(By.ID, 'captcha-input') -
captcha_input.send_keys(captcha_code) -
username_input = driver.find_element(By.ID, 'username-input') -
password_input = driver.find_element(By.ID, 'password-input') -
username_input.send_keys('your_username') -
password_input.send_keys('your_password') -
submit_button = driver.find_element(By.ID, 'submit-button') -
submit_button.click()
以上代码示例中,假设登录页面的验证码图片元素的id为'captcha-image',验证码输入框的id为'captcha-input',用户名输入框的id为'username-input',密码输入框的id为'password-input',登录按钮的id为'submit-button'。根据实际情况,需要替换这些id值为实际的页面元素id。
注意:上述示例仅适用于验证码图片通过Ajax请求加载,并且返回的是base64编码的情况。如果验证码图片是通过其他方式加载的,或者返回的是其他格式的数据(如图片的URL),则需要根据具体情况进行相应的处理。
感谢每一个认真阅读我文章的人,礼尚往来总是要有的,虽然不是什么很值钱的东西,如果你用得到的话可以直接拿走:
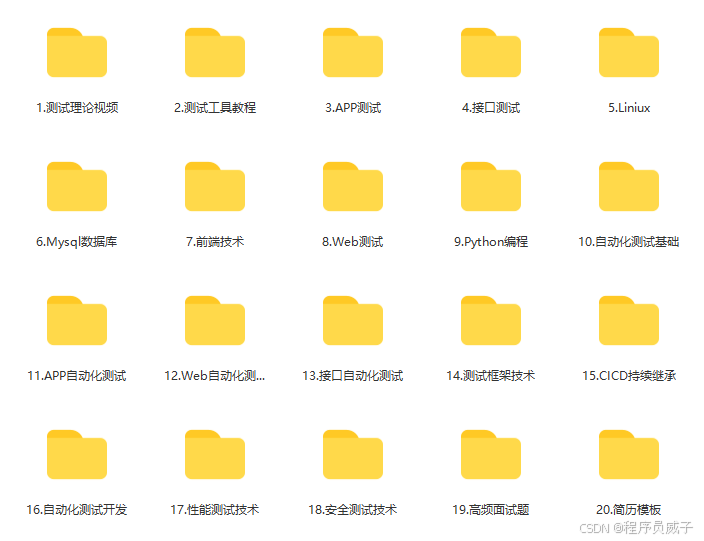
这些资料,对于【软件测试】的朋友来说应该是最全面最完整的备战仓库,这个仓库也陪伴上万个测试工程师们走过最艰难的路程,希望也能帮助到你!有需要的小伙伴可以点击下方小卡片领取

更多推荐
 10
10 0
0- 0


 已为社区贡献1条内容

所有评论(0)