
SpringAI智能体开发-10个案例带你跑通开发流程,内含源码
本文目录
-
1、入门
-
2、角色预设
-
3、流处理
-
4、文生图
-
5、文生音频及语音翻译
-
6、多模态使用方法
-
7、集成通义千问
-
8、集成openai
-
9、FuncationCalling
-
10、整合Llama3大模型本地私有化部署
1、入门
接口文档:https://docs.spring.io/spring-ai/reference/api/chatclient.html
1.1、效果
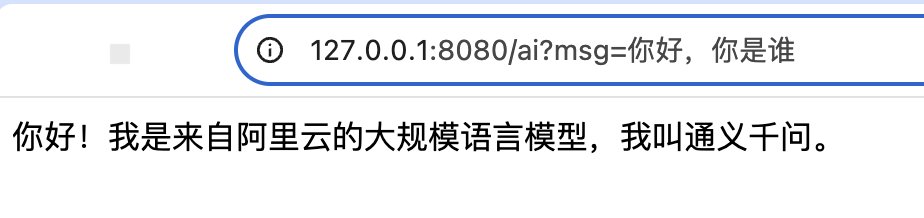
1.2、配置方法
vim ~/.zshrc
spring:
  ai:
    qwen:
      api-key: ${DASHSCOPE_API_KEY}


export DASHSCOPE_API_KEY=sk-xxxxxxbf9  // 配置成你自己的api key
1.3、调用接口
 @Autowired
private ChatModel chatModel;


@GetMapping
String ai(@RequestParam("msg") String userInput) {
      returnthis.chatClient.prompt()
              .user(userInput)
              .call()
              .content();
  }
2、角色预设
调用结果
角色: 你是一个友好的聊天机器人,用海盗的声音回答问题
回复:为什么骷髅不互相打架? 因为他们没有胆量
文档:https://docs.spring.io/spring-ai/reference/api/chatclient.html#_default_system_text
代码片段
@Bean
ChatClient chatClient(ChatClient.Builder builder) {
    // 你是一个友好的聊天机器人,用海盗的声音回答问题
    return builder.defaultSystem("You are a friendly chat bot that answers question in the voice of a Pirate").build();
}
3、流处理
文档:https://docs.spring.io/spring-ai/reference/api/chatclient.html#_streaming_responses
代码片段
@GetMapping(value = "/stream",produces = "text/html;charset=UTF-8")
  public Flux<String> stream(@RequestParam(value = "msg",
          defaultValue = "Tell me a joke") String message) {
      Flux<String> output = this.chatClient.prompt()
              .user(message)
//                .system("You are a funny assistant") // 设置角色
              .stream()
              .content();
      return output;
  }
4、文生图
文档:https://docs.spring.io/spring-ai/reference/api/image/openai-image.html
代码片段
 @Autowired
OpenAiImageModel openaiImageModel;

@GetMapping
public String text2Img(@RequestParam(value = "msg",
        defaultValue = "为一个介绍AI技能的网站diyai.cn做张logo") String msg){
    ImageResponse response = openaiImageModel.call(
            new ImagePrompt(msg,
                    OpenAiImageOptions.builder()
                            .withModel(OpenAiImageApi.ImageModel.DALL_E_3.getValue())
//                                .withQuality("hd") // 质量
                            .withN(1) // The number of images to generate. Must be between 1 and 10. For dall-e-3, only n=1 is supported.
                            .withHeight(1024) // The height of the generated images. Must be one of 256, 512, or 1024 for dall-e-2.
                            .withWidth(1024) // The width of the generated images. Must be one of 256, 512, or 1024 for dall-e-2.
                            .build()));
    return response.getResult().getOutput().getUrl();
}
5、文生音频及语音翻译
官方文档:https://docs.spring.io/spring-ai/reference/api/index.html#api/audio
@Autowired
OpenAiAudioSpeechModel openAiAudioSpeechModel;

@Autowired
OpenAiAudioTranscriptionModel openAiTranscriptionModel;
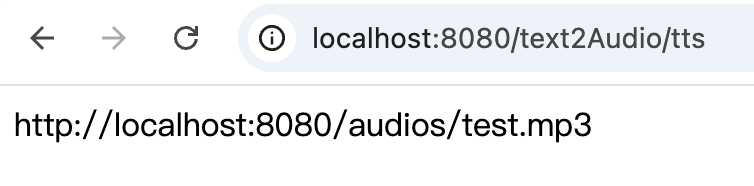
5.1 TTS
@GetMapping("/tts")
public ResponseEntity<String> tts(@RequestParam(value = "msg",
                               defaultValue = "欢迎朋友加入本社群") String msg,
                       @RequestParam(value = "audioName", defaultValue = "welcomeJoin") String audioName) {
    try {
        OpenAiAudioSpeechOptions speechOptions = OpenAiAudioSpeechOptions.builder()
                .withModel(OpenAiAudioApi.TtsModel.TTS_1.value)
                .withVoice(OpenAiAudioApi.SpeechRequest.Voice.ALLOY)
                .withResponseFormat(OpenAiAudioApi.SpeechRequest.AudioResponseFormat.MP3)
                .withSpeed(1.0f)
                .build();
        SpeechPrompt speechPrompt = new SpeechPrompt(msg, speechOptions);
        SpeechResponse response = openAiAudioSpeechModel.call(speechPrompt);
        byte[] outputBytes = response.getResult().getOutput();
        File output = getMp3OutputPath(audioName);
        FileOutputStream fos = new FileOutputStream(output);
        fos.write(outputBytes);
        fos.close();
    } catch (NonTransientAiException e) {
        if (e.getMessage().contains("insufficient_user_quota")) {
            return ResponseEntity.status(HttpStatus.BAD_REQUEST).body("您的配额不足,请联系管理员或充值。");
        }
        throw e;
    } catch (Exception ex) {
        ex.printStackTrace();
    }
    return ResponseEntity.status(HttpStatus.OK).body("http://localhost:8080/audios/" + audioName + ".mp3");
}

public File getMp3OutputPath(String audioName) throws IOException {
    File audioDir =  new ClassPathResource("static/audios").getFile();
    if (!audioDir.exists()) {
        audioDir.mkdirs();
    }
    returnnew File(audioDir, audioName + ".mp3");
}
生成的音频文件:
welcomeJoin,敏哥聊技术,2秒
5.2 语音翻译
@GetMapping("/audio2Text")
public ResponseEntity<String> transcription(@RequestParam(value = "audioName", defaultValue = "welcomeJoin") String audioName){
    OpenAiAudioApi.TranscriptResponseFormat responseFormat = OpenAiAudioApi.TranscriptResponseFormat.VTT;
    OpenAiAudioTranscriptionOptions transcriptionOptions = OpenAiAudioTranscriptionOptions.builder()
            .withLanguage("en")
            .withTemperature(0f)
            .withResponseFormat(responseFormat)
            .build();
    Resource audioFile = new ClassPathResource("static/audios/" + audioName + ".mp3");
    AudioTranscriptionPrompt transcriptionRequest = new AudioTranscriptionPrompt(audioFile, transcriptionOptions);
    AudioTranscriptionResponse response = openAiTranscriptionModel.call(transcriptionRequest);
    return ResponseEntity.status(HttpStatus.OK).body(response.getResult().getOutput()+"<br/>http://localhost:8080/audios/" + audioName + ".mp3");
}

6、多模态使用方法
api:https://docs.spring.io/spring-ai/reference/api/chat/openai-chat.html
代码实现
@RequestMapping("/multiModal")
@RestController
publicclass MultiModalController {
    @Autowired
    ChatModel chatModel;

    @GetMapping()
    public String multiModal(@RequestParam(value = "msg",
                                  defaultValue = "你从这张图中看到了什么") String msg) throws IOException {
        byte[] imageData = new ClassPathResource("static/images/test.png").getContentAsByteArray();

        UserMessage userMessage = new UserMessage(msg, List.of(new Media(MimeTypeUtils.IMAGE_PNG,imageData)));
        ChatResponse response = chatModel.call(new Prompt(userMessage,
                OpenAiChatOptions.builder()
                        .withModel(OpenAiApi.ChatModel.GPT_4_TURBO_PREVIEW.getValue())
                        .build()));
        return response.getResult().getOutput().getContent();
    }
}

图片理解
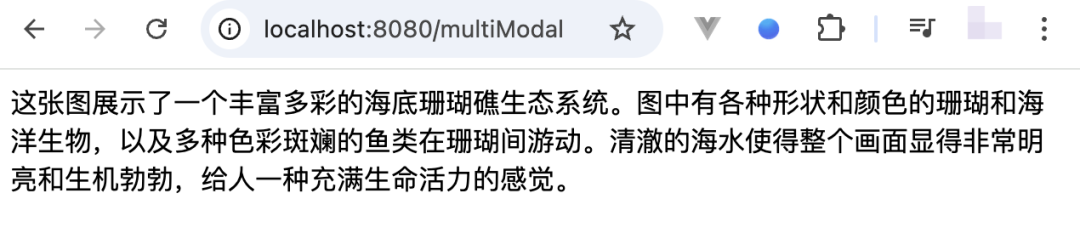
示例1
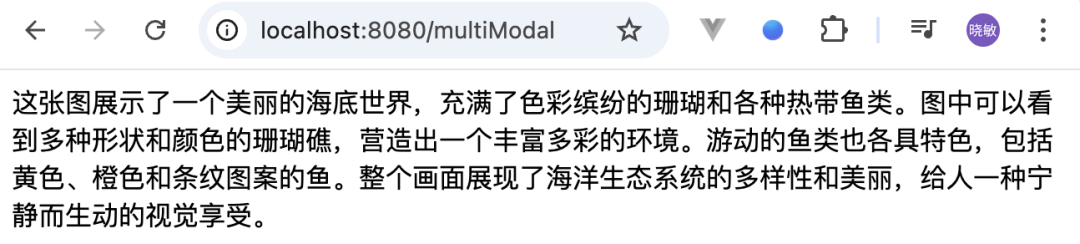
示例2
7、集成通义千问
调用结果
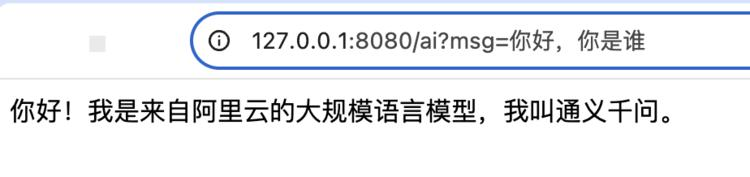
添加依赖
片段
<parent>
    <groupId>org.springframework.boot</groupId>
    <artifactId>spring-boot-starter-parent</artifactId>
    <version>3.3.0</version>
    <relativePath/>
</parent>


<properties>
        <maven.compiler.source>17</maven.compiler.source>
        <maven.compiler.target>17</maven.compiler.target>
        <project.build.sourceEncoding>UTF-8</project.build.sourceEncoding>
        <spring-boot.version>3.3.0</spring-boot.version>
        <spring-ai.version>1.0.3</spring-ai.version>
    </properties>

<dependency>
    <groupId>io.springboot.ai</groupId>
    <artifactId>spring-ai-qwen-spring-boot-starter</artifactId>
</dependency>


<dependencyManagement>
    <dependencies>
        <dependency>
            <groupId>org.springframework.boot</groupId>
            <artifactId>spring-boot-dependencies</artifactId>
            <version>${spring-boot.version}</version>
            <type>pom</type>
            <scope>import</scope>
        </dependency>
        <dependency>
            <groupId>io.springboot.ai</groupId>
            <artifactId>spring-ai-bom</artifactId>
            <version>${spring-ai.version}</version>
            <type>pom</type>
            <scope>import</scope>
        </dependency>
    </dependencies>
</dependencyManagement>

<repositories>
    <repository>
        <id>spring-milestones</id>
        <name>Spring Milestones</name>
        <url>https://repo.spring.io/milestone</url>
        <snapshots>
            <enabled>false</enabled>
        </snapshots>
    </repository>
    <repository>
        <id>spring-snapshots</id>
        <name>Spring Snapshots</name>
        <url>https://repo.spring.io/snapshot</url>
        <releases>
            <enabled>false</enabled>
        </releases>
    </repository>
</repositories>
https://mvnrepository.com/artifact/io.springboot.ai/spring-ai-qwen-spring-boot-starter/1.0.3
配置类
@Configuration
public class AIConfig {

    @Autowired
    QWenAiCommonProperties qWenAiCommonProperties;

    @Bean
    public ChatClient chatClient(){
        return new QWenAiChatClient(new QWenAiApi(qWenAiCommonProperties.getApiKey()));
    }
}
Controller
@RestController
public class AIController {

    @Autowired
    QWenAiChatClient chatClient;

    @GetMapping("/ai")
    String generation(@RequestParam("msg") String msg) {
        return this.chatClient.call(msg);
    }
}
8、集成openai
文档: https://openai.xiniushu.com/
调用结果

依赖包
<properties>
        <maven.compiler.source>17</maven.compiler.source>
        <maven.compiler.target>17</maven.compiler.target>
        <project.build.sourceEncoding>UTF-8</project.build.sourceEncoding>
        <spring-boot.version>3.3.0</spring-boot.version>
<!-- https://mvnrepository.com/artifact/io.springboot.ai/spring-ai-openai-spring-boot-starter/1.0.3-->
      <spring-ai.version>1.0.0-M1</spring-ai.version>
</properties>

<dependencies>
    <dependency>
        <groupId>org.springframework.boot</groupId>
        <artifactId>spring-boot-starter-web</artifactId>
    </dependency>
    <!-- 添加 spring-ai 的依赖 -->
    <dependency>
        <groupId>org.springframework.ai</groupId>
        <artifactId>spring-ai-openai-spring-boot-starter</artifactId>
    </dependency>
    <dependency>
        <groupId>org.projectlombok</groupId>
        <artifactId>lombok</artifactId>
        <scope>provided</scope>
    </dependency>
</dependencies>
<dependencyManagement>
    <dependencies>
        <dependency>
            <groupId>org.springframework.boot</groupId>
            <artifactId>spring-boot-dependencies</artifactId>
            <version>${spring-boot.version}</version>
            <type>pom</type>
            <scope>import</scope>
        </dependency>
        <dependency>
            <groupId>org.springframework.ai</groupId>
            <artifactId>spring-ai-bom</artifactId>
            <version>${spring-ai.version}</version>
            <type>pom</type>
            <scope>import</scope>
        </dependency>
    </dependencies>
</dependencyManagement>

<repositories>
    <repository>
        <id>spring-milestones</id>
        <name>Spring Milestones</name>
        <url>https://repo.spring.io/milestone</url>
        <snapshots>
            <enabled>false</enabled>
        </snapshots>
    </repository>
    <repository>
        <id>spring-snapshots</id>
        <name>Spring Snapshots</name>
        <url>https://repo.spring.io/snapshot</url>
        <releases>
            <enabled>false</enabled>
        </releases>
    </repository>
</repositories>
Controller
@Autowired
private ChatModel chatModel;


@GetMapping
String ai(@RequestParam("msg") String userInput) {
    return this.chatClient.prompt()
            .user(userInput)
            .call()
            .content();
}
9、FuncationCalling
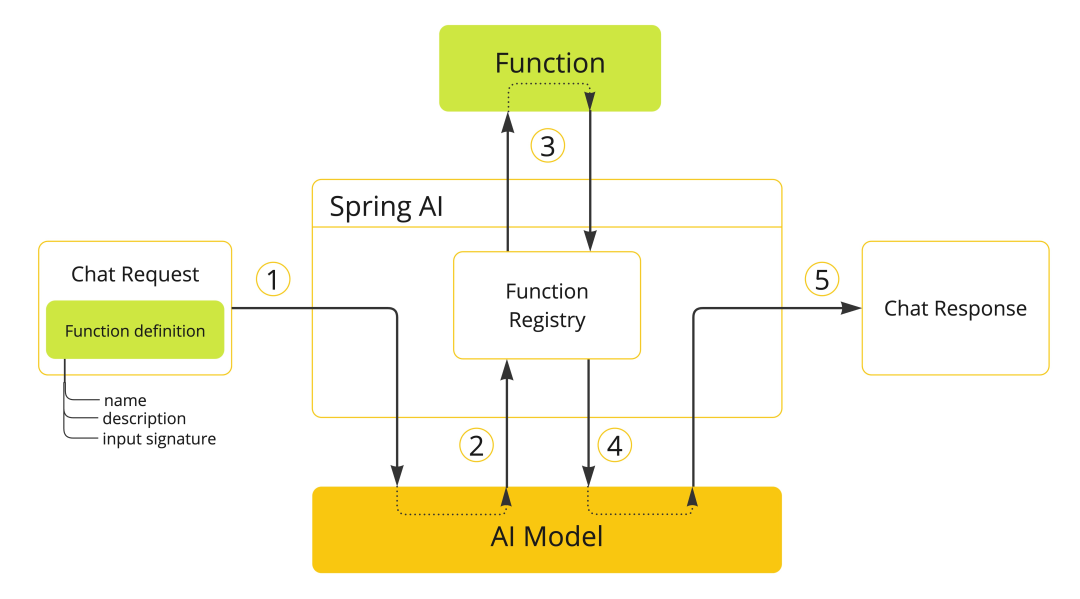
案例
调用星图云开放平台的天气接口,可查询近2周指定地区的天气
准备资料
星图云开放平台接口:https://open.geovisearth.com/console/key
官方文档:https://docs.spring.io/spring-ai/reference/api/functions.html
官方示例:https://gitee.com/PatrickW/spring-projects-ai/blob/1.0.0-M3/spring-ai-spring-boot-autoconfigure/src/test/java/org/springframework/ai/autoconfigure/openai/tool/FunctionCallbackWithPlainFunctionBeanIT.java
案例测试
http://localhost:8080/fc/weather?query
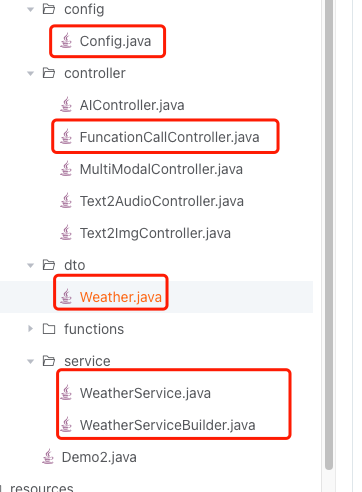
FjFanm_NppA0J3ZN4oKmv59aWdCA
1、北京石景山的天气怎么样,你可以调用currentWeather函数,北京石景山的location为WTX_CH101011000

示例1
2、北京石景山的天气怎么样,北京石景山的location为WTX_CH101011000

示例2
代码片段
ImageDescriptionFunction
public class ImageDescriptionFunction
        implements Function<ImageDescriptionFunction.Request, ImageDescriptionFunction.Response> {

    // 回调
    @Override
    public Response apply(Request request) {
        if(request.name == null){
            returnnew Response("请提供图片名称");
        }
        returnnew Response("图片名称为:" + request.name);
    }

    @Data
    publicclass Request{
        public Request(String name){
            this.name = name;
        }
        private String name;
    }

    @Data
    publicclass Response{
        public Response(String description){
            this.description = description;
        }
        String description;
    }
}
WeatherService
@Service
public class WeatherService implements Function<Weather.Request, Weather.Response> {

    @Autowired
    WeatherServiceBuilder weatherServiceBuilder;

    @Override
    public Weather.Response apply(Weather.Request request) {
        return weatherServiceBuilder.getWeather(request.location());
    }
}
WeatherServiceBuilder
@Service
publicclass WeatherServiceBuilder {

    @Value("${spring.weather.api.base-url}")
    String weatherBaseUrl;

    @Value("${spring.weather.api.key}")
    String weatherApiKey;


    @Autowired
    RestClient restClient;
    public Weather.Response getWeather(String location){
        return restClient.get()
                .uri(UriComponentsBuilder.fromUriString(weatherBaseUrl)
                        .path("/v2/cn/city/basic")
                        .queryParam("token", weatherApiKey)
                        .queryParam("location",location)
                        .toUriString())
                .retrieve()
                .body(Weather.Response.class);
    }
}
Controller
@Autowired
OpenAiChatModel chatModel;

@Autowired
WeatherServiceBuilder weatherServiceBuilder;

// query=北京石景山的天气怎么样,你可以调用currentWeather函数,北京石景山的location为WTX_CH101011000
@GetMapping("/weather")
public String weather(@RequestParam(value = "query") String query) {
    try {
        UserMessage userMessage = new UserMessage(query);
        OpenAiChatOptions options = OpenAiChatOptions.builder()
                .withFunction("currentWeather")
                .withModel(OpenAiApi.ChatModel.GPT_4)
                .build();

        log.info("query: {}", query);
        ChatResponse response = chatModel.call(new Prompt(userMessage, options));
        log.info("Received response from OpenAI: {}", response.getResult().getOutput().getContent());

        return response.getResult().getOutput().getContent();
    } catch (Exception e) {
        log.error("Error processing weather request", e);
        return e.getMessage();
    }
}
Weather实体
@Data
public class Weather {
    public record Request(String location){};

    // 解析接口数据
    public record Response(Location location,Result result){};
    public record Result(ArrayList<ResultItem> datas){};
    public record ResultItem(String fc_time,String tem_min,String tem_max){}

    public record Location(String path,String areaCode){}
}
这份完整版的大模型 AI 学习资料已经上传CSDN,朋友们如果需要可以微信扫描下方CSDN官方认证二维码免费领取【保证100%免费】

一、大模型风口已至:月薪30K+的AI岗正在批量诞生
2025年大模型应用呈现爆发式增长,根据工信部最新数据:
国内大模型相关岗位缺口达47万
初级工程师平均薪资28K
70%企业存在"能用模型不会调优"的痛点
真实案例:某二本机械专业学员,通过4个月系统学习,成功拿到某AI医疗公司大模型优化岗offer,薪资直接翻3倍!
二、如何学习大模型 AI ?
🔥AI取代的不是人类,而是不会用AI的人!麦肯锡最新报告显示:掌握AI工具的从业者生产效率提升47%,薪资溢价达34%!🚀
由于新岗位的生产效率,要优于被取代岗位的生产效率,所以实际上整个社会的生产效率是提升的。
但是具体到个人,只能说是:
“最先掌握AI的人,将会比较晚掌握AI的人有竞争优势”。
这句话,放在计算机、互联网、移动互联网的开局时期,都是一样的道理。
我在一线互联网企业工作十余年里,指导过不少同行后辈。帮助很多人得到了学习和成长。
我意识到有很多经验和知识值得分享给大家,也可以通过我们的能力和经验解答大家在人工智能学习中的很多困惑,所以在工作繁忙的情况下还是坚持各种整理和分享。但苦于知识传播途径有限,很多互联网行业朋友无法获得正确的资料得到学习提升,故此将并将重要的AI大模型资料包括AI大模型入门学习思维导图、精品AI大模型学习书籍手册、视频教程、实战学习等录播视频免费分享出来。
1️⃣ 提示词工程:把ChatGPT从玩具变成生产工具
2️⃣ RAG系统:让大模型精准输出行业知识
3️⃣ 智能体开发:用AutoGPT打造24小时数字员工
📦熬了三个大夜整理的《AI进化工具包》送你:
✔️ 大厂内部LLM落地手册(含58个真实案例)
✔️ 提示词设计模板库(覆盖12大应用场景)
✔️ 私藏学习路径图(0基础到项目实战仅需90天)

第一阶段(10天):初阶应用
该阶段让大家对大模型 AI有一个最前沿的认识,对大模型 AI 的理解超过 95% 的人,可以在相关讨论时发表高级、不跟风、又接地气的见解,别人只会和 AI 聊天,而你能调教 AI,并能用代码将大模型和业务衔接。
* 大模型 AI 能干什么?
* 大模型是怎样获得「智能」的?
* 用好 AI 的核心心法
* 大模型应用业务架构
* 大模型应用技术架构
* 代码示例:向 GPT-3.5 灌入新知识
* 提示工程的意义和核心思想
* Prompt 典型构成
* 指令调优方法论
* 思维链和思维树
* Prompt 攻击和防范
* …
第二阶段(30天):高阶应用
该阶段我们正式进入大模型 AI 进阶实战学习,学会构造私有知识库,扩展 AI 的能力。快速开发一个完整的基于 agent 对话机器人。掌握功能最强的大模型开发框架,抓住最新的技术进展,适合 Python 和 JavaScript 程序员。
* 为什么要做 RAG
* 搭建一个简单的 ChatPDF
* 检索的基础概念
* 什么是向量表示(Embeddings)
* 向量数据库与向量检索
* 基于向量检索的 RAG
* 搭建 RAG 系统的扩展知识
* 混合检索与 RAG-Fusion 简介
* 向量模型本地部署
* …
第三阶段(30天):模型训练
恭喜你,如果学到这里,你基本可以找到一份大模型 AI相关的工作,自己也能训练 GPT 了!通过微调,训练自己的垂直大模型,能独立训练开源多模态大模型,掌握更多技术方案。
到此为止,大概2个月的时间。你已经成为了一名“AI小子”。那么你还想往下探索吗?
* 为什么要做 RAG
* 什么是模型
* 什么是模型训练
* 求解器 & 损失函数简介
* 小实验2:手写一个简单的神经网络并训练它
* 什么是训练/预训练/微调/轻量化微调
* Transformer结构简介
* 轻量化微调
* 实验数据集的构建
* …
第四阶段(20天):商业闭环
对全球大模型从性能、吞吐量、成本等方面有一定的认知,可以在云端和本地等多种环境下部署大模型,找到适合自己的项目/创业方向,做一名被 AI 武装的产品经理。
* 硬件选型
* 带你了解全球大模型
* 使用国产大模型服务
* 搭建 OpenAI 代理
* 热身:基于阿里云 PAI 部署 Stable Diffusion
* 在本地计算机运行大模型
* 大模型的私有化部署
* 基于 vLLM 部署大模型
* 案例:如何优雅地在阿里云私有部署开源大模型
* 部署一套开源 LLM 项目
* 内容安全
* 互联网信息服务算法备案
* …
学习是一个过程,只要学习就会有挑战。天道酬勤,你越努力,就会成为越优秀的自己。
如果你能在15天内完成所有的任务,那你堪称天才。然而,如果你能完成 60-70% 的内容,你就已经开始具备成为一名大模型 AI 的正确特征了。
这份完整版的大模型 AI 学习资料已经上传CSDN,朋友们如果需要可以微信扫描下方CSDN官方认证二维码免费领取【保证100%免费】

更多推荐
 26
26 0
0- 0


 已为社区贡献10条内容

所有评论(0)